Brother International CS6000i User Guide - Page 26
Removing the presser foot, holder
 |
UPC - 012502615309
View all Brother International CS6000i manuals
Add to My Manuals
Save this manual to your list of manuals |
Page 26 highlights
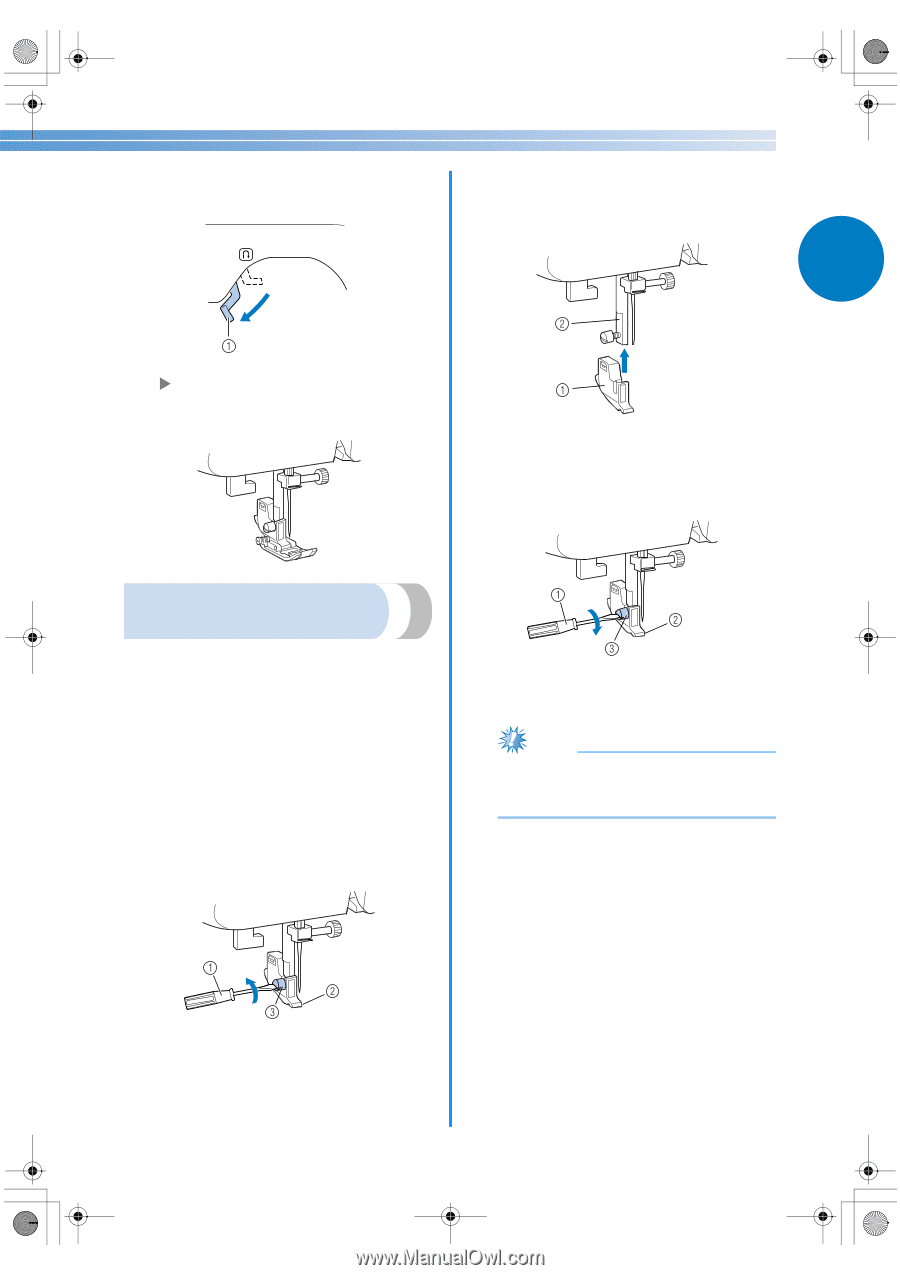
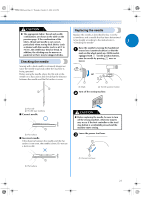
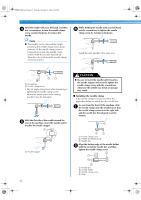
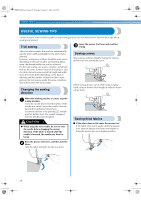
NCBC2000.book Page 25 Thursday, October 21, 2004 4:32 PM Slowly lower the presser foot lever so that the f presser foot pin snaps into the shank in the presser foot holder. ■ Attaching the presser foot holder Align the presser foot holder with the lower- a left side of the presser bar. 1 a Presser foot lever X The presser foot is attached. Raise the presser foot lever to check that the g presser foot is securely attached. a Presser foot holder b Presser bar Hold the presser foot holder in place with b your right hand, and then tighten the screw using the screwdriver in your left hand. Removing the presser foot holder Remove the presser foot holder when cleaning the sewing machine or when installing a presser foot that does not use the presser foot holder, such as the quilting foot. Use the screwdriver to remove the presser foot holder. ■ Removing the presser foot holder Remove the presser foot. a • For details, refer to "Replacing the presser foot" (page 24). Use the screwdriver to loosen the presser foot b holder screw. a Screwdriver b Presser foot holder c Presser foot holder screw Note ● If the presser foot holder is not correctly installed, the thread tension will be incorrect. a Screwdriver b Presser foot holder c Presser foot holder screw 25
-
 1
1 -
2
-
3
-
4
-
5
-
6
-
7
-
8
-
9
-
10
-
11
-
12
-
13
-
14
-
15
-
16
-
17
-
18
-
19
-
20
-
 21
21 -
 22
22 -
 23
23 -
 24
24 -
 25
25 -
 26
26 -
 27
27 -
 28
28 -
 29
29 -
 30
30 -
 31
31 -
32
-
33
-
34
-
35
-
36
-
37
-
38
-
39
-
40
-
41
-
42
-
43
-
44
-
45
-
46
-
47
-
48
-
49
-
50
-
51
-
52
-
53
-
54
-
55
-
56
-
57
-
58
-
59
-
60
-
61
-
62
-
63
-
64
-
65
-
66
 |
 |