Brother International GT-541 Instruction Manual - English - Page 29
Insert the Install CD. The following window appears., appears during installation - install software
 |
View all Brother International GT-541 manuals
Add to My Manuals
Save this manual to your list of manuals |
Page 29 highlights
(3) Turn on your GT-541 printer. The following window appears. 3. Getting Started Select "No, not this time", and then click "Next". (4) Insert the Install CD. The following window appears. (5) Select "Install the software automatically (Recommended)", and the click "Next". The installation starts. When "Hardware installation" dialog (not passed Windows Logo testing) appears during installation, Click "Continue Anyway". The installation continues. If the following window appears, follow the instruction below: GT-541 19
-
 1
1 -
2
-
3
-
4
-
5
-
6
-
7
-
8
-
9
-
10
-
11
-
12
-
13
-
14
-
15
-
16
-
17
-
18
-
19
-
20
-
21
-
22
-
23
-
 24
24 -
 25
25 -
 26
26 -
 27
27 -
 28
28 -
 29
29 -
 30
30 -
 31
31 -
 32
32 -
 33
33 -
 34
34 -
35
-
36
-
37
-
38
-
39
-
40
-
41
-
42
-
43
-
44
-
45
-
46
-
47
-
48
-
49
-
50
-
51
-
52
-
53
-
54
-
55
-
56
-
57
-
58
-
59
-
60
-
61
-
62
-
63
-
64
-
65
-
66
-
67
-
68
-
69
-
70
-
71
-
72
-
73
-
74
-
75
-
76
-
77
-
78
-
79
-
80
-
81
-
82
-
83
-
84
-
85
-
86
-
87
-
88
-
89
-
90
-
91
-
92
-
93
-
94
-
95
-
96
-
97
-
98
-
99
-
100
-
101
-
102
-
103
-
104
-
105
-
106
-
107
-
108
-
109
-
110
-
111
-
112
-
113
-
114
-
115
-
116
-
117
-
118
-
119
-
120
-
121
-
122
-
123
-
124
-
125
-
126
 |
 |
3. Getting Started
GT-541
19
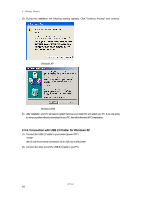
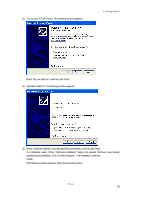
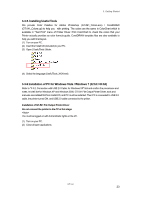
(3)
Turn on your GT-541 printer. The following window appears.
Select "No, not this time”, and then click “Next”.
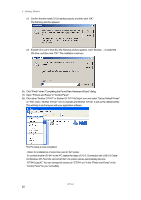
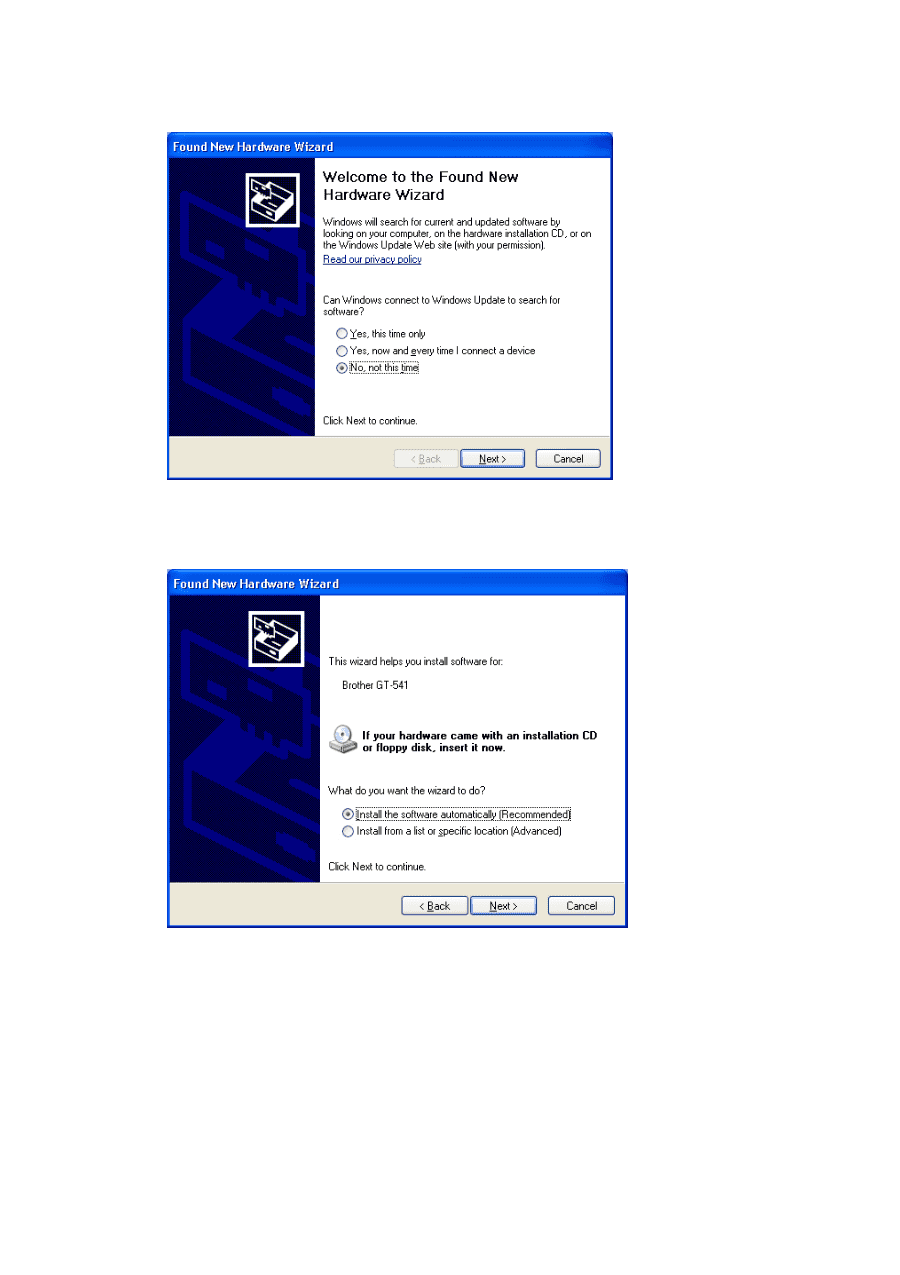
(4)
Insert the Install CD. The following window appears.
(5)
Select “Install the software automatically (Recommended)”, and the click “Next”.
The installation starts. When "Hardware installation" dialog (not passed Windows Logo testing)
appears during installation, Click "Continue Anyway". The installation continues.
<Note>
If the following window appears, follow the instruction below: