Brother International GT-541 Instruction Manual - English - Page 62
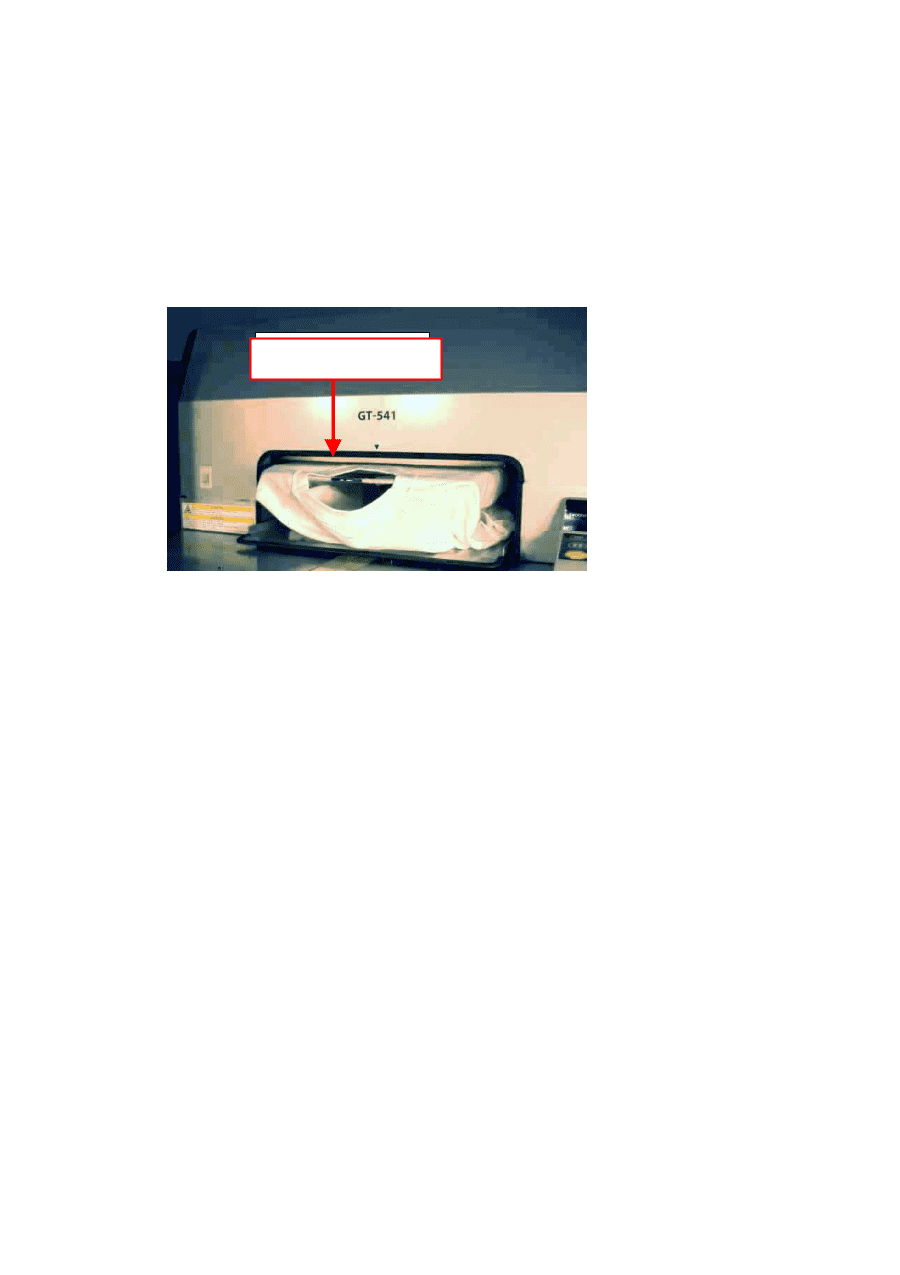
Obstruction Sensor, Adjust the Platen height by turning the Platen Height Adjustment Lever.
 |
View all Brother International GT-541 manuals
Add to My Manuals
Save this manual to your list of manuals |
Page 62 highlights
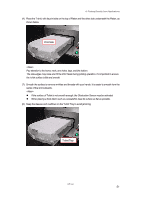
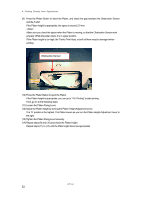
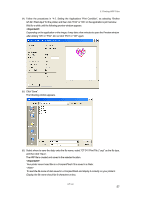
4. Printing Directly from Applications (9) Press the Platen Button to insert the Platen, and check the gap between the Obstruction Sensor and the T-shirt. If the Platen height is appropriate, the space is around 2.0 mm. Make sure you check the space when the Platen is moving, so that the Obstruction Sensor work properly. While the platen stops, it is in upper position. If the Platen height is too high, the T-shirt, Print Head, or both of them may be damaged when printing. OObbssttrruucctitoionnSSeennsosor r (10) Press the Platen Button to eject the Platen. If the Platen height is appropriate, you can go to "4-6. Printing" to start printing. If not, go on to the following steps. (11) Loosen the Platen Fixing Lever. (12) Adjust the Platen height by turning the Platen Height Adjustment Lever. The "A" position is the highest. The Platen lowers as you turn the Platen Height Adjustment Lever to the right. (13) Tighten the Platen Fixing Lever securely. (14) Repeat steps (9) and (10) and check the Platen height. Repeat steps (11) to (14) until the Plate height becomes appropriate. GT-541 52
-
 1
1 -
2
-
3
-
4
-
5
-
6
-
7
-
8
-
9
-
10
-
11
-
12
-
13
-
14
-
15
-
16
-
17
-
18
-
19
-
20
-
21
-
22
-
23
-
24
-
25
-
26
-
27
-
28
-
29
-
30
-
31
-
32
-
33
-
34
-
35
-
36
-
37
-
38
-
39
-
40
-
41
-
42
-
43
-
44
-
45
-
46
-
47
-
48
-
49
-
50
-
51
-
52
-
53
-
54
-
55
-
56
-
 57
57 -
 58
58 -
 59
59 -
 60
60 -
 61
61 -
 62
62 -
 63
63 -
 64
64 -
 65
65 -
 66
66 -
 67
67 -
68
-
69
-
70
-
71
-
72
-
73
-
74
-
75
-
76
-
77
-
78
-
79
-
80
-
81
-
82
-
83
-
84
-
85
-
86
-
87
-
88
-
89
-
90
-
91
-
92
-
93
-
94
-
95
-
96
-
97
-
98
-
99
-
100
-
101
-
102
-
103
-
104
-
105
-
106
-
107
-
108
-
109
-
110
-
111
-
112
-
113
-
114
-
115
-
116
-
117
-
118
-
119
-
120
-
121
-
122
-
123
-
124
-
125
-
126
 |
 |