Brother International GT-541 Instruction Manual - English - Page 65
Printing ARP Files - cost
 |
View all Brother International GT-541 manuals
Add to My Manuals
Save this manual to your list of manuals |
Page 65 highlights
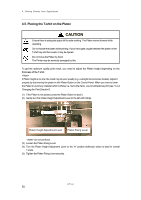
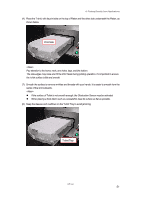
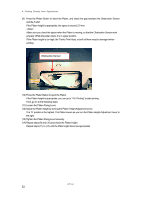
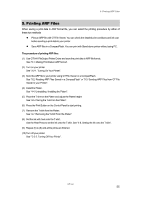
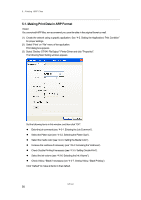
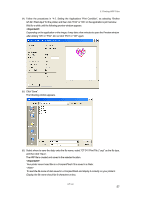
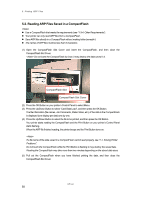
5. Printing ARP Files 5. Printing ARP Files When saving a print data in ARP format file, you can select the printing procedure by either of these two methods Print an ARP file with GT File Viewer. You can check the detailed print conditions and ink cost before sending a print data to your printer. Save ARP files in a CompactFlash. You can print with Stand-alone printer without using PC. The procedure of printing ARP files: (1) Use GT-541 FileOutput Printer Driver and save the print data in ARP file format. See "5-1. Making Print Data in ARP format". (2) Turn on your printer: See "3-2-1. Turning On Your Printer". (3) Send the ARP file to your printer using GT File Viewer or a CompactFlash. See "5-2. Reading ARP Files Saved in a CompactFlash" or "5-3. Sending ARP Files from GT File Viewer to your Printer". (4) Install the Platen. See "4-4. Uninstalling / Installing the Platen". (5) Place the T-shirt on the Platen and adjust the Platen height: See "4-5. Placing the T-shirt on the Platen". (6) Press the Print Button on the Control Panel to start printing. (7) Remove the T-shirt from the Platen. See "4-7. Removing the T-shirt From the Platen". (8) Set the ink with heat onto the T-shirt. Use the Heat Press to set the ink onto the T-shirt. See "4-8. Setting the Ink onto the T-shirt". (9) Repeat (5) to (8) until all the prints are finished. (10) Turn off your printer: See ""3-2-2. Turning Off Your Printer". GT-541 55
-
 1
1 -
2
-
3
-
4
-
5
-
6
-
7
-
8
-
9
-
10
-
11
-
12
-
13
-
14
-
15
-
16
-
17
-
18
-
19
-
20
-
21
-
22
-
23
-
24
-
25
-
26
-
27
-
28
-
29
-
30
-
31
-
32
-
33
-
34
-
35
-
36
-
37
-
38
-
39
-
40
-
41
-
42
-
43
-
44
-
45
-
46
-
47
-
48
-
49
-
50
-
51
-
52
-
53
-
54
-
55
-
56
-
57
-
58
-
59
-
 60
60 -
 61
61 -
 62
62 -
 63
63 -
 64
64 -
 65
65 -
 66
66 -
 67
67 -
 68
68 -
 69
69 -
 70
70 -
71
-
72
-
73
-
74
-
75
-
76
-
77
-
78
-
79
-
80
-
81
-
82
-
83
-
84
-
85
-
86
-
87
-
88
-
89
-
90
-
91
-
92
-
93
-
94
-
95
-
96
-
97
-
98
-
99
-
100
-
101
-
102
-
103
-
104
-
105
-
106
-
107
-
108
-
109
-
110
-
111
-
112
-
113
-
114
-
115
-
116
-
117
-
118
-
119
-
120
-
121
-
122
-
123
-
124
-
125
-
126
 |
 |