Brother International GT-541 Instruction Manual - English - Page 85
Solving Print Quality Problems, Adjust the Platen Height. See - garment printer
 |
View all Brother International GT-541 manuals
Add to My Manuals
Save this manual to your list of manuals |
Page 85 highlights
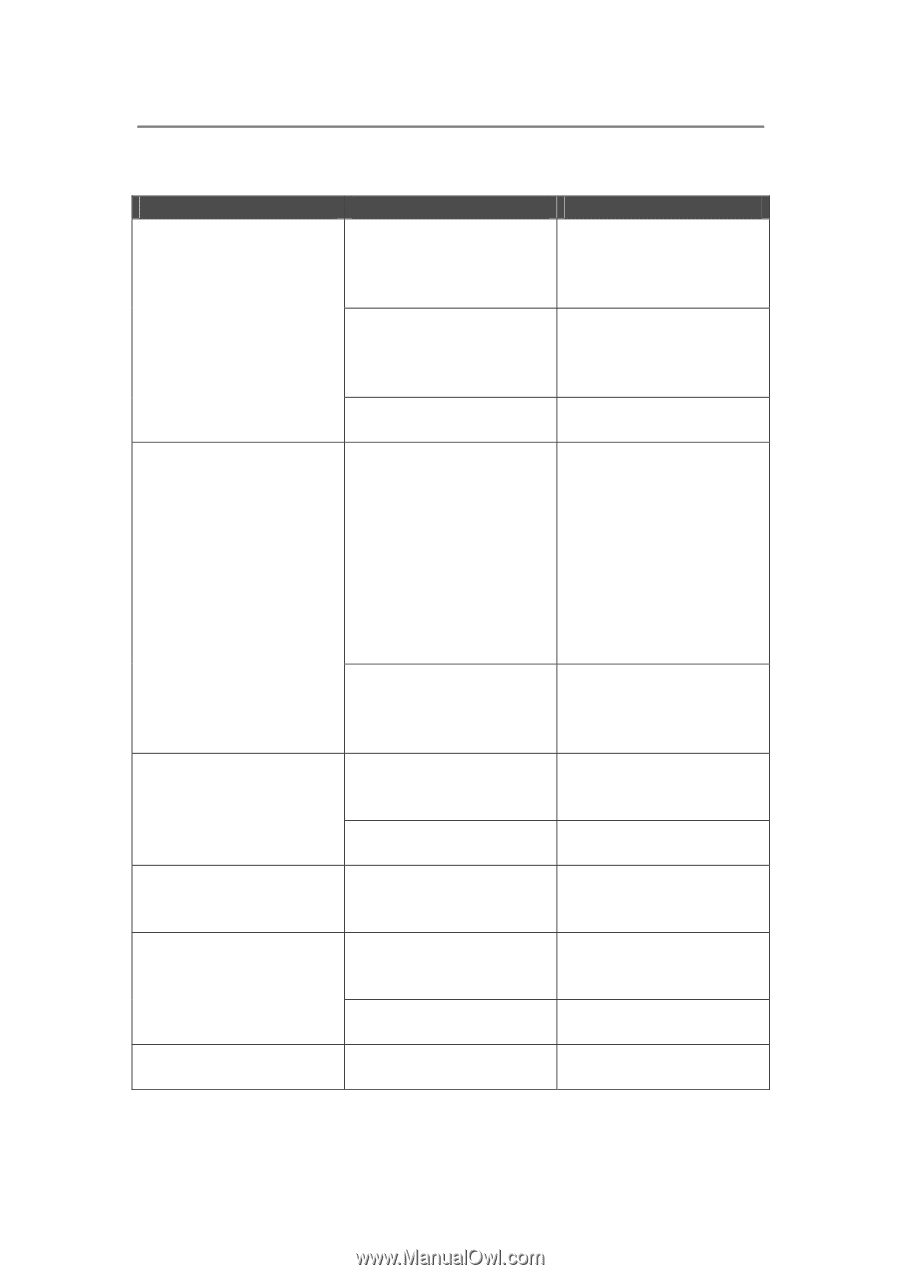
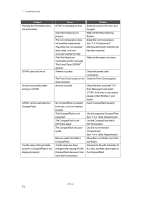
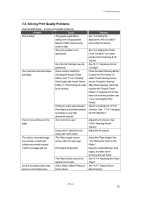
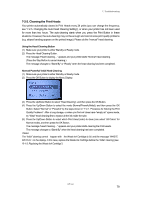
7. Troubleshooting 7-2. Solving Print Quality Problems Use the table below to solve print quality problems. Problem Cause Print is faded. The graphic application's settings are not appropriate. Maybe CYMK mode is being used for data. The print condition is not appropriate. Your print has horizontal stripes (banding). Ink in the Ink Cartridge may be getting low. Some nozzles misfired by checking the Nozzle Check Pattern (see "7-2-3. Checking Print Quality with Nozzle Check Pattern "). The Print Heads need to be cleaned. The ink runs and blurs on the edge. Printing by wider gaps between Print Heads and printed medium or printing on very high absorbent material. Too much ink is used. The outlines of printed image are not clear, or texts and outlines are printed doubled. T-shirt is smudged with ink. Using a thin T-shirt that is not made with 100% cotton. The Platen height may be wrong. with a too large gap.. Print Heads hit garment Ink dots smudged yellow area where is next to black area. The Platen Sheet needs to be replaced and is dirty. Select Yellow / Black Printing of Printer Driver. Solution See "4-2 Setting the Application's Print Condition" and modify the artwork. See "4-3. Setting the Printer Driver Condition" and select proper Vivid Processing & Ink Volume. See "6-1-1. Replacing the Ink Cartridge". Press the Head Cleaning Button to clean the Print Heads. Or select "Head Cleaning" menu and try "Powerful Cleaning". After Head Cleaning, check the nozzles with "Nozzle Check Pattern. If repeating this 5 times does not solve the problem, see "7-2-2. Cleaning the Print Heads". Select "uni-directional" of Print Direction. See"7-2-4. Changing the Print Direction". Adjust the Ink Volume. See "4-3-6. Selecting the Ink Volume". Adjust the ink volume. Adjust the Platen Height. See "4-5. Placing the T-shirt on the Platen". Keep the surface flat (esp. both edges) and take care in removing the wet T-shirt.. See "6-1-4. Replacing the Platen Sheet". See "4-3-7. Setting Yellow / Black Printing". GT-541 75
-
 1
1 -
2
-
3
-
4
-
5
-
6
-
7
-
8
-
9
-
10
-
11
-
12
-
13
-
14
-
15
-
16
-
17
-
18
-
19
-
20
-
21
-
22
-
23
-
24
-
25
-
26
-
27
-
28
-
29
-
30
-
31
-
32
-
33
-
34
-
35
-
36
-
37
-
38
-
39
-
40
-
41
-
42
-
43
-
44
-
45
-
46
-
47
-
48
-
49
-
50
-
51
-
52
-
53
-
54
-
55
-
56
-
57
-
58
-
59
-
60
-
61
-
62
-
63
-
64
-
65
-
66
-
67
-
68
-
69
-
70
-
71
-
72
-
73
-
74
-
75
-
76
-
77
-
78
-
79
-
 80
80 -
 81
81 -
 82
82 -
 83
83 -
 84
84 -
 85
85 -
 86
86 -
 87
87 -
 88
88 -
 89
89 -
 90
90 -
91
-
92
-
93
-
94
-
95
-
96
-
97
-
98
-
99
-
100
-
101
-
102
-
103
-
104
-
105
-
106
-
107
-
108
-
109
-
110
-
111
-
112
-
113
-
114
-
115
-
116
-
117
-
118
-
119
-
120
-
121
-
122
-
123
-
124
-
125
-
126
 |
 |