Brother International GT-541 Instruction Manual - English - Page 86
Procedure for Solving the Print Quality Problems
 |
View all Brother International GT-541 manuals
Add to My Manuals
Save this manual to your list of manuals |
Page 86 highlights
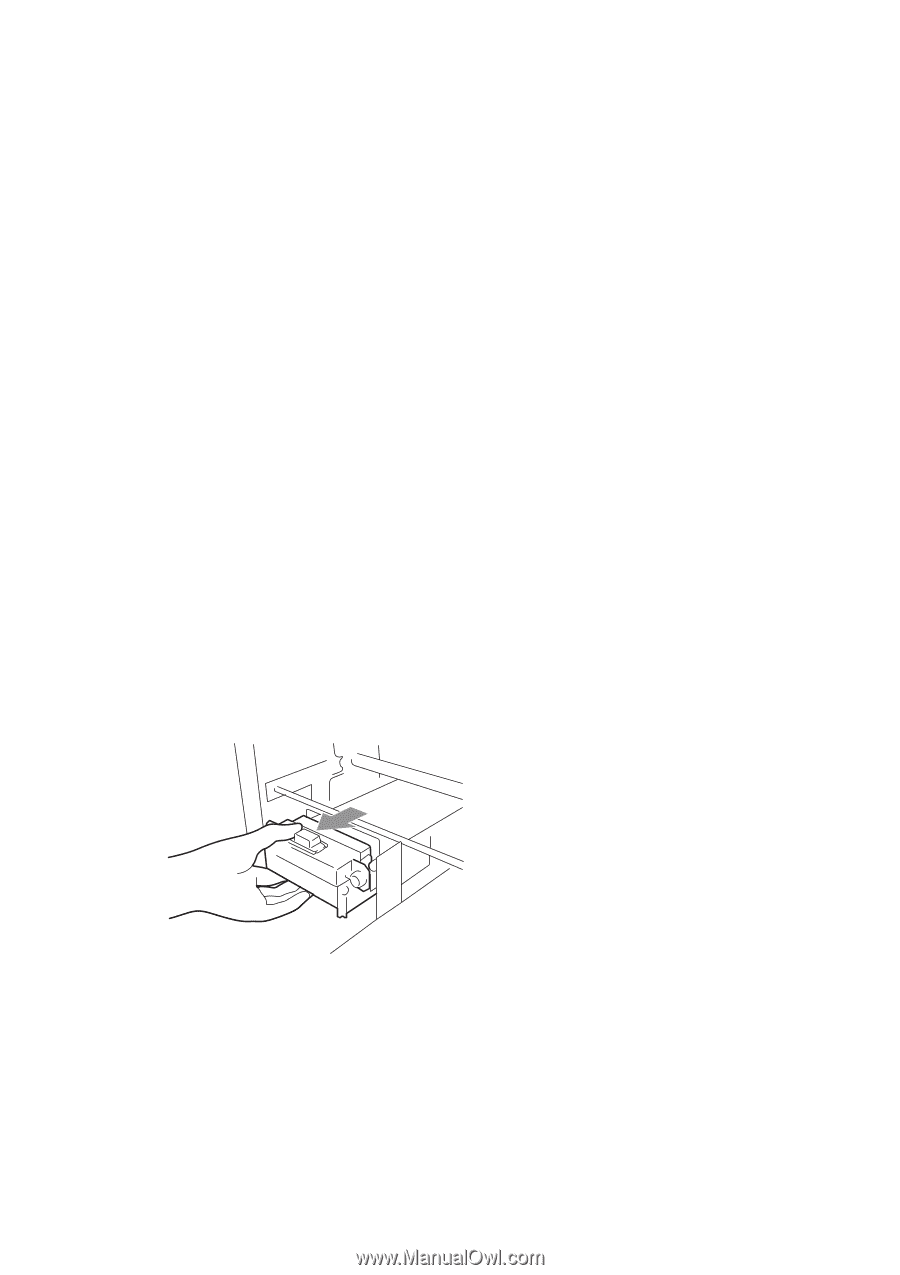
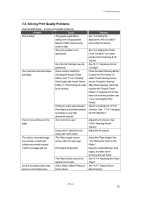
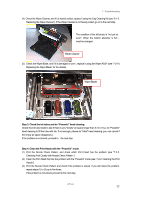
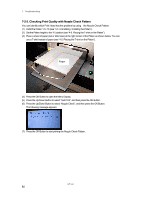
7. Troubleshooting 7-2-1. Procedure for Solving the Print Quality Problems Follow the procedure (Step 1 to 7) below until the print quality problem is solved. Step 1: Clean the Print Heads by pressing the Head Cleaning Button. Head Cleaning with flushing fresh ink can solve most print quality problems. See "7-2-2. Cleaning the Print Heads / Using the Head Cleaning" and do it a maximum of five times. Check the nozzles by test printing of Nozzle Check Pattern (see "7-2-3. Checking Print Quality with Nozzle Check Pattern "). If the problem is not solved, go on to the next step. It is very important the machine is used in an environment as specified. Use a humidifier to keep the humidity up to 35% to keep print quality. Your printer automatically cleans its Print Heads every 24 prints; however more frequent Print Heads cleaning may need to be done depending on the environment. In this case, change the Auto Head Cleaning frequency (see "7-2-5. Changing the Auto Head Cleaning Setting"). Step 2: Check the Wiper Cleaner, replace it when it is full. The Wiper Cleaner absorbs some waste ink carried by the Wiper Blade. If Wiper Cleaner cannot absorb waste ink any more, the dirty Wiper Blade wipes the Print Head Nozzles and this causes misfiring or damage the Print Head. Please replace the Wiper Cleaner and clean the Wiper Blade and caps when you insert the new Black Ink Cartridge; Check if it is too dirty to wipe off the waste ink. Please use Cap Cleaning Kit. If the black ink is not changed frequently please consider the wiper. How to Check: (1) See "6-1-2. Replacing the Wiper Cleaner" and select "Cap/Wiper Clean" and then turn off your printer. (2) Open the Front Cover. (3) Pull out the Wiper Cleaner Cassette in the left. Do not tilt the Wiper Cleaner Cassette; ink may get on your hands or clothing. GT-541 76
-
 1
1 -
2
-
3
-
4
-
5
-
6
-
7
-
8
-
9
-
10
-
11
-
12
-
13
-
14
-
15
-
16
-
17
-
18
-
19
-
20
-
21
-
22
-
23
-
24
-
25
-
26
-
27
-
28
-
29
-
30
-
31
-
32
-
33
-
34
-
35
-
36
-
37
-
38
-
39
-
40
-
41
-
42
-
43
-
44
-
45
-
46
-
47
-
48
-
49
-
50
-
51
-
52
-
53
-
54
-
55
-
56
-
57
-
58
-
59
-
60
-
61
-
62
-
63
-
64
-
65
-
66
-
67
-
68
-
69
-
70
-
71
-
72
-
73
-
74
-
75
-
76
-
77
-
78
-
79
-
80
-
 81
81 -
 82
82 -
 83
83 -
 84
84 -
 85
85 -
 86
86 -
 87
87 -
 88
88 -
 89
89 -
 90
90 -
 91
91 -
92
-
93
-
94
-
95
-
96
-
97
-
98
-
99
-
100
-
101
-
102
-
103
-
104
-
105
-
106
-
107
-
108
-
109
-
110
-
111
-
112
-
113
-
114
-
115
-
116
-
117
-
118
-
119
-
120
-
121
-
122
-
123
-
124
-
125
-
126
 |
 |