Brother International GT-541 Instruction Manual - English - Page 87
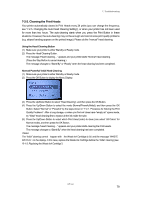
Wiper Blade, Wiper Cleaner, Checking Print Quality with Nozzle Check Pattern .
 |
View all Brother International GT-541 manuals
Add to My Manuals
Save this manual to your list of manuals |
Page 87 highlights
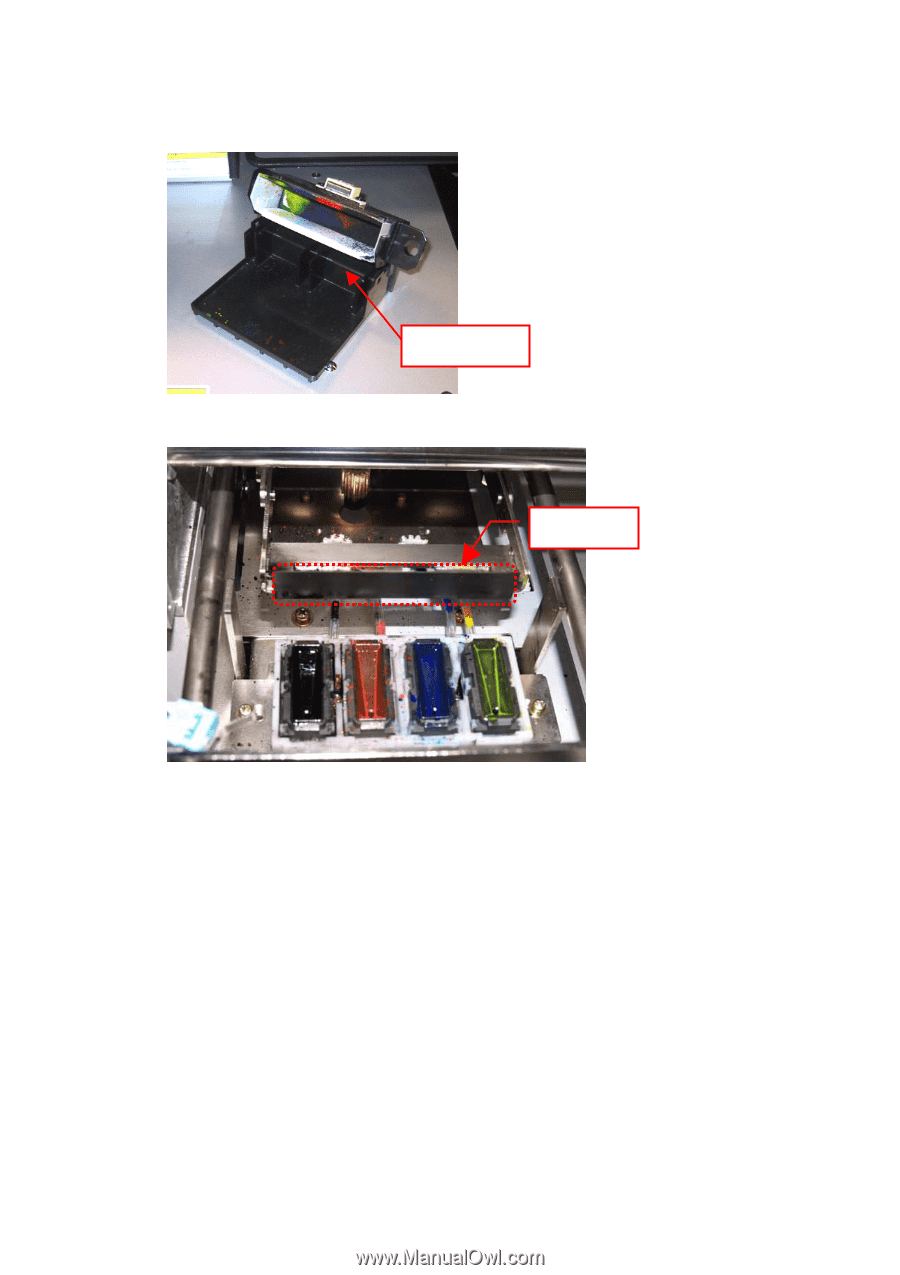
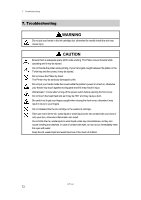
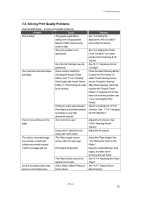
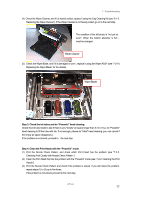
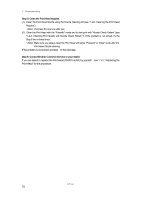
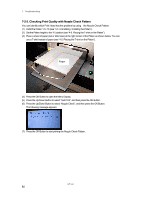
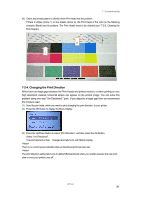
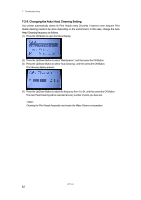
7. Troubleshooting (4) Check the Wiper Cleaner, and if it is heavily soiled, replace it using the Cap Cleaning Kit (see "6-1-2. Replacing the Wiper Cleaner"). If the Wiper Cleaner is not heavily soiled, go on to the next step. The condition of the left photo is "not yet but soon". When the bottom absorber is full it must be changed. Wiper Cleaner (5) Check the Wiper Blade, and if it is damaged or worn , replace it using the Wiper ASSY (see "7-2-10. Replacing the Wiper Blade" for the details). Wiper Blade Step 3: Check the ink tubes and do "Powerful" head cleaning. Check the ink tube inside to see if there is any "empty" air space longer than 5 mm. If so, do "Powerful" head cleaning to fill the tube with ink. If not enough, please do "Initial" head cleaning (you can cancel if the empty air space disappears.) If the problem is not solved, proceed to the next step. Step 4: Clean the Print Heads with the "Powerful" mode. (1) Print the Nozzle Check Pattern, and check which Print Head has the problem (see "7-2-3. Checking Print Quality with Nozzle Check Pattern "). (2) Clean the Print Head that has the problem with the "Powerful" mode (see "7-2-2. Cleaning the Print Heads"). (3) Print the Nozzle Check Pattern and check if the problem is solved. If you still notice the problem, repeat steps (1) to (3) up to five times. If the problem is not solved, proceed to the next step. GT-541 77
-
 1
1 -
2
-
3
-
4
-
5
-
6
-
7
-
8
-
9
-
10
-
11
-
12
-
13
-
14
-
15
-
16
-
17
-
18
-
19
-
20
-
21
-
22
-
23
-
24
-
25
-
26
-
27
-
28
-
29
-
30
-
31
-
32
-
33
-
34
-
35
-
36
-
37
-
38
-
39
-
40
-
41
-
42
-
43
-
44
-
45
-
46
-
47
-
48
-
49
-
50
-
51
-
52
-
53
-
54
-
55
-
56
-
57
-
58
-
59
-
60
-
61
-
62
-
63
-
64
-
65
-
66
-
67
-
68
-
69
-
70
-
71
-
72
-
73
-
74
-
75
-
76
-
77
-
78
-
79
-
80
-
81
-
 82
82 -
 83
83 -
 84
84 -
 85
85 -
 86
86 -
 87
87 -
 88
88 -
 89
89 -
 90
90 -
 91
91 -
 92
92 -
93
-
94
-
95
-
96
-
97
-
98
-
99
-
100
-
101
-
102
-
103
-
104
-
105
-
106
-
107
-
108
-
109
-
110
-
111
-
112
-
113
-
114
-
115
-
116
-
117
-
118
-
119
-
120
-
121
-
122
-
123
-
124
-
125
-
126
 |
 |