Brother International GT-541 Instruction Manual - English - Page 89
Cleaning the Print Heads, Using the Head Cleaning Button
 |
View all Brother International GT-541 manuals
Add to My Manuals
Save this manual to your list of manuals |
Page 89 highlights
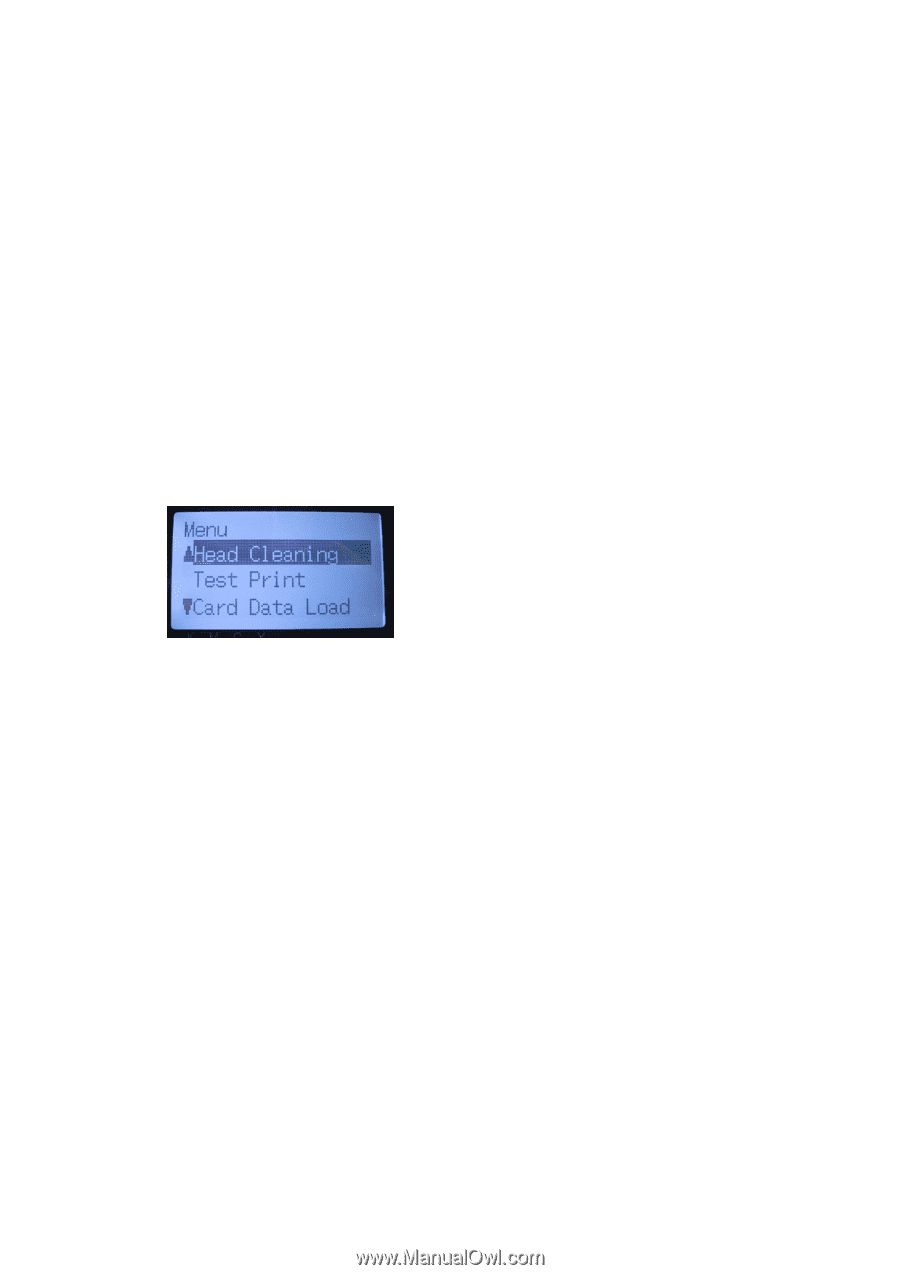
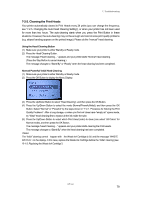
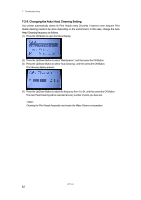
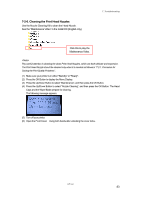
7. Troubleshooting 7-2-2. Cleaning the Print Heads Your printer automatically cleans its Print Heads every 24 prints (you can change the frequency; see "7-2-5. Changing the Auto Head Cleaning Setting"), or when your printer has not been used for more than two hours. The auto-cleaning starts when you press the Print Button in these situations. However, the auto-cleaning may not be enough and cannot solve print quality problems (e.g. stripes/ banding appears on the printed image). Please do the "manual" head cleaning. Using the Head Cleaning Button (1) Make sure your printer is either Standby or Ready mode. (2) Press the Head Cleaning Button. The message "Head Cleaning..." appears and your printer starts "Normal" head cleaning. (Press the Stop Button to cancel cleaning.) The message changes to "Stand By" or "Ready" when the head cleaning has been completed. Normal/ Powerful/ Initial Head Cleaning (1) Make sure your printer is either Standby or Ready mode. (2) Press the OK Button to display the Menu Display. (3) Press the Up/Down Button to select "Head Cleaning", and then press the OK Button. (4) Press the Up/Down Button to select the mode (Normal/Powerful/Initial), and then press the OK Button. Select "Normal" or "Powerful" by the steps shown in "7-2-1. Procedure for Solving the Print Quality Problems". After a long storage, or when you find ink tubes have "empty air" space inside, try "Initial" head cleaning first to replace all the ink inside the tube. (5) Press the Up/Down Button to select which Print Head (color) to clean (can select "All Colors" for Normal mode), and then press the OK Button. The message "Head Cleaning..." appears and your printer starts cleaning the Print Heads. The message changes to "Stand By" when the head cleaning has been completed. The "Initial" cleaning cannot happen with the Waste Ink Cartridge is full, and the message "WASTE INK FULL" on the display. In this case, replace the Waste Ink Cartridge before the "Initial" cleaning (see "6-1-3. Replacing the Waste Ink Cartridge"). GT-541 79
-
 1
1 -
2
-
3
-
4
-
5
-
6
-
7
-
8
-
9
-
10
-
11
-
12
-
13
-
14
-
15
-
16
-
17
-
18
-
19
-
20
-
21
-
22
-
23
-
24
-
25
-
26
-
27
-
28
-
29
-
30
-
31
-
32
-
33
-
34
-
35
-
36
-
37
-
38
-
39
-
40
-
41
-
42
-
43
-
44
-
45
-
46
-
47
-
48
-
49
-
50
-
51
-
52
-
53
-
54
-
55
-
56
-
57
-
58
-
59
-
60
-
61
-
62
-
63
-
64
-
65
-
66
-
67
-
68
-
69
-
70
-
71
-
72
-
73
-
74
-
75
-
76
-
77
-
78
-
79
-
80
-
81
-
82
-
83
-
 84
84 -
 85
85 -
 86
86 -
 87
87 -
 88
88 -
 89
89 -
 90
90 -
 91
91 -
 92
92 -
 93
93 -
 94
94 -
95
-
96
-
97
-
98
-
99
-
100
-
101
-
102
-
103
-
104
-
105
-
106
-
107
-
108
-
109
-
110
-
111
-
112
-
113
-
114
-
115
-
116
-
117
-
118
-
119
-
120
-
121
-
122
-
123
-
124
-
125
-
126
 |
 |