Brother International HL-4150CDN Network Users Manual - English - Page 34
Network and Sharing Center, Wireless Network Connection SETUP - user manual
 |
UPC - 012502624998
View all Brother International HL-4150CDN manuals
Add to My Manuals
Save this manual to your list of manuals |
Page 34 highlights
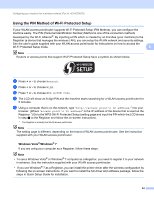
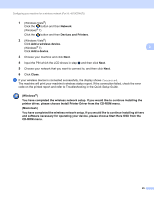
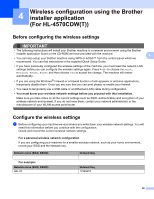
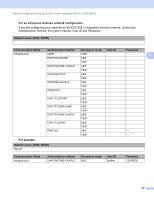
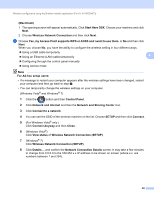
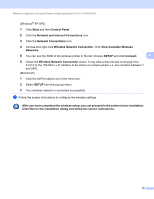
Wireless configuration using the Brother installer application (For HL-4570CDW(T)) (Macintosh) 4 1 The opening screen will appear automatically. Click Start Here OSX. Choose your machine and click Next. 2 Choose Wireless Network Connection and then click Next. c Choose Yes, my Access Point supports WPS or AOSS and I want to use them. or No and then click Next. When you choose No, you have the ability to configure the wireless setting in four different ways. Using a USB cable temporarily Using an Ethernet (LAN) cable temporarily 4 Configuring through the control panel manually Using Ad-hoc mode Note For Ad-hoc setup users: • If a message to restart your computer appears after the wireless settings have been changed, restart your computer and then go back to step b. • You can temporarily change the wireless settings on your computer. (Windows Vista® and Windows® 7) 1 Click the button and then Control Panel. 2 Click Network and Internet and then the Network and Sharing Center icon. 3 Click Connect to a network. 4 You can see the SSID of the wireless machine on the list. Choose SETUP and then click Connect. 5 (For Windows Vista® only ) Click Connect Anyway and then Close. 6 (Windows Vista®) Click View status of Wireless Network Connection (SETUP). 7 (Windows® 7) Click Wireless Network Connection (SETUP). 8 Click Details.... and confirm the Network Connection Details screen. It may take a few minutes to change from 0.0.0.0 to the 169.254.x.x IP address to be shown on screen (where x.x. are numbers between 1 and 254). 29
-
 1
1 -
2
-
3
-
4
-
5
-
6
-
7
-
8
-
9
-
10
-
11
-
12
-
13
-
14
-
15
-
16
-
17
-
18
-
19
-
20
-
21
-
22
-
23
-
24
-
25
-
26
-
27
-
28
-
 29
29 -
 30
30 -
 31
31 -
 32
32 -
 33
33 -
 34
34 -
 35
35 -
 36
36 -
 37
37 -
 38
38 -
 39
39 -
40
-
41
-
42
-
43
-
44
-
45
-
46
-
47
-
48
-
49
-
50
-
51
-
52
-
53
-
54
-
55
-
56
-
57
-
58
-
59
-
60
-
61
-
62
-
63
-
64
-
65
-
66
-
67
-
68
-
69
-
70
-
71
-
72
-
73
-
74
-
75
-
76
-
77
-
78
-
79
-
80
-
81
-
82
-
83
 |
 |
