Brother International HL-4150CDN Network Users Manual - English - Page 35
Network and Internet Connections, Wireless Network Connection
 |
UPC - 012502624998
View all Brother International HL-4150CDN manuals
Add to My Manuals
Save this manual to your list of manuals |
Page 35 highlights
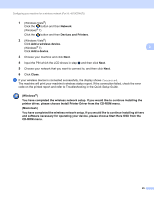
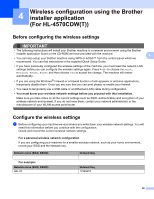
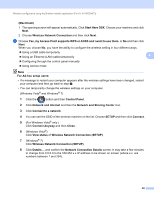
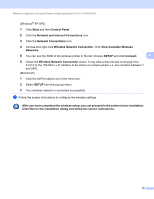
Wireless configuration using the Brother installer application (For HL-4570CDW(T)) (Windows® XP SP2) 1 Click Start and then Control Panel. 2 Click the Network and Internet Connections icon. 3 Click the Network Connections icon. 4 Choose and right-click Wireless Network Connection. Click View Available Wireless Networks. 5 You can see the SSID of the wireless printer in the list. Choose SETUP and click Connect. 4 6 Check the Wireless Network Connection status. It may take a few minutes to change from 0.0.0.0 to the 169.254.x.x IP address to be shown on screen (where x.x. are numbers between 1 and 254). (Macintosh) 1 Click the AirPort status icon in the menu bar. 2 Select SETUP from the pop-up menu. 3 Your wireless network is connected successfully. d Follow the screen instructions to configure the wireless settings. After you have completed the wireless setup, you can proceed to the printer driver installation. Click Next in the installation dialog and follow the screen instructions. 30
-
 1
1 -
2
-
3
-
4
-
5
-
6
-
7
-
8
-
9
-
10
-
11
-
12
-
13
-
14
-
15
-
16
-
17
-
18
-
19
-
20
-
21
-
22
-
23
-
24
-
25
-
26
-
27
-
28
-
29
-
 30
30 -
 31
31 -
 32
32 -
 33
33 -
 34
34 -
 35
35 -
 36
36 -
 37
37 -
 38
38 -
 39
39 -
 40
40 -
41
-
42
-
43
-
44
-
45
-
46
-
47
-
48
-
49
-
50
-
51
-
52
-
53
-
54
-
55
-
56
-
57
-
58
-
59
-
60
-
61
-
62
-
63
-
64
-
65
-
66
-
67
-
68
-
69
-
70
-
71
-
72
-
73
-
74
-
75
-
76
-
77
-
78
-
79
-
80
-
81
-
82
-
83
 |
 |