Brother International IntelliFax-4100e Users Manual - English - Page 66
Dual Access, Real Time Transmission, REAL TIME TX, NEXT FAX ONLY, SETUP SEND, OUT OF MEMORY
 |
UPC - 012502616399
View all Brother International IntelliFax-4100e manuals
Add to My Manuals
Save this manual to your list of manuals |
Page 66 highlights
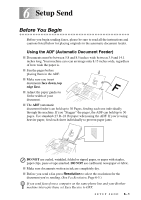
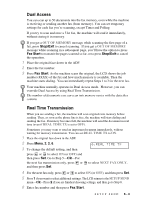
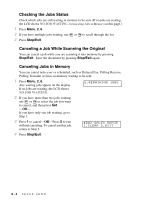
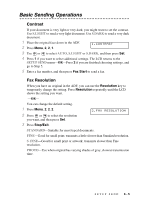
Dual Access You can scan up to 50 documents into the fax memory, even while the machine is receiving or sending another fax (from memory). You can set temporary settings for each fax you're scanning, except Timer and Polling. If you try to scan and store a 51st fax, the machine will send it immediately, without storing it in memory. If you get a OUT OF MEMORY message while scanning the first page of a fax, press Stop/Exit to cancel scanning. If you get a OUT OF MEMORY message while scanning in a subsequent page, you'll have the option to press Fax Start to transmit the pages scanned so far, or to press Stop/Exit to cancel the operation. 1 Place the original face down in the ADF. 2 Enter the fax number. 3 Press Fax Start. As the machine scans the original, the LCD shows the job number (#XXX) of the fax and how much memory is available. Then the machine starts dialing. You can immediately repeat Steps 1 to 3 for the next fax. Your machine normally operates in Dual Access mode. However, you can override Dual Access by using Real Time Transmission. The number of documents you can scan into memory varies with the data they contain. Real Time Transmission When you are sending a fax, the machine will scan originals into memory before sending. Then, as soon as the phone line is free, the machine will start dialing and sending the fax. If memory becomes full, the machine will send the document in real time (even if REAL TIME TX is set to OFF). Sometimes you may want to send an important document immediately, without waiting for memory transmission. You can set REAL TIME TX to ON. 1 Place the original face down in the ADF. 2 Press Menu, 2, 2, 6. 6.REAL TIME TX 3 To change the default setting, and then press or to select ON (or OFF) and then press Set. Go to Step 5-OR-For the next fax transmission only, press or to select NEXT FAX ONLY, and then press Set. 4 For the next fax only, press or to select ON (or OFF), and then press Set. 5 Press 1 if you want to select additional settings. The LCD returns to the SETUP SEND menu-OR-Press 2 if you are finished choosing settings, and then go to Step 6. 6 Enter fax number and then press Fax Start. SETUP SEND 6-3
-
 1
1 -
2
-
3
-
4
-
5
-
6
-
7
-
8
-
9
-
10
-
11
-
12
-
13
-
14
-
15
-
16
-
17
-
18
-
19
-
20
-
21
-
22
-
23
-
24
-
25
-
26
-
27
-
28
-
29
-
30
-
31
-
32
-
33
-
34
-
35
-
36
-
37
-
38
-
39
-
40
-
41
-
42
-
43
-
44
-
45
-
46
-
47
-
48
-
49
-
50
-
51
-
52
-
53
-
54
-
55
-
56
-
57
-
58
-
59
-
60
-
 61
61 -
 62
62 -
 63
63 -
 64
64 -
 65
65 -
 66
66 -
 67
67 -
 68
68 -
 69
69 -
 70
70 -
 71
71 -
72
-
73
-
74
-
75
-
76
-
77
-
78
-
79
-
80
-
81
-
82
-
83
-
84
-
85
-
86
-
87
-
88
-
89
-
90
-
91
-
92
-
93
-
94
-
95
-
96
-
97
-
98
-
99
-
100
-
101
-
102
-
103
-
104
-
105
-
106
-
107
-
108
-
109
-
110
-
111
-
112
-
113
-
114
-
115
-
116
-
117
-
118
-
119
-
120
-
121
-
122
-
123
-
124
-
125
-
126
-
127
-
128
-
129
-
130
-
131
-
132
-
133
-
134
-
135
-
136
-
137
-
138
-
139
-
140
-
141
-
142
-
143
-
144
-
145
-
146
-
147
-
148
-
149
-
150
-
151
-
152
-
153
-
154
-
155
 |
 |