Brother International LS-2125i Users Manual - English - Page 25
Replacing The Presser Foot - presser feet
 |
UPC - 012502615293
View all Brother International LS-2125i manuals
Add to My Manuals
Save this manual to your list of manuals |
Page 25 highlights
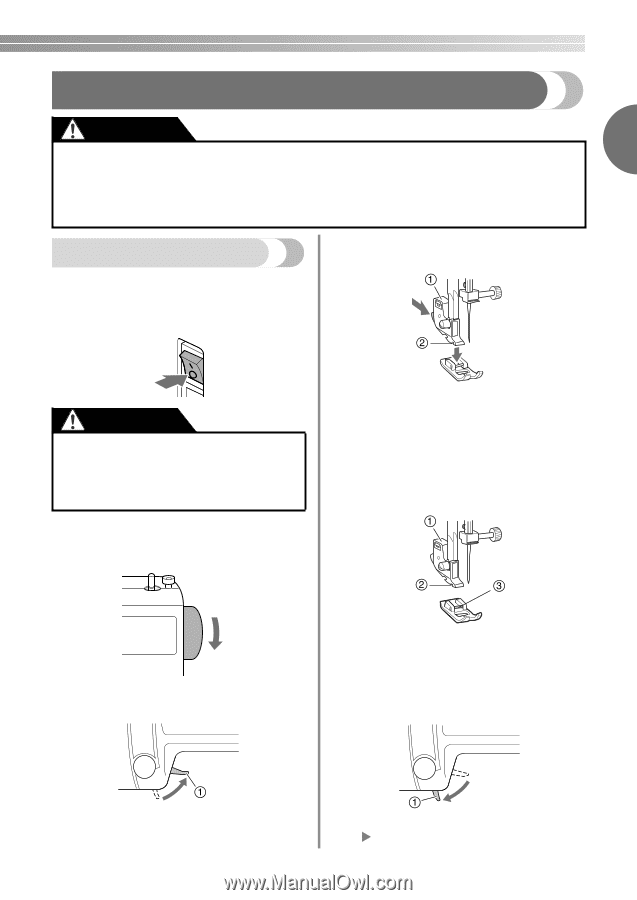
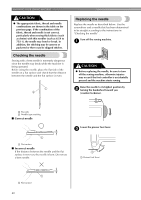
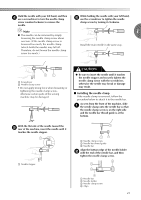
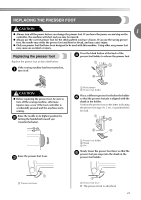
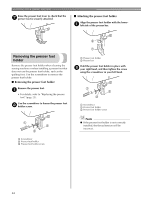
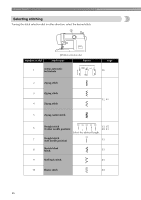
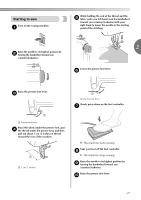
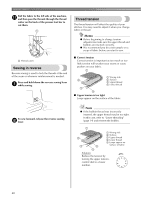
REPLACING THE PRESSER FOOT CAUTION 1 ● Always turn off the power before you change the presser foot. If you leave the power on and step on the controller, the machine will start and you may be injured. ● Always use the correct presser foot for the stitch pattern you have chosen. If you use the wrong presser foot, the needle may strike the presser foot and bend or break, and may cause injury. ● Only use presser feet that have been designed to be used with this machine. Using other any presser feet may cause an accident or injury. Replacing the presser foot Press the black button at the back of the d presser foot holder to release the presser foot. Replace the presser foot as described below. If the sewing machine has been turned on, a turn it off. CAUTION ● Before replacing the presser foot, be sure to turn off the sewing machine, otherwise injuries may occur if the foot controller is accidentally pressed and the machine starts sewing. Raise the needle to its highest position by b turning the handwheel toward you (counterclockwise). a Black button b Presser foot holder Place a different presser foot below the holder e so that the presser foot pin is aligned with the shank in the holder. Position the presser foot so the letter indicating the presser foot type (A, I, etc.) is positioned to be read. Raise the presser foot lever. c a Presser foot holder b Shank c Pin Slowly lower the presser foot lever so that the f presser foot pin snaps into the shank in the presser foot holder. a Presser foot lever a Presser foot lever X The presser foot is attached. 23
-
 1
1 -
2
-
3
-
4
-
5
-
6
-
7
-
8
-
9
-
10
-
11
-
12
-
13
-
14
-
15
-
16
-
17
-
18
-
19
-
 20
20 -
 21
21 -
 22
22 -
 23
23 -
 24
24 -
 25
25 -
 26
26 -
 27
27 -
 28
28 -
 29
29 -
 30
30 -
31
-
32
-
33
-
34
-
35
-
36
-
37
-
38
-
39
-
40
-
41
-
42
-
43
-
44
-
45
-
46
-
47
-
48
-
49
-
50
-
51
-
52
-
53
-
54
-
55
-
56
 |
 |