Brother International LS-2125i Users Manual - English - Page 40
Adjusting buitching, stitching, Button sewing - loose stitch
 |
UPC - 012502615293
View all Brother International LS-2125i manuals
Add to My Manuals
Save this manual to your list of manuals |
Page 40 highlights
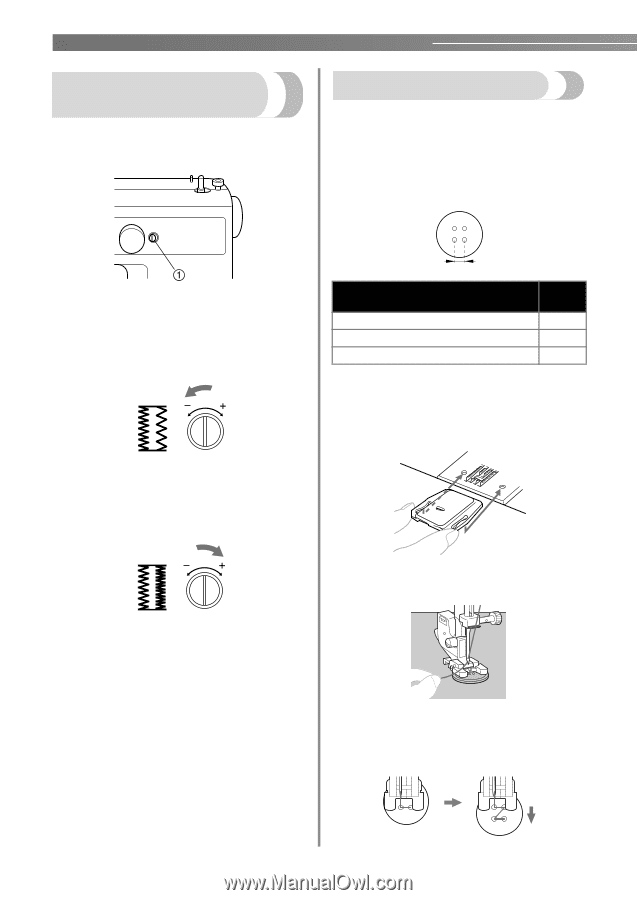
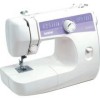
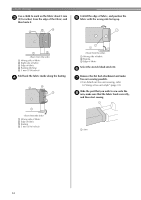
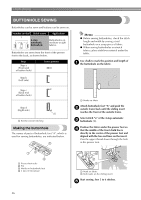
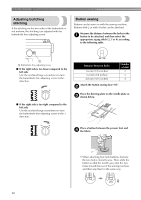
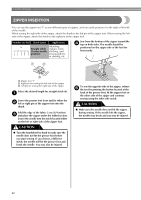
UTILITY STITCHES Adjusting buitching stitching If the stitching on the two sides of the buttonhole is not uniform, the stitching can adjusted with the buttonhole fine-adjusting screw. Button sewing Buttons can be sewn on with the sewing machine. Buttons with 2 or with 4 holes can be attached. Measure the distance between the holes in the a button to be attached, and then select the appropriate zigzag stitch (2, 3 or 4) according to the following table. a Buttonhole fine-adjusting screw ■ If the right side is too loose compared to the left side Use the enclosed large screwdriver to turn the buttonhole fine-adjusting screw in the direction. ■ If the right side is too tight compared to the left side Use the enclosed large screwdriver to turn the buttonhole fine-adjusting screw in the + direction. Distance between holes 1.6 mm (1/16 inches) 3.2 mm (1/8 inches) 4.8 mm (3/16 inches) Number of dial 2 3 4 Attach the button sewing foot "M". b Place the darning plate on the needle plate as c shown below. Place a button between the presser foot and d the fabric. • When attaching four-hole buttons, first sew the two holes closest to you. Then, slide the button so that the needle goes into the two holes toward the rear of the sewing machine, and then sew them in the same way. 38
-
 1
1 -
2
-
3
-
4
-
5
-
6
-
7
-
8
-
9
-
10
-
11
-
12
-
13
-
14
-
15
-
16
-
17
-
18
-
19
-
20
-
21
-
22
-
23
-
24
-
25
-
26
-
27
-
28
-
29
-
30
-
31
-
32
-
33
-
34
-
 35
35 -
 36
36 -
 37
37 -
 38
38 -
 39
39 -
 40
40 -
 41
41 -
 42
42 -
 43
43 -
 44
44 -
 45
45 -
46
-
47
-
48
-
49
-
50
-
51
-
52
-
53
-
54
-
55
-
56
 |
 |