Brother International MFC-465CN Quick Setup Guide - English - Page 24
For Network Interface Users (For Windows® 2000 Professional/XP/ XP Professional x64 Edition/Windows
 |
UPC - 012502618218
View all Brother International MFC-465CN manuals
Add to My Manuals
Save this manual to your list of manuals |
Page 24 highlights
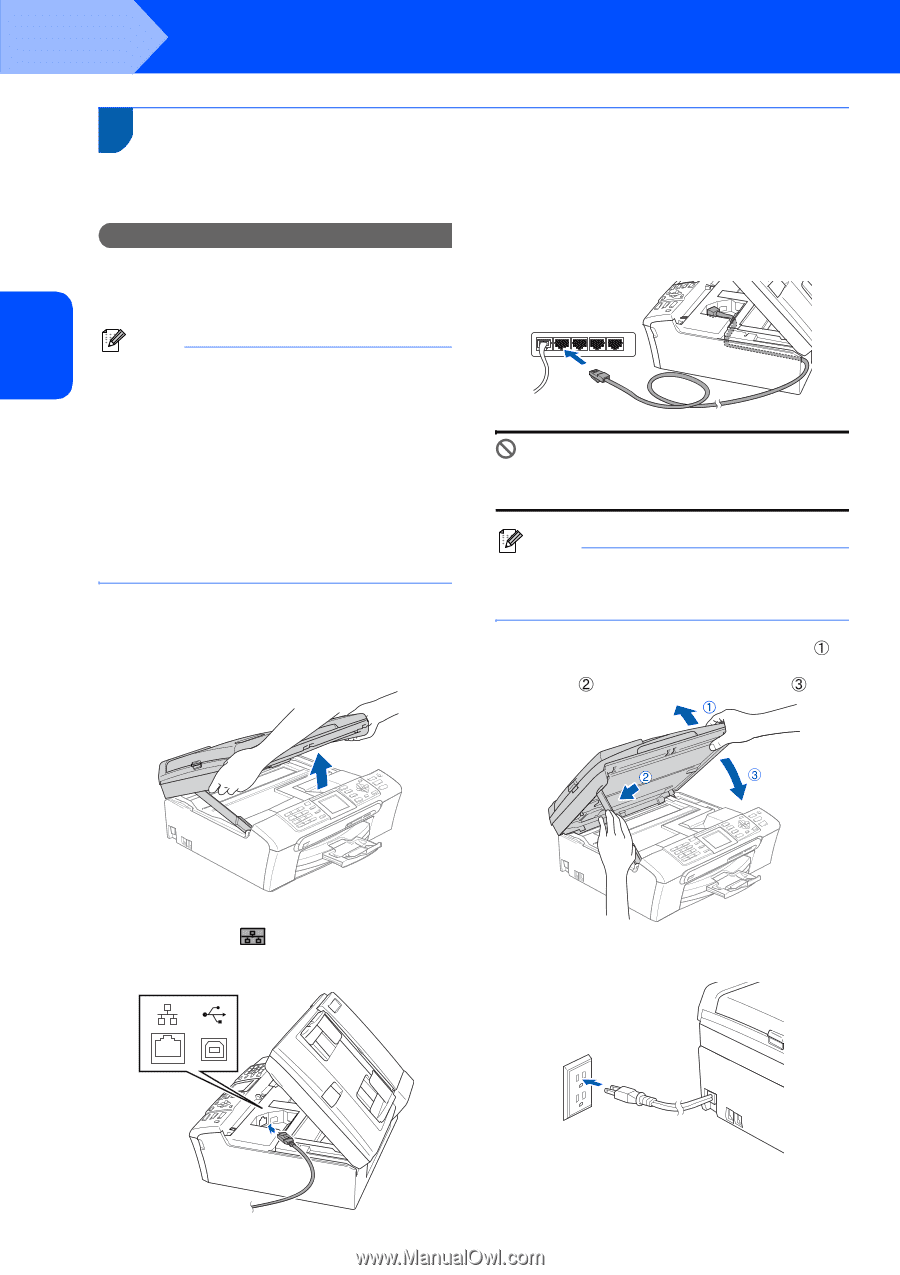
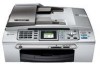
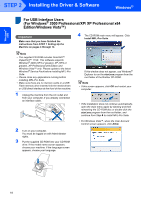
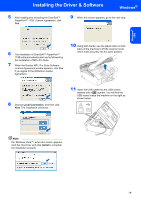
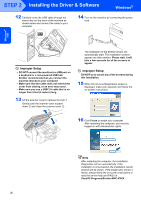
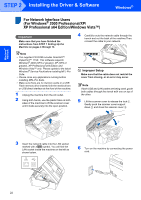
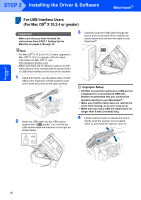
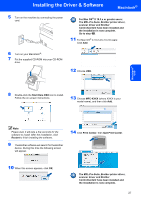
Windows® Network STEP 2 Installing the Driver & Software Windows® For Network Interface Users 2 (For Windows® 2000 Professional/XP/ XP Professional x64 Edition/Windows Vista™) Important Make sure that you have finished the instructions from STEP 1 Setting Up the Machine on pages 4 through 14. 4 Carefully route the network cable through the trench and out the back of the machine.Then, connect the cable to your network. Note • The supplied CD-ROM includes ScanSoft™ PaperPort™ 11SE. This software supports Windows® 2000 (SP4 or greater), XP (SP2 or greater), XP Professional x64 Edition and Windows Vista™ only. Please update to the latest Windows® Service Pack before installing MFL-Pro Suite. • Please close any applications running before installing MFL-Pro Suite. • Make sure there are no memory cards or a USB Flash memory drive inserted into the media drives or USB direct interface at the front of the machine. 1 Unplug the machine from the AC outlet. 2 Using both hands, use the plastic tabs on both sides of the machine to lift the scanner cover until it locks securely into the open position. Improper Setup Make sure that the cable does not restrict the cover from closing, or an error may occur. Note If both USB and LAN cables are being used, guide both cables through the trench with one on top of the other. 5 Lift the scanner cover to release the lock . Gently push the scanner cover support down and close the scanner cover . 3 Insert the network cable into the LAN socket marked with a symbol. You will find the LAN socket inside the machine on the left as shown below. 6 Turn on the machine by connecting the power cord. 22
-
 1
1 -
2
-
3
-
4
-
5
-
6
-
7
-
8
-
9
-
10
-
11
-
12
-
13
-
14
-
15
-
16
-
17
-
18
-
 19
19 -
 20
20 -
 21
21 -
 22
22 -
 23
23 -
 24
24 -
 25
25 -
 26
26 -
 27
27 -
 28
28 -
 29
29 -
30
-
31
-
32
-
33
-
34
-
35
-
36
-
37
-
38
-
39
 |
 |