Brother International MFC-465CN Quick Setup Guide - English - Page 8
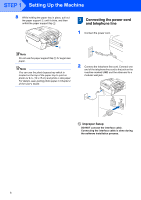
Connecting the power cord and telephone line, Improper Setup
 |
UPC - 012502618218
View all Brother International MFC-465CN manuals
Add to My Manuals
Save this manual to your list of manuals |
Page 8 highlights
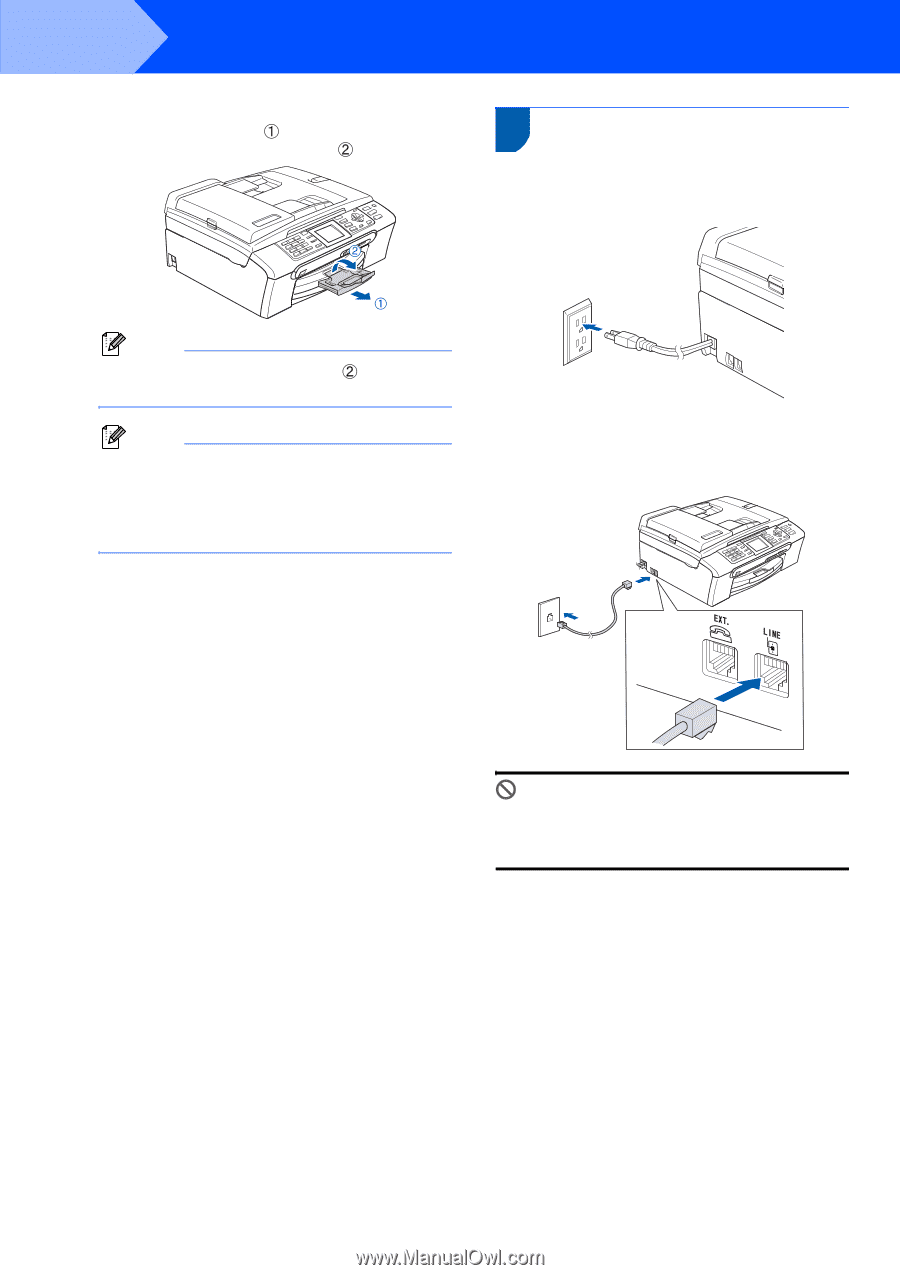
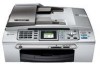
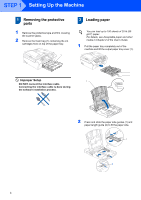
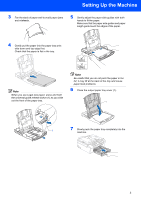
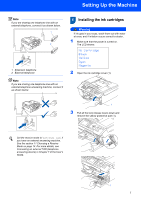
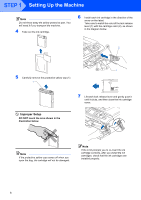
STEP 1 Setting Up the Machine 8 While holding the paper tray in place, pull out the paper support until it clicks, and then unfold the paper support flap . 3 Connecting the power cord and telephone line 1 Connect the power cord. Note Do not use the paper support flap paper. for Legal size Note You can use the photo bypass tray which is located on the top of the paper tray to print on photo 4 x 6 in. (10 x 15 cm) and photo L size paper. For details, see Loading photo paper in Chapter 2 of the User's Guide. 2 Connect the telephone line cord. Connect one end of the telephone line cord to the jack on the machine marked LINE and the other end to a modular wall jack. Improper Setup DO NOT connect the interface cable. Connecting the interface cable is done during the software installation process. 6
-
 1
1 -
2
-
 3
3 -
 4
4 -
 5
5 -
 6
6 -
 7
7 -
 8
8 -
 9
9 -
 10
10 -
 11
11 -
 12
12 -
 13
13 -
14
-
15
-
16
-
17
-
18
-
19
-
20
-
21
-
22
-
23
-
24
-
25
-
26
-
27
-
28
-
29
-
30
-
31
-
32
-
33
-
34
-
35
-
36
-
37
-
38
-
39
 |
 |