Brother International MFC 495CW Quick Setup Guide - English - Page 5
Install the ink cartridges, CAUTION
 |
UPC - 012502623175
View all Brother International MFC 495CW manuals
Add to My Manuals
Save this manual to your list of manuals |
Page 5 highlights
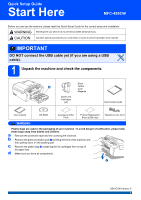
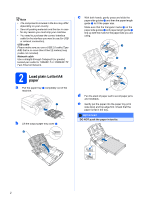
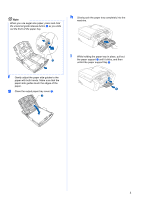
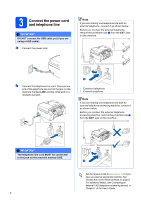
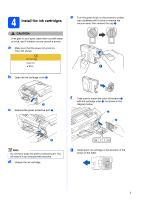
4 Install the ink cartridges e Turn the green knob on the protective yellow cap clockwise until it clicks to release the vacuum seal, then remove the cap a. CAUTION If ink gets in your eyes, wash them out with water at once, and if irritation occurs consult a doctor. a Make sure that the power is turned on. The LCD shows: No Cartridge Install Ink Black 1 b Open the ink cartridge cover a. 1 c Remove the green protective part a. f Take care to match the color of the lever a with the cartridge color b, as shown in the diagram below. 1 2 1 Note Do not throw away the green protective part. You will need it if you transport the machine. d Unpack the ink cartridge. g Install each ink cartridge in the direction of the arrow on the label. 5
-
 1
1 -
 2
2 -
 3
3 -
 4
4 -
 5
5 -
 6
6 -
 7
7 -
 8
8 -
 9
9 -
 10
10 -
 11
11 -
12
-
13
-
14
-
15
-
16
-
17
-
18
-
19
-
20
-
21
-
22
-
23
-
24
-
25
-
26
-
27
-
28
-
29
-
30
-
31
-
32
-
33
-
34
-
35
-
36
-
37
-
38
-
39
-
40
-
41
-
42
-
43
-
44
-
45
-
46
 |
 |
5
4
Install the ink cartridges
CAUTION
If ink gets in your eyes, wash them out with water
at once, and if irritation occurs consult a doctor.
a
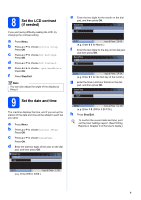
Make sure that the power is turned on.
The LCD shows:
b
Open the ink cartridge cover
a
.
c
Remove the green protective part
a
.
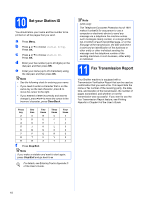
d
Unpack the ink cartridge.
e
Turn the green knob on the protective yellow
cap clockwise until it clicks to release the
vacuum seal, then remove the cap
a
.
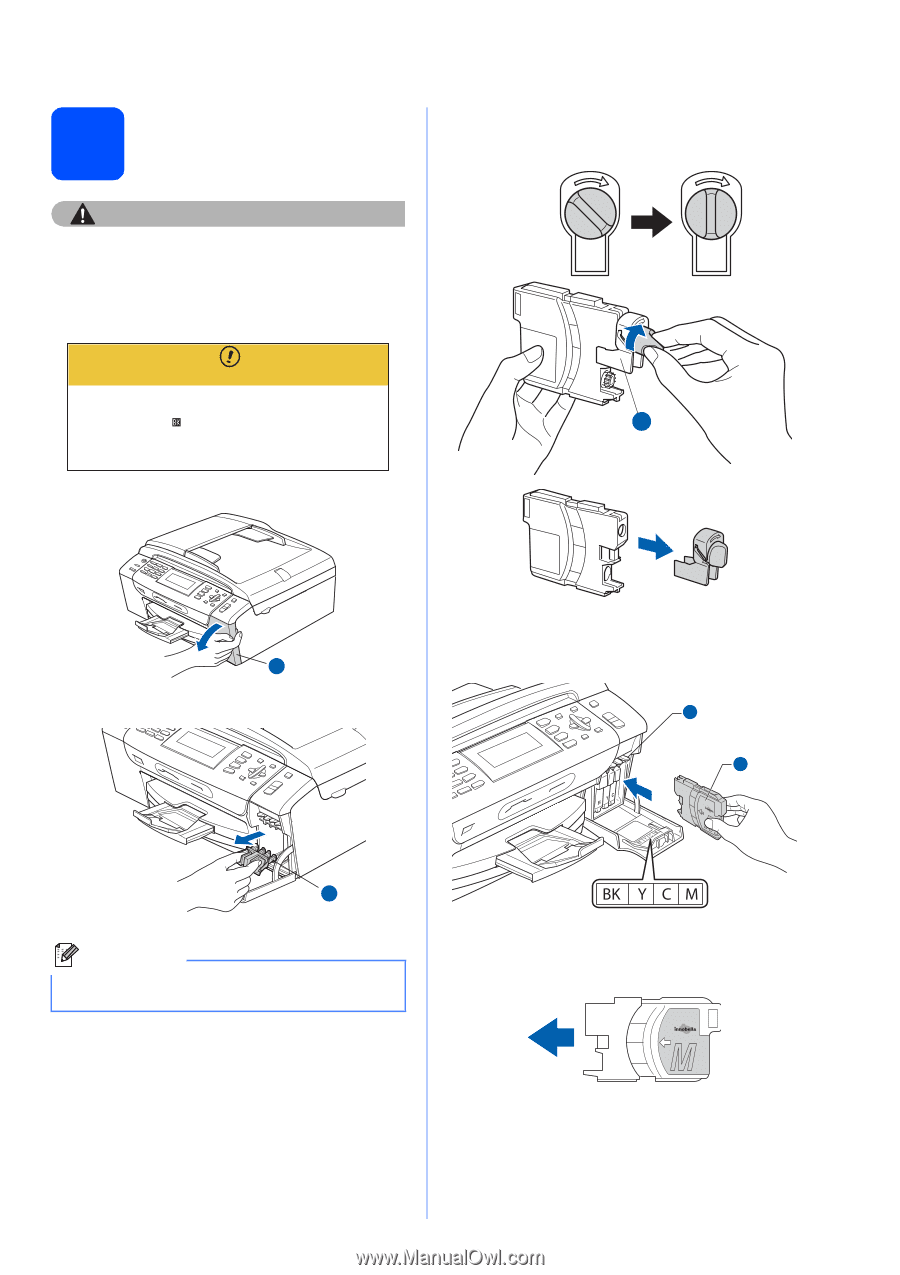
f
Take care to match the color of the lever
a
with the cartridge color
b
, as shown in the
diagram below.
g
Install each ink cartridge in the direction of the
arrow on the label.
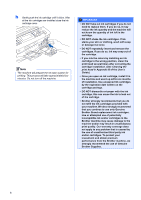
Note
Do not throw away the green protective part. You
will need it if you transport the machine.
No Cartridge
Black
Install Ink
1
1
1
2
1