Brother International MFC-9320CW Software Users Manual - English - Page 33
User Authentication, Other Print Options, Color Calibration, Use PC Login Name
 |
UPC - 012502622406
View all Brother International MFC-9320CW manuals
Add to My Manuals
Save this manual to your list of manuals |
Page 33 highlights
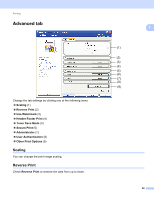
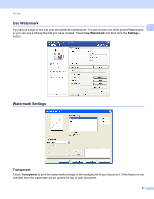
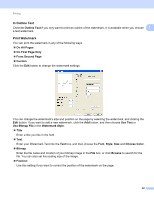
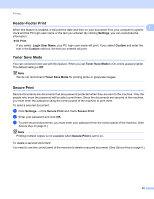
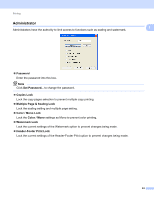
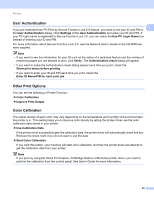
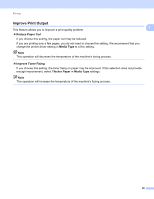
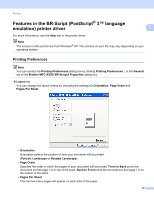
Printing User Authentication 1 1 If you are restricted from PC Print by Secure Function Lock 2.0 feature, you need to set your ID and PIN in the User Authentication dialog. Click Settings of the User Authentication and enter your ID and PIN. If your PC login name is registered to Secure Function Lock 2.0, you can check the Use PC Login Name box instead of entering your ID and PIN. For more information about Secure Function Lock 2.0, see the Network User's Guide on the CD-ROM we have supplied. Note • If you want to see the information for your ID such as the status of a restricted feature and the number of remaining pages you are allowed to print, click Verify. The Authentication result dialog will appear. • If you want to make the Authentication result dialog appear each time you print, check the Show print status before printing. • If you want to enter your ID and PIN each time you print, check the Enter ID Name/PIN for each print job. Other Print Options 1 You can set the following in Printer Function: „ Color Calibration „ Improve Print Output Color Calibration 1 The output density of each color may vary depending on the temperature and humidity of the environment the printer is in. This setting helps you to improve color density by letting the printer driver use the color calibration data stored in your printer. „ Use Calibration Data If the printer driver successfully gets the calibration data, the printer driver will automatically check this box. Remove the check mark if you do not want to use the data. „ Start Color Calibration If you click this button, your machine will start color calibration and then the printer driver will attempt to get the calibration data from your printer. Note If you print by using the Direct Print feature, PictBridge feature or BR-Script printer driver, you need to perform the calibration from the control panel. See User's Guide for more information. 25
-
 1
1 -
2
-
3
-
4
-
5
-
6
-
7
-
8
-
9
-
10
-
11
-
12
-
13
-
14
-
15
-
16
-
17
-
18
-
19
-
20
-
21
-
22
-
23
-
24
-
25
-
26
-
27
-
 28
28 -
 29
29 -
 30
30 -
 31
31 -
 32
32 -
 33
33 -
 34
34 -
 35
35 -
 36
36 -
 37
37 -
 38
38 -
39
-
40
-
41
-
42
-
43
-
44
-
45
-
46
-
47
-
48
-
49
-
50
-
51
-
52
-
53
-
54
-
55
-
56
-
57
-
58
-
59
-
60
-
61
-
62
-
63
-
64
-
65
-
66
-
67
-
68
-
69
-
70
-
71
-
72
-
73
-
74
-
75
-
76
-
77
-
78
-
79
-
80
-
81
-
82
-
83
-
84
-
85
-
86
-
87
-
88
-
89
-
90
-
91
-
92
-
93
-
94
-
95
-
96
-
97
-
98
-
99
-
100
-
101
-
102
-
103
-
104
-
105
-
106
-
107
-
108
-
109
-
110
-
111
-
112
-
113
-
114
-
115
-
116
-
117
-
118
-
119
-
120
-
121
-
122
-
123
-
124
-
125
-
126
-
127
-
128
-
129
-
130
-
131
-
132
-
133
-
134
-
135
-
136
-
137
-
138
-
139
-
140
-
141
-
142
-
143
-
144
-
145
-
146
-
147
-
148
-
149
-
150
-
151
-
152
-
153
-
154
-
155
-
156
-
157
-
158
-
159
-
160
-
161
-
162
-
163
-
164
-
165
-
166
-
167
-
168
-
169
-
170
-
171
-
172
-
173
-
174
-
175
-
176
-
177
-
178
-
179
-
180
-
181
-
182
-
183
-
184
-
185
-
186
-
187
-
188
-
189
-
190
-
191
-
192
-
193
-
194
-
195
-
196
-
197
-
198
-
199
-
200
-
201
-
202
-
203
-
204
-
205
-
206
-
207
-
208
-
209
 |
 |