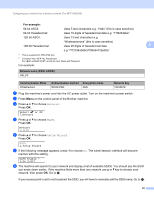
Brother International MFC-9320CW Network Users Manual - English - Page 46
Using the SES/WPS or AOSS control panel menu to con your machine for a wireless network (Automatic Wireless mode) - mfc power button
 |
UPC - 012502622406
View all Brother International MFC-9320CW manuals
Add to My Manuals
Save this manual to your list of manuals |
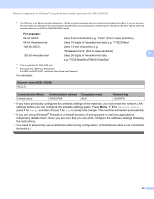
Page 46 highlights
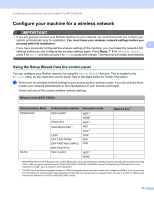
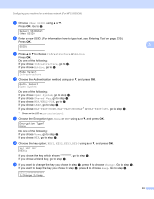
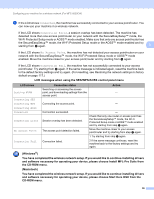
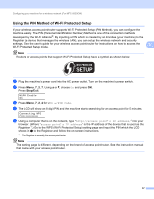
Configuring your machine for a wireless network (For MFC-9320CW) Using the SES/WPS or AOSS control panel menu to configure your machine for a wireless network (Automatic Wireless mode) 3 If your wireless access point/router supports either SecureEasySetup™, Wi-Fi Protected Setup (PBC 1) or AOSS™, you can configure the machine easily without knowing your wireless network settings. Your Brother machine has the SES/WPS/AOSS menu on the control panel. This feature automatically detects which mode your access point uses, SecureEasySetup™, Wi-Fi Protected Setup or AOSS™. By pushing a button on the 3 wireless access point/router and the machine, you can setup the wireless network and security settings. See the user's guide for your wireless access point/router for instructions on how to access one-push mode. 1 Push Button Configuration Note Routers or access points that support SecureEasySetup™, Wi-Fi Protected Setup or AOSS™ have the symbols shown below. a Plug the machine's power cord into the AC power outlet. Turn on the machine's power switch. b Press Menu, 7, 2, 7. Using a or b, choose On and press OK. Press Stop/Exit. WLAN Enable On c Press Menu, 7, 2, 3 for SES/WPS/AOSS. This feature will automatically detect which mode (SecureEasySetup™, Wi-Fi Protected Setup or AOSS™) your access point uses to configure your machine. WLAN 3.SES/WPS/AOSS Note If your wireless access point supports Wi-Fi Protected Setup (PIN Method) and you want to configure your machine using the PIN (Personal Identification Number) Method, see Using the PIN Method of Wi-Fi Protected Setup on page 37. d The machine will search for an access point that supports SecureEasySetup™, Wi-Fi Protected Setup or AOSS™ for 2 minutes. Setting WLAN e Put your access point in the SecureEasySetup™ mode, Wi-Fi Protected Setup mode or AOSS™ mode, depending on what is supported by your access point. Please refer to the instruction manual that came with your access point. You will see Connecting AOSS, Connecting SES or Connecting WPS on the LCD while the machine searches your access point. 35
-
 1
1 -
2
-
3
-
4
-
5
-
6
-
7
-
8
-
9
-
10
-
11
-
12
-
13
-
14
-
15
-
16
-
17
-
18
-
19
-
20
-
21
-
22
-
23
-
24
-
25
-
26
-
27
-
28
-
29
-
30
-
31
-
32
-
33
-
34
-
35
-
36
-
37
-
38
-
39
-
40
-
 41
41 -
 42
42 -
 43
43 -
 44
44 -
 45
45 -
 46
46 -
 47
47 -
 48
48 -
 49
49 -
 50
50 -
 51
51 -
52
-
53
-
54
-
55
-
56
-
57
-
58
-
59
-
60
-
61
-
62
-
63
-
64
-
65
-
66
-
67
-
68
-
69
-
70
-
71
-
72
-
73
-
74
-
75
-
76
-
77
-
78
-
79
-
80
-
81
-
82
-
83
-
84
-
85
-
86
-
87
-
88
-
89
-
90
-
91
-
92
-
93
-
94
-
95
-
96
-
97
-
98
-
99
-
100
-
101
-
102
-
103
-
104
-
105
-
106
-
107
-
108
-
109
-
110
-
111
-
112
-
113
-
114
-
115
-
116
-
117
-
118
-
119
-
120
-
121
-
122
-
123
-
124
-
125
-
126
-
127
-
128
-
129
-
130
-
131
-
132
-
133
-
134
-
135
-
136
-
137
-
138
-
139
-
140
-
141
-
142
-
143
-
144
-
145
-
146
-
147
-
148
-
149
-
150
-
151
-
152
-
153
-
154
-
155
-
156
-
157
-
158
-
159
-
160
-
161
-
162
-
163
-
164
-
165
-
166
-
167
-
168
-
169
-
170
-
171
-
172
-
173
-
174
-
175
-
176
-
177
-
178
-
179
-
180
-
181
-
182
-
183
-
184
-
185
-
186
-
187
-
188
-
189
-
190
-
191
-
192
-
193
-
194
-
195
-
196
-
197
-
198
-
199
-
200
-
201
-
202
-
203
-
204
-
205
-
206
-
207
-
208
-
209
-
210
-
211
-
212
-
213
-
214
-
215
-
216
-
217
-
218
-
219
-
220
-
221
-
222
-
223
-
224
-
225
-
226
-
227
-
228
-
229
-
230
-
231
-
232
-
233
-
234
-
235
-
236
-
237
-
238
-
239
-
240
-
241
-
242
-
243
-
244
-
245
-
246
-
247
-
248
-
249
 |
 |