Brother International MFC-J5910DW Network Users Manual - English - Page 15
Wireless configuration temporarily using a USB cable, For Windows® users (Recommended
 |
View all Brother International MFC-J5910DW manuals
Add to My Manuals
Save this manual to your list of manuals |
Page 15 highlights
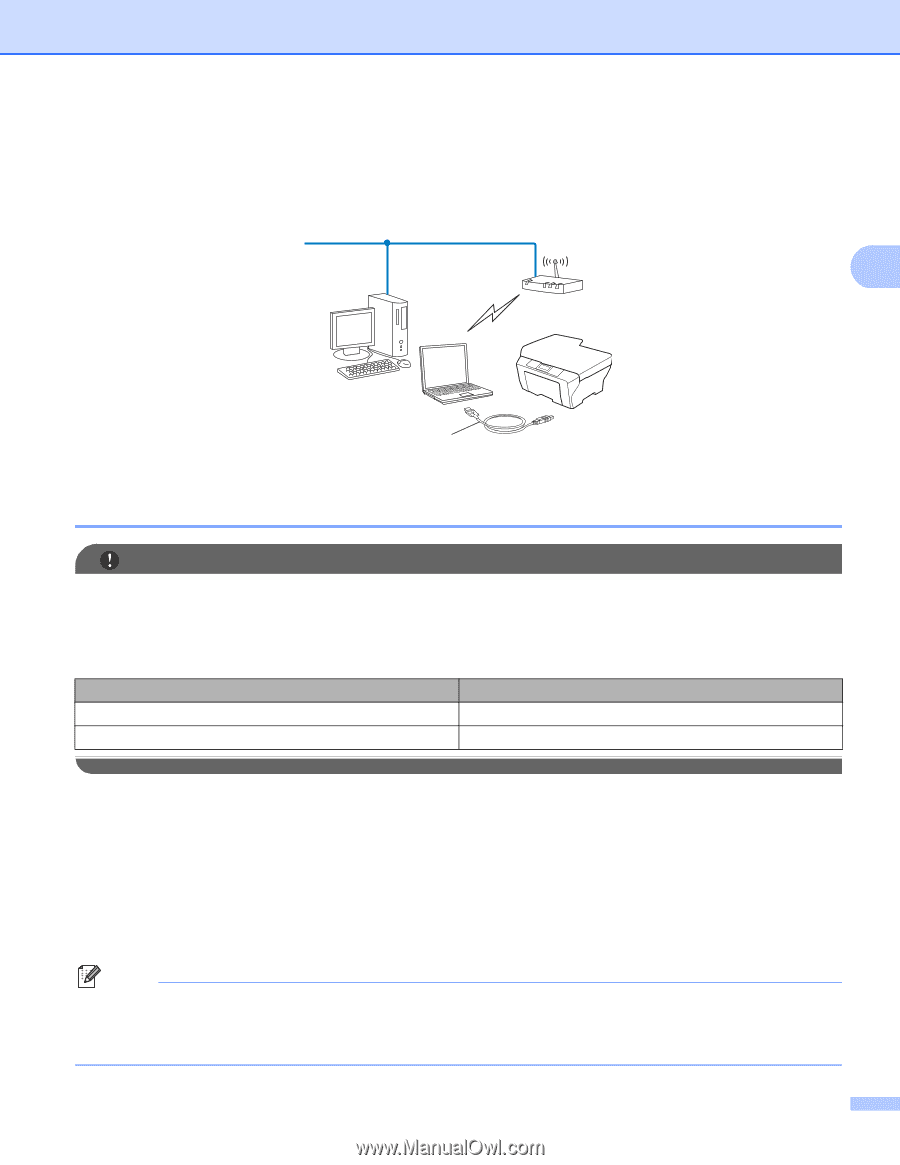
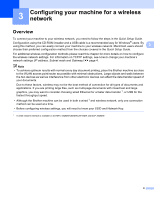
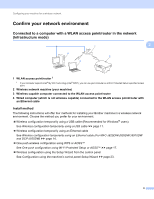
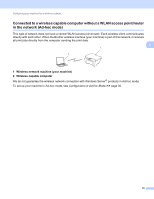
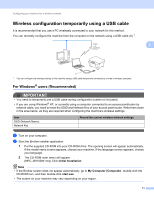
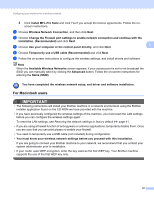
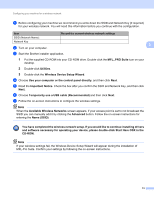
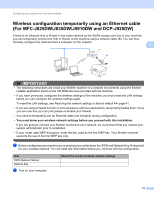
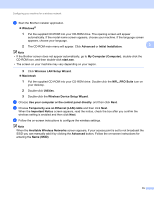
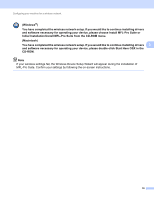
Configuring your machine for a wireless network Wireless configuration temporarily using a USB cable It is recommended that you use a PC wirelessly connected to your network for this method. You can remotely configure the machine from the computer on the network using a USB cable (A) 1. 3 3 A 1 You can configure the wireless settings of the machine using a USB cable temporarily connected to a wired or wireless computer. For Windows® users (Recommended) 3 IMPORTANT • You need to temporarily use a USB cable during configuration (cable not included). • If you are using Windows® XP, or currently using a computer connected to an access point/router by network cable, you need to know the SSID and Network Key of your access point/router. Write them down in the area below, as they are required when configuring the machine's wireless settings. Item SSID (Network Name): Network Key Record the current wireless network settings a Turn on your computer. b Start the Brother installer application. 1 Put the supplied CD-ROM into your CD-ROM drive. The opening screen will appear automatically. If the model name screen appears, choose your machine. If the language screen appears, choose your language. 2 The CD-ROM main menu will appear. (MFC-J5910DW only) Click Initial Installation. Note • If the Brother screen does not appear automatically, go to My Computer (Computer), double-click the CD-ROM icon, and then double-click start.exe. • The screen on your machine may vary depending on your region. 11
-
 1
1 -
2
-
3
-
4
-
5
-
6
-
7
-
8
-
9
-
 10
10 -
 11
11 -
 12
12 -
 13
13 -
 14
14 -
 15
15 -
 16
16 -
 17
17 -
 18
18 -
 19
19 -
 20
20 -
21
-
22
-
23
-
24
-
25
-
26
-
27
-
28
-
29
-
30
-
31
-
32
-
33
-
34
-
35
-
36
-
37
-
38
-
39
-
40
-
41
-
42
-
43
-
44
-
45
-
46
-
47
-
48
-
49
-
50
-
51
-
52
-
53
-
54
-
55
-
56
-
57
-
58
-
59
-
60
-
61
-
62
-
63
-
64
-
65
-
66
-
67
-
68
-
69
-
70
-
71
-
72
-
73
-
74
-
75
-
76
-
77
-
78
-
79
-
80
-
81
-
82
-
83
-
84
-
85
 |
 |