Brother International S-7200B Service Manual - Page 56
CONTROL BOX AND MOTOR, 10-1. Removing and installing the control box
 |
View all Brother International S-7200B manuals
Add to My Manuals
Save this manual to your list of manuals |
Page 56 highlights
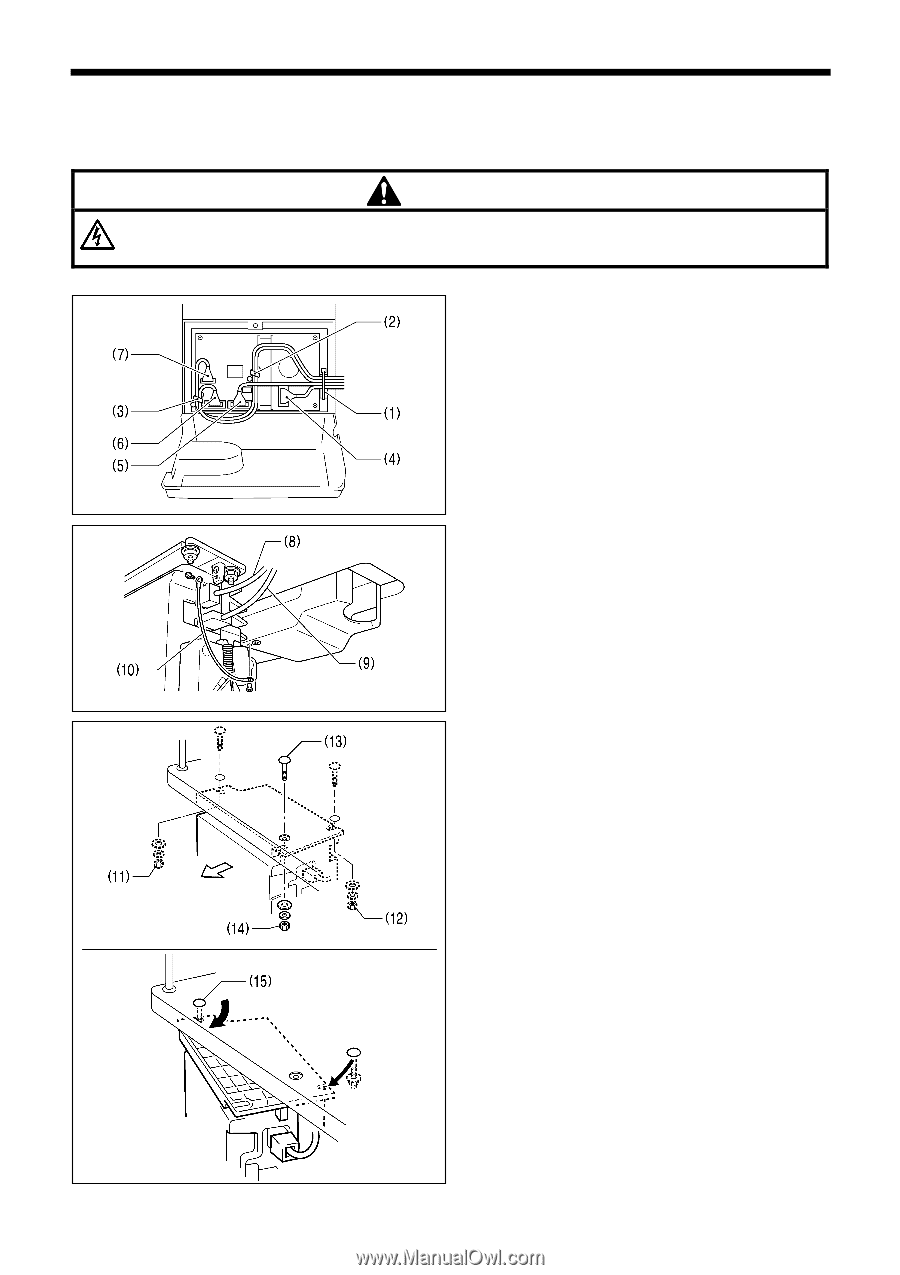
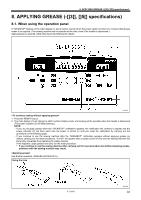
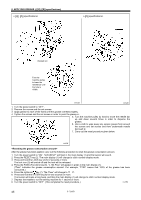
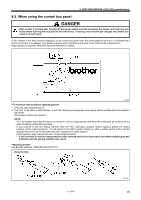
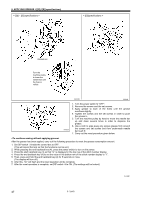
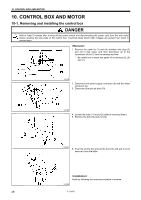
10. CONTROL BOX AND MOTOR 10. CONTROL BOX AND MOTOR 10-1. Removing and installing the control box DANGER Wait at least 5 minutes after turning off the power switch and disconnecting the power cord from the wall outlet before opening the face plate of the control box. Touching areas where high voltages are present can result in severe injury. 1. Remove the cable tie (1) and the shielded wire clips (2) and (3) in that order, and then disconnect all of the connectors (4) to (7) from the sewing machine. * Be careful not to break the pawls of connectors (5), (6) and (7). 0656B 2. Disconnect the power supply connector (8) and the motor connector (9). 3. Disconnect the ground wire (10). 2322M 4. Loosen the nuts (11) and (12) (without removing them). 5. Remove the bolt (13) and nut (14). 2323M 6. Pivot the control box around the bolt (15) and pull it out to remove it from the table. Install by following the removal procedure in reverse. 2324M 49 S-7200B
-
 1
1 -
2
-
3
-
4
-
5
-
6
-
7
-
8
-
9
-
10
-
11
-
12
-
13
-
14
-
15
-
16
-
17
-
18
-
19
-
20
-
21
-
22
-
23
-
24
-
25
-
26
-
27
-
28
-
29
-
30
-
31
-
32
-
33
-
34
-
35
-
36
-
37
-
38
-
39
-
40
-
41
-
42
-
43
-
44
-
45
-
46
-
47
-
48
-
49
-
50
-
 51
51 -
 52
52 -
 53
53 -
 54
54 -
 55
55 -
 56
56 -
 57
57 -
 58
58 -
 59
59 -
 60
60 -
 61
61 -
62
-
63
-
64
-
65
-
66
-
67
-
68
-
69
-
70
-
71
-
72
-
73
-
74
-
75
-
76
-
77
-
78
-
79
-
80
-
81
-
82
-
83
-
84
 |
 |