Brother International S-7200B Service Manual - Page 66
Memorizing the neutral position, Memorizing the maximum backward position, Completion of setting
 |
View all Brother International S-7200B manuals
Add to My Manuals
Save this manual to your list of manuals |
Page 66 highlights
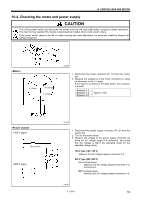
11. TREADLE UNIT ASSEMBLY 3) Memorizing the neutral position With your foot released from the treadle, press the thread trimming key (2). "Pdrr x.xxx" will appear in the main display (3). 2335M 4) Memorizing the maximum backward position With the treadle depressed backward to the maximum backward position, press the thread trimming key (2). "Pd-- x.xxx" will appear in the main display (3). 5) Completion of setting 2336M 1. Press the ENTER key (4). The buzzer will sound and the main display (3) will switch off. NOTE: If you do not press the ENTER key (4), the settings will not be memorized. 2337M 2. Turn off the power switch (1). 3. Set DIP switch No.4 to OFF. 0653B 59 S-7200B
-
 1
1 -
2
-
3
-
4
-
5
-
6
-
7
-
8
-
9
-
10
-
11
-
12
-
13
-
14
-
15
-
16
-
17
-
18
-
19
-
20
-
21
-
22
-
23
-
24
-
25
-
26
-
27
-
28
-
29
-
30
-
31
-
32
-
33
-
34
-
35
-
36
-
37
-
38
-
39
-
40
-
41
-
42
-
43
-
44
-
45
-
46
-
47
-
48
-
49
-
50
-
51
-
52
-
53
-
54
-
55
-
56
-
57
-
58
-
59
-
60
-
 61
61 -
 62
62 -
 63
63 -
 64
64 -
 65
65 -
 66
66 -
 67
67 -
 68
68 -
 69
69 -
 70
70 -
 71
71 -
72
-
73
-
74
-
75
-
76
-
77
-
78
-
79
-
80
-
81
-
82
-
83
-
84
 |
 |
S-7200B
11. TREADLE UNIT ASSEMBLY
59
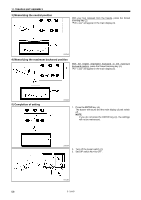
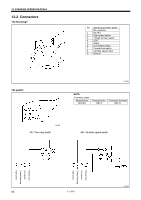
3) Memorizing the neutral position
With your foot released from the treadle
, press the thread
trimming key (2).
"Pdrr x.xxx" will appear in the main display (3).
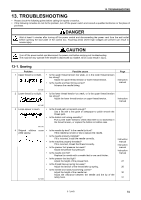
4) Memorizing the maximum backward position
With the treadle depressed backward to the maximum
backward position
, press the thread trimming key (2).
“Pd-- x.xxx” will appear in the main display (3).
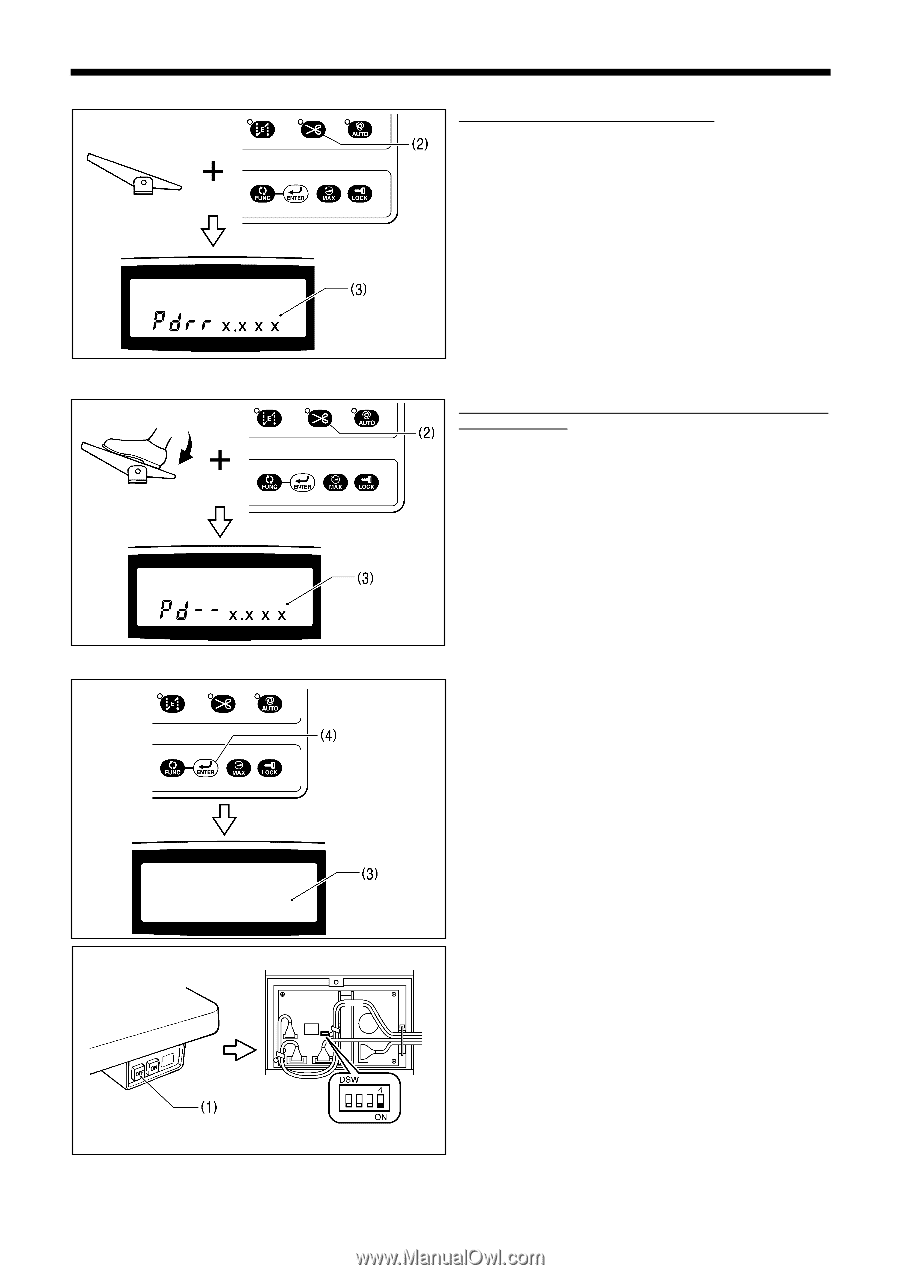
5) Completion of setting
1.
Press the ENTER key (4).
The buzzer will sound and the main display (3) will switch
off.
NOTE:
If you do not press the ENTER key (4), the settings
will not be memorized.
2.
Turn off the power switch (1).
3.
Set DIP switch No.4 to OFF.
2335M
2336M
0653B
2337M