Brother International SM-6500PRW Users Manual - English - Page 26
Replacing The Presser Foot
 |
View all Brother International SM-6500PRW manuals
Add to My Manuals
Save this manual to your list of manuals |
Page 26 highlights
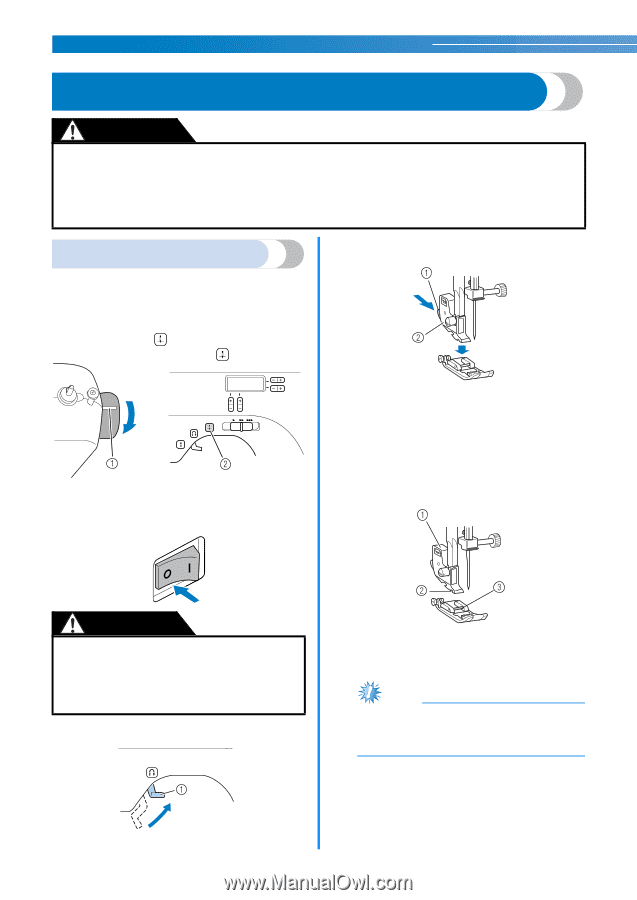
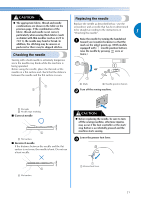
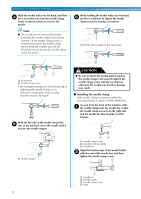
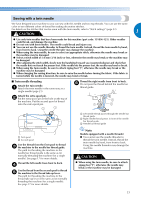
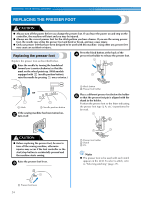
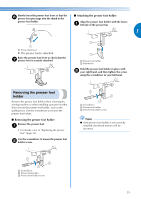
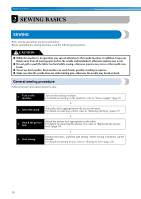
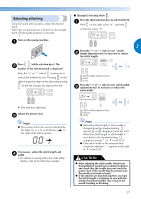
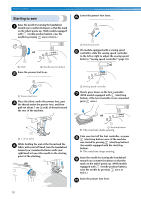
KNOWING YOUR SEWING MACHINE REPLACING THE PRESSER FOOT CAUTION ● Always turn off the power before you change the presser foot. If you leave the power on and step on the controller, the machine will start and you may be injured. ● Always use the correct presser foot for the stitch pattern you have chosen. If you use the wrong presser foot, the needle may strike the presser foot and bend or break, and may cause injury. ● Only use presser feet that have been designed to be used with this machine. Using other any presser feet may cause an accident or injury. Replacing the presser foot Press the black button at the back of the d presser foot holder to release the presser foot. Replace the presser foot as described below. Raise the needle by turning the handwheel a toward you (counterclockwise) so that the mark on the wheel points up. (With models equipped with (needle position button), raise the needle by pressing once or twice.) or a Mark b Needle position button If the sewing machine has been turned on, b turn it off. a Black button b Presser foot holder Place a different presser foot below the holder e so that the presser foot pin is aligned with the shank in the holder. Position the presser foot so the letter indicating the presser foot type (J, A, etc.) is positioned to be read. CAUTION ● Before replacing the presser foot, be sure to turn off the sewing machine, otherwise injuries may occur if the foot controller or the start/stop button is accidentally pressed and the machine starts sewing. Raise the presser foot lever. c a Presser foot holder b Shank c Pin Note ● The presser foot to be used with each stitch appears in the LCD. To select a stitch, refer to "Selecting stitching" (page 27). a Presser foot lever 24
-
 1
1 -
2
-
3
-
4
-
5
-
6
-
7
-
8
-
9
-
10
-
11
-
12
-
13
-
14
-
15
-
16
-
17
-
18
-
19
-
20
-
 21
21 -
 22
22 -
 23
23 -
 24
24 -
 25
25 -
 26
26 -
 27
27 -
 28
28 -
 29
29 -
 30
30 -
 31
31 -
32
-
33
-
34
-
35
-
36
-
37
-
38
-
39
-
40
-
41
-
42
-
43
-
44
-
45
-
46
-
47
-
48
-
49
-
50
-
51
-
52
-
53
-
54
-
55
-
56
-
57
-
58
-
59
-
60
-
61
-
62
-
63
-
64
-
65
-
66
-
67
-
68
 |
 |