Brother International SM-6500PRW Users Manual - English - Page 34
Utility Stitches
 |
View all Brother International SM-6500PRW manuals
Add to My Manuals
Save this manual to your list of manuals |
Page 34 highlights
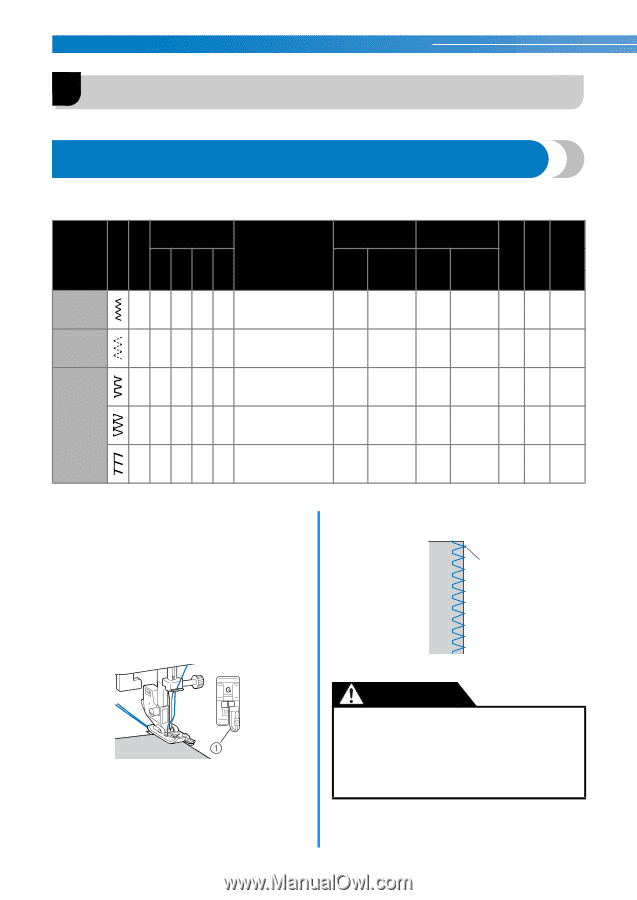
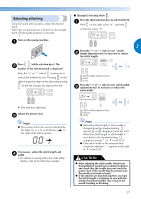
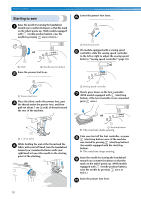
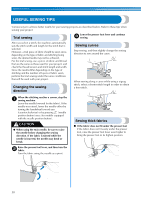
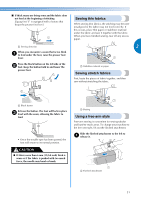
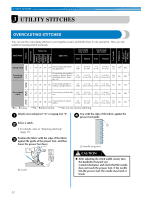
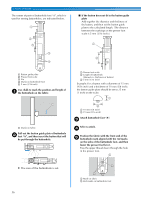
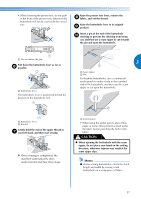
UTILITY STITCHES 3 UTILITY STITCHES OVERCASTING STITCHES You can use the overcasting stitches to join together seams and finish them in one operation. They are also useful for sewing stretch materials. Stitch Name Pattern No. Application Stitch Width [mm (inch.)] Stitch Length [mm (inch.)] Auto Manual Auto Manual Pattern Presser Foot 70 stitches model 60 stitches model 50 stitches model 40 stitches model Twin Needle Walking Foot Reverse/ Reinforcement Stitching Zigzag stitch 3-point zigzag stitch J 04 04 04 04 Overcasting and attaching appliqués 3.5 (1/8) 0.0-7.0 (0-1/4) 1.4 (1/16) 0.0-4.0 (0-3/16) Yes ( J ) Ye*s** Rev.* Overcasting on medium J 05 05 05 05 weight or stretch fabrics, attaching elastic, darn- 5.0 1.5-7.0 1.0 0.2-4.0 Yes (3/16) (1/16-1/4) (1/16) (1/64-3/16) ( J ) No Rfc. ** ing, etc. G 06 06 06 06 Overcasting on thin or medium weight fabrics 3.5 (1/8) 2.5-5.0 (3/32-3/16) 2.0 (1/16) 1.0-4.0 (1/16-3/16) No No Rfc. ** Overcasting stitch G 07 07 07 07 Overcasting on thick fabrics 5.0 (3/16) 2.5-5.0 (3/32-3/16) 2.5 (3/32) 1.0-4.0 (1/16-3/16) No No Rfc. ** *Rev.: Reverse J 08 08 08 08 Overcasting on stretch fabrics 5.0 (3/16) 0.0-7.0 (0-1/4) 2.5 0.5-4.0 Yes (3/32) (1/32-3/16) ( J ) No **Rfc.: Reinforcement ***Do not use reverse stitching. Rfc. ** Attach overcasting foot "G" or zigzag foot "J". a Sew with the edge of the fabric against the d presser foot guide. Select a stitch. b 1 • For details, refer to "Selecting stitching" (page 27). Position the fabric with the edge of the fabric c against the guide of the presser foot, and then lower the presser foot lever. a Needle drop point a Guide CAUTION ● After adjusting the stitch width, slowly turn the handwheel toward you (counterclockwise) and check that the needle does not touch the presser foot. If the needle hits the presser foot, the needle may bend or break. 32
-
 1
1 -
2
-
3
-
4
-
5
-
6
-
7
-
8
-
9
-
10
-
11
-
12
-
13
-
14
-
15
-
16
-
17
-
18
-
19
-
20
-
21
-
22
-
23
-
24
-
25
-
26
-
27
-
28
-
 29
29 -
 30
30 -
 31
31 -
 32
32 -
 33
33 -
 34
34 -
 35
35 -
 36
36 -
 37
37 -
 38
38 -
 39
39 -
40
-
41
-
42
-
43
-
44
-
45
-
46
-
47
-
48
-
49
-
50
-
51
-
52
-
53
-
54
-
55
-
56
-
57
-
58
-
59
-
60
-
61
-
62
-
63
-
64
-
65
-
66
-
67
-
68
 |
 |