Brother International SM-6500PRW Users Manual - English - Page 42
Zipper Insertion
 |
View all Brother International SM-6500PRW manuals
Add to My Manuals
Save this manual to your list of manuals |
Page 42 highlights
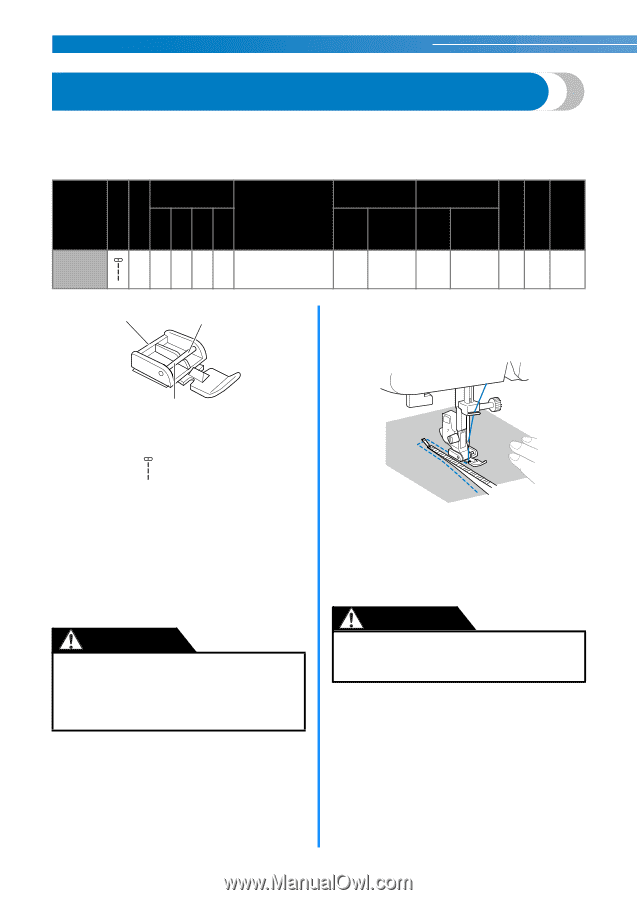
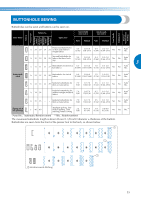
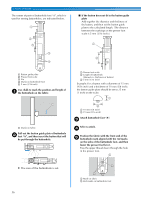
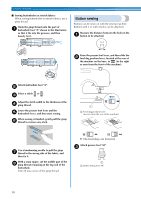
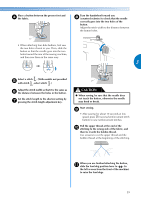
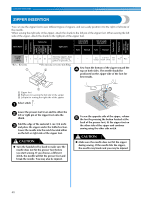
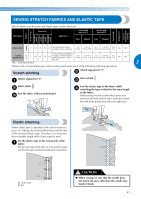
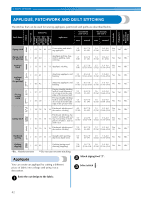
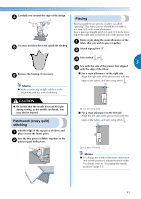
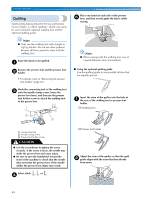
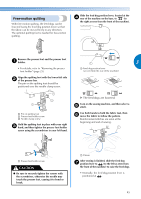
UTILITY STITCHES ZIPPER INSERTION You can use the zipper foot to sew different types of zippers, and can easily position it to the right or left side of the needle. When sewing the right side of the zipper, attach the shank to the left pin of the zipper foot. When sewing the left side of the zipper, attach the shank to the right pin of the zipper foot. Stitch Name Pattern No. Application Stitch Width [mm (inch.)] Stitch Length [mm (inch.)] Auto Manual Auto Manual Pattern Presser Foot 70 stitches model 60 stitches model 50 stitches model 40 stitches model Twin Needle Walking Foot Reverse/ Reinforcement Stitching Straight stitch I (center) *Rev.: Reverse 1 Attaching zippers, basic 01 01 01 01 stitching, and sewing - gathers or pintucks, etc. - 2.5 0.2-5.0 Yes (3/32) (1/64-3/16) ( J ) Yes** Rev.* **Do not use reverse stitching. 2 Sew from the bottom of the zipper toward the d top on both sides. The needle should be positioned on the zipper side of the foot for best results. 3 a Zipper foot b Right pin for sewing the left side of the zipper c Left pin for sewing the right side of the zipper Select stitch . a Lower the presser foot lever and fix either the b left or right pin of the zipper foot onto the shank. Fold the edge of the material 2 cm (3/4 inch) c and place the zipper under the folded section. Lower the needle into the notch located either on the left or right side of the zipper foot. CAUTION ● Turn the handwheel by hand to make sure the needle does not hit the presser foot before you start sewing. If you choose a different stitch, the needle will hit the presser foot and break the needle. You may also be injured. To sew the opposite side of the zipper, release e the foot by pressing the button located at the back of the presser foot, fit the zipper foot on the other side of the zipper and continue sewing using the other side notch. CAUTION ● Make sure the needle does not hit the zipper during sewing. If the needle hits the zipper, the needle may break and you may be injured. 40
-
 1
1 -
2
-
3
-
4
-
5
-
6
-
7
-
8
-
9
-
10
-
11
-
12
-
13
-
14
-
15
-
16
-
17
-
18
-
19
-
20
-
21
-
22
-
23
-
24
-
25
-
26
-
27
-
28
-
29
-
30
-
31
-
32
-
33
-
34
-
35
-
36
-
 37
37 -
 38
38 -
 39
39 -
 40
40 -
 41
41 -
 42
42 -
 43
43 -
 44
44 -
 45
45 -
 46
46 -
 47
47 -
48
-
49
-
50
-
51
-
52
-
53
-
54
-
55
-
56
-
57
-
58
-
59
-
60
-
61
-
62
-
63
-
64
-
65
-
66
-
67
-
68
 |
 |