Brother International XL-2600i Operation Manual - Page 44
Zigzag Stitching, Costura en zig-zag
 |
View all Brother International XL-2600i manuals
Add to My Manuals
Save this manual to your list of manuals |
Page 44 highlights
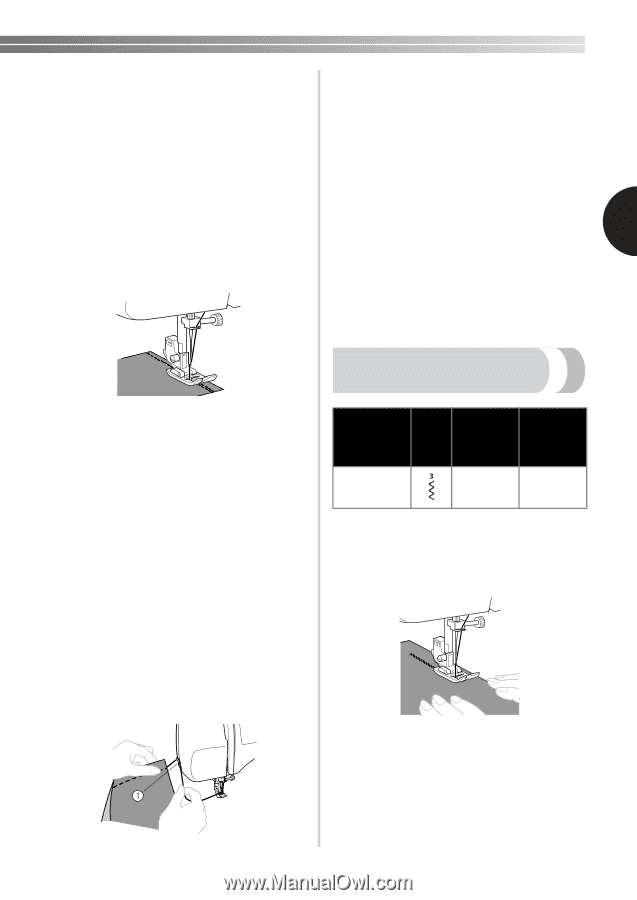
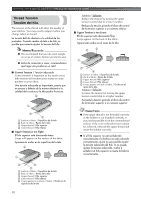
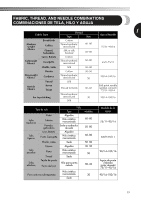
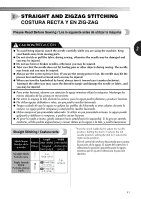
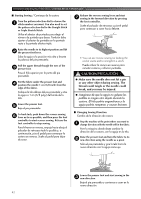
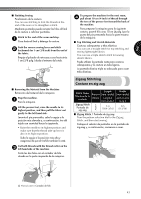
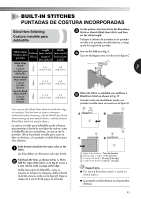
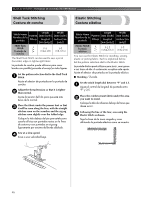
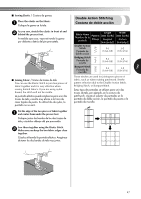
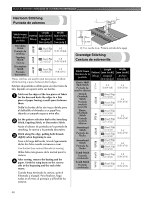
■ Finishing Sewing Finalización de la costura You can use stitching to lock the threads at the end of the seam or to strengthen a stitch. To prepare the machine for the next seam, 4 pull about 10 cm (4 inch) of thread through the toes of the presser foot toward the back of the machine. Mediante puntadas puede rematar los hilos al final de la costura o reforzar puntadas. Stitch to the end of the seam and stop. 1 Cosa hasta el final y detenga la costura. Para preparar la máquina para la siguiente costura, pase el hilo unos 10 cm (4 pulg.) por la punta del pie prensatela hacia la parte trasera de la máquina. ■ Top Stitching and Stretch Materials Push the reverse sewing lever and stitch 2 backwards for 1 cm (3/8 inch) from the end of the fabric. Empuje el pulsador de retroceso y cosa hacia atrás 1 cm (3/8 pulg.) desde el extremo de la tela. Costuras sobrepuestas y telas elásticas You can use a straight stitch for top stitching and 2 sewing lightweight fabrics. You can use a triple stretch stitch for sewing stretch fabrics. Puede utilizar la puntada recta para costuras sobrepuestas y la costura en telas ligeras. La puntada elástica triple es adecuada para coser telas elásticas. ■ Removing the Material from the Machine Extracción del material de la máquina Stop the machine. 1 Pare la máquina. Lift the presser foot, raise the needle to its 2 highest position, and then pull the fabric out gently to the left hand side. Levante el pie prensatela, suba la aguja a la posición más elevada y, a continuación, tire del tejido con suavidad hacia la izquierda. • Raise the needle to its highest position and make sure that the thread take-up lever is also in its highest position. Suba la aguja a la posición más alta y asegúrese de que el tirahilo también lo esté. Cut both threads with the thread cutter on the 3 left hand side of the machine Corte los dos hilos con el cortador de hilo situado en la parte izquierda de la máquina. . Zigzag Stitching Costura en zig-zag Stitch Name Nombre de la puntada Zigzag Stitch Puntada de zig-zag Pattern Dibujo Length [mm (inch)] Longitud [mm (pulg.)] F-4 (1/64-3/16) Width [mm (inch)] Anchura [mm (pulg.)] 0-5 (0-3/16) ■ Zigzag Stitch / Puntada de zig-zag Turn the pattern selection dial to the Zigzag Stitch, and then start sewing. Coloque el selector de puntadas en la puntada de zig-zag y, a continuación, comience a coser. 1 Thread cutter / Cortador de hilo 43
-
 1
1 -
2
-
3
-
4
-
5
-
6
-
7
-
8
-
9
-
10
-
11
-
12
-
13
-
14
-
15
-
16
-
17
-
18
-
19
-
20
-
21
-
22
-
23
-
24
-
25
-
26
-
27
-
28
-
29
-
30
-
31
-
32
-
33
-
34
-
35
-
36
-
37
-
38
-
 39
39 -
 40
40 -
 41
41 -
 42
42 -
 43
43 -
 44
44 -
 45
45 -
 46
46 -
 47
47 -
 48
48 -
 49
49 -
50
-
51
-
52
-
53
-
54
-
55
-
56
-
57
-
58
-
59
-
60
-
61
-
62
-
63
-
64
-
65
-
66
-
67
-
68
-
69
-
70
-
71
-
72
-
73
-
74
-
75
-
76
-
77
-
78
-
79
-
80
-
81
-
82
 |
 |