Canon 0058B001 ZR Instruction Manual
Canon 0058B001 - ZR 200 Camcorder Manual
 |
UPC - 013803047714
View all Canon 0058B001 manuals
Add to My Manuals
Save this manual to your list of manuals |
Canon 0058B001 manual content summary:
- Canon 0058B001 | ZR Instruction Manual - Page 1
ACCESSORIES ONLY. COPYRIGHT WARNING: Unauthorized recording of copyrighted materials may infringe on the rights of copyright owners and be contrary to copyright laws. Digital Video Camcorder alert the user to the presence of important operating and maintenance (servicing) instructions in the literature accompanying - Canon 0058B001 | ZR Instruction Manual - Page 2
IMPORTANT SAFETY INSTRUCTIONS In these safety instructions the word 10. Power Sources - The CA-600A "product" refers to the Canon Digital Video Camcorder ZR and all its accessories. Compact Power Adapter should be operated only from the type of power E 1. Read Instructions - All the safety and - Canon 0058B001 | ZR Instruction Manual - Page 3
Disconnect this product from the wall ANTENNA LEAD IN WIRE outlet and all power sources including GROUND battery, and refer servicing to qualified CLAMP service personnel under the following ELECTRIC SERVICE EQUIPMENT NEC - NATIONAL ELECTRICAL CODE ANTENNA DISCHARGE UNIT (NEC SECTION 810-20 - Canon 0058B001 | ZR Instruction Manual - Page 4
Focus Manually 49 Powering Your Camcorder 8 Setting the White Balance 50 Loading a Cassette 11 Basic Recording 13 Zooming 16 Using the LCD Screen 17 Playing back a Cassette 19 Connections for Playback on a TV Screen 22 Tips for Making Better Videos 26 ~ For Playback ...~ Displaying Data - Canon 0058B001 | ZR Instruction Manual - Page 5
are used to refer to settings displayed in the menus and buttons labeled on the camcorder itself e.g. Press the EJECT button. CA-600 Compact Power Adapter DC-600 DC Coupler STV-150 Stereo Video Cable S-150 S-video Cable STV-250 Stereo Video Digital Video Cassette Cable FU-100 Finder Unit and - Canon 0058B001 | ZR Instruction Manual - Page 6
E digital video camcorder that conforms to the new digital video Mini standard to give you outstanding picture quality. From wide-angle to 11× telephoto - with unparalleled optical quality. The digital zoom magnifies this by four for even more dramatic results. Introduction 2.5" LCD Screen (180 - Canon 0058B001 | ZR Instruction Manual - Page 7
B A Powering Your Camcorder Before operating your camera, you will need to use the power adapter to: E provide power from an AC outlet or charge battery packs Notes: • The power adapter converts current from a household power socket (100-240 V AC, 50/60 Hz) to the DC current used by your camera. • - Canon 0058B001 | ZR Instruction Manual - Page 8
pack fully if you want it to power the camera for more than a few minutes. The power adapter supplied with your camcorder can hold two battery packs and is capable of charging them one after another. Additional battery packs are available as an optional accessory (p.73). 1. Attach one or two - Canon 0058B001 | ZR Instruction Manual - Page 9
, or, if the adapter was already plugged into an AC outlet, from the side labeled "A". • When powering your camcorder from an AC outlet, you do not need to remove attached battery packs, but charging will not take place until you remove the DC coupler from the adapter. • You can find detailed notes - Canon 0058B001 | ZR Instruction Manual - Page 10
a power source. 2. Slide the OPEN/EJECT 5 button downwards to release the cover (the camera's grip). • Pull the cover fully open and wait a couple of seconds for the cassette compartment to open automatically. 3. Load or unload the cassette. • Insert the cassette gently with the window facing - Canon 0058B001 | ZR Instruction Manual - Page 11
labeled SAVE or ERASE OFF). If you load this cassette and put the camera in record pause mode (p. 13), "THE TAPE IS SET FOR ERASURE PREVENTION" is displayed for approx. 4 seconds and then the v mark flashes in the display. If you want to record on the cassette again, slide the tab back so the - Canon 0058B001 | ZR Instruction Manual - Page 12
8). • Loaded a cassette (p. 11). • Fastened the shoulder strap (p. 60). • Removed the LCD cover (p. 60). You may also want to charge the backup battery (p. 62) in order to set the date and time display (p. 32). To record 1. Press down and slide the POWER switch to [. • This selects the camera's Easy - Canon 0058B001 | ZR Instruction Manual - Page 13
the digital effects (p. 40). • To check that the camera is recording correctly, make a test recording first. • Before making important recordings, clean the video heads using a Canon DVM-CL Digital Video Head Cleaning Cassette or a commercially available digital video head cleaning cassette. • You - Canon 0058B001 | ZR Instruction Manual - Page 14
be distorted during playback. For important recordings, therefore, set the camera to SP mode. • If you record in both modes on the same tape, the in LP mode on other digital equipment may produce mosaic-like noise and the sound may become distorted when played back on this camcorder, and vice - Canon 0058B001 | ZR Instruction Manual - Page 15
) The zoom control continues to work as usual. You can freely zoom in and out between 1× and 44× magnification - the camera automatically switches between optical zooming (up to 11×) and digital zooming (11× to 44×). Notes: • When you want to get as close as possible to your subject, keep the zoom - Canon 0058B001 | ZR Instruction Manual - Page 16
or the camera strap (p. 60). • You can turn the viewfinder focusing wheel (to clearly see the display) to suit your eyesight. • Avoid touching the LCD screen or the mirror inside the Finder Unit. • Do not hold the camcorder by the LCD panel. • Bright light falling on the LCD screen may cause glare - Canon 0058B001 | ZR Instruction Manual - Page 17
the menu before turning the screen upright. You can also use the wireless controller. No Cassette is loaded Exposure Adjustment Manual focus AF OFF 18 REC REC PAUSE EJECT STOP The tape has reached the end Condensation warning The battery pack is exhausted Self-Timer countdown Photo mode AF/AE mark - Canon 0058B001 | ZR Instruction Manual - Page 18
the tape backwards, stop playback and turn the multi-switch lever towards the lens. • If the playback picture is rough (mosaic-like noise), clean the video heads using a Canon DVM-CL Digital Video Head Cleaning Cassette or a commercially available digital video head cleaning cassette. 19 - Canon 0058B001 | ZR Instruction Manual - Page 19
-in speaker Speaker The camcorder has a built-in speaker so you can review the sound track alongside the picture during playback. Adjust the speaker volume by turning the select dial when the camera is in VCR mode (p. 19). • A VOLUME bar appears in the display temporarily to indicate the current - Canon 0058B001 | ZR Instruction Manual - Page 20
normal playback. Press the PLAY e button to return to normal playback. • The camera automatically returns to playback after about 30 seconds of slow playback. Mastering the Basics Note: • Mosaic-like noise appears on the screen during some of the VCR modes and the sound track cannot be heard. 21 - Canon 0058B001 | ZR Instruction Manual - Page 21
Connections for Playback on a TV Screen You can connect the camera to a TV or VCR in order to play back your E recordings. See your TV or VCR instruction manual for further details. You will need to attach a power source to the camera (see p. 8), and for S-video or to use an RF Unit, attach the DU- - Canon 0058B001 | ZR Instruction Manual - Page 22
the DU-100 Docking Unit, via its L and R audio terminals and V video terminal. • If cables are inserted to the S-video or Video terminals of an attached Docking Unit, there will be no output from the AUDIO VIDEO OUT terminal of the camera itself. • If you are going to use the TV as a monitor while - Canon 0058B001 | ZR Instruction Manual - Page 23
-100 RF Unit 2 3 VHF TV with flat twin-lead antenna cable RU-100 RF Unit Mastering the Basics 2 V L R 300-75 ohm adapter 3 VHF 75-300 ohm adapter To connect the camera directly to a TV which does not have audio/video terminals, you will need to use the optional RU-100 RF Unit together - Canon 0058B001 | ZR Instruction Manual - Page 24
the adapter and insert the antenna cable. Tighten the screws again. If the antenna cable does not have antenna lugs, you will need to strip one end of the cable and wind the wires around the screws. Selecting the video channel Turn the TV on, start playback on the camera (see p. 19), and set the - Canon 0058B001 | ZR Instruction Manual - Page 25
by changing the angle of the LCD screen. When not attached to the camera, always replace its protective cap. • Make sure that the fastening screw of the tripod is no longer than 3/16 inch (5.5 mm), or it will damage the camera. Composition The most important element in the scene does not have - Canon 0058B001 | ZR Instruction Manual - Page 26
picture angle before you begin. A good way to tell a story with video is to begin with a long shot that establishes the situation, and then . Hold the final image for a few seconds before you stop recording. Tilt the camera up to exaggerate the height of the subject. Tilt down from the top of a - Canon 0058B001 | ZR Instruction Manual - Page 27
menu, see page 36. Camera menu (CAM. MENU) q Shutter speed p. 48 w Digital effects p. 40 e Image stabilizer p. 30 r Digital zoom p. 16 t 16:9 p. 43 y White balance p. 50 u Self-timer p. 46 i Remote sensor p. 31 o Recording mode p. 15 !0 Audio mode p. 44 !1 Wind screen p. 45 !2 Backlight - Canon 0058B001 | ZR Instruction Manual - Page 28
menu. 2. Turn the select dial up or down to move the arrow up or down the display. 3. Press in the select dial to select your chosen option from the menu. • Your selected option remains on the screen and all other options are removed. 4. Turn the select dial up or down to choose - Canon 0058B001 | ZR Instruction Manual - Page 29
On/Off E MENU With most camcorders, even the slightest hand movements will be noticeable during telephoto recording. the camera menu. (see p. 28) IMAGE S. i •OFF • The i mark appears in the display when the stabilizer is on. • The image stabilizer cannot be turned off when the POWER switch - Canon 0058B001 | ZR Instruction Manual - Page 30
. Be careful not to reverse the polarity of the batteries. E Remote sensor Using the Full Range of Features Notes: • When using the wireless controller in brightly lit places or outdoors, the effective range will be less. • The camera may have difficulty picking up the remote control signals at - Canon 0058B001 | ZR Instruction Manual - Page 31
(see p. 52). Set the date and time display when you first start using your camera. Charge the backup battery before you begin (see p. 62). 1. Put the camera in record pause mode. 2. Open the camera menu and select D/TIME SET. • The year display starts to flash. 3. Turn the select dial up and down - Canon 0058B001 | ZR Instruction Manual - Page 32
cannot use the camera functions (when a cassette is loaded, the LENS COVER switch/power off do not cut the power until recording is complete). • You cannot use the FADE-T, WIDE or SCROLL digital effects while the camera is set to photo mode (the effect name flashes purple in the display for a few - Canon 0058B001 | ZR Instruction Manual - Page 33
tape. 5. Press in the select dial to leave record search mode • The camera returns to record pause mode. Note: • You cannot set record search while the camera is in mirror mode (with the LCD screen facing the same direction as the lens), or without a tape loaded. 34 Using the Full Range of Features - Canon 0058B001 | ZR Instruction Manual - Page 34
. 2. Press and release the c (record review) button while you check the picture in the display. • The camera rewinds the tape, plays back the last few seconds, and returns to record pause mode. Note: • Noise may appear on the screen during record search and record review. 35 Using the Full Range of - Canon 0058B001 | ZR Instruction Manual - Page 35
program whose [ mark is displayed and then disappears after 4 seconds. Selecting from the program menu In addition to setting the recording programs you can turn the digital effects on/off and select record search. 1. Set the camera to record pause mode, with the POWER switch set to the P position - Canon 0058B001 | ZR Instruction Manual - Page 36
camera will take care of focus, exposure and other adjustments, leaving you free to point and shoot. If you select this Easy Recording program, you cannot use: • Exposure lock or compensation • Different shutter speeds • White balance set/indoor/outdoor modes • 16:9 effect • Digital Effects Also - Canon 0058B001 | ZR Instruction Manual - Page 37
Range of Features Auto E In normal recording conditions, set the POWER switch to P , and choose AUTO from the program menu. This is the same as the Easy Recording program, except that you now have the option of using any of the camera's manual functions - you can adjust focus and exposure, set the - Canon 0058B001 | ZR Instruction Manual - Page 38
. However, you can take advantage of this to create special effects, by rapid zooming or by panning along with a moving subject. Picture quality will not be as good as in normal lighting conditions, and autofocus may not work as well as usual. • The camera sets the image stabilizer off while the Low - Canon 0058B001 | ZR Instruction Manual - Page 39
Using the Digital Effects Fade Trigger E When you start recording, the scene gradually fades in from a black screen. When you stop recording, it gradually fades out. Wipe When you start recording, the picture begins as a thin vertical line in the center of the screen which gradually expands sideways - Canon 0058B001 | ZR Instruction Manual - Page 40
Sepia E Records a monochrome image with a sepia tint. Strobe This effect converts on-screen action to a series of still images, giving an effect similar to slow-motion. 41 Using the Full Range of Features - Canon 0058B001 | ZR Instruction Manual - Page 41
in record pause mode, with the POWER switch set to the P position. 2. Select the D. EFFECT option from the camera menu and choose one of the digital effects from list. • When you close the menu, the name of the digital effect that you have chosen flashes in the display. • To turn digital effects off - Canon 0058B001 | ZR Instruction Manual - Page 42
recording a scene, the camera first clears the screen and then applies the effect. • The camera remembers your chosen effect until you change it, but when you switch the POWER switch to [ (Easy Recording) the digital effect is deactivated and its name flashes purple in the display for a few seconds - Canon 0058B001 | ZR Instruction Manual - Page 43
later date. 1. To switch to the 12 bit mode open the camera menu and select AUDIO MODE. 2. Select "12 bit" and close the menu. • "12 bit" is shown in the display for approximately 4 seconds. Notes: • You cannot add new sound to a tape using this camcorder. • For details of playing back a tape that - Canon 0058B001 | ZR Instruction Manual - Page 44
with the sound track. (It does not operate with an external microphone: WS | is displayed). Turn it off when you want the microphone to be as sensitive as possible. 1. Open the camera menu and point the arrow at WIND SCREEN. 2. Select the OFF setting and close the menu. • WS | is shown in the - Canon 0058B001 | ZR Instruction Manual - Page 45
power off or sliding the LENS COVER switch to CLOSE. • In photo mode slide the MOVIE/PHOTO switch to PHOTO, and then set the self-timer in exactly the same way. The camera also displayed at this time. • You cannot set the self-timer while the camera is in mirror mode (with the LCD screen facing the - Canon 0058B001 | ZR Instruction Manual - Page 46
Manually Exposure lock E When you are recording in situations where the lighting difficult lighting conditions, or to manipulate the mood of the scene. The camera's iris can be manually set to you change recording programs, change the position of the POWER switch, or close the lens cover. • You - Canon 0058B001 | ZR Instruction Manual - Page 47
the camera menu. 1. Make sure the camera is set to record pause mode, in the Auto recording program. 2. Select the SHUTTER option at the camera camera shows the current shutter speed in the display. 4. Close the menu. Note: • The camera returns to the AUTO shutter setting when you slide the POWER - Canon 0058B001 | ZR Instruction Manual - Page 48
Manually The camera can focus automatically. All you have to do is point it, and whatever is in the center of the display will in the display.) You can now adjust the focus manually. Press and then the focus. Manual focus Use the multi-switch the exposure) and autofocus will start again as soon as - Canon 0058B001 | ZR Instruction Manual - Page 49
mode. b) To set the white balance yourself, point the camera at a white object (such as a sheet of paper) and zoom in until it fills the display, then select SET. • The display flashes then remains lit. • Depending on the light source, the flashing may at times continue. The result will remain - Canon 0058B001 | ZR Instruction Manual - Page 50
you slide the POWER switch away from the P setting. • When the LENS COVER switch is set to CLOSE, the current white balance setting remains in the memory. • If you shoot with studio/video lighting, use the (indoor) mode. • During normal outdoor shooting, setting to AUTO will provide better results - Canon 0058B001 | ZR Instruction Manual - Page 51
in the camera's memory. - If the tape was recorded on a camera without a data code function. - If noise or tape damage prevents the data code from being read. • Data code is not displayed during high speed playback modes. • If a recording made on ZR is played back on a different DV camcorder, the - Canon 0058B001 | ZR Instruction Manual - Page 52
Range of Features There is no need to reset the date and time when you travel to another time zone; use the camera's World Clock to make sure the display shows the correct time when you play back your recordings. Set the base time zone that agrees with the date and time - Canon 0058B001 | ZR Instruction Manual - Page 53
LONDON 1. Set the camera to VCR mode, open the VCR will now match local time at the place where you made the recording and the camera shows the name of the recording zone in the display display. Notes: • The recording can be edited to a VCR showing the local time, but when editing via the digital - Canon 0058B001 | ZR Instruction Manual - Page 54
Pre-Marked Position OFF VCR POWER W T 2 WIRELESS CONTROLLER WL-D67 MENU ZERO SET MEMORY TV SCREEN DATA CODE SEARCH SELECT PAUSEa can also use zero set memory to mark a position on a tape in record pause mode. When you then play back the tape, pressing rewind will take you back to the - Canon 0058B001 | ZR Instruction Manual - Page 55
the POWER switch to VCR camera may skip straight past it. • A date cannot be identified if the total recording time on that day was less than one minute. • Date search playback may start just before or after the beginning of the located section. • If the data code is not displayed correctly you will - Canon 0058B001 | ZR Instruction Manual - Page 56
video channel, or set the TV/VIDEO selector to VIDEO. • Turn on the VCR, and set its input selector to LINE. Load a blank cassette, and put the VCR in record pause mode. • See your TV and VCR instruction manuals for details. 3. Slide the camera's POWER switch to VCR, and load your recorded cassette - Canon 0058B001 | ZR Instruction Manual - Page 57
DV cable unconnected, the camera displays the caution "CHECK THE DV INPUT". An anomalous image may also flash onto the screen. • Blanks between recordings on the playback tape are recorded as anomalous images on the tape that is being recorded to. • When operating either camcorder with the DV cable - Canon 0058B001 | ZR Instruction Manual - Page 58
, "COPYRIGHT PROTECTED PLAYBACK IS RESTRICTED" appears in the display for a few seconds and then the camera displays a blank blue screen; you cannot view the contents of the cassette. If you try to record from such a tape via the digital cable "COPYRIGHT PROTECTED DUBBING RESTRICTED" appears in the - Canon 0058B001 | ZR Instruction Manual - Page 59
you are not using the LCD screen, clipping it on to the screen base first. Attaching the FU-100 Finder Unit case • If you plan to use the Finder Unit case, make sure that you attach it to the strap before attaching the strap to the camera. • Place the Finder Unit in the - Canon 0058B001 | ZR Instruction Manual - Page 60
appears in the display for 4 seconds when the power is completely exhausted. The empty battery mark then appears and starts to flash. The power indicator light also flashes. • The indicator is not constant - different levels will be shown when you subject the battery pack and camcorder to different - Canon 0058B001 | ZR Instruction Manual - Page 61
source to the camcorder. When you first use the camera, bring the backup battery to full charge by connecting a power source to the camera overnight. You do not need to turn the camera on for charging to take place. • If you use the camcorder regularly, the back-up battery will remain charged. If - Canon 0058B001 | ZR Instruction Manual - Page 62
12 bit stereo 1 mode, unless new sound has been added post-recording. 1. Set the camera to VCR mode. (see p. 28) screen as a guide. Note: • When you have chosen the output, FIXED or VARIABLE is shown in the top left of the display for a few seconds. If you turn the power off the output (and display - Canon 0058B001 | ZR Instruction Manual - Page 63
dust and moisture, and where the temperature is no higher than 86°F (30°C). After storage, check each part and function of your camera to make sure everything is still working properly. Note: • These cautions also apply to accessories such as battery packs and cassettes. 64 Additional Information - Canon 0058B001 | ZR Instruction Manual - Page 64
mosaic-like noise appears on the playback picture, the video heads may be dirty. When the video heads are badly contaminated, the camera may show a blank blue screen. • Clean the video heads using Canon's DVM-CL Digital Video Head Cleaning Cassette. If the "noise" remains, repeat the cleaning (up to - Canon 0058B001 | ZR Instruction Manual - Page 65
sources • You can use the compact power adapter to operate your camera and charge battery packs in any country where the electricity supply is between 100 and 240 V AC, 50/60 Hz. Contact your Canon dealer for information about plug adapters for overseas use. TV playback • Although you can always - Canon 0058B001 | ZR Instruction Manual - Page 66
approximately 4 seconds. Then, the power indicator flashes and the h mark flashes in the display. If there is a cassette in the camera, it stops automatically and "REMOVE THE CASSETTE" is displayed for approximately 4 seconds and then EJECT is shown in the display. • The camera may not detect the - Canon 0058B001 | ZR Instruction Manual - Page 67
off. • The camera was in record pause mode for more than about five minutes (p. 13). • The battery pack is exhausted (p. 9). ? The start/stop button doesn't work. • The POWER switch is not set to [ or P (p. 13). • The LENS COVER switch is set to CLOSE (p. 13). • The cassette is not loaded or is - Canon 0058B001 | ZR Instruction Manual - Page 68
will often get better results using manual focus (see p. 49). Focus on something which is about the same distance away, lock the focus, and then point the camera subjects Night scenes ? Contents of data code display may • Check settings made for date/time. vary. Note: Contents of data code display - Canon 0058B001 | ZR Instruction Manual - Page 69
't work. • The POWER switch is not set to VCR (p. 19) • The cassette is not loaded (p. 11). • The tape has reached the end. ? There's a bright stripe on the screen. • When recording in dark places a bright light in the scene or in the vicinity of the camera may cause a vertical light bar ("smear - Canon 0058B001 | ZR Instruction Manual - Page 70
Miscellaneous Problem ? The wireless controller doesn't work. ? The camera malfunctions. ? The DV cable is connected correctly, but there's nothing in the display. ? The camera becomes warm during use. ? The camera doesn't display the correct date and time. E Cause and/or what to do about it • The - Canon 0058B001 | ZR Instruction Manual - Page 71
-1 Adapter Bracket DU-100 Docking Unit RU-100 RF Unit VL-10Li Battery Video Light BP-914, BP-927 and BP-941 Battery Pack Additional Information SC-1000 Soft Carrying Case 72 S-150 S-video Cable STV-150 Stereo Video Cable STV-250 Stereo Video Cable CV-150F DV Cable Antenna TV VCR Digital device - Canon 0058B001 | ZR Instruction Manual - Page 72
is also available E as an optional accessory. CB-600 Car Battery Adapter Power your camera, or recharge battery packs on the move. The car battery adapter plugs into your car's cigarette lighter socket and runs off a 12-24 V DC negative ground battery. SC-1000 Soft Carrying Case This lightweight - Canon 0058B001 | ZR Instruction Manual - Page 73
Optional accessories: CH-900 Dual Battery Charger/Holder BP-914 Battery Pack BP-927 Battery Pack BP-941 Battery Pack WS-20 Wrist Strap SC-1000 Soft Carrying Case RU-100 RF Unit VL-10Li Battery Video Light JR7.2V 10WF Halogen Bulb SA-1 Adapter Bracket DVM-CL Digital Video Head Cleaning Cassette D85 - Canon 0058B001 | ZR Instruction Manual - Page 74
11) OFF VCR POWER Camera mode Auto Program menu VCR mode Cassette compartment (P. 11) DU-100 Docking Unit V DC L MONO R S MOVIE/PHOTO switch (P. 13) Stereo microphone LENS COVER switch (P. 13) Strap attachment bar (P. 60) DV IN/OUT terminal (P. 58) DV IN/OUT AUDIO VIDEO OUT (phones) terminal - Canon 0058B001 | ZR Instruction Manual - Page 75
Stop) button Multi-switch (P. 19, 51, 53) Multi-switch lever (P. 19, 51, 53) Camera mode • Manual exposure adjustment • Manual focus VCR mode • Fast forward playback • Rewind playback c (record review) button (P. 35) Select dial (P. 29) MENU button (P. 29) MULTI-CONNECTOR (P. 22) MULTI-CONNECTOR - Canon 0058B001 | ZR Instruction Manual - Page 76
button (P. 20) REW button (P. 20) PLAY button (P. 19) button (P. 21) REC PAUSE button (P. 58) START /STOP ZOOM W T MENU ZERO SET MEMORY TV SCREEN DATA CODE SEARCH SELECT PAUSEa REW PLAYe FF STOP3 SLOW 2 REC PAUSE Transmitter Zoom buttons (P. 16) Controller buttons (P. 29) ZERO SET - Canon 0058B001 | ZR Instruction Manual - Page 77
menu. • The LCD screen will now be completely blank, but the camera will continue to show warning/caution displays when necessary. Record pause mode (p. 13) Recording (p. 13) Shows how much battery power remains (p. 61). The battery pack is exhausted (p. 9, 61). No cassette is loaded, or it is set - Canon 0058B001 | ZR Instruction Manual - Page 78
Camera menu (p. 28) CAM.MENU SELECT SE [MENU] CLOS SHUTTER AUTO D.EFFECT••••EFFECT display (p. 16): W Optical zoom 0 Self-timer countdown 1 0 sec (p. 46) SELF-TIMER 0 T Audio mode (p. 44) 16bit Optical plus digital W T zoom (the digital portion is shown in cyan on the LCD screen - Canon 0058B001 | ZR Instruction Manual - Page 79
(p. 50). 16:9 effect (p. 43). 16:9 Digital effects. The display flashes when the function has been selected and appears steadily when it is turned on (p. 40). EFFECT OFF FADE-T WIPE SCROLL ART BLK&WHT SEPIA STROBE The wind screen is turned off (p. 45). WSOFF Zero set memory (p. 55) Audio - Canon 0058B001 | ZR Instruction Manual - Page 80
a new tape is loaded. Appears each time you turn the power on, until you set the date and time (p. 32). SET THE DATE AND TIME Appears when the battery pack is exhausted (p. 9, 61). CHANGE THE BATTERY PACK Recording reminder 0sec 10sec When you start recording, the camera counts from 0SEC to - Canon 0058B001 | ZR Instruction Manual - Page 81
EIS standard (525 lines, 60 fields) (approx.) NTSC color signal Microphone: Stereo electret condenser Video recording system: microphone 2 rotary heads, helical scanning DV Terminal: Special 4-pin connector DV system (Consumer digital VCR (conforms to IEEE1394) SD system) Output level - Canon 0058B001 | ZR Instruction Manual - Page 82
, 22 Displaying Data Code, 52 DC Coupler, 8 Digital Effects, 40 Digital Video, 7 Digital Zoom, 16 DV terminal, 58 I Image Stabilizer, 30 Introducing the ZR, 7 L LANC, 59 LCD Cover, 60 LCD Screen, 17 Loading Cassettes, 11 Low Light, 39 LP Modes, 15 M Maintenance, 64 Making Better Videos, 26 Manual - Canon 0058B001 | ZR Instruction Manual - Page 83
8 Powering your camcoder, 8 Pre-Marked Position, 55 Preparing the Camera, 60 Problems, 68 R Recharging the Battery Pack, 61 Recording, 13 Recording Programs, 36 Record Pause Mode, 13 Record Review, 34 Record Search, 34 Remote Control, 31 Remote Sensor, 31 Rewind, 20 S Sand & Snow, 39 Screen Displays - Canon 0058B001 | ZR Instruction Manual - Page 84
in CUSA's instruction manual, or service performed by other than a CUSA Center or Service Facility. (b) Use of parts or supplies (other than those sold by CUSA) which cause damage to the DV Camcorder or cause abnormally frequent service calls or service problems. (c) If any DV Camcorder has had - Canon 0058B001 | ZR Instruction Manual - Page 85
respect to Canon digital video equipment purchased in Canada. This limited warranty is only effective upon presentation of a bill of sale or other proof of purchase for this Canon digital video equipment to a Canon Service Facility when repairs are required. Canon consumer video digital equipment is
-
 1
1 -
 2
2 -
 3
3 -
 4
4 -
 5
5 -
 6
6 -
 7
7 -
8
-
9
-
10
-
11
-
12
-
13
-
14
-
15
-
16
-
17
-
18
-
19
-
20
-
21
-
22
-
23
-
24
-
25
-
26
-
27
-
28
-
29
-
30
-
31
-
32
-
33
-
34
-
35
-
36
-
37
-
38
-
39
-
40
-
41
-
42
-
43
-
44
-
45
-
46
-
47
-
48
-
49
-
50
-
51
-
52
-
53
-
54
-
55
-
56
-
57
-
58
-
59
-
60
-
61
-
62
-
63
-
64
-
65
-
66
-
67
-
68
-
69
-
70
-
71
-
72
-
73
-
74
-
75
-
76
-
77
-
78
-
79
-
80
-
81
-
82
-
83
-
84
-
85
 |
 |
Introduction
2
E
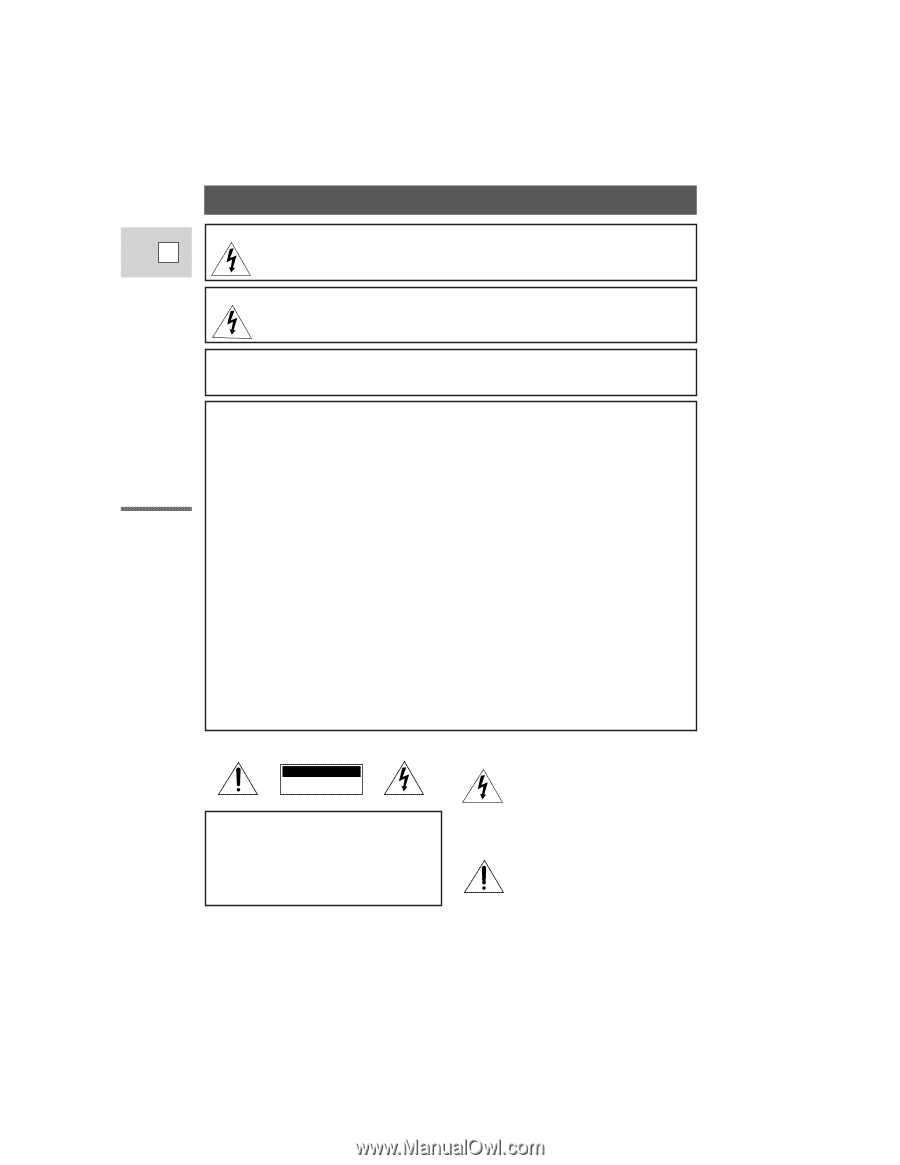
WARNING:TO REDUCE THE RISK OF FIRE OR ELECTRIC SHOCK, DO NOT
EXPOSE THIS PRODUCT TO RAIN OR MOISTURE.
Important Usage Instructions
WARNING:TO REDUCE THE RISK OF ELECTRIC SHOCK AND TO REDUCE
ANNOYING INTERFERENCE, USE THE RECOMMENDED
ACCESSORIES ONLY.
COPYRIGHT WARNING:
Unauthorized recording of copyrighted materials may infringe on the
rights of copyright owners and be contrary to copyright laws.
Important Warning
CAUTION:
TO REDUCE THE RISK OF ELECTRIC
SHOCK, DO NOT REMOVE COVER (OR
BACK). NO USER SERVICEABLE PARTS
INSIDE. REFER SERVICING TO QUALI-
FIED SERVICE PERSONNEL.
The lightning flash with arrowhead
symbol, within an equilateral triangle,
is intended to alert the user to the
presence of uninsulated “dangerous
voltage” within the product’s
enclosure, that may be of sufficient
magnitude to constitute a risk of
electric shock to persons.
The exclamation point, within an
equilateral triangle, is intended to
alert the user to the presence of
important operating and maintenance
(servicing) instructions in the literature
accompanying the product.
CAUTION
RISK OF ELECTRIC SHOCK
DO NOT OPEN
Digital Video Camcorder, ZR
This device complies with Part 15 of the FCC Rules. Operation is subject to the following two
conditions: (1) This device may not cause harmful interference, and (2) this device must accept any
interference received, including interference that may cause undesired operation.
Note: This equipment has been tested and found to comply with the limits for class B digital device,
pursuant to Part 15 of the FCC Rules. These limits are designed to provide reasonable protection
against harmful interference in a residential installation. This equipment generates, uses and can
radiate radio frequency energy and, if not installed and use in accordance with the instructions, may
cause harmful interference to radio communications. However, there is no guarantee that interference
will not occur in a particular installation. If this equipment does cause harmful interference to radio or
television reception, which can be determined by turning the equipment off and on, the user is
encouraged to try to correct the interference by one or more of the following measures:
• Reorient or relocate the receiving antenna.
• Increase the separation between the equipment and receiver.
• Connect the equipment into an outlet on a circuit different from that to which the receiver is
connected.
• Consult the dealer or an experienced radio/TV technician for help.
Use of shielded cable is required to comply with class B limits in Subpart B of Part 15 of FCC Rules.
Do not make any changes or modifications to the equipment unless otherwise specified in the manual.
If such changes or modifications should be made, you could be required to stop operation of the
equipment.
Canon U.S.A. Inc.
One Canon Plaza, Lake Success, NY 11042, U.S.A.
Tel No. (516)328-5600