Canon 0296B002 EOS 5D Instruction Manual
Canon 0296B002 - EOS 5D Digital Camera SLR Manual
 |
UPC - 013803056853
View all Canon 0296B002 manuals
Add to My Manuals
Save this manual to your list of manuals |
Canon 0296B002 manual content summary:
- Canon 0296B002 | EOS 5D Instruction Manual - Page 1
INSTRUCTION MANUAL E E INSTRUCTION MANUAL - Canon 0296B002 | EOS 5D Instruction Manual - Page 2
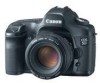
you for purchasing a Canon product. The EOS 5D is a high-performance, digital AF SLR camera with a large, 35.8 x 23.9mm CMOS sensor with 12.8 effective megapixels. The camera has nine high-precision AF points, and it is compatible with all Canon EF lenses (except EF-S lenses). Designed for quick - Canon 0296B002 | EOS 5D Instruction Manual - Page 3
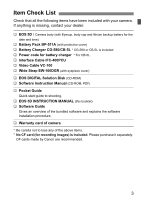
DIGITAL Solution Disk (CD-ROM) ‰ Software Instruction Manual (CD-ROM, PDF) ‰ Pocket Guide Quick start guide to shooting. ‰ EOS 5D INSTRUCTION MANUAL (this booklet) ‰ Software Guide Gives an overview of the bundled software and explains the software installation procedure. ‰ Warranty card of camera - Canon 0296B002 | EOS 5D Instruction Manual - Page 4
Glance 6 Handling Precautions 10 Quick Start Guide 12 Nomenclature 14 Conventions Used in this Manual 20 1 Getting Started 21 Recharging Battery 41 Cleaning the CMOS sensor 42 Dioptric Adjustment 44 Holding the Camera 44 2 Fully Automatic Shooting 45 Using Full Auto 46 Self-timer - Canon 0296B002 | EOS 5D Instruction Manual - Page 5
Autofocus Fails (Manual Focusing 80 Selecting 2 Depth of Field Preview 89 Manual Exposure 90 Setting Exposure Compensation 92 Non-Canon Flash Units 102 5 6 Image Playback 103 Setting the Image Review 8 7 Direct Printing from the Camera 121 Preparing to Print 123 PictBridge / CP Direct - Canon 0296B002 | EOS 5D Instruction Manual - Page 6
Contents at a Glance Image Quality Set picture effects Î p.53 (Selecting a Picture Style) Set custom picture effects Î p.55 (Customizing the Picture Style) Print the image to a large size Î p.50 (73, 83, 1) Take many photos Î p.50 (76, 86) Adjust the color tone Î p.64 (WB correction) Take - Canon 0296B002 | EOS 5D Instruction Manual - Page 7
) Photograph fireworks Î p.96 (Bulb exposures) Photograph dark scenes Î p.100 (Flash photography) Image Playback and Printing View images with the camera Î p.107 (x Playback) Erase an image Î p.118 (L Erase) Prevent accidental erasure of an image Î p.117 (K Protect) View images on TV - Canon 0296B002 | EOS 5D Instruction Manual - Page 8
contacting your eyes, skin, and clothing. It can cause blindness or skin problems. If the battery leakage contacts your eyes, skin, or clothing, flush photograph an infant, keep at least 1 meter away. • Before storing the camera or accessory when not in use, remove the battery pack and disconnect the - Canon 0296B002 | EOS 5D Instruction Manual - Page 9
so may cause injury. Also make sure the tripod is sturdy enough to support the camera and lens. • Do not leave a lens or lens-attached camera under the sun without the lens cap attached. Otherwise, the lens may concentrate requires repair, contact your dealer or your nearest Canon Service Center. 9 - Canon 0296B002 | EOS 5D Instruction Manual - Page 10
, mirror, and focusing screen. Do not use cleaners that contain organic solvents to clean the camera body or lens. For stubborn dirt, take the camera to a Canon Service Center. Do not touch the camera's electrical contacts with your fingers. This is to prevent the contacts from corroding. Corroded - Canon 0296B002 | EOS 5D Instruction Manual - Page 11
to record and playback images. Using Canon CF cards is recommended. Do not bend the card or subject it to any excessive force or physical shock. Do not store CF cards in hot, dusty, or humid locations. Lens Electrical Contacts After detaching the lens from the camera, attach the lens caps or - Canon 0296B002 | EOS 5D Instruction Manual - Page 12
Quick Start Guide 1 Insert the battery. (p.24) To recharge the battery, see page 22. 2 Attach the lens. (p.27) Align the red dot. 3 and insert a CF card. (p.28) Face the label side toward you and insert the end with the small holes into the camera. 5 Set the power switch to . (p.30) 12 - Canon 0296B002 | EOS 5D Instruction Manual - Page 13
(p.46) All the necessary camera settings will be set automatically. 7 Focus the subject. (p.30) Aim the AF point over the subject and press the shutter button halfway to autofocus. 8 Take the picture. (p.30) Press the shutter button fully to take the picture. 9 Review the picture on the - Canon 0296B002 | EOS 5D Instruction Manual - Page 14
) Mirror (p.42,97) Contacts (p.11) Lens mount Strap mount (p.21) Terminal cover Depth-of-field preview button (p.89) Lens release button (p.27) Lens lock pin Digital terminal (p.124) Body cap (p.27) 14 PC terminal (p.102) Remote control terminal (N3 type) Video OUT terminal (p.116) - Canon 0296B002 | EOS 5D Instruction Manual - Page 15
Dioptric adjustment knob (p.44) Eyecup (p.98) Viewfinder eyepiece Direct print button (p.138) Menu button (p.33) Info/ Trimming orientation button (p.72,107/136) Jump button (p.114) Playback button (p.107) Erase button (p.118) LCD monitor (p.36) Tripod socket Power/Quick - Canon 0296B002 | EOS 5D Instruction Manual - Page 16
Nomenclature LCD Panel Shutter speed Busy (buSY) ISO speed gISO speed White balance Q Auto W Daylight E Shade R Cloudy Y Tungsten light U White fluorescent light I Flash O Custom P Color temperature AF point selection CF card full warning (FuLL CF) CF card error warning (Err CF) No CF card - Canon 0296B002 | EOS 5D Instruction Manual - Page 17
Viewfinder Information Spot metering circle Focusing screen Nomenclature AF points (Superimposed display) AE lock/ AEB in-progress Flash-ready Improper FE lock warning High-speed sync (FP flash) FE lock/ FEB in-progress Flash exposure compensation Shutter speed FE lock (FEL) - Canon 0296B002 | EOS 5D Instruction Manual - Page 18
Nomenclature Mode Dial l : Camera user setting (p.148) k : Bulb (p.96) a : Manual exposure (p.90) f : Aperture-priority AE (p.88) s : Shutter-priority AE (p.86) d : Program AE (p.84) 1 : Full Auto (p.46) Battery Charger CG-580 This is a battery pack charger. (p. - Canon 0296B002 | EOS 5D Instruction Manual - Page 19
Battery Charger CB-5L This is a battery pack charger. (p.22) Power cord Power cord socket Nomenclature Battery pack slot Red lamp Do not use any AC adapters or compact power adapters other than the ones (rated input: 100-240 V AC, 50/60 Hz, rated output: 7.8-8.1 V DC) shown on the system map (p. - Canon 0296B002 | EOS 5D Instruction Manual - Page 20
this manual, the icons and markings indicating the camera's buttons, dials, and settings correspond to the icons and markings on the camera. For of the button. This manual uses the following alert symbols: : The Caution symbol indicates a warning to prevent shooting problems. : The Note symbol gives - Canon 0296B002 | EOS 5D Instruction Manual - Page 21
Getting Started This chapter explains a few preliminary steps and basic camera operations. Attaching the Strap Pass the end of the strap through the camera's strap mount from the bottom. Then pass it through the strap's buckle as shown in the illustration. Pull the strap to take up any slack - Canon 0296B002 | EOS 5D Instruction Manual - Page 22
Recharging the Battery 1 Remove the cover. When you remove the battery from the camera, be sure to reattach the cover to protect against short circuit. mark CG-580 CB-5L 2 Attach the battery. Align the battery front edge with - Canon 0296B002 | EOS 5D Instruction Manual - Page 23
shorting. Before using the camera again, be sure to recharge the battery. Storing the battery while fully charged may reduce its service life or performance. Battery Packs BP-511A, BP-514, BP-511, and BP-512 are dedicated to Canon products. Using them with a non-Canon battery charger or product may - Canon 0296B002 | EOS 5D Instruction Manual - Page 24
Installing and Removing the Battery Installing the Battery Load a fully charged BP-511A battery pack into the camera. 1 Open the battery compartment cover. Slide the lever as shown by the arrow and open the cover. 2 Insert the battery. Point the battery contacts downward. - Canon 0296B002 | EOS 5D Instruction Manual - Page 25
remaining At 20°C / 68°F Approx. 800 At 0°C / 32°F Approx. 400 The figures above are based on a fully-charged BP-511A and CIPA (Camera & Imaging Products Association) testing criteria. The actual number of shots may be fewer than indicated above depending on the shooting conditions. The number - Canon 0296B002 | EOS 5D Instruction Manual - Page 26
Using a Household Power Outlet With AC Adapter Kit ACK-E2 (optional), you can connect the camera to a household power outlet and not worry about the battery level. 1 Connect the DC Coupler. the cover. Do not connect or disconnect the power cord while the camera's switch is set to or . 26 - Canon 0296B002 | EOS 5D Instruction Manual - Page 27
by turning them as shown by the arrow. 2 Attach the lens. Align the red dots on the lens and camera and turn the lens as shown by the arrow until it snaps in place. 3 On the lens, set the attaching or detaching the lens, take care to prevent dust from entering the camera through the lens mount. 27 - Canon 0296B002 | EOS 5D Instruction Manual - Page 28
by the arrow to open it. Top CF card eject button 2 Insert the CF card. Using Canon CF cards is recommended. If the CF card is inserted in the wrong way, it may damage the camera. As shown by the arrow, face the label side toward you and insert the end with - Canon 0296B002 | EOS 5D Instruction Manual - Page 29
. Doing so may damage the image data, CF card, or camera. • Shaking or banging the camera around. • Open the CF card slot cover. • Removing the shock. If you use a Microdrive, be careful not to subject the camera to vibration or physical shock especially while recording or displaying images. On - Canon 0296B002 | EOS 5D Instruction Manual - Page 30
be indicated on the top LCD panel with the number of . When all the images are finished recording, the display will turn off and the camera will turn off. Shutter Button The shutter button has two steps. You can press the shutter button halfway. Then you can further press the shutter - Canon 0296B002 | EOS 5D Instruction Manual - Page 31
, you can turn the dial to set the desired setting. When the timer runs out or if you press the shutter button down halfway, the camera will be ready to shoot. In this way, you can set the AF mode, drive mode, and metering mode and select or set the AF - Canon 0296B002 | EOS 5D Instruction Manual - Page 32
time, you can turn the dial to set the desired setting. When the timer ends or if you press the shutter button down halfway, the camera will be ready to shoot. You can select the AF point or set the white balance, ISO speed, and flash exposure compensation. When using the - Canon 0296B002 | EOS 5D Instruction Manual - Page 33
Style, the date/time, Custom Functions, etc. While looking at the LCD monitor, you use the button, button, and dial on the camera back to proceed to the next step. LCD Monitor button button Quick Control Dial button Menu category Menu items Menu category color code - Canon 0296B002 | EOS 5D Instruction Manual - Page 34
Menu Operations Menu Setting Procedure 1 Display the menu. Press the button to display the menu. To turn off the menu, press the button again. 2 Select a menu item. Turn the dial to select the menu item, then press . Press the button to jump to the first item of each menu category. 3 - Canon 0296B002 | EOS 5D Instruction Manual - Page 35
color bias / B/A and M/G bias 1 level, ±3 levels 64,65 Custom WB Manual setting of white balance 62 Color temp. Set to 2800K - 10000K (100K increments) 63 Specifies images to be printed (DPOF). 139 Auto play Auto playback of images 112 Review time Off / 2 sec. / 4 sec. / 8 sec. / Hold - Canon 0296B002 | EOS 5D Instruction Manual - Page 36
Setting the Date/Time 40 File numbering Continuous / Auto reset / Manual reset 70 Select folder Folder selection and creation 68 15 languages provided 120 Custom Functions (C.Fn) Customize the camera 149 Clear all camera settings (Reset the camera to the default 37 settings.) Clear - Canon 0296B002 | EOS 5D Instruction Manual - Page 37
settings], then press. 3 Select [OK]. Turn the dial to select [OK], then press . The default settings will be restored. X The camera's default settings will be as shown below. Shooting Settings Image-Recording Settings AF mode One-Shot AF Quality AF point selection Automatic AF - Canon 0296B002 | EOS 5D Instruction Manual - Page 38
3 Setting the Language The LCD monitor's interface language can be set to one of fifteen languages. 1 Select [Language]. Turn the dial to select [c Language], then press . X The Language screen will appear. 2 Set the desired language. Turn the dial to select the language, then press . - Canon 0296B002 | EOS 5D Instruction Manual - Page 39
], then press . 2 Set the desired time. Turn the dial to select the desired time, then press . After auto power off, you can turn on the camera again with any of the following buttons: Shutter button, button, and button. Pressing the , , or button will not turn on the - Canon 0296B002 | EOS 5D Instruction Manual - Page 40
3 Setting the Date and Time Set the date and time as shown below. 1 Select [Date/Time]. Turn the dial to select [c Date/ Time], then press . X The date/time screen will appear. 2 Set the date and time. Pressing the button toggles the orange box between and . With the box displayed, turn - Canon 0296B002 | EOS 5D Instruction Manual - Page 41
Replacing the Date/Time Battery The date/time (back-up) battery maintains the camera's date and time. The battery's service life is about 5 years. If the date/time is reset when the battery is replaced, replace the back-up battery with a new CR2016 lithium battery - Canon 0296B002 | EOS 5D Instruction Manual - Page 42
3 Cleaning the CMOS sensorN The image sensor is like the film in a film camera. If any dust adheres on the image sensor, it may show up as a dark speck on the images. To avoid this, follow the procedure below - Canon 0296B002 | EOS 5D Instruction Manual - Page 43
to . X The camera will turn off, the shutter will close, and the mirror switch to . The camera will then be ready cover. Do not insert the blower tip inside the camera beyond the lens mount. If the power goes out BG-E4 (optional) is attached to the camera and size-AA batteries supply the power. Use - Canon 0296B002 | EOS 5D Instruction Manual - Page 44
, you can see a sharp viewfinder image even without eyeglasses. The camera's adjustable dioptric range is -3 to +1 dpt. Turn the dioptric adjustment your body. Hold the lens bottom with your left hand. Press the camera against your face and look through the viewfinder. To maintain a stable stance - Canon 0296B002 | EOS 5D Instruction Manual - Page 45
automatically sets the AF mode, drive mode, etc. All you do is point and shoot. In addition, to help prevent mistakes caused by operating the camera improperly, the buttons and are disabled in these modes. So you need not worry about accidental errors. 45 - Canon 0296B002 | EOS 5D Instruction Manual - Page 46
1Using Full Auto All you do is point the camera and press the shutter button for quick and easy shooting. With nine AF points to focus the subject, anyone can easily take nice pictures. AF - Canon 0296B002 | EOS 5D Instruction Manual - Page 47
card with one that has room. Using a non-Canon lens with an EOS camera may not result in proper camera or lens operation. When focus is achieved, the when focus is achieved. (p.99) The image review time after image capture can be changed with the menu's [x Review time] setting. (p.104) If you want to - Canon 0296B002 | EOS 5D Instruction Manual - Page 48
lit. X During the self-timer operation, the LCD panel counts down the seconds until the picture is taken. Do not stand in front of the camera when you press the shutter button to start the self-timer. Doing so will throw off the focus. Use a tripod when you use the self - Canon 0296B002 | EOS 5D Instruction Manual - Page 49
Image Settings This chapter explains the digital image settings for the image-recording quality, Picture Style, RAW and RAW+JPEG), file numbering method selection, folder selection and creation, and checking camera settings. The asterisk M appended on the right of the page title indicates that the - Canon 0296B002 | EOS 5D Instruction Manual - Page 50
3 Setting the Image-recording Quality The 73/83/74/84/76/86 modes record the image in the widely-used JPEG. In the 1 mode, the captured image will require post-processing with the software provided. The 1+73/+83/ +74/+84/+76/+86 (RAW+ JPEG) modes simultaneously record the image in both RAW and JPEG. - Canon 0296B002 | EOS 5D Instruction Manual - Page 51
burst (p.52) apply to a Canon 512MB CF card. The single image size, number of possible shots, and maximum burst during continuous shooting are based on Canon's testing standards (ISO 100, Picture Style: [Standard]). The actual single - Canon 0296B002 | EOS 5D Instruction Manual - Page 52
is displayed even when the drive mode is set to (Single) or . The maximum burst is displayed even when a CF card is not in the camera. Therefore, before shooting, make sure that a CF card is installed in the - Canon 0296B002 | EOS 5D Instruction Manual - Page 53
3 Selecting a Picture StyleN By selecting a Picture Style, you can obtain the desired image effects. You can also adjust the settings of each Picture Style to obtain custom image effects. 1 Select [Picture Style]. Turn the dial to select [z Picture Style], then press . X The Picture Style - Canon 0296B002 | EOS 5D Instruction Manual - Page 54
3 Selecting a Picture StyleN • Monochrome For black-and-white images. To obtain natural-looking, black-and-white images, set a suitable white balance. JPEG black-and-white images captured with the [Monochrome] setting cannot be converted into color images even with imageediting software. RAW images - Canon 0296B002 | EOS 5D Instruction Manual - Page 55
3 Customizing the Picture StyleN You can customize the Picture Style by changing the individual parameters like [Sharpness] and [Contrast]. To customize [Monochrome], see page 56. 1 Select [Picture Style]. Turn the dial to select [z Picture Style], then press . X The Picture Style selection - Canon 0296B002 | EOS 5D Instruction Manual - Page 56
press . To return to the Picture Style selection screen, press the button. X Any settings different from the default will be displayed in blue. When the camera returns to shooting, will be displayed on the LCD panel. 56 - Canon 0296B002 | EOS 5D Instruction Manual - Page 57
3 Customizing the Picture StyleN Filter effects The same effect as using filters with black-and-white film can be obtained with digital images. A color can be brightened by using a filter having a similar or same color. At the same time, the complementary colors will be darkened. Filter N: None - Canon 0296B002 | EOS 5D Instruction Manual - Page 58
3 Registering the Picture StyleN You can register your own Picture Style in User Defined 1 to 3. You can set the Sharpness, Contrast, and other parameters to suit your preferences. You can also select a Picture Style already set with the provided software. 1 Select [Picture Style]. Turn the dial - Canon 0296B002 | EOS 5D Instruction Manual - Page 59
3 Registering the Picture StyleN 4 Set the parameters. Turn the dial to select a parameter like [Sharpness], then press . Turn the dial to set the desired setting, then press . For details, see "Customizing the Picture Style" on pages 55-57. Press the button to register the new - Canon 0296B002 | EOS 5D Instruction Manual - Page 60
noise, etc. On the other hand, a low ISO speed is not suited for low light or action shots, but the image will look cleaner. The camera can be set between ISO 100 and 1600 in 1/3-stop increments. In the (Full Auto) mode, the ISO speed will be set automatically within ISO - Canon 0296B002 | EOS 5D Instruction Manual - Page 61
6000 2000 - 10000 2800 - 10000 * Set the optimum white balance manually to suit the lighting. (p.62) About White Balance The three RGB ( a white object looks white regardless of the type of lighting. With a digital camera, the color temperature can be adjusted with software so that the colors in - Canon 0296B002 | EOS 5D Instruction Manual - Page 62
1 Photograph a white object. The plain, white object should fill the spot metering circle. Set the lens focus mode switch to , then focus manually. (p.80) Set any white balance setting. (p.61) Shoot the white object so that a standard exposure is obtained. 2 Select [Custom WB]. Turn the dial - Canon 0296B002 | EOS 5D Instruction Manual - Page 63
taken with a color temperature meter, take test shots and adjust the setting to compensate for the difference between the color temperature meter's reading and the camera's color temperature reading. 63 - Canon 0296B002 | EOS 5D Instruction Manual - Page 64
3 White Balance CorrectionN You can correct the standard color temperature for the white balance setting. This adjustment will have the same effect as using a color temperature conversion or color compensating filter. Each color can be corrected to one of nine levels. Users familiar with using color - Canon 0296B002 | EOS 5D Instruction Manual - Page 65
3 White Balance Auto BracketingN With just one shot, three images having a different color tone can be recorded simultaneously. Based on the white balance mode's standard color temperature, the image will be bracketed with a blue/amber bias or magenta/green bias. This is called white balance - Canon 0296B002 | EOS 5D Instruction Manual - Page 66
3 White Balance Auto BracketingN 3 Take the picture. X When B/A bracketing has been set, the three images will be recorded onto the CF card in the following sequence: Standard WB, B (blue) bias, and A (amber) bias. If M/G bracketing has been set, the sequence will be Standard WB, M (magenta) bias, - Canon 0296B002 | EOS 5D Instruction Manual - Page 67
Exif 2.21). Since the image will look very subdued with sRGB personal computers and printers not compatible with Design rule for Camera File System 2.0 (Exif 2.21), post-processing of the image with software will not appended. The ICC profile is explained in the Software Instruction Manual (PDF). 67 - Canon 0296B002 | EOS 5D Instruction Manual - Page 68
3 Creating and Selecting a Folder You can freely create and select the folder where the captured images are to be saved. This is optional since a folder will be created automatically for saving captured images. Creating a Folder 1 Go to the Create folder screen. Turn the dial to select [c - Canon 0296B002 | EOS 5D Instruction Manual - Page 69
necessary to save and organize your images. The folder names must start with three digits from 100 to 999 followed by five letters, like 100ABC_D. The five letters can same three-digit number (regardless of the letters) such as "100ABC_C" and "100ABC_D", the camera will not recognize the folders. 69 - Canon 0296B002 | EOS 5D Instruction Manual - Page 70
counting in one of three different ways: [Continuous], [Auto reset], and [Manual reset]. The images you take are automatically assigned a file number from 0001 to if the replacement CF card already contains images captured with the camera, the file numbering will start after the highest file number - Canon 0296B002 | EOS 5D Instruction Manual - Page 71
to 0001. Images captured thereafter are saved in this new folder. The file numbering method (Auto reset or Continuous) that was in effect before the manual reset will continue to take effect. If file No. 9999 is created, "FuLL" will be displayed on the LCD panel and in the viewfinder. Replace - Canon 0296B002 | EOS 5D Instruction Manual - Page 72
Setting Display Date/Time (p.40) Picture Style (p.53) Color space (p.67) WB correction (p.64)/ WB bracketing (p.65) Register camera settings (p.148) Color temperature setting (p.63) ISO speed (p.60) Auto rotate display (p.105) Auto power off (p.39) File number (p.70) CF card remaining capacity - Canon 0296B002 | EOS 5D Instruction Manual - Page 73
Setting the AF, Metering, and Drive Modes Drive modes AF mode Metering mode The viewfinder has 9 AF points. By selecting a suitable AF point, you can shoot with autofocus while framing the subject as desired. You can also set the AF mode to suit the subject or obtain the desired effect. Evaluative - Canon 0296B002 | EOS 5D Instruction Manual - Page 74
an Extender (optional) is attached and the maximum aperture of the lens is f/5.6 or smaller, AF will not be possible. For details, see the Extender's instructions. stands for auto focus. stands for manual focus. 74 - Canon 0296B002 | EOS 5D Instruction Manual - Page 75
fully. Recompose the picture and try to focus again. Or see "When Autofocus Fails (Manual Focusing)" (p.80). AI Servo AF for Moving Subjects While you press the shutter button halfway, the camera focuses continuously. This AF mode is for moving subjects when the focusing distance keeps changing - Canon 0296B002 | EOS 5D Instruction Manual - Page 76
even if the subject moves slightly away from the center AF point, the camera can still continue focusing. If the subject moves completely away from the center focusing the subject as long as it covers the subject. With a manually selected AF point, the selected AF point will focus track the subject. - Canon 0296B002 | EOS 5D Instruction Manual - Page 77
AF point is used for focusing. The AF point can be selected automatically by the camera or manually by you. In the (Full Auto) mode, automatic selection will be set. Automatic AF point selection The camera selects the AF point automatically according to the shooting conditions. All the AF points - Canon 0296B002 | EOS 5D Instruction Manual - Page 78
's AF-assist beam, select the center AF point. Lens' Maximum Aperture and AF Sensitivity The EOS 5D will execute high-precision AF with lenses whose maximum aperture is f/2.8 or larger. With lenses whose maximum aperture is f/2.8 or larger* With the center AF point, high-precision, cross-type - Canon 0296B002 | EOS 5D Instruction Manual - Page 79
Focusing an Off-Center Subject After achieving focus, you can lock the focus on a subject and recompose the shot. This is called "focus lock." Focus lock works only in the One-Shot AF mode. 1 Set the Mode Dial to any setting except (Full Auto). 2 Select the desired AF point. 3 Focus the subject. - Canon 0296B002 | EOS 5D Instruction Manual - Page 80
an object at the same distance as the subject and lock the focus before recomposing. (2) Set the lens focus mode switch to and focus manually. Manual Focusing Focusing ring 1 On the lens, set the focus mode switch to . 2 Focus the subject. Focus by turning the lens focusing ring until the - Canon 0296B002 | EOS 5D Instruction Manual - Page 81
most subjects even under backlit conditions. After detecting the main subject's position, brightness, background, front and back lighting, etc., the camera sets the proper exposure. w Partial Metering Effective when the background is much brighter than the subject due to backlighting, etc. Partial - Canon 0296B002 | EOS 5D Instruction Manual - Page 82
. When the internal memory becomes full during continuous Max. Burst shooting, "buSY" will be displayed on the LCD panel and in the viewfinder and the camera cannot take any more shots. As the captured images are transferred to the CF card, you will be able to capture more images. Press the - Canon 0296B002 | EOS 5D Instruction Manual - Page 83
Advanced Operations In shooting modes other than (Full Auto), you can freely set the shutter speed or aperture to obtain the desired result. The asterisk M appended on the right of the page title indicates that the respective feature cannot be changed in the (Full Auto) mode. After you press - Canon 0296B002 | EOS 5D Instruction Manual - Page 84
d Program AE Like (Full Auto) mode, this is a general-purpose shooting mode. The camera automatically sets the shutter speed and aperture value to suit the subject's brightness. This is called Program AE. * stands for Program * AE stands for Auto - Canon 0296B002 | EOS 5D Instruction Manual - Page 85
Exposure compensation AEB AE lock with button Depth-of-field preview Register camera settings Clear registered camera set. Clear all camera settings Custom Function (C.Fn) Clear all Custom Functions Sensor cleaning Manual/stroboscopic flash High-speed sync (FP flash) FE lock Flash ratio control - Canon 0296B002 | EOS 5D Instruction Manual - Page 86
s Shutter-Priority AE In this mode, you set the shutter speed and the camera automatically sets the aperture value to suit the brightness of the subject. This is called Shutter-Priority AE. A fast shutter speed can freeze the motion - Canon 0296B002 | EOS 5D Instruction Manual - Page 87
s Shutter-Priority AE If the maximum aperture blinks, it indicates underexposure. Turn the dial to set a slower shutter speed until the aperture value stops blinking. If the minimum aperture blinks, it indicates overexposure. Turn the dial to set a faster shutter speed until the aperture - Canon 0296B002 | EOS 5D Instruction Manual - Page 88
f Aperture-Priority AE In this mode, you set the desired aperture and the camera sets the shutter speed automatically to suit the subject brightness. This is called aperture-priority AE. A larger aperture opening (smaller f/number) will result in a blurred - Canon 0296B002 | EOS 5D Instruction Manual - Page 89
f/number, the smaller the aperture opening will be. The aperture values displayed will differ depending on the lens. If no lens is attached to the camera, "00" will be displayed for the aperture value. Depth of Field PreviewN Press the depth-of-field preview button to stop down to the current - Canon 0296B002 | EOS 5D Instruction Manual - Page 90
determine the exposure, refer to the exposure level indicator in the viewfinder or use a handheld exposure meter. This method is called manual exposure. * stands for Manual. 1 Set the Mode Dial to . 2 Set the desired shutter speed. While looking at the LCD panel, turn the dial. 3 Set the - Canon 0296B002 | EOS 5D Instruction Manual - Page 91
a Manual Exposure 5 Set the exposure. Check the exposure level and set the desired shutter speed and aperture value. : Standard exposure level. : To set it to the - Canon 0296B002 | EOS 5D Instruction Manual - Page 92
Setting Exposure CompensationN Exposure compensation is used to alter the standard exposure setting set by the camera. You can make the image look lighter (increased exposure) or darker (decreased exposure). You can set the exposure compensation up to ±2 stops in 1/3-stop increments. - Canon 0296B002 | EOS 5D Instruction Manual - Page 93
3 Auto Exposure Bracketing (AEB)N By changing the shutter speed or aperture automatically, the camera brackets the exposure up to ±2 stops in 1/3-stop increments for three successive shots. This is called Auto Exposure Bracketing (AEB). Standard exposure Decreased exposure Increased - Canon 0296B002 | EOS 5D Instruction Manual - Page 94
3 Auto Exposure Bracketing (AEB)N Canceling AEB Follow steps 1 and 2 to set the AEB amount to < >. It will also be canceled if you set the switch to , change the lens, attain flash ready, replace the battery, or replace the CF card. Neither flash nor bulb exposures can be used with - Canon 0296B002 | EOS 5D Instruction Manual - Page 95
AAE LockN AE lock enables you to lock the exposure at a different place from the point of focus. After locking the exposure, you can recompose the shot while maintaining the desired exposure setting. This is called AE lock. It is effective for backlit subjects. 1 Focus the subject. Press the shutter - Canon 0296B002 | EOS 5D Instruction Manual - Page 96
Bulb Exposures When bulb is set, the shutter stays open while you hold down the shutter button fully, and closes when you let go of the shutter button. This is called bulb exposure. Use bulb exposures for night scenes, fireworks, the heavens, and other subjects requiring long exposures. 1 Set the - Canon 0296B002 | EOS 5D Instruction Manual - Page 97
such as at the beach or ski area on a sunny day, take the picture promptly after mirror lockup. During mirror lockup, do not point the camera lens at the sun. The sun's heat can scorch and damage the shutter curtains. If you use bulb exposures, the self-timer, and mirror lockup - Canon 0296B002 | EOS 5D Instruction Manual - Page 98
ULCD Panel Illumination The LCD panel is provided with illumination. Each time you press the button, the LCD panel illumination will turn on or off. Use it to read the LCD panel in the dark (9). The illumination will turn off automatically after the shot is taken. Pressing any shooting-related - Canon 0296B002 | EOS 5D Instruction Manual - Page 99
Select [Off]. Turn the dial to select [Off], then press . 3 CF Card Reminder This prevents shooting if there is no CF card in the camera. This can be set in all shooting modes. 1 Select [Shoot w/o card]. Turn the dial to select [z Shoot w/o card], then press . 2 Select [Off]. Turn the - Canon 0296B002 | EOS 5D Instruction Manual - Page 100
makes flash photography as easy as any AE mode. For details on using the EX-series Speedlite, refer to the Speedlite's instruction manual. The EOS 5D is a Type-A camera compatible with all EX-series Speedlites providing the features below. • E-TTL II Autoflash E-TTL II incorporates an improved flash - Canon 0296B002 | EOS 5D Instruction Manual - Page 101
-, ML-, TLseries) set in the TTL or A-TTL autoflash mode, the flash will be fired only at full output. If you set the camera's shooting mode to manual or aperture-priority AE, you can adjust the aperture and fire the flash at full output. Meanwhile, the Speedlite will remain in the TTL - Canon 0296B002 | EOS 5D Instruction Manual - Page 102
Sync Speed The EOS 5D can synchronize with compact, non-Canon flash units at 1/ 200 sec. or slower shutter speeds. With large studio flash, the sync speed is 1/125 sec. or slower. Be sure to test the flash to see if it synchronizes properly with the camera. PC Terminal The camera's PC terminal is - Canon 0296B002 | EOS 5D Instruction Manual - Page 103
such as how to view and erase captured images and how to connect the camera to a TV monitor. For images taken with another camera: The camera might not be able to properly display images captured with a different camera or edited with a personal computer or whose file name was changed. 103 - Canon 0296B002 | EOS 5D Instruction Manual - Page 104
image until you press the shutter button halfway. However, if auto power off has been set, the camera will turn off automatically after the auto power off time elapses. During the image review for single-shooting, you can delete the displayed image by pressing the button and selecting [OK]. To - Canon 0296B002 | EOS 5D Instruction Manual - Page 105
dial to select [On], then press . 3 Take a vertical shot. For the image review right after image capture, the image will not be displayed vertically on the LCD monitor. 4 vertical image is taken while the camera is pointed up or down, the image might not rotate automatically for playback. When - Canon 0296B002 | EOS 5D Instruction Manual - Page 106
3 Setting the LCD Brightness You can adjust the brightness of the LCD monitor to one of five levels. 1 Select [LCD brightness]. Turn the dial to select [c LCD brightness], then press . X The brightness adjustment screen will appear. 2 Adjust the brightness. While looking at the gray chart on - Canon 0296B002 | EOS 5D Instruction Manual - Page 107
Image Playback You can select any captured image to view. You can view a single image, the shooting information, an index display, or a magnified view. xSingle image display 1 Playback the image. Press the button. X The last captured image will appear on the LCD monitor. 2 Select the image. To - Canon 0296B002 | EOS 5D Instruction Manual - Page 108
Image Playback Shooting Information Display Image Original image verification data appended Flash exposure compensation amount Shooting time Shooting date Shutter speed Playback image number/ Total images recorded Aperture Image protect Exposure compensation amount Image-recording quality File No - Canon 0296B002 | EOS 5D Instruction Manual - Page 109
Image Playback 3 Histogram On the menu's [x Histogram] setting, you can select [Bright.] or [RGB]. [Bright.] Display Sample Histograms This histogram is a graph showing the distribution of the image's brightness level. The horizontal axis indicates the brightness level (darker on the left and - Canon 0296B002 | EOS 5D Instruction Manual - Page 110
Image Playback H Index Display Nine thumbnail images are displayed on one screen. 1 Set the camera for playback. Press the button. X The last captured image will appear on the LCD monitor. 2 Display the index images. Press the button. X The selected thumbnail - Canon 0296B002 | EOS 5D Instruction Manual - Page 111
Image Playback u/yMagnified View You can magnify the image by 1.5x to 10x on the LCD monitor. Magnified area 1 Display the image. Display the image in the single-image or image info. display mode. 2 Magnify the image. Press the button. X First, the center of the image will be magnified. To - Canon 0296B002 | EOS 5D Instruction Manual - Page 112
Image Playback 3 Automated Playback of Images (Auto playback) You can playback the CF card's images in an automatic slide show. Each image will be displayed for about 3 sec. 1 Select [Auto play]. Turn the dial to select [x Auto play], then press . X The auto play screen will appear. 2 Start - Canon 0296B002 | EOS 5D Instruction Manual - Page 113
Image Playback 3 Rotating an Image You can rotate an image by 90° or 270° clockwise. Images will then be displayed in the correct orientation during playback. 1 Select [Rotate]. Turn the dial to select [x Rotate], then press . X The Rotate screen will appear. 2 Rotate the image. Turn the - Canon 0296B002 | EOS 5D Instruction Manual - Page 114
CJump Display During the single image, image with shooting information, index, or magnified image display, you can jump forward or back to images stored on the CF card. 1 Playback the image. 2 Go to the jump display. Press the button. X The jump bar will appear at the bottom of the screen. Jump - Canon 0296B002 | EOS 5D Instruction Manual - Page 115
CJump Display Jumping during the single image or image with shooting information display Jump 10 images / Jump 100 images Turn the dial clockwise to jump forward by 10 or 100 images. Or turn it counterclockwise to jump backward by 10 or 100 images. Jump shot date You can jump to a picture taken - Canon 0296B002 | EOS 5D Instruction Manual - Page 116
terminal 3 Set the switch to or . 4 Press the button. X The image will appear on the TV screen. (Nothing will be displayed on the camera's LCD monitor.) After you finish, set the switch to , turn the TV off, then disconnect the video cable. If the proper video system format - Canon 0296B002 | EOS 5D Instruction Manual - Page 117
step 2. To exit the image protection, press the button. The menu will reappear. Once an image is protected, it cannot be erased by the camera's Erase function. To erase a protected image, you must first cancel the protection. If you erase all the images (p.119), only the protected images will - Canon 0296B002 | EOS 5D Instruction Manual - Page 118
LErasing Images You can erase images individually or erase all the images at one time in the CF card. Only protected images will not be erased. Once an image is erased, it cannot be recovered. Make sure you no longer need the image before erasing it. To prevent important images from being erased - Canon 0296B002 | EOS 5D Instruction Manual - Page 119
LErasing Images Erasing All Images 1 Display the image. Press the button. 2 Display the erase menu. Press the button. X The Erase menu will appear at the bottom of the screen. 3 Select [All]. Turn the dial to select [All], then press . X The confirmation dialog will appear. 4 Erase - Canon 0296B002 | EOS 5D Instruction Manual - Page 120
is completed, the menu will reappear. A non-Canon CF card or a CF card formatted with another camera or personal computer might not work with the camera. If this happens, format the card with the camera first. Then it might work with the camera. The CF card's capacity displayed on the formatting - Canon 0296B002 | EOS 5D Instruction Manual - Page 121
Direct Printing from the Camera You can connect the camera directly to a printer and print out the images in the CF card. The camera enables direct printing with printers compatible with " PictBridge", Canon " CP Direct", and Canon " Bubble Jet Direct." 121 - Canon 0296B002 | EOS 5D Instruction Manual - Page 122
instructions applicable to your printer on the pages indicated. Canon CP printer Canon PIXMA/DS/BJ printer Non-Canon printer - 132 Page 126 - 129 Canon's PictBridge Web Site The Web site below gives more information about using your Canon camera with various printers such as which paper types to - Canon 0296B002 | EOS 5D Instruction Manual - Page 123
personal computer will not work with the [Print/PTP] setting. For direct printing, using AC Adapter Kit ACK-E2 (optional) to power the camera is recommended. Connect the camera to the printer 1 Turn the camera's switch to . 2 Set up the printer. For details, refer to the printer's manual. 123 - Canon 0296B002 | EOS 5D Instruction Manual - Page 124
the cable plug to the camera's terminal, the cable plug's icon must face the front side of the camera. To connect to the printer, refer to the printer's instruction manual. 4 Turn on the printer. 5 Turn the camera's switch to or . X Some printers may have a beeping sound. 124 - Canon 0296B002 | EOS 5D Instruction Manual - Page 125
with direct printing. If you use a battery to power the camera, make sure it is fully charged. During direct printing, keep checking the battery level. If there is a long beeping sound in step 5, it indicates a problem with the PictBridge printer. To find out what's wrong, do the following: Press - Canon 0296B002 | EOS 5D Instruction Manual - Page 126
wPrinting with PictBridge The setting options will differ depending on the printer. Some settings might be disabled. For details, refer to your printer's instruction manual. Printer connected icon 1 Select the image to be printed. Check that the icon is displayed on the upper left of the LCD - Canon 0296B002 | EOS 5D Instruction Manual - Page 127
Paper Plus Glossy Photo Photo Paper Pro Fast Photo Photo Paper Plus Glossy Default If you are using a non-Canon printer, refer to the printer's instruction manual. USetting the Layout Turn the dial to select the desired layout, then press . X The Print setting screen will reappear - Canon 0296B002 | EOS 5D Instruction Manual - Page 128
. [20-up ] will have the shooting information* printed on the side of the thumbnail images. Default With a Canon printer, the print will be borderless. * From the Exif data, the camera name, lens name, shooting mode, shutter speed, aperture, exposure compensation amount, ISO speed, etc., will be - Canon 0296B002 | EOS 5D Instruction Manual - Page 129
printing but it does not resume, operate the buttons on the printer to resume printing. For details, see the printer's instruction manual. Error Messages If a problem occurs during printing, an error message will appear on the camera's LCD monitor. Press to stop printing. After resolving the - Canon 0296B002 | EOS 5D Instruction Manual - Page 130
APrinting with CP Direct Printer connected icon 1 Select the image to be printed. Check that the icon is displayed on the upper left of the LCD monitor. Turn the dial - Canon 0296B002 | EOS 5D Instruction Manual - Page 131
[Image] [Borders] [Date] APrinting with CP Direct 4 Set the options as desired. Set the [Image], [Borders], and [Date] as desired. Turn the dial to select the menu item, then press . Turn the dial to select the desired setting, then press . [Image] is selectable when card-size paper - Canon 0296B002 | EOS 5D Instruction Manual - Page 132
multiple pictures, the printing will stop after the current picture is finished printing. If a problem occurs during printing, an error message will appear on the camera's LCD monitor. Select [Stop] or [Continue] (after resolving the problem). If [Continue] is not displayed, select [Stop]. 132 - Canon 0296B002 | EOS 5D Instruction Manual - Page 133
SPrinting with Bubble Jet Direct Printer connected icon 1 Select the image to be printed. Check that the icon is displayed on the upper left of the LCD monitor. Turn the dial - Canon 0296B002 | EOS 5D Instruction Manual - Page 134
the menu item, then press . Turn the dial to select the desired setting, then press . [Paper] is the size of the paper loaded in the printer. Check the [Borders] and [Date] settings and set them if necessary. When you are done, press the button to return to the print setting screen - Canon 0296B002 | EOS 5D Instruction Manual - Page 135
the printer does not resume printing, it will resume automatically after you resolve the problem. If you are using a BJ printer equipped with an operation display panel, the error No. will be displayed if an error occurs. To resolve the respective error, refer to the BJ printer's instruction manual - Canon 0296B002 | EOS 5D Instruction Manual - Page 136
[Trimming], then press . X The trimming screen will appear. 2 Trim the image. The image area within the trimming frame will be printed. The operation guide disappears while you trim the image. It will reappear after 5 sec. of idle time. Changing the trimming frame size When you press the or - Canon 0296B002 | EOS 5D Instruction Manual - Page 137
you can see the trimmed image area that will be printed. Depending on the printer, the trimmed image area might not be printed as you specified. The smaller you the trimming frame will turn red. While trimming the image, look at the camera's LCD monitor. If you look at the image on a TV screen, the - Canon 0296B002 | EOS 5D Instruction Manual - Page 138
Easy Printing When you print directly from your camera to your printer, the printing settings will be saved in your camera. To use the same settings again, follow the steps below. 1 Connect the camera to a printer and prepare for printing. 2 Playback the images and select the ones to be printed. 3 - Canon 0296B002 | EOS 5D Instruction Manual - Page 139
is very convenient when you make prints with a DPOFcompatible printer or photo lab. About DPOF DPOF (Digital Print Order Format) is a standard for recording print ordering instructions to the CF card. It is for images taken with a digital camera, and you can specify which photos and the quantity to - Canon 0296B002 | EOS 5D Instruction Manual - Page 140
3 Print Ordering Print Settings Set the print type, date imprinting, and file No. imprinting. The print settings will be applied to all print-ordered images. (They cannot be set individually for each image.) 1 Select [Print order]. Turn the dial to select [x Print order], then press . X The - Canon 0296B002 | EOS 5D Instruction Manual - Page 141
as you specified. If this happens with your printer, refer to the printer's instruction manual. Or check with your photo lab about compatibility when ordering prints. Do not insert into the camera a CF card containing images captured by a different camera and then try to order prints. The images - Canon 0296B002 | EOS 5D Instruction Manual - Page 142
3 Print Ordering Selecting Individual Images for Printing 1 Select [Order]. Turn the dial to select [Order], then press . X The order screen will appear. 2 Select the image to be printed. Turn the dial to select the image to be printed. Press the button to see a three-image view. To - Canon 0296B002 | EOS 5D Instruction Manual - Page 143
3 Print Ordering For [Index] If you want to include the image in the index print, checkmark the box. Otherwise, leave the box unchecked. Press to checkmark the box , or press again to remove the checkmark. If there are other images you want to select, repeat steps 2 and 3. You can - Canon 0296B002 | EOS 5D Instruction Manual - Page 144
CF card, and the menu will reappear. Note that RAW images cannot be selected for printing even when you set "Mark all." When using a PictBridge printer, print no more than 500 images for one print order. If you specify more than this, all the selected images might not be printed. 144 - Canon 0296B002 | EOS 5D Instruction Manual - Page 145
compatible with direct printing, you can easily print images specified with DPOF. 1 Prepare to print. See "Setting the Camera" (steps 1 and 2) and "Connect the camera to the printer" (steps 1 to 5) on pages 123 to 124. 2 Select [Print order]. Turn the dial to select [x Print order], then press - Canon 0296B002 | EOS 5D Instruction Manual - Page 146
As for the number of index images with Bubble Jet Direct, see the BJ printer's instruction manual. If you stopped the printing and want to resume printing the remaining images, select was low. If there is a printing problem, see page 129 for PictBridge, page 132 for CP Direct, or page - Canon 0296B002 | EOS 5D Instruction Manual - Page 147
Customizing the Camera The current camera settings can be saved under the Mode Dial's setting. Also, Custom Functions enable you to fine-tune your camera to suit your shooting preferences. Custom Functions work in all modes except (Full Auto). 147 - Canon 0296B002 | EOS 5D Instruction Manual - Page 148
AEB, WB SHIFT/BKT, Custom WB, Color temp., Color space, Picture Style, Review time, AF points, Histogram, Auto power off, Auto rotate, LCD brightness, File revert the setting to the default, select [Clear registered camera set.] with step 2 explained on page 150. The settings will be reset to the - Canon 0296B002 | EOS 5D Instruction Manual - Page 149
3 Setting a Custom FunctionN Custom Function No. 1 Select [Custom Functions (C.Fn)]. Turn the dial to select [c Custom Functions (C.Fn)], then press . X The Custom Function screen will appear. 2 Select Custom Function No. Turn the dial to select the desired setting, then press . - Canon 0296B002 | EOS 5D Instruction Manual - Page 150
Custom Functions will be reset to the default settings. The C.Fn-00 focusing screen setting will not be canceled. When the shooting mode is , the camera settings and Custom Function settings cannot be reset or cleared to the default settings. 150 - Canon 0296B002 | EOS 5D Instruction Manual - Page 151
3 Custom Function SettingsN C.Fn-01 SET function when shooting You can change the function assigned to . 0: Default (no function) 1: Change quality After pressing , look at the LCD panel and turn the dial to set the recording quality directly. 2: Change Picture Style Press the - Canon 0296B002 | EOS 5D Instruction Manual - Page 152
prevents the AF from being thrown off by any obstacle passing between the camera and subject. The exposure is set at the moment the picture is taken executed after AF start. C.Fn-05 AF-assist beam Enables or disables the EOS-dedicated Speedlite's AF-assist beam. 0: Emits The AF-assist beam is - Canon 0296B002 | EOS 5D Instruction Manual - Page 153
Flash firing Enables or disables the firing of an external flash or non-Canon flash connected to the PC terminal. 0: Fires 1: Does not fire be canceled in the following cases: AEB: You turn the switch to , change lenses, have flash- ready, replace the battery, or replace the CF card. WB-BKT: - Canon 0296B002 | EOS 5D Instruction Manual - Page 154
Top Always displays the top menu screen [Quality]. C.Fn-12 Mirror lockup 0: Disable 1: Enable Effective for close-up and telephoto shots to prevent camera shake caused by the mirror's reflex action. See page 97 for the mirror lockup procedure. C.Fn-13 AF point selection method 0: Normal Press - Canon 0296B002 | EOS 5D Instruction Manual - Page 155
3 Custom Function SettingsN C.Fn-14 E-TTL II 0: Evaluative Fully automatic flash photography for all conditions, from low light to daylight fill-flash. 1: Average The flash is averaged for the entire area covered by the flash. Since automatic flash exposure compensation will not be executed, you - Canon 0296B002 | EOS 5D Instruction Manual - Page 156
, , or depth-of-field preview button will exit the image playback or menu display and make the pressed button active. Also, during the image review right after image capture, you can hold down the button and press the or button to magnify or reduce the image. Even during image - Canon 0296B002 | EOS 5D Instruction Manual - Page 157
the button is pressed, AF operation with the camera is disabled. 2: AE lock while metering When manual AF point selection mode, the button instantly switches to automatic AF point selection from manual stop button is provided only on super telephoto lenses. C.Fn-20 Add original decision data 0: - Canon 0296B002 | EOS 5D Instruction Manual - Page 158
attaching the standard focusing screen Ee-A. Since the Ee-A focusing screen comes with the EOS 5D, C.Fn-00-0 is already set. To change the focusing screen, follow the instructions that comes with the focusing screen. The C.Fn-00 setting is not included in the registered camera settings (p.148). 158 - Canon 0296B002 | EOS 5D Instruction Manual - Page 159
Reference This section will help you understand your camera better. It covers information on camera features, system accessories, and other reference information. 159 - Canon 0296B002 | EOS 5D Instruction Manual - Page 160
(max. 3 shots/sec.), focusing is executed. AE lock (Other than the (Full Auto) mode.) AF point selection Metering mode Automatic AF point selection Manual AF point selection q Evaluative Metering* AE lock is applied at the AF AE lock is applied at the point that achieved focus. selected - Canon 0296B002 | EOS 5D Instruction Manual - Page 161
Program Line The following program line applies when the camera is in Program AE mode. ISO 1002004080010600 Aperture value (f/no.) 5 6 7 8 9 10 11 12 13 14 15 16 17 18 19 20 21 22 23 32 4 - Canon 0296B002 | EOS 5D Instruction Manual - Page 162
Troubleshooting Guide If there is a problem, first refer to this Troubleshooting Guide. If this Troubleshooting Guide does not resolve the problem, contact your dealer or nearest Canon Service image is recorded onto the CF card. X When the camera finishes recording the image to the CF card, the - Canon 0296B002 | EOS 5D Instruction Manual - Page 163
Troubleshooting Guide The camera turns off by itself. Auto power off is in effect. X blinks.) X Press the shutter button halfway again and focus the subject. If you still cannot focus properly, focus manually. (p.30, 80) The LCD monitor does not display a clear image. The LCD monitor screen is dirty. - Canon 0296B002 | EOS 5D Instruction Manual - Page 164
Troubleshooting Guide The image is out of focus. The lens focus mode switch is set to . X Set the lens focus mode switch to . (p.27) Camera shake occurred when you pressed the shutter button. X To prevent camera shake, hold the camera still and press the shutter button gently. (p.30, 44) The - Canon 0296B002 | EOS 5D Instruction Manual - Page 165
displayed on the LCD panel. Follow the instruction below to resolve the problem for respective error code. If the same error occurs often, something is probably wrong with the camera. Jot down the "xx" error code and take your camera to the nearest Canon Service Center. If an error occurs after you - Canon 0296B002 | EOS 5D Instruction Manual - Page 166
source kit (AC adapter, DC coupler, power cord) for supplying power to the camera with a household power outlet. Compatible with 100 - 240 V AC. Compact button. Shoe-mount Speedlites An EX-series Speedlite can be attached to the camera's hot shoe. In the same way as normal exposures, you can use - Canon 0296B002 | EOS 5D Instruction Manual - Page 167
E-series dioptric adjustment lenses (-4 to +3 diopters) can be attached to the camera's eyepiece to further expand the dioptric adjustment range. Focusing Screens Ee-D and Ee-S The Ee-D has a grid for easier alignment with horizontal or vertical lines, and the Ee-S makes manual focusing easier. CF - Canon 0296B002 | EOS 5D Instruction Manual - Page 168
Extender EP-EX15 Rubber Frame Eb ST-E2 220EX 430EX 580EX Macro Ring Lite Macro Twin Lite MR-14EX MT-24EX E-series Dioptric Adjustment Lenses Bundled Accessories Eyecup Eb Focusing Screen Ee-A Angle Finder C Wide Strap EW-100DGR Focusing Screen Ee-D Ee-S Battery Charger CG-580 or CB-5L - Canon 0296B002 | EOS 5D Instruction Manual - Page 169
Windows 98 Second Edition Mac OS X · EOS DIGITAL Solution Disk · Software Instruction Manual (PDF) Wireless LAN adapter Ethernet port Interface printer Timer Remote Controller TC-80N3 Remote Switch RS-80N3 CP Printer Wireless Controller LC-5 TV/Video Bubble Jet Direct-compatible printer - Canon 0296B002 | EOS 5D Instruction Manual - Page 170
lenses: Lens mount: Digital, single-lens reflex, AF/AE camera Type I or II CF card * Compatible with Microdrive and 2GB or larger CF cards 35.8 x 23.9mm Canon EF lenses (except EF-S lenses) Canon File numbering: Consecutive numbering, auto reset, manual reset Color space: sRGB, Adobe RGB Picture - Canon 0296B002 | EOS 5D Instruction Manual - Page 171
(-1 diopter with 50mm lens at infinity) Eyepoint: 20 mm Built-in dioptric adjustment: -3.0 - +1.0 diopter Focusing One-Shot AF, AI Servo AF, AI Focus AF, Manual focusing (MF) AF point selection: Auto, manual Selected AF point display: Superimposed in viewfinder and indicated on LCD - Canon 0296B002 | EOS 5D Instruction Manual - Page 172
: Full auto, program AE (shiftable), shutter-priority AE, aperture-priority AE, manual exposure, E-TTL II autoflash ISO speed: Equivalent to ISO 100-1600 (in delay Remote control with N3 type terminal • External Speedlite EOS-dedicated Speedlite: E-TTL II autoflash with EX-series Speedlite - Canon 0296B002 | EOS 5D Instruction Manual - Page 173
(Large/Fine): Approx. 60, RAW: Approx. 17 * With a Canon 512MB CF card. * Varies depending on the subject, ISO speed, printers: Printable images: Easy Print feature: CP Direct, Bubble Jet Direct, and PictBridge-compatible printers JPEG images (DPOF printing possible) Provided • DPOF: Digital - Canon 0296B002 | EOS 5D Instruction Manual - Page 174
Specifications • Customization Camera setting registration: Under Mode Dial's setting Custom battery Rated voltage: 7.4 V DC Battery capacity: 1390 mAh Dimensions (W x H x D): 38 x 21 x 55 mm / 1.5 x 0.8 x 2.2 in. Weight: Approx. 82 g / 2.9 oz • Battery Charger CG-580 Compatible - Canon 0296B002 | EOS 5D Instruction Manual - Page 175
humidity: 85% or lower Dimensions (W x H x D): 91 x 67 x 32.3 mm / 3.6 x 2.6 x 1.3 in. Weight: Approx. 105 g / 3.7 oz (excluding power cord) All the specifications above are based on Canon's testing standards. The camera's specifications and physical appearance are subject to change without - Canon 0296B002 | EOS 5D Instruction Manual - Page 176
accordance with the instructions, may cause harmful cable with the ferrite core provided with the digital camera must be used with this equipment in order to manual. If such changes or modifications should be made, you could be required to stop operation of the equipment. Canon U.S.A. Inc. One Canon - Canon 0296B002 | EOS 5D Instruction Manual - Page 177
133 Bulb exposures 96 Bundled Items 3 C C.Fn 151 Camera setting display 72 Center-weighted Average Metering.....81 CF card 11, 28, 120, 167 Clear all camera settings 37 Clear all Custom Functions .......... 150 Clear settings 36 Color - Canon 0296B002 | EOS 5D Instruction Manual - Page 178
the Camera 44 I Image processing 51 Image review time Manual AF point selection 77 Manual Focusing 80 Manual reset 71 Menus 33, 35, 36 Metering mode 81 MF 80 Mirror Lockup 97 Mode Dial 18 Monochrome 54 Multi-controller 20, 32 N Neutral 53 Noise reduction 151 Nomenclature 14 Non-Canon - Canon 0296B002 | EOS 5D Instruction Manual - Page 179
Index Playback 107 Playback menu 33, 35 Portrait 53 Possible shots 25, 51 Power outlet 26 Power Switch 20, 30 Pressing completely 30 Pressing halfway 30 Print ordering 139 Print/PTP 123 Program AE 84 Program shift 85 Protect 117 Protection 117 Q Quick Control Dial 20, 32 R RAW 51 - Canon 0296B002 | EOS 5D Instruction Manual - Page 180
2-chome, Minato-ku, Tokyo 108-8011, Japan This Instruction Manual booklet is current as of August 2005. For information on the camera's compatibility with any accessories and lenses introduced after this date, contact any Canon Service Center. CT1-1295-001 © CANON INC. 2005 PRINTED IN JAPAN
-
 1
1 -
 2
2 -
 3
3 -
 4
4 -
 5
5 -
 6
6 -
 7
7 -
8
-
9
-
10
-
11
-
12
-
13
-
14
-
15
-
16
-
17
-
18
-
19
-
20
-
21
-
22
-
23
-
24
-
25
-
26
-
27
-
28
-
29
-
30
-
31
-
32
-
33
-
34
-
35
-
36
-
37
-
38
-
39
-
40
-
41
-
42
-
43
-
44
-
45
-
46
-
47
-
48
-
49
-
50
-
51
-
52
-
53
-
54
-
55
-
56
-
57
-
58
-
59
-
60
-
61
-
62
-
63
-
64
-
65
-
66
-
67
-
68
-
69
-
70
-
71
-
72
-
73
-
74
-
75
-
76
-
77
-
78
-
79
-
80
-
81
-
82
-
83
-
84
-
85
-
86
-
87
-
88
-
89
-
90
-
91
-
92
-
93
-
94
-
95
-
96
-
97
-
98
-
99
-
100
-
101
-
102
-
103
-
104
-
105
-
106
-
107
-
108
-
109
-
110
-
111
-
112
-
113
-
114
-
115
-
116
-
117
-
118
-
119
-
120
-
121
-
122
-
123
-
124
-
125
-
126
-
127
-
128
-
129
-
130
-
131
-
132
-
133
-
134
-
135
-
136
-
137
-
138
-
139
-
140
-
141
-
142
-
143
-
144
-
145
-
146
-
147
-
148
-
149
-
150
-
151
-
152
-
153
-
154
-
155
-
156
-
157
-
158
-
159
-
160
-
161
-
162
-
163
-
164
-
165
-
166
-
167
-
168
-
169
-
170
-
171
-
172
-
173
-
174
-
175
-
176
-
177
-
178
-
179
-
180
 |
 |

E
INSTRUCTION MANUAL
E
INSTRUCTION
MANUAL