Canon 7080C User Manual
Canon 7080C - DR - Document Scanner Manual
 |
UPC - 013803034974
View all Canon 7080C manuals
Add to My Manuals
Save this manual to your list of manuals |
Canon 7080C manual content summary:
- Canon 7080C | User Manual - Page 1
Document Scanner INSTRUCTIONS ENGLISH PlePalseeasreeardetahdistmhiasnmuaal nbueafolrbeeofpoereratoinpgerthaitsinugnitth. Aisftuernyito. uAffitneirshyou finish rearediandginthgisthmisanmuaaln, ustaolr,esitoinreaitsainfeapslaacfee fpolrafcueturfoerrefufeturernecree.ference. - Canon 7080C | User Manual - Page 2
when the equipment is operated in a commercial environment. This equipment generates, uses, and can radiate radio frequency energy and, if not installed and used in accordance with the instruction manual, may cause harmful interference to radio communications. Operation of this equipment in - Canon 7080C | User Manual - Page 3
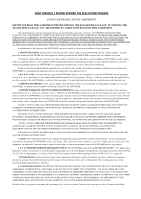
, THE DISK PACKAGE CONTAINING SCANNER DRIVER SOFTWARE PROGRAMS AND/OR SCANNER UTILITY SOFTWARE PROGRAM PROPRIETARY TO CANON OR ITS LICENSOR (THE "SOFTWARE") AND THE ACCOMPANYING DOCUMENTATION AND OTHER ITEMS TO THE PLACE WHERE YOU OBTAINED THEM FOR A REFUND BEFORE THEY ARE USED OR OPENED OR UNPACKED - Canon 7080C | User Manual - Page 4
- Canon 7080C | User Manual - Page 5
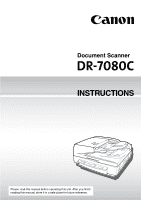
Canon Document Scanner DR-7080C. Please read this manual thoroughly before operating the machine in order to familiarize yourself with its capabilities, and to make the most of its many functions. After reading this manual, store it in a safe place for future reference. Conventions This manual uses - Canon 7080C | User Manual - Page 6
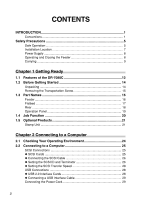
Chapter 1 Getting Ready 1.1 Features of the DR-7080C 12 1.2 Before Getting Started 14 Unpacking 14 Removing the Transportation Screw 15 1.3 Part Names 16 Feeder ...16 Flatbed ...17 Rear ...18 Operation Panel 19 1.4 Job Function 20 1.5 Optional Products 21 Stamp Unit 21 Chapter 2 Connecting - Canon 7080C | User Manual - Page 7
the Power 30 Turning ON the Power 30 Recognizing the Scanner 31 Turning OFF the Power 33 Chapter 3 Using the Software 3.1 About the Software 36 3.2 Installing the Software 37 3.3 How to Use the Software 39 How to Display the ISIS/TWAIN Driver Help File 39 How to Start CapturePerfect 40 How - Canon 7080C | User Manual - Page 8
82 6.4 Display Messages 83 Error Messages 83 Scanner Status Messages 85 6.5 Troubleshooting 86 Chapter 7 User Maintenance 7.1 Changing the Flatbed (Platen Glass) and Pressure Board 93 Cleaning the Feeder 94 Cleaning the Power Plug 98 Appendix Specifications 100 Specification for the Scanner - Canon 7080C | User Manual - Page 9
Connect the plug securely to the power source. ■ Use only the power cord and plug provided with the scanner. ■ Never attempt to disassemble or modify the scanner. ■ Never use flammable aerosol products near the scanner. ■ Before you clean the scanner, turn OFF the power and disconnect the power cord - Canon 7080C | User Manual - Page 10
scanner is not being used for a long time, disconnect the power cord from the power outlet. ■ Avoid wearing loose fitting clothing, dangling jewelry, long ties, or even long hair that could become entangled with moving parts, especially the rollers that feed the scanner from the flatbed (platen glass - Canon 7080C | User Manual - Page 11
subject to vibration and strong shock • Places subject to rapid changes in temperature or humidity Condensation occurring inside the scanner may impair scan image quality. Place the scanner in a room that is well within the following range: Room temperature 59°F to 86°F (15°C to 30°C) Relative - Canon 7080C | User Manual - Page 12
independent power outlet. Do not plug the scanner into an outlet shared with another device. If you use an extension cord, pay attention to the total amperage of the cord. • If you are unsure of anything relating to the power supply, contact your service representative or the power company. • Never - Canon 7080C | User Manual - Page 13
the cables are not removed before moving the scanner, you may damage the plugs or connectors by forcibly pulling them out. ■ Notice to Cardiac Pacemaker Users This product generates a weak magnetic field. If you use a cardiac pacemaker, move away from product in the event that you notice any unusual - Canon 7080C | User Manual - Page 14
- Canon 7080C | User Manual - Page 15
names and functions of parts on the scanner. 1.1 Features of the DR-7080C 12 1.2 Before Getting Started 14 Unpacking 14 Removing the Transportation Screw ....... 15 1.3 Part Names 16 Feeder 16 Flatbed 17 Rear 18 Operation Panel 19 1.4 Job Function 20 1.5 Optional Products 21 Stamp Unit 21 - Canon 7080C | User Manual - Page 16
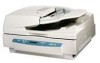
Chapter 1 Getting Ready Features of the DR-7080C The DR-7080C is a desktop ADF/flatbed scanner for high-speed scanning of large volume documents. The following are the main features of the DR-7080C. ● Black and white, grayscale, and 24-bit color output Support for black and white, grayscale, and 24- - Canon 7080C | User Manual - Page 17
out") a specific color when scanning. ● Stamping (option) This feature automatically marks the trailing edge of a scanned document page with a stamp to indicate that is has been scanned. (See "Optional Products," on p. 21.) *1 This function is not supported on a computer that is running Windows NT - Canon 7080C | User Manual - Page 18
are missing, contact your sales representative. DR-7080C reaPdleinagsethriseamdatnhuisaml, satnourealitbienfoaresaofpeepralatcinegfothrisfuutunriet. Areffteerreynocue.finish Document INSTRUCTIONS Scanner Instructions (this manual) QUICK REFERENCEDOCUMENT SCANNER Quick Reference Power Cord - Canon 7080C | User Manual - Page 19
and other forces during shipment. You must remove the transportation screw before trying to use the scanner. Important ● Turning the scanner ON without removing the transportation screw may damage the scanner. If installed, always remove the transportation screw and tag before turning the power ON - Canon 7080C | User Manual - Page 20
This section describes the names and functions of each part. Before you connect the DR-7080C, take a few minutes to familiarize yourself with the main parts. Feeder q Feeder Cover Open this cover to clear document jams and clean the rollers. (See pp. 77, 90.) w Opening Lever Operate this release - Canon 7080C | User Manual - Page 21
Flatbed 1.3 Part Names 1 i Pressure Board This board presses the document page against the glass during scanning. (See p. 89.) o Flatbed (Platen Glass) When placing the document onto the platen glass, align it with the arrow in the upper left corner of the glass. (See p. 51.) !0 - Canon 7080C | User Manual - Page 22
provided power cord here. Important ● Never touch the cables on the left side of the back panel. Disconnection of cables can cause a malfunction of the scanner. ● Take care to ensure that the vents never become blocked. Blocked vents can lead to heat build-up inside the - Canon 7080C | User Manual - Page 23
Part Names 1 q Menu Key Press this key to cycle the display through the various user modes, as shown below. (See "About the User Modes," on p. 68.) w Set Keys Use . y New File Key This key is active for applications that support batch separation. This key lights when pressed or in accordance with - Canon 7080C | User Manual - Page 24
"Using the Job Mode for Scanning," on page 59. Scan to PC Scan to Printer Save image to specified folder. Output to printer (Mail Server) Scan to Mail Send image as mail attachment. (Internet) (Network) DR-7080C Note The Job function is not supported on a computer that is running Windows - Canon 7080C | User Manual - Page 25
Optional Products Optional Products 1 The following options can be purchased and used on the DR-7080C, if they are necessary. Contact your sales representative. Stamp Unit The stamp unit affixes a "scanned" stamp on document pages that are scanned using the feeder. The application can be used to - Canon 7080C | User Manual - Page 26
- Canon 7080C | User Manual - Page 27
Chapter 2 Connecting to a Computer This chapter describes how to connect the scanner to a computer, and includes information about what you need to do to get Windows to recognize the scanner. 2.1 Checking Your Operating Environment 24 2.2 Connecting to a Computer 25 SCSI Connections 25 USB - Canon 7080C | User Manual - Page 28
DR-7080C does not support operation under Windows 95. ● The Job function is not supported on a computer that is running Windows NT. If you want to use the Job function, run the scanner with a computer running a supported operating system other than Windows NT. ● Use the latest USB 2.0 driver when - Canon 7080C | User Manual - Page 29
the connector that can be connected to the scanner. ◆ SCSI Cards Be sure to use one of the recommended SCSI cards when connecting the scanner with a SCSI cable. The recommended SCSI cards are listed below. Recommended SCSI cards Manufacturer: Adaptec Product names: AHA-2930U, AHA-2940AU, ASC-19160 - Canon 7080C | User Manual - Page 30
turned OFF. ■ Do not connect both SCSI and USB interface cables at the same time. Connect your computer to the scanner using the SCSI cable. Two SCSI connectors are located on the rear of the scanner. Insert the SCSI cable from the computer into one of the connectors on the bottom of the - Canon 7080C | User Manual - Page 31
as the last device of the daisy chain> Set the terminator switch on the scanner to OFF. In such a connection, set the terminator on the SCSI device connected as to set the DIP switch or use a terminator plug if this scanner is installed as the last piece of equipment in a daisy chain. Note that - Canon 7080C | User Manual - Page 32
procedure in your computer's operation manual when installing the USB 2.0 interface card on your computer. ● Use the most recent USB 2.0 driver provided by Adaptec or Microsoft. ● Windows NT operating system does not support USB. Use a SCSI cable to connect the scanner to computers with the - Canon 7080C | User Manual - Page 33
strip. ■ Never bundle or tie the power cord around itself or another object. Connect the plug securely to the power source. ■ Use only the power cord and plug provided with the scanner. ■ Before you connect the power cord, be sure to turn OFF the power. ■ Be sure to connect to an AC - Canon 7080C | User Manual - Page 34
from the power outlet. Contact your service representative immediately. Failure to do so might cause a fire. 2 Turn ON the computer. Note You will need to install the scanner device driver when you start Windows the first time after you connect the scanner to your computer. (See "Recognizing the - Canon 7080C | User Manual - Page 35
If you are using Windows 98/Me or Windows 2000/XP, then the first time that you turn ON your computer after connecting this scanner to your computer, Windows Plug and Play function automatically displays a screen prompting you to install the scanner driver. Follow the instructions on the screen - Canon 7080C | User Manual - Page 36
appears in the [Hardware Installation] dialog box indicating that Note the driver "has not passed Windows logo testing," this is not a problem. ● The DR-7080C will be registered as "CANON DR-7080C SCSI" or "CANON DR-7080C USB" in the "Imaging Device" directory. ● Note that the SCSI connection - Canon 7080C | User Manual - Page 37
OFF the Power Important If you are using a SCSI connection, turn OFF the computer first, before turning OFF the scanner. 1 Turn OFF the computer. 2 2 Turn OFF the scanner. OFF ON CAUTION ■ Wait at least 10 seconds before turning ON the scanner again. ■ For your safety, disconnect the power - Canon 7080C | User Manual - Page 38
- Canon 7080C | User Manual - Page 39
chapter describes how to install and use the ISIS/TWAIN driver, CapturePerfect, and Job Registration Tool that come packaged with the scanner. 3.1 About the Software 36 3.2 Installing the Software 37 3.3 How to Use the Software 39 How to Display the ISIS/TWAIN Driver Help File ... 39 How to Start - Canon 7080C | User Manual - Page 40
and read the Readme.txt file on the setup disc before installing the software. ● ISIS/TWAIN driver This driver allows the scanner to use ISIS (Image and Scanner Interface Specification) compatible applications or TWAIN (Tool Without An Interesting Name) compatible applications to scan documents. Be - Canon 7080C | User Manual - Page 41
Registration Tool use the TWAIN Driver. Install the software in the order of the ISIS/TWAIN Driver, CapturePerfect, and then the Job Registration Tool. ● The Job function is not supported on a computer that is running Windows NT. If you Important want to use the Job function, run the scanner with - Canon 7080C | User Manual - Page 42
on which Windows operating system you are using. 4 Enter "D:\*****\setup.exe" in the [Open] field, and then click [OK]. Note ● In this example, the CD-ROM drive name is D stands for the name of the folder where you will install the applicable software. ISIS/TWAIN Driver: D:\Driver\setup.exe - Canon 7080C | User Manual - Page 43
on using the ISIS/TWAIN driver. How to Display the ISIS/TWAIN Driver Help File The explanation on how to use the ISIS/TWAIN driver is in the ISIS/TWAIN driver help file. To view the help file, click the [Start] button, and then click [Programs] - 3 [Canon DR-7080C] - [Canon DR-7080C Help - Canon 7080C | User Manual - Page 44
CapturePerfect. See [Help] in CapturePerfect for information on how to use CapturePerfect. 1 Click the [Start] button, and then click [Programs] - [CapturePerfect 2.0]. Click [All Programs] - [CapturePerfect 2.0] if your OS is Windows XP. 2 This starts CapturePerfect. Note The basic operation of - Canon 7080C | User Manual - Page 45
Job function is not supported on a computer that is running Windows NT. If you want to use the Job function, run the scanner with a computer running a supported operating system other than Windows NT. 1 Click the [Start] button, and then click [Programs] - [Canon DR- 7080C] - [Job Registration Tool - Canon 7080C | User Manual - Page 46
Chapter 3 Using the Software 2 This starts Job Registration Tool. Note ● See the Job Registration Tool help file for information about how to use the Job Registration Tool. To view the help file, click the [Help] button. ● The last page of this manual is "Job Title Record." Use it to record the - Canon 7080C | User Manual - Page 47
if your system is Windows NT 4.0 Workstation, Windows 2000 Professional, or Windows XP. ● The dialogs and button names in Windows XP are different from those used in the explanations in this manual. Refer to the Windows XP "Help and Support Center" to uninstall the software. 1 Click the [Start - Canon 7080C | User Manual - Page 48
. 4 This displays a [Confirm File Deletion] dialog box for the application you are removing. If you selected "Canon DR-7080C Driver," the above dialog box appears. 5 Click the [Yes] button, and the uninstaller starts. Follow the instructions on the screen to finish uninstalling the software. 44 - Canon 7080C | User Manual - Page 49
48 Loading a Document into the Feeder ...... 48 Positioning a Document on the Flatbed (Platen Glass 51 4.3 Document Feeding and Scanning ..... 54 Scan Procedure 54 4.4 Other Scanning Techniques 59 Using the Job Mode for Scanning 59 Using the Count Only Mode 63 Using Patch Code Sheets 64 - Canon 7080C | User Manual - Page 50
Using the Scanner g/m2 Black-and-white/Color Documents Mixed 13 to 32 lb bond/50 to 128 g/m2 Color Documents 17 to 32 lb bond/64 to 128 g/m2 Follow in pencil or some other soft writing material, be sure to clean the scanning rollers. (See "Cleaning the Feeder," on p. 94.) • If you scan thin - Canon 7080C | User Manual - Page 51
scanning side setting to "Flatbed," and then scan the document one page at a time. • To avoid paper jams, damage to documents, and a scanner malfunction, do not feed 0.2" (5 mm) of its edges or documents with a color background may cause erroneous skew detection or automatic size detection. - Canon 7080C | User Manual - Page 52
Using the Scanner Placing Documents onto the Scanner This section describes how to load documents into the feeder and how to position a document page on the flatbed each slide guide so its pointer is aligned with the corresponding paper size on the document size label. Slide Guide Use both hands to - Canon 7080C | User Manual - Page 53
4.2 Placing Documents onto the Scanner 2 Align the edges of the document stack on a flat surface, and then load the stack into the feeder with the scanning side facing upwards. Insert - Canon 7080C | User Manual - Page 54
Chapter 4 Using the Scanner 4 After scanning is complete, lift the document feeder tray, and then remove the document from the document eject tray. Important ● Leaving a document in the document - Canon 7080C | User Manual - Page 55
onto the Scanner Positioning a Document on the Flatbed (Platen Glass) Use the following procedure to scan on the flatbed (platen glass) when scanning a book, thick document, very thin document, an OHP (Overhead Transparency) transparency, or any other document that cannot be scanned using the feeder - Canon 7080C | User Manual - Page 56
Chapter 4 Using the Scanner 2 Place the document onto the flatbed (platen glass) with the scanning side facing downwards. With the scanning side of the document facing downwards, align its corner with the arrow mark in the upper left corner of the flatbed (platen glass). 3 Slowly and carefully lower - Canon 7080C | User Manual - Page 57
4.2 Placing Documents onto the Scanner 4 Raise the feeder and remove the document from the flatbed (platen glass). Important forward w. 4 1.96" (50 mm) 3. Set the thick document or book on the flatbed (platen glass) and hold the feeder lightly while scanning. Book or Thick Document 4. To return - Canon 7080C | User Manual - Page 58
the document, cause document jams, or damage the scanner. Scan Procedure The ISIS/TWAIN driver "Feeding Option" setting allows you to select from the scanner, instruct the scanner from your computer to start scanning. ● Panel Feeding (See p. 56.) Panel feeding comes in handy when using the feeder - Canon 7080C | User Manual - Page 59
Feeding and Scanning ◆ Standard Feeding To use the standard feeding mode, instruct the scanner to start from the application. 1 Select [Standard Feeding] in [Feeding Option] on the ISIS/TWAIN driver's settings screen. 2 Place the document onto the scanner. 4 See "Placing Documents onto the - Canon 7080C | User Manual - Page 60
the scan command from your application, and then use the scanner's [Start] and [Stop] keys to control the scanning operation. 1 Select [Panel-Feeding] in [Feeding Option] on the ISIS/TWAIN driver's settings screen. 2 From the application you are using, execute the required command to start scanning - Canon 7080C | User Manual - Page 61
be used when feeding a document from the feeder. After 4 you execute the scan start command from the application, the scanner starts scanning automatically whenever it detects a document loaded into the feeder. 1 Select [Automatic Feeding] in [Feeding Option] on the ISIS/TWAIN driver's settings - Canon 7080C | User Manual - Page 62
Chapter 4 Using the Scanner 3 Load the document into the document feeder tray. The scanner detects the documents, and scanning starts. See "Placing Documents onto the Scanner," on page 48 for information about placing Important documents onto the scanner. 4 When scanning of the document is complete - Canon 7080C | User Manual - Page 63
Job Mode for Scanning Important The Job function is not supported on a computer that is running Windows NT. If you want to use the Job function, run the scanner with a computer running a supported operating system other than Windows NT. 1 Set the Event function. (See "Setting the Event Function - Canon 7080C | User Manual - Page 64
the Job Mode to operate correctly, see "Troubleshooting," on page 86. Note ◆ Setting the Event Function The Job function does not function when [DR7080C Job Tool] has not been specified in the scanner's Event function. Before using the Job function, set the scanner's event according to the following - Canon 7080C | User Manual - Page 65
and Cameras]. 4.4 Other Scanning Techniques This displays the [Scanners and Cameras] dialog box. The dialog box that appears differs according to what version of Windows is running on the computer. Note 4 3 Select [Canon DR-7080C SCSI], and then click [Properties]. 4 Click the [Events - Canon 7080C | User Manual - Page 66
] in the [Scanner events] field. 6 Uncheck all the items in the [Send to this application] field except for [DR7080C Job Tool]. 7 Click the [Apply] button. You cannot use the Job function if the [Disable device events] check box is checked. Important 8 Click the [OK] button. 9 Restart Windows. 62 - Canon 7080C | User Manual - Page 67
the feeder in order to count them. The document is not scanned. You can perform Count Only Mode operations on the scanner, without using your computer. 1 Use the user modes to enter the scanner's Count Only Mode. (See "How to Set the User Modes," on p. 72.) This causes the Start key lamp to light - Canon 7080C | User Manual - Page 68
four types: [PATCH II (A4)], [PATCH II (LTR)], [PATCH T (A4)], and [PATCH T (LTR)]. Click the [Start] button in Windows, and then click [Programs] - [Canon DR-7080C] - [PATCH X(XX)], and use the document that is printed. Note You need CapturePerfect or an application that can open PDF (portable - Canon 7080C | User Manual - Page 69
4.4 Other Scanning Techniques ◆ Types of Patch Code Patterns There are two patch code patterns as shown below. The result varies depending on the pattern. ● PATCH T (FILE A) When this sheet is recognized, the document following the sheet is saved to a separate file. ● PATCH II (FILE B) 4 When this - Canon 7080C | User Manual - Page 70
Chapter 4 Using the Scanner ◆ How to Use Patch Code Sheets 1 Print the patch code sheet on the following paper size: detection is enabled. Do not bend or wrinkle the patch code sheet. This could prevent the scanner from recognizing the sheet. ● When the patch code sheet is being scanned, if it is - Canon 7080C | User Manual - Page 71
4.4 Other Scanning Techniques 2 Place the patch code sheet on top of the documents that are to be saved to a separate file, and then scan the documents. Place the patch code sheet on top of the documents that are to be saved to a separate 4 file. 3 Set the scanning conditions, and then start - Canon 7080C | User Manual - Page 72
- Canon 7080C | User Manual - Page 73
Chapter 5 User Modes This chapter describes the user modes, which you can use to configure the scanner settings. 5.1 About the User Modes 70 User Mode Functions 70 How to Set the User Modes 72 - Canon 7080C | User Manual - Page 74
feeder, which can damage the page. Take care to make sure that document pages are aligned correctly. ● Stand-by Mode ON: Scanner enters Stand-by Mode after 10 minutes of non-use (default). OFF: Scanner does not enter Stand-by Mode. ● Display Language Mode ON: Japanese OFF: English (default) 70 - Canon 7080C | User Manual - Page 75
● Display Contrast Mode 5.1 About the User Modes ▼ ▼ Use the Set [ ] and [ ] keys to move the pointer [10]: 10 Mbyte/sec (First SCSI) [20]: 20 Mbyte/sec (Ultra SCSI) (default) If the scanner does not operate correctly when the output speed is set to [20 Mbyte/sec], reduce the transfer speed to - Canon 7080C | User Manual - Page 76
following procedure to configure user mode settings. 1 Press the [Menu] key to display the user mode screens. Use the [Menu] key to cycle through the user modes in the sequence shown below. 2 Use the Set [ ] and [ ] keys to change the currently displayed setting. 3 Press the [Enter] key to register - Canon 7080C | User Manual - Page 77
Chapter 6 Troubleshooting This chapter describes the trouble that may occur on the DR-7080C and how to correct it. 6.1 When the Scanner Is Not Recognized 74 SCSI Connections 74 USB Connections 76 6.2 Clearing Paper Jams 77 Clearing a Paper Jam 77 Paper Jam Causes 81 6.3 When the Scanned - Canon 7080C | User Manual - Page 78
it. If you can see one of these, then refer to the SCSI card's operator's manual to reset the SCSI card. Click [Start]-[Settings]-[Control Panel], and then open [SCSI adapter] and check if the "SCSI card" is being recognized correctly. If it is not correctly recognized - Canon 7080C | User Manual - Page 79
6.1 When the Scanner Is Not Recognized Cause Remedy Same SCSI ID is used for other SCSI devices scanner's power cord. Then, turn ON the scanner, and then turn ON the computer. (See p. 29.) Cause Remedy The scanner does not support the SCSI card. Replace with a SCSI card compatible with the driver - Canon 7080C | User Manual - Page 80
card is being recognized by Windows in the operating system you are using. Cause Remedy The scanner is OFF. Check the connections with the computer, and then turn ON the scanner. (See p. 30.) Cause The USB 2.0 interface card does not support the scanner. Remedy Use one of the recommended USB - Canon 7080C | User Manual - Page 81
unexpectedly and the message shown below appears on the display panel. Use the procedure below to clear a paper jam. Clearing a Paper Jam all jammed sheets of paper. Paper scraps left inside the scanner may be drawn into the scanner again, causing another paper jam or malfunction. ■ When opening - Canon 7080C | User Manual - Page 82
Chapter 6 Troubleshooting 3 Remove the jammed paper. 4 If the document is jammed under the feeder guide, grasp the tab inside the scanner to open the feeder guide. Note If you are duplex scanning, the document may be jammed under the feeder guide. 78 - Canon 7080C | User Manual - Page 83
Paper Jams 5 Rotate the dial on your side of the scanner to remove any paper jammed inside the feeder. Note ● feeder tray and remove the paper. 6 Close the feeder guide. Take care to avoid pinching your fingers when closing the feeder guide. 6 CAUTION 7 Close the feeder cover. Take care to - Canon 7080C | User Manual - Page 84
Chapter 6 Troubleshooting 8 Raise the feeder. Open the feeder carefully and slowly, taking care to avoid letting the feeder fall over CAUTION backwards. 9 Remove any paper jammed inside - Canon 7080C | User Manual - Page 85
to do: Scan such paper from the flatbed (platen glass), one page at a time. (See p. 51.) ● What to check: Are the rollers inside the feeder dirty or worn? What to do: If the rollers are dirty, clean them. (See p. 93.) If the rollers are worn, contact your service representative to have them replaced - Canon 7080C | User Manual - Page 86
on how to install the driver, see "Installing the Software," on p. 37. For details on how to install the application, see the instruction manual for the application in use. ● Other Causes Even if the computer is correctly recognizing the scanner, and the driver and the application are installed - Canon 7080C | User Manual - Page 87
Messages This section explains the error messages and scanner status messages that appear on the display panel error continues to appear, scan the document from the flatbed (platen glass). Display 6 Cause Paper is jammed in the feeder. Remedy Use the procedure under "Clearing a Paper Jam," on - Canon 7080C | User Manual - Page 88
Chapter 6 Troubleshooting Display Cause Remedy service call error," which indicates that the scanner has an internal problem. This error requires servicing from your service representative. Turn off the scanner. With the displayed error code on hand, contact your sales reprentative or your service - Canon 7080C | User Manual - Page 89
Stand-by Mode. A signal from the computer or an operation panel key operation will recover the scanner to Ready Mode. The scanner is in the Count Only Mode. (See "Using the Count Only Mode," on p. 63.) Status The scanner is in the Job Mode. Press the [Start] key to start scanning or the [Stop - Canon 7080C | User Manual - Page 90
want to use the Job function. (See "Checking Your Operating Environment," on p. 24.) Cause 2: The Windows Event function is not configured to start DR-7080C Job Tool. Remedy 2: On the Windows Control Panel, double-click [Scanners and Cameras] to open DR-7080C SCSI properties. Specify "DR-7080C Job - Canon 7080C | User Manual - Page 91
6.5 Troubleshooting ● The Job function does not work when the [Start] key is pressed after selecting a job, and [Scan Error] is displayed. Cause 1: Another application is using the DR-7080C ISIS/TWAIN Driver. Remedy 1: Close the other application that is using the DR-7080C ISIS/TWAIN Driver. Cause - Canon 7080C | User Manual - Page 92
- Canon 7080C | User Manual - Page 93
Chapter 7 User Maintenance This chapter describes daily cleaning of the scanner. 7.1 Changing the Stamp Cartridge .......... 90 7.2 Daily Cleaning 92 Cleaning the Main Unit 92 Cleaning the Flatbed (Platen Glass) and Pressure Board 93 Cleaning the Feeder 94 Cleaning the Power Plug 98 - Canon 7080C | User Manual - Page 94
or faint. Contact your sales reprentative or service representative to purchase a new stamp cartridge. 1 Open the feeder cover. Operate the opening lever, and then slowly raise the cover until it stops. 2 Grasping the tab inside the scanner, open the feeder guide. Stamp cartridge 3 Use a pair of - Canon 7080C | User Manual - Page 95
protrude outside the hole. ● Improperly installing the stamp cartridge can cause paper jams. 5 Close the feeder guide. Take care to avoid pinching your fingers when closing the feeder guide. CAUTION 6 Close the feeder cover. Take care to avoid pinching your fingers when closing the feeder cover - Canon 7080C | User Manual - Page 96
To maintain high-quality scanning, you should periodically clean the following: • Main unit • Flatbed (Platen glass) • Pressure Board • Feeder CAUTION ■ Before you clean the scanner, turn OFF the scanner and computer and disconnect the power cord from the power outlet. Otherwise, an electrical - Canon 7080C | User Manual - Page 97
pressure board periodically. 1 Raise the feeder. CAUTION Open the feeder carefully and slowly, taking care to avoid letting the feeder fall over backwards. 2 Wipe the flatbed (platen glass) and pressure board with a cloth moistened with plain water and thoroughly wrung out. Next, wipe the - Canon 7080C | User Manual - Page 98
slowly, taking care to avoid pinching your fingers. Failure to do so might result in personal injury. Cleaning the Feeder Without periodical cleaning, a problem may be caused on the scanned image or the document may become soiled. Clean the feeder periodically. 1 Open the feeder cover. Operate the - Canon 7080C | User Manual - Page 99
wrung out. Next, wipe the rollers dry with a soft, dry cloth. 3 Wipe the three rollers on the feeder guide with a cloth moistened with plain water and thoroughly wrung out. Next, wipe the rollers dry with a soft, dry cloth. 4 Grasping the tab inside the scanner, open the feeder guide. 7 95 - Canon 7080C | User Manual - Page 100
with a cloth moistened with plain water and thoroughly wrung out. Next, wipe the rollers dry with a soft, dry cloth. 6 Wipe the four rollers inside the feeder guide with a cloth moistened with plain water and thoroughly wrung out. Next, wipe the rollers dry with a soft, dry cloth. 7 Close the feeder - Canon 7080C | User Manual - Page 101
slowly, taking care to avoid letting the feeder fall over backwards. 10 Wipe the scanning glass (narrow strip of glass) to the left of the flatbed (platen glass) with a cloth moistened with plain water and thoroughly wrung out. Next, wipe the glass dry with a soft, dry cloth. 7 97 - Canon 7080C | User Manual - Page 102
Chapter 7 User Maintenance 11 Wipe the metal next to the rubber rollers with a cloth moistened with plain water and thoroughly wrung out. Next, wipe the metal dry with a soft, dry cloth. 12 Slowly and carefully lower the - Canon 7080C | User Manual - Page 103
Appendix This appendix contains the specifications and index. Specifications 100 Specifications for the Scanner 100 Options 101 Consumables 101 Exterior Dimensions 102 Index 103 - Canon 7080C | User Manual - Page 104
Specifications Specifications for the Scanner Type Document Size Document Thickness Document Weight Document Feeding Scanning Method Desktop ADF/flatbed scanner Color Documents Mixed 13 to 32 lb bond/50 to 128 g/m2 Color Documents 17 to 32 lb bond/64 to 128 g/m2 Feeder/Flatbed 24-bit color - Canon 7080C | User Manual - Page 105
You can use the functions noted above if the software supports them. ● They may not work depending on your computer's capabilities and the software you are using. Specifications are subject about options and consumables, contact your sales representative or your service representative. 101 - Canon 7080C | User Manual - Page 106
Appendix Exterior Dimensions Units: inches (units in parentheses are millimeters) 23.7" (602 mm) 27.1" (688 mm) 22.6" (575 mm) 0.4" (10 mm) 13.3" (377 mm) 22.2" (565 mm) 11.7" (297 mm) 5.8" (148 mm) 11.8" (300 mm) 102 - Canon 7080C | User Manual - Page 107
Event function 60 Exterior dimensions 102 - F - Features of DR-7080C 12 Feeder 16 -Document eject tray 16 -Document feeder tray 16 -Document set indicator 16 -Feeder cover 16 -Opening lever 16 -Slide guide 16 File separation 63 Flatbed 17, 64 -Opening sensor 17 -Platen glass 17 -Power - Canon 7080C | User Manual - Page 108
scanner 31 Rubber roller guide 48 Software 36 -How to use the software 39 -Installation 37 -Uninstallation 43 Specifications 100 Stamp cartridge 90 Stamp unit 21 Standard feeding 55 Stand-by Mode 70 Start key 19 Stop key 19 - T - Terminator 26 Transportation screw 15 Troubleshooting - Canon 7080C | User Manual - Page 109
with the Job Registration Tool. (See "Job Registration Tool," on p. 42.) Make a copy of this page and the next page and keep them near the scanner. Job No. Job Title Function Scan to PC Scan to Printer Scan to Mail Scan to PC Scan to Printer Scan to Mail Scan to - Canon 7080C | User Manual - Page 110
Job No. Job Title Function Scan to PC Scan to Printer Scan to Mail Scan to PC Scan to Printer Scan to Mail Scan to PC Scan to Printer Scan to Mail Scan to PC Scan to Printer Scan to Mail Scan to PC Scan to Printer Scan to Mail Scan to PC Scan to Printer Scan to Mail Scan to PC Scan to - Canon 7080C | User Manual - Page 111
- Canon 7080C | User Manual - Page 112
ELECTRONICS INC. 1248, SHIMOKAGEMORI, CHICHIBU-SHI, SAITAMA 369-1892, JAPAN CANON U.S.A. INC. ONE CANON PLAZA, LAKE SUCCESS, N.Y. 11042, U.S.A. CANON CANADA INC. 6390 DIXIE ROAD, MISSISSAUGA, ONTARIO L5T 1P7, CANADA CANON EUROPA N.V. BOVENKERKERWEG 59-61, P.O.BOX 2262 AMSTELVEEN, THE NETHERLANDS
-
 1
1 -
 2
2 -
 3
3 -
 4
4 -
 5
5 -
 6
6 -
 7
7 -
8
-
9
-
10
-
11
-
12
-
13
-
14
-
15
-
16
-
17
-
18
-
19
-
20
-
21
-
22
-
23
-
24
-
25
-
26
-
27
-
28
-
29
-
30
-
31
-
32
-
33
-
34
-
35
-
36
-
37
-
38
-
39
-
40
-
41
-
42
-
43
-
44
-
45
-
46
-
47
-
48
-
49
-
50
-
51
-
52
-
53
-
54
-
55
-
56
-
57
-
58
-
59
-
60
-
61
-
62
-
63
-
64
-
65
-
66
-
67
-
68
-
69
-
70
-
71
-
72
-
73
-
74
-
75
-
76
-
77
-
78
-
79
-
80
-
81
-
82
-
83
-
84
-
85
-
86
-
87
-
88
-
89
-
90
-
91
-
92
-
93
-
94
-
95
-
96
-
97
-
98
-
99
-
100
-
101
-
102
-
103
-
104
-
105
-
106
-
107
-
108
-
109
-
110
-
111
-
112
 |
 |

Document Scanner
INSTRUCTIONS
Please read this manual before operating this unit. After you finish
reading this manual, store it in a safe place for future reference.
INSTRUCTIONS