Canon BJC-250 Series User Manual
Canon BJC-250 Series Manual
 |
View all Canon BJC-250 Series manuals
Add to My Manuals
Save this manual to your list of manuals |
Canon BJC-250 Series manual content summary:
- Canon BJC-250 Series | User Manual - Page 1
BJC-250 USER'S MANUAL Canon - Canon BJC-250 Series | User Manual - Page 2
BJC-250 Contents 1 Introduction 1.1 Supplies and Accessories 1.2 BJ Cartridges 1.2 Canon Specialty Papers 1.4 Getting Help From Canon 1.5 Servicing the Printer 1.6 2 Using the Printer With Windows® 2.1 Installing the Printer Driver 2.1 Printing a Document 2.2 Printer Setup Within - Canon BJC-250 Series | User Manual - Page 3
the Print Head from Windows Cleaning the Print Head Using the Operators Panel BJ Cartridge Guidelines BJ Cartridge Maintenance Replacing the BJ Cartridge Storing a BJ Cartridge Transporting the Printer 5 Troubleshooting Identifying Your Printer Problem General Problems Clearing Paper Jams Technical - Canon BJC-250 Series | User Manual - Page 4
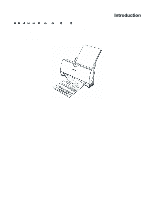
Congratulations on your purchase of the Canon BJC-250 Series Color Bubble Jet™ Printer. We appreciate your choosing this printer to meet your printing needs. The BJC-250 Series printers offer excellent print quality and fast print speed using both color and black inks. We are certain you will - Canon BJC-250 Series | User Manual - Page 5
you, call the Canon Referral Service at 1-800-848-4123. If supplies are not available from your local dealer, you can order directly from Canon by calling 1-800-671-1090 BJ Cartridges You can use the following Canon BJ cartridges with the BJC-250 Series printers: o BC-05 Color BJ Cartridge o BC-02 - Canon BJC-250 Series | User Manual - Page 6
You can also purchase the optional Canon Photo Kit BC-06, which includes everything you need to produce photo-realistic images: o BC-06 Photo BJ Cartridge o SB-05 Ink Cartridge Storage Box o Canon High Resolution Paper HR-101 (60 sheets) See Chapter 4, Maintaining the Printer, for details on the BJ - Canon BJC-250 Series | User Manual - Page 7
Specialty Papers Canon manufactures numerous specialty papers, including: o Glossy Photo Paper GP-201 o Banner Paper o High Resolution Paper HR-101 o T-Shirt 102 Transparencies o Back Print Film BF-102 o High Gloss Film HG-101 See Chapter 3, Paper Handling, for details on Canon's Specialty Papers. - Canon BJC-250 Series | User Manual - Page 8
Help From Canon Canon Computer Systems, Inc. offers a full range of customer technical support options including*: o 24-hour, 7-day-a-week, toll free automated support for troubleshooting issues on most current products (1-800-423-2366) o Speak to a technician free of service charge (currently - Canon BJC-250 Series | User Manual - Page 9
Servicing the Printer The Canon BJC-250 Series Color Bubble Jet Printers are designed with the latest technology to provide trouble-free operation. The warranty card that comes with the printer describes Canon's one year limited warranty for your Bubble Jet printer. Be sure to read the warranty - Canon BJC-250 Series | User Manual - Page 10
. You define these settings within the printer driver, and the printer driver then communicates the settings to both the computer and the printer. You must install the BJC-250 Printer Driver for windows before you can use the printer with your computer. See your Quick Start Guide for instructions. - Canon BJC-250 Series | User Manual - Page 11
. 2 Make sure the Canon BJC-250 is selected as your default printer. Choose Print Setup from the File menu. Click on the Setup button if you want to make any adjustments as appropriate for printing your document. (See Print Setup Within Windows 95 or Printer Setup Within Windows 3.1 for details - Canon BJC-250 Series | User Manual - Page 12
Choose Print from the File menu. After making any necessary changes to the printing parameters, select OK to start the print job. 2 of 2 4/9/98 3:46 PM - Canon BJC-250 Series | User Manual - Page 13
then select Properties from the drop down list. Using the Printer Driver in Windows 95 The printing options are displayed on the following Windows 95 tabs: General, Details, Paper, Graphics, Setting, and Control. See The Windows Tabs section (page 2-5) for details. For detailed information on any - Canon BJC-250 Series | User Manual - Page 14
does not appear in the file menu for your application, refer to the user's manual supplied with the application. It should provide information about changing the printer setup parameters. In Windows 3.1, the printing options are displayed on these tabs: Paper, Graphics, Setting, and Control. See - Canon BJC-250 Series | User Manual - Page 15
has several tabs from which you select you printing options and learn about your printer drivers well as your printer. General (Windows 95 only) This tab allows you to add comments regarding the printer driver and print test page or a separator page. (You see this tab when you open the Properties - Canon BJC-250 Series | User Manual - Page 16
. (The printing options on this tab are the same for both Windows 95 and Windows 3.1. However, the Image Color Matching feature is available in Windows 95 only.) Setting This tab allows you to turn on or off the Setup Analyzer and Cartridge Detection. It also allows you to save up to four custom - Canon BJC-250 Series | User Manual - Page 17
Control This tab allows you to print test pages, turn off the printer, enable or disable the auto power on feature, and clean the print head. It also allows you to turn off the printer after a certain period of inactivity. (The printing options on this tab are the same for both Windows 95 and - Canon BJC-250 Series | User Manual - Page 18
Specifying Your Printer Options Be sure to use your on-line help to find out about the settings available for each printing options. To move between the Windows tabs, click on any of the tabs. To save the settings and exit, click the OK button. To cancel your settings selections on a tab, click - Canon BJC-250 Series | User Manual - Page 19
- Canon BJC-250 Series | User Manual - Page 20
the Setting tab, click on the green check to enable the Setup Analyzer. Click on the red Ø symbol to disable it. When you exit the printer driver and accept your printing settings by clicking the OK button, the Setup Analyzer (if enabled) checks to see if any of your settings are contrary - Canon BJC-250 Series | User Manual - Page 21
is located on the Setting tab, click the green check. Click on the red Ø symbol to disable it. If cartridge Detection cannot detect the cartridge type, it advises you to check that you printer is on-line and that the cables are secure. If you choose the monochrome Color Model and you have - Canon BJC-250 Series | User Manual - Page 22
Use the optional BC-02 Black BJ Cartridge to optimize the printer's performance when you are printing black text and graphics only. In the BJC-250 Printer Driver for Windows, choose the following settings to tell your printer to print using black ink only. Media Type---Plain Paper Print Quality - Canon BJC-250 Series | User Manual - Page 23
swap file that is from 4 MB to 9 MB. The computer will be able to prepare the print file faster. See your Windows documentation for instructions. Avoid diffusion halftones. In the Custom Settings dialog box, choose Diffusion only when printing final output or photographic images. Choosing a Halftone - Canon BJC-250 Series | User Manual - Page 24
, yellow, magenta, blue, green, and red when possible. The computer will need to calculate and transfer less dot information. Use the Draft print quality. The printer will need to image fewer dots. Use Plain Paper as Media Type. The print head will make only on pass for each printed line. Use - Canon BJC-250 Series | User Manual - Page 25
Selecting paper types Setting the paper thickness lever Summary of printer settings for various print media Automatically loading paper Manually feeding paper Printing on envelopes Using Canon's Specialty Papers To ensure the best performance of your printer, you'll want to select the best paper and - Canon BJC-250 Series | User Manual - Page 26
paper with the BC-06 Photo BJ Cartridge to produce photo-realistic prints from your printer. Be sure to print on the glossy side. (In your print driver, select Glossy Paper when you have Glossy Photo Paper loaded.) 250 Chapter 3 Page 2 Banner Paper Canon's Banner Paper is specifically designed for - Canon BJC-250 Series | User Manual - Page 27
(when you use T-Shirt Transfer mode through the BJC-250 Printer Driver for Windows) so when you iron it onto the t-shirt the image is viewed correctly. Greeting Cards Get the most out of your Canon Creative or other card making software with Canon Greeting Cards GC-101. These cards give your unique - Canon BJC-250 Series | User Manual - Page 28
graph paper, the lines may not match because the 1/6 inch line spacing of the printer is slightly less than that of graph paper. If the print density of your light paper stock may curl slightly due to the large amount if ink. If you need to print dense graphics, try printing on heavier stock. Do - Canon BJC-250 Series | User Manual - Page 29
Setting the Paper Thickness Lever To ensure trouble-free paper handling, you'll want to set the paper thickness lever before loading paper. Set the lever according to the thickness of the paper - Canon BJC-250 Series | User Manual - Page 30
Printer Setting for Various Print Media - Canon BJC-250 Series | User Manual - Page 31
, or you can manually feed one sheet at a time through the manual feed slot. You place 10 sheets of back print film in the sheet feeder. However, these special media may not advance correctly under unusual environmental conditions (such as extreme temperatures or humidity). If you have trouble - Canon BJC-250 Series | User Manual - Page 32
2 Pull the Paper Support up until it stops. 3 Fan the paper For best results, fan the paper before loading it. Always fan a stack of paper along the edge that will - Canon BJC-250 Series | User Manual - Page 33
4 Slide the stack of paper into the sheet feeder until it stops Align the edge of the paper with the right edge of the sheet feeder. Secure the stack with the paper guide 5 Start your print operation. Make sure that the printer is turned on. - Canon BJC-250 Series | User Manual - Page 34
print media (17 lb to 28 lb or 64 g/m² to 105 g/m²). 1 If you are manually feeding thick paper, set the thickness lever to the right. 2 Start your print operation. If you are using Windows, you must select Manual Feed in the BJC-250 Printer Driver for the printer to accept manually fed paper. - Canon BJC-250 Series | User Manual - Page 35
until it stops inside the sheet feeder. Align the sheet with left edge of the manual feed slot. Hold the sheet for about two seconds until it feeds automatically. The printer will automatically load the paper into position After printing on thick paper or envelopes, set the paper thickness lever - Canon BJC-250 Series | User Manual - Page 36
sizes in the sheet feeder; however, Canon cannot guarantee consistent performance on envelope sizes other COM10 and DL. The following envelopes are not recommended because they may cause jams or smears, or may damage your printer. Envelopes with windows, holes, perforations, cutouts, and double - Canon BJC-250 Series | User Manual - Page 37
2 Make sure the paper support is raised. 3 Prepare the envelopes. Arrange the stack of envelopes on a firm surface and press down firmly on the edges to make the folds crisp. - Canon BJC-250 Series | User Manual - Page 38
4 Insert the envelopes. Slide a stack of envelopes into the sheet feeder until it stops. Align the edge of the paper guide with the left edge of the stack of envelopes. 5 Start your print operation. Make sure the printer is on. - Canon BJC-250 Series | User Manual - Page 39
Be sure to read any instructions that come with your Canon Specialty Paper. These instructions provide important information regarding how . Paper type Canon Glossy Photo Paper GP-210 Canon Fabric Sheet FS-101 Canon CF-102 Transparencies Canon Back Print Film BF-102 Drying time 10 minutes 1 Hour - Canon BJC-250 Series | User Manual - Page 40
Uncurling Back Print Film If Back Print Film becomes curled, follow these steps to uncurl it: 1 Cover the non-glossy side of the film with a sheet of plain paper. 2 Roll the film and paper up in the direction opposite the curl. 3 Keep the film rolled up for five minutes. - Canon BJC-250 Series | User Manual - Page 41
with the paper to remove paper dust from the printer's rollers; this will help prevent paper feed problems. Using the Cleaning Sheet 1 Set up the printer. Make sure the paper thickness lever is to the lever. Make sure the paper support is extended. 2 Insert the cleaning sheet. Remove the two - Canon BJC-250 Series | User Manual - Page 42
Sheet 1 Setup the printer. Make sure the paper thickness lever is to the right position. Make sure the paper support is extended. 2 Insert the fabric sheet. Insert the sheet with the cloth side out (toward you) and open end up (away from the sheet feeder) Adjust the paper guide to the edge of - Canon BJC-250 Series | User Manual - Page 43
BJC-250 Printer Driver for Windows. In the Paper tab, select A4 for the Paper Size and select Fabric Sheet for the Print Media. In the graphics tab, select High for the Print Quality. Start the print operation from your Windows running water to remove the extra ink Hang the fabric sheet up to - Canon BJC-250 Series | User Manual - Page 44
Printing on Banner Paper For best results, use Canon Banner Paper. To set up a print job on banner quite a bit of ink. If you think your BJ cartridge may run out of ink, use a new BJ cartridge. For best print results on Banner Paper, use light design patterns. To prevent ink from running over the - Canon BJC-250 Series | User Manual - Page 45
1 Set the paper thickness lever. Open the front cover. Use both hands to open the front cover. Set the paper thickness lever to the right. Close the front cover. 2 Cut the Banner at the crease according to the length you need. The maximum length you can use is six sheets (66 inches) or 1676 mm). - Canon BJC-250 Series | User Manual - Page 46
right edge of the sheet feeder and slide it into the printer until it stops. Then adjust the paper guide to the edge of the paper. Do not allow the paper to hang over the edge of the desk or work table. Do not extend the paper support for - Canon BJC-250 Series | User Manual - Page 47
the File Menu, select Print. Then select your print options using the BJC-250 Printer Driver for Windows. For the Paper Feed Method, select Automatic Feed. For the Media Type, select Banner. See your application software instructions for other options. 7 Start Printing. Click OK or Print to start - Canon BJC-250 Series | User Manual - Page 48
Maintaining the Printer This chapter covers the care required for your printer. It includes: Printer guidelines Cleaning the printer Printing the test pages Cleaning the print head BJ cartridge guidelines Replacing the BJ cartridge Storing a BJ cartridge Transporting the printer - Canon BJC-250 Series | User Manual - Page 49
unplug the AC adapter unnecessarily. Do not unplug the printer or turn off a power strip to which the printer is attached when the printer's power is turned on. This may prevent the mechanism that holds the BJ cartridge. Attempting to move the BJ cartridge holder may damage delicate mechanical parts. - Canon BJC-250 Series | User Manual - Page 50
so will damage the surface of the printer. When cleaning the printer, avoid the area near the print head on the BJ cartridge. Do not touch the print head. Ink may leak out and cause stains. Clean the printer regularly to avoid printing problems. Remove any ink mist or paper debris from the interior - Canon BJC-250 Series | User Manual - Page 51
Printing the Test Pages You can print these test pages to check the operation of your printer and your print quality. Test A This test prints a repeating pattern of characters. - Canon BJC-250 Series | User Manual - Page 52
Demonstration This test prints a sample page describing the printer's features. - Canon BJC-250 Series | User Manual - Page 53
Nozzle Test Use this test print to check that each print head nozzle is operating properly. When the BC-05 Color BJ cartridge is installed, the pattern includes the three colors: yellow, magenta, and cyan. In the color pattern, you'll notice that lines are missing between the - Canon BJC-250 Series | User Manual - Page 54
use the Test option on the Control tab in your BJC-250 Printer Driver for Windows to print a self test, demonstration page, or a nozzle test pattern. Before selecting a Tests option, make sure paper is properly loaded in the sheet feeder (see - Canon BJC-250 Series | User Manual - Page 55
Printing the Test Pages Using the Operator Panel To print a test page, make sure the printer is turned off and paper is loaded. Press and hold the POWER button until you hear the number of beeps that correspond to the test - Canon BJC-250 Series | User Manual - Page 56
the Print Head Your printer is equipped with a print head cleaning function to ensure constant high quality printing. Cleaning the Print Head From Windows If you are using Windows, you can execute print head cleaning from the Control sheet in the printer driver. Simply click on Clean Ink Head. - Canon BJC-250 Series | User Manual - Page 57
print head is being cleaned Perform the print head cleaning only when you encounter a print quality problem. Unnecessary and repetitious cleaning will waste ink. If you execute the print head cleaning while paper is manually loaded, the printer will eject the paper and then perform the cleaning. - Canon BJC-250 Series | User Manual - Page 58
Guidelines You can use these cartridges with the printer. BC-05 Color BJ Cartridge Use this cartridge for all your color printing needs. BC-02 Black BJ Cartridge Use this cartridge for high-speed, black ink only printing. BC-06 Photo BJ Cartridge Use this cartridge for photo-realistic color printing - Canon BJC-250 Series | User Manual - Page 59
thing you can do to extend the life of your printer and to ensure optimum print quality is to take care of the BJ cartridges. Spilled ink can stain any surface. Open BJ cartridges carefully, and follow the guidelines presented here to protect against spilled ink. If you are using the BC-05 Color BJ - Canon BJC-250 Series | User Manual - Page 60
how to replace the bc-05 Color BJ cartridge with the BC-02 Black BJ Cartridge. Follow the instructions in this section to replace an old BJ cartridge or to change BJ cartridges when you are switching between the BC-05 and any of the other BJ cartridges. 1 Open the front cover. Grip the cover on - Canon BJC-250 Series | User Manual - Page 61
Store or dispose of the BJ cartridge. If you are replacing an old BJ cartridge, dispose of the old cartridge properly. If you are switching cartridges, you must store the cartridge you are removing in the Ink Cartridge Storage Box. 4 Take the new BJ cartridge out of its protective packaging. Peel - Canon BJC-250 Series | User Manual - Page 62
pressed against the back of the holder 7 Press the lock lever down completely; do not use excessive force. Make sure the cartridge is secure, and the lever locks into place. Make sure there is no resistance when you press on the lock lever; it should lock easily - Canon BJC-250 Series | User Manual - Page 63
if you turn off a power strip to which the printer is connected), or if you manually move the cartridge holder from the home position, the BJ cartridge will not be capped and it may dry out. If you installed a new BJ cartridge, the printer automatically cleans the print head. If you need to initiate - Canon BJC-250 Series | User Manual - Page 64
, you must either install it in the printer or store it in the Ink Cartridge Storage Box to prevent the print head from drying and clogging. 1 Open the Ink Cartridge Storage Box. When opening or closing the Ink Cartridge Storage Box, press in on the release tab that locks the cover in place - Canon BJC-250 Series | User Manual - Page 65
the tab. Then press down to lock the cover in place. Whenever you remove a BJ cartridge from the printer, store the cartridge in the storage box (unless you are disposing of it). If you have more than one Ink Cartridge Storage Box, you can hook them together. Simply connect them by the slides and - Canon BJC-250 Series | User Manual - Page 66
it is not a portable printer and need to take care when transporting it. The printers' components, such as . If you plan to move the printer from one location to another, or if you want to store it, follow the steps below. 1 Turn off the printers power. Make sure the print head is in the - Canon BJC-250 Series | User Manual - Page 67
3 Close the front cover. Return the paper support and paper output tray to their original positions. 4 Repack the printer in its original packing materials. Do not remove the BJ cartridge from the printer or ship a BJ cartridge from which you have removed the protective cap. An opened BJ - Canon BJC-250 Series | User Manual - Page 68
solving information, be sure to use our other support services. See Getting Help From Canon in Chapter 1 (page 1-5) for details on Canon's customer technical support options. Identifying Your Printer Problem Before contacting Canon, identify your printer problem and make sure you have the following - Canon BJC-250 Series | User Manual - Page 69
The most basic problems you may encounter are "the printer does not print" and " your print quality is not satisfactory" If the printer does not print Check all your cable connections Check your printer driver setup Check your computer configuration Check your BJ cartridge If your print quality - Canon BJC-250 Series | User Manual - Page 70
, open the front cover and remove the paper left inside the printer. 3 Turn the printer on. Press the POWER button to turn the printer back on. The POWER light comes on and the print head moves to the home position. The printer is now ready for printing. If you are printing high density graphics - Canon BJC-250 Series | User Manual - Page 71
Notes Compaq Presario 7170/7180 Problem A [k prints at the top of the page when printing from Windows 95 on a Compaq to save new configuration, and confirm save by answering "Yes" to final question Toshiba Laptop Problem A[K prints at the top of the page and/or partial printout when printing on a - Canon BJC-250 Series | User Manual - Page 72
the Microsoft Web page. To change the CMOS settings: From Windows 95, click on Start Go to Programs Select Toshiba Utilities You will have either TSETUP or HARDWARE SETUP UTILITY For TSETUP Select Hardware Options Select Parallel/ Printer Select Standard bi-directional Click OK The computer will ask - Canon BJC-250 Series | User Manual - Page 73
from Compaq Tech Support. Go to Control Panel System Device Manager Click "+" in Front of Port Highlight ECP Printer Port Properties Driver Change Driver.... Show all Devices Printer Port Click OK Click OK Close Reboot If these suggestions do not solve the problem, you need to call Canon (see page - Canon BJC-250 Series | User Manual - Page 74
Film (CF-102) Canon Back Print Film (BF-102) Canon High Gloss Film (HG-101) Canon Glossy Photo Paper (GP-201) Fabric Sheets (FS-101) for Canon Bubble Jet Printers Canon T-Shirt Transfers (TR-101) Canon Greeting Cards (GC-101) Canon Banner Paper Commercial Number 10 European DL Paper Weight - Canon BJC-250 Series | User Manual - Page 75
Automatic Feed Manual Feed Print Speed BC-05 BC-02 Print Width Maximum Line Feed Speed line at 1/6-inch line feeds Bi- Directional in text Unidirectional in graphics with BC-02 Black BJ Cartridge with BC-05, BC-06, BC-09F Printable Area - Papers The shaded portion the following figure shows the printing - Canon BJC-250 Series | User Manual - Page 76
Printable Areas - Envelopes The shaded portion in the following figure shows the printing area for an envelope. - Canon BJC-250 Series | User Manual - Page 77
Cartridge (optional) Print Head Ink Color Life Expectancy BC-06 Photo BJ Cartridge (optional) Print Head Life Expectancy BJ Cartridges Power Consumption Dimensions (paper support not extended) Weight IEEE-1284 (A) Per ISO 9296 41°F to 95°F (0°C to 35°C) 10% to 90% RH (no condensation) 32°F to 95°F
-
 1
1 -
 2
2 -
 3
3 -
 4
4 -
 5
5 -
 6
6 -
 7
7 -
8
-
9
-
10
-
11
-
12
-
13
-
14
-
15
-
16
-
17
-
18
-
19
-
20
-
21
-
22
-
23
-
24
-
25
-
26
-
27
-
28
-
29
-
30
-
31
-
32
-
33
-
34
-
35
-
36
-
37
-
38
-
39
-
40
-
41
-
42
-
43
-
44
-
45
-
46
-
47
-
48
-
49
-
50
-
51
-
52
-
53
-
54
-
55
-
56
-
57
-
58
-
59
-
60
-
61
-
62
-
63
-
64
-
65
-
66
-
67
-
68
-
69
-
70
-
71
-
72
-
73
-
74
-
75
-
76
-
77
 |
 |

BJC-250
USER’S
MANUAL
Canon