Canon CONSOLE Image Control & Storage Software v1.1 CONSOLE_V1-1_ENG.pdf
Canon CONSOLE Image Control & Storage Software v1.1 Manual
 |
View all Canon CONSOLE Image Control & Storage Software v1.1 manuals
Add to My Manuals
Save this manual to your list of manuals |
Canon CONSOLE Image Control & Storage Software v1.1 manual content summary:
- Canon CONSOLE Image Control & Storage Software v1.1 | CONSOLE_V1-1_ENG.pdf - Page 1
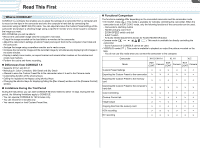
using an IEEE1394 (DV) cable. You can adjust and save the Custom Preset settings of the camcorder and analyze a shooting image using a waveform monitor and a vector scope to compose the image you want. Uninstalling the Software Troubleshooting This software is for use with Windows® XP (Service - Canon CONSOLE Image Control & Storage Software v1.1 | CONSOLE_V1-1_ENG.pdf - Page 2
6-50 Output to the Camcorder 6-51 Time Slider...6-51 Waveform Vector Monitor 6-52 File Browser 6-52 Copying from the Memory Card 6-52 Uninstall Uninstalling the Software 7-54 Uninstalling the AV/C Camera Storage Subunit-WIA Driver 7-54 Uninstalling of the Drivers 7-55 Appendix Troubleshooting - Canon CONSOLE Image Control & Storage Software v1.1 | CONSOLE_V1-1_ENG.pdf - Page 3
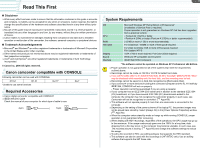
XL2* Required Accessories Canon digital camcorder compatible with CONSOLE IEEE1394 (DV) Cable Check the manual of your computer for which type of cable to use: 4-pin: 6-pin: System Requirements OS CPU RAM Hard Disk Display Sound Interface Microsoft Windows XP Home Edition or Professional - Canon CONSOLE Image Control & Storage Software v1.1 | CONSOLE_V1-1_ENG.pdf - Page 4
and to record on the tape in the camcorder and onto the computer's hard disk by connecting the camcorder using an IEEE1394 (DV) cable. You can adjust and save the Custom Preset settings of the camcorder and analyze a shooting image using a waveform monitor and a vector scope to compose the image you - Canon CONSOLE Image Control & Storage Software v1.1 | CONSOLE_V1-1_ENG.pdf - Page 5
, Launch, Activation) Installing the Software and Drivers...1-6 Installing CONSOLE and the Canon Virtual VCR Driver 1-6 Installing the AV/C Camera Storage Subunit-WIA Driver 1-7 Connecting the Camcorder ...1-8 Connecting the Camcorder to the Computer 1-8 Launching CONSOLE ...1-9 Changing - Canon CONSOLE Image Control & Storage Software v1.1 | CONSOLE_V1-1_ENG.pdf - Page 6
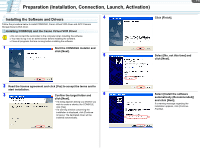
, Launch, Activation) Installing the Software and Drivers 4 Follow the procedure below to install CONSOLE, Canon Virtual VCR driver and AV/C Camera Storage Subunit-WIA driver. Installing CONSOLE and the Canon Virtual VCR Driver Do not connect the camcorder to the computer when installing the - Canon CONSOLE Image Control & Storage Software v1.1 | CONSOLE_V1-1_ENG.pdf - Page 7
the installation of the driver. 1 Turn the camcorder's power on and activate the DV CONTROL function. 2 Set the camcorder's recording program to EXT.CONT. 3 Connect the camcorder to the computer using the IEEE1394 (DV) cable. ( 1-8) • For details about connecting the camcorder to the computer, refer - Canon CONSOLE Image Control & Storage Software v1.1 | CONSOLE_V1-1_ENG.pdf - Page 8
adjustments except for AUDIO MONITOR button 3 Connect the camcorder to the computer using the IEEE1394 (DV) cable. • You do not need to turn off the computer. • Do not deactivate the DV CONTROL function while the camcorder is connected to the computer. • Refer to the computer manual for the location - Canon CONSOLE Image Control & Storage Software v1.1 | CONSOLE_V1-1_ENG.pdf - Page 9
using CONSOLE, you need to deactivate the Windows program that automatically prompts you to choose an application when you connect the camcorder to the computer (set to "Take no action"). 1 Set the camcorder's recording program to EXT.CONT. or Camera mode. ( 1-8) 2 Right-click on [Canon Camera - Canon CONSOLE Image Control & Storage Software v1.1 | CONSOLE_V1-1_ENG.pdf - Page 10
license key, please visit the Canon's download site. • You can use the same license key you have camcorder is not connected to the computer, the product ID will not be displayed. Product ID 5 Visit the Canon's download site where you downloaded the trial version software and follow the instructions - Canon CONSOLE Image Control & Storage Software v1.1 | CONSOLE_V1-1_ENG.pdf - Page 11
1-11 Preparation (Installation, Connection, Launch, Activation) 3 Click [Register] in the trial 5 Click [Register] after entering the license key and a user name. confirmation window. If you are already running the software, select [Version] [About CONSOLE] and click the [Register] button. - Canon CONSOLE Image Control & Storage Software v1.1 | CONSOLE_V1-1_ENG.pdf - Page 12
Chapter 2 CONSOLE Windows Main Panel ...2-13 Menu Bar...2-13 Camcorder Status ...2-14 Toolbar ...2-14 Work Space ...2-15 Camcorder Screen ...2-15 - Canon CONSOLE Image Control & Storage Software v1.1 | CONSOLE_V1-1_ENG.pdf - Page 13
Various Settings and [Performance Check] Camera and Picture Control Recording onto the Hard Disk Playback the Recorded Files CONSOLE Windows 2-13 Main Panel 1 6 5 Menu Bar „ [File] Menu 1 2 3 1 Displays the [Option Settings] window ( 3-17). 2 Changes the default shortcut key settings ( Appx - Canon CONSOLE Image Control & Storage Software v1.1 | CONSOLE_V1-1_ENG.pdf - Page 14
and Picture Control Recording onto the Hard Disk Playback the Recorded Files CONSOLE Windows 2-14 „ [Version] Menu „ Main Toolbar 1 2 3 4 1 1 Displays the version and the license information. Camcorder Status This status shows the name of the camcorder connected and status of the tape - Canon CONSOLE Image Control & Storage Software v1.1 | CONSOLE_V1-1_ENG.pdf - Page 15
not displayed, activate the DV CONTROL function of the camcorder. When XL2 is connected to the computer and other device is connected using IEEE1394, the status of the camcorder and the remaining recording time will not be displayed on the camcorder's LCD screen. When the hard disk does not - Canon CONSOLE Image Control & Storage Software v1.1 | CONSOLE_V1-1_ENG.pdf - Page 16
Chapter 3 Various Settings and [Performance Check] Video Folder and Recording Settings...3-17 [General] Tab...3-17 [DV Rec] Tab ...3-18 [HDV Rec] Tab ...3-18 [Performance Check]...3-19 Changing the Default Shortcut Key Settings 3-21 - Canon CONSOLE Image Control & Storage Software v1.1 | CONSOLE_V1-1_ENG.pdf - Page 17
onto the hard disk. CONSOLE only saves the settings of the camcorder when the recoding is started. The name of the Custom Preset file will be the recording file name, and the extension is ".cpf". • When [Sequence] or [Frame] mode is selected in the [DV Rec] tab of the [Option Settings] window, the - Canon CONSOLE Image Control & Storage Software v1.1 | CONSOLE_V1-1_ENG.pdf - Page 18
DV-MXF]. For details, refer to the instruction manual of the software or consult the software manufacturer. 2 Select a mode for recoding onto the hard Name_sub.WAV". When using the editing software, load all the sound files. The recorded [MPEG2ES] picture cannot be output to the camcorder. When - Canon CONSOLE Image Control & Storage Software v1.1 | CONSOLE_V1-1_ENG.pdf - Page 19
CONSOLE Windows Various Settings and [Performance Check] Camera and Picture Control Recording onto the Hard Disk Playback the Recorded Files 3-19 Various Settings and [Performance Check] [Performance Check] You can check whether the selected video folder can be used for saving the recordings - Canon CONSOLE Image Control & Storage Software v1.1 | CONSOLE_V1-1_ENG.pdf - Page 20
CONSOLE Windows Various Settings and [Performance Check] Camera and Picture Control Recording onto the Hard Disk Playback the Recorded Files 3-20 Various Settings and [Performance Check] 3 Click [Start] on the right side. The performance check of the system starts. 4 Review the result and click - Canon CONSOLE Image Control & Storage Software v1.1 | CONSOLE_V1-1_ENG.pdf - Page 21
CONSOLE Windows Various Settings and [Performance Check] Camera and Picture Control Recording onto the Hard Disk Playback The new key setting will not be applied unless you click [Apply]. Clicking [Set Original] initializes the shortcut key settings to the default parameters ( Appx-61). 5 Click - Canon CONSOLE Image Control & Storage Software v1.1 | CONSOLE_V1-1_ENG.pdf - Page 22
[Focus Assist] ...4-28 [Camera Control] ...4-28 [Control] Tab...4-29 [Information] Tab ...4-31 Waveform Vector Monitor ...4-32 [Color Control] ...4- ...4-39 Practical Usages of the Custom Preset Files 4-40 Use of the Disconnected Camcorder After Adjusting the Custom Preset Files 4-40 Passing Down - Canon CONSOLE Image Control & Storage Software v1.1 | CONSOLE_V1-1_ENG.pdf - Page 23
CONSOLE Windows Various Settings and [Performance Check] Camera and Picture Control Recording onto the Hard Disk Playback the Recorded Files Camera and Picture Control 4-23 Using the Recording tool to adjust the picture settings of the camcorder to create a picture in the [Rec Panel]. [Rec Viewer] - Canon CONSOLE Image Control & Storage Software v1.1 | CONSOLE_V1-1_ENG.pdf - Page 24
CONSOLE Windows Various Settings and [Performance Check] Camera and Picture Control Recording onto the Hard Disk Playback the Recorded Files Camera and Picture Control 4-24 Overlaying Marker You can display the overlaying marker in the preview. The safety zone (90% and 80% of the preview image - Canon CONSOLE Image Control & Storage Software v1.1 | CONSOLE_V1-1_ENG.pdf - Page 25
CONSOLE Windows Various Settings and [Performance Check] Camera and Picture Control Recording onto the Hard Disk Playback the Recorded Files Camera and Picture Control 4-25 „ Adding a New Marker 1 Click [Add]. 4 Select the [Aspect ratio] and click [Add]. 2 Select the marker group. • If the - Canon CONSOLE Image Control & Storage Software v1.1 | CONSOLE_V1-1_ENG.pdf - Page 26
CONSOLE Windows Various Settings and [Performance Check] Camera and Picture Control Recording onto the Hard Disk Playback the Recorded Files Camera and Picture Control 4-26 „ Editing the Marker 1 Select a marker by placing a check mark and click the selected marker name. The marker is displayed in - Canon CONSOLE Image Control & Storage Software v1.1 | CONSOLE_V1-1_ENG.pdf - Page 27
CONSOLE Windows Various Settings and [Performance Check] Camera and Picture Control Recording onto the Hard Disk Playback the Recorded Files Camera and Picture Control 4-27 Splitting the Preview Image You can split the preview image vertically or horizontally and compare the camcorder picture with - Canon CONSOLE Image Control & Storage Software v1.1 | CONSOLE_V1-1_ENG.pdf - Page 28
used. [Camera Control] This window enables you to control the hard disk recording and set the camcorder settings. 1 2 1 3 2 1 Focus Preview 2 Aspect Ratio Displays a part of the camcorder picture as in its original to fit the aspect ratio of the monitor. The status of the mode will be - Canon CONSOLE Image Control & Storage Software v1.1 | CONSOLE_V1-1_ENG.pdf - Page 29
Windows Various Settings and [Performance Check] Camera and Picture Control Recording onto the Hard Disk Playback the Recorded Files Camera and Picture Control 4-29 [Control] Tab When the camcorder is set to the Camera mode, you cannot control all settings on [Control] tab. Set the camcorder - Canon CONSOLE Image Control & Storage Software v1.1 | CONSOLE_V1-1_ENG.pdf - Page 30
CONSOLE Windows Various Settings and [Performance Check] Camera and Picture Control Recording onto the Hard Disk Playback the Recorded Files Camera and to auto, Tv, Av or manual mode. When you are using XL2 and set the camcorder's frame rate to 24F or 30F (NTSC) or 25F (PAL) the camcorder's gain - Canon CONSOLE Image Control & Storage Software v1.1 | CONSOLE_V1-1_ENG.pdf - Page 31
CONSOLE Windows Various Settings and [Performance Check] Camera and Picture Control Recording onto the Hard Disk Playback the Recorded Files Camera and Picture Control 4-31 [Information] Tab This tab shows information of the hard disk recording. 1 Displays the recording file name, a recording - Canon CONSOLE Image Control & Storage Software v1.1 | CONSOLE_V1-1_ENG.pdf - Page 32
CONSOLE Windows Various Settings and [Performance Check] Camera and Picture Control Recording onto the Hard Disk Playback the Recorded Files Camera and Picture Control 4-32 Waveform Vector Monitor This monitor shows a waveform and color information of the picture displayed in the [Rec Viewer]. 1 - Canon CONSOLE Image Control & Storage Software v1.1 | CONSOLE_V1-1_ENG.pdf - Page 33
CONSOLE Windows Various Settings and [Performance Check] Camera and Picture Control Recording onto the Hard Disk Playback the Recorded Files Camera and Picture Control 4-33 2 [Line Select] You can select the image-scanning mode of the waveform monitor and the vector scope. 1 2 3 1 Switches - Canon CONSOLE Image Control & Storage Software v1.1 | CONSOLE_V1-1_ENG.pdf - Page 34
onto the Hard Disk Playback the Recorded Files Camera and Picture Control 4-34 [Color Control] The settings for [Color Correction] and skin and sky details are managed on the [Color Control] window. You can switch over each panel by clicking the tabs. When connecting the XL H1 or XL2, this - Canon CONSOLE Image Control & Storage Software v1.1 | CONSOLE_V1-1_ENG.pdf - Page 35
the Hard Disk Playback the Recorded Files Camera and Picture Control 4-35 2 Adjust the levels of [R Gain] and [B [Detail] Gain] by moving the sliders. Skin and sky details settings are managed on the [Detail] window. For details about each parameter, refer to the camcorder instruction manual - Canon CONSOLE Image Control & Storage Software v1.1 | CONSOLE_V1-1_ENG.pdf - Page 36
CONSOLE Windows Various Settings and [Performance Check] Camera and Picture Control Recording onto the Hard Disk Playback the Recorded Files Camera and Picture if [OFF] is selected. 4 Click of [Effect Level] and select [High], [Middle] or [Low]. The skin detail settings will not be effective if - Canon CONSOLE Image Control & Storage Software v1.1 | CONSOLE_V1-1_ENG.pdf - Page 37
, refer to the camcorder instruction manual. Depending on the camcorder connected, some parameters differ. For details, refer to the camcorder instruction manual. The [Custom Preset] window cannot be used when recording. When using XL2, you need to set the camcorder's recording program to - Canon CONSOLE Image Control & Storage Software v1.1 | CONSOLE_V1-1_ENG.pdf - Page 38
card, you need to have installed the AV/C Camera Storage Subunit-WIA driver with a camcorder that is set to the EXT.CONT. mode connected to the computer. 1 Click . 4 Click to save the new settings. If new memory is selected before clicking , a window asking you whether or not you wish to - Canon CONSOLE Image Control & Storage Software v1.1 | CONSOLE_V1-1_ENG.pdf - Page 39
CONSOLE Windows Various Settings and [Performance Check] Camera and Picture Control Recording onto the Hard Disk Playback the Recorded Files Camera and Camera Storage Subunit-WIA driver with a camcorder that is set to the EXT.CONT. mode connected to the computer. 1 Click . 3 Check the camcorder - Canon CONSOLE Image Control & Storage Software v1.1 | CONSOLE_V1-1_ENG.pdf - Page 40
settings but returns to the Custom Preset settings active on the camcorder before connecting to the computer. 1 Adjust the Custom Preset settings. ( 4-37) 2 Save the new Custom Preset file to the camcorder. 3 Disconnect the DV cable from the camcorder. 4 Apply the saved file created in step 2 to the - Canon CONSOLE Image Control & Storage Software v1.1 | CONSOLE_V1-1_ENG.pdf - Page 41
and install the AV/C Camera Storage Subunit-WIA driver ( 1-7). If you already installed the driver, you do not need to re-install it. For details about the steps 3 to 6, refer to "Inserting/Removing a Memory Card" and "Using the Custom Preset" on the camcorder instruction manual. 1 Adjust the Custom - Canon CONSOLE Image Control & Storage Software v1.1 | CONSOLE_V1-1_ENG.pdf - Page 42
to original settings. Closes the [Variation] window. A still reference image. Tabs of different categories of the Custom Preset settings. When displaying the [Variation] window for the first time in HD and SD modes, the color bars will be displayed on the camcorder screen. The images used - Canon CONSOLE Image Control & Storage Software v1.1 | CONSOLE_V1-1_ENG.pdf - Page 43
Chapter 5 Recording onto the Hard Disk Recording a Movie File...5-45 By Operating the Camcorder ...5-45 By Operating CONSOLE...5-45 Cache Recording...5-46 Setting the Cache Time...5-46 Cache Recording ...5-46 Frame Recording...5-47 Setting the Frame Recording ...5-47 Frame - Canon CONSOLE Image Control & Storage Software v1.1 | CONSOLE_V1-1_ENG.pdf - Page 44
cache recording part ( 5-46). In the following cases, recordings cannot be saved on a hard disk: - During option settings or performance check. - When the sequence number of the file exceeds the maximum value (e.g. "CNSL9999999.avi"). - When CONSOLE is started while using the camcorder with - Canon CONSOLE Image Control & Storage Software v1.1 | CONSOLE_V1-1_ENG.pdf - Page 45
• To stop recording, press the start/stop button on the camcorder again. By Operating CONSOLE 1 Click in the [Camera Control] window. To stop recording, click . • Recording starts on both the tape in the camcorder and the hard disk. • When [Save custom preset file when recording start.] is - Canon CONSOLE Image Control & Storage Software v1.1 | CONSOLE_V1-1_ENG.pdf - Page 46
Windows Various Settings and [Performance Check] Camera and Picture Control Recording onto the Hard Disk Playback the Recorded Files 5-46 Recording onto the Hard Disk Cache Recording You can set CONSOLE to store the camcorder in the following cases: - When the When IEEE1394 (DV) is disconnected - Canon CONSOLE Image Control & Storage Software v1.1 | CONSOLE_V1-1_ENG.pdf - Page 47
recording cannot be controlled from the camcorder. Setting the Frame Recording 1 Select [Option] from the [File] menu or click . Frame Recording 1 Specify the frame recording settings. ( 5-47) 2 Click in the [Camera Control] window. 2 3 Click [OK]. Select [DV Rec] tab and select [Frame - Canon CONSOLE Image Control & Storage Software v1.1 | CONSOLE_V1-1_ENG.pdf - Page 48
CONSOLE Windows Various Settings and [Performance Check] Camera and Picture Control Recording onto the Hard Disk Playback the Recorded Files 5-48 Recording onto the Hard Disk Data Dropping • If the hard disk is accessed while recording, a part of the data input from the camcorder may not be - Canon CONSOLE Image Control & Storage Software v1.1 | CONSOLE_V1-1_ENG.pdf - Page 49
Chapter 6 Playback the Recorded Files [Play Viewer] ...6-50 Output to the Camcorder...6-51 Time Slider ...6-51 Waveform Vector Monitor ...6-52 File Browser ...6-52 Copying from the Memory Card ...6-52 - Canon CONSOLE Image Control & Storage Software v1.1 | CONSOLE_V1-1_ENG.pdf - Page 50
CONSOLE Windows Various Settings and [Performance Check] Camera and Picture Control Recording onto the Hard Disk Playback the Recorded Files 6-50 Playback the Recorded Files You can playback or view the recorded pictures using playback tools in [Play Panel]. [Play Viewer] You can playback and - Canon CONSOLE Image Control & Storage Software v1.1 | CONSOLE_V1-1_ENG.pdf - Page 51
on the monitor. When using XL2: Only video in DV standard is displayed on the monitor. When the camcorder is set to HD mode and the [HD DOWN-CONV] menu under [SIGNAL SETUP] in the [VCR/PLAY] menu is set to [ON], the playback picture will not be output to the camcorder. When [HD DOWN-CONV - Canon CONSOLE Image Control & Storage Software v1.1 | CONSOLE_V1-1_ENG.pdf - Page 52
case, please copy the files to the hard disk using a card reader/writer, and then check the files in the file browser. When using XL2, you cannot use a memory card. You need to set the camcorder's recording program to EXT.CONT. Proper operation cannot be guaranteed if you are not using Canon - Canon CONSOLE Image Control & Storage Software v1.1 | CONSOLE_V1-1_ENG.pdf - Page 53
Chapter 7 Uninstall Uninstalling the Software...7-54 Uninstalling the AV/C Camera Storage Subunit-WIA Driver 7-54 Uninstalling of the Drivers ...7-55 - Canon CONSOLE Image Control & Storage Software v1.1 | CONSOLE_V1-1_ENG.pdf - Page 54
before uninstalling the driver. 1 Turn the camcorder power on and set the camcorder's recording program to EXT.CONT. 2 Connect the camcorder to the computer using the IEEE1394 (DV) cable. ( 1-8) If Scanner and Camera Wizard or Explorer is displayed, close the windows. 3 From the [start - Canon CONSOLE Image Control & Storage Software v1.1 | CONSOLE_V1-1_ENG.pdf - Page 55
• [#(number)] may appear after [Canon Camera Storage Device], but that would not affect the uninstall process. • The uninstall process is complete. Uninstalling of the Drivers If you had problems uninstalling the driver, use the following procedures to remove it. Use the procedures below for the - Canon CONSOLE Image Control & Storage Software v1.1 | CONSOLE_V1-1_ENG.pdf - Page 56
), [WINDOWS] and [INF] folders in succession. • If the [INF] folder is not visible in the [WINDOWS] folder, use the following Canon Camera Storage Device] appears under the [Imaging devices] and/or [Other devices] categories, use the following procedures to delete it. 1) Right click on [Canon Camera - Canon CONSOLE Image Control & Storage Software v1.1 | CONSOLE_V1-1_ENG.pdf - Page 57
not to delete the wrong files. If you delete the wrong file, you may be unable to restart Windows. • The Windows Notepad program will start and show the file contents. • When uninstalling the AV/C Camera Storage Subunit-WIA Driver, click each [oem*] file until you find the one that contains [; AV - Canon CONSOLE Image Control & Storage Software v1.1 | CONSOLE_V1-1_ENG.pdf - Page 58
Appendix Troubleshooting...Appx-59 Shortcut Keys (Default Settings) ...Appx-61 - Canon CONSOLE Image Control & Storage Software v1.1 | CONSOLE_V1-1_ENG.pdf - Page 59
camcorder not supported by CONSOLE is connected. Check if your camcorder is supported by CONSOLE ( 3). ÎThe DV CONTROL function of the camcorder is set to [OFF]. Set the DV CONTROL function to [ON]. For details, refer to the instruction manual of your camcorder. ÎMore than one camcorder is connected - Canon CONSOLE Image Control & Storage Software v1.1 | CONSOLE_V1-1_ENG.pdf - Page 60
on the recording file. In such case, change the software settings using one or more of the followings to window size of the [Rec Viewer] window. • Hide or reduce the window size of the [Vector and Wave Monitor] window. The preview image is not played back smoothly. ÎDepending on the laptop PC's power - Canon CONSOLE Image Control & Storage Software v1.1 | CONSOLE_V1-1_ENG.pdf - Page 61
Shift] + [Tab] Finalize: [.] Tab Selection: Camera „ Displaying [Play Panel]: [9], [Ctrl] + [P] Control] window value down: [ ], [ ] „ Waveform Vector Monitor To execute: [Space], [Enter] Displaying/Hiding (in [Enter] Time Slider (These keys can be used only when the time slider is active.) To - Canon CONSOLE Image Control & Storage Software v1.1 | CONSOLE_V1-1_ENG.pdf - Page 62
PUB.DIE-272 © CANON INC. 2006 The information on this manual is verified as of July 1st, 2006.
-
 1
1 -
 2
2 -
 3
3 -
 4
4 -
 5
5 -
 6
6 -
 7
7 -
8
-
9
-
10
-
11
-
12
-
13
-
14
-
15
-
16
-
17
-
18
-
19
-
20
-
21
-
22
-
23
-
24
-
25
-
26
-
27
-
28
-
29
-
30
-
31
-
32
-
33
-
34
-
35
-
36
-
37
-
38
-
39
-
40
-
41
-
42
-
43
-
44
-
45
-
46
-
47
-
48
-
49
-
50
-
51
-
52
-
53
-
54
-
55
-
56
-
57
-
58
-
59
-
60
-
61
-
62
 |
 |
PUB. DIE-272
English
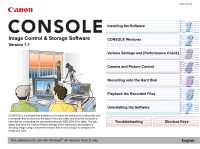
CONSOLE is a software that enables you to adjust the settings of a camcorder from
a computer and to record on the tape in the camcorder and onto the computer’s
hard disk by connecting the camcorder using an IEEE1394 (DV) cable. You can
adjust and save the Custom Preset settings of the camcorder and analyze a
shooting image using a waveform monitor and a vector scope to compose the
image you want.
Image Control & Storage Software
Version 1.1
This software is for use with Windows
®
XP (Service Pack 2) only.
CONSOLE Windows
Various Settings and [Performance Check]
Camera and Picture Control
Recording onto the Hard Disk
Playback the Recorded Files
Troubleshooting
Shortcut Keys
Installing the Software
Uninstalling the Software