Canon CanoScan LiDE70 Guia de Inicio Rapido de CanoScan LiDE 70 [Spanish Versi
Canon CanoScan LiDE70 Manual
 |
View all Canon CanoScan LiDE70 manuals
Add to My Manuals
Save this manual to your list of manuals |
Canon CanoScan LiDE70 manual content summary:
- Canon CanoScan LiDE70 | Guia de Inicio Rapido de CanoScan LiDE 70 [Spanish Versi - Page 1
the scanned image to a new e-mail message. • For Mac OS X 10.3/10.2.8: Refer to Troubleshooting in the Scanning Guide (onscreen manual) before using. Refer to the Scanning Guide (on-screen manual) for further information about ScanGear, CanoScan Toolbox, Scanner Buttons, Troubleshooting and - Canon CanoScan LiDE70 | Guia de Inicio Rapido de CanoScan LiDE 70 [Spanish Versi - Page 2
) B&W Preview Speed *2*3 Interface Maximum Document Size Scanner Buttons Temperature Operating Range Humidity Power Requirements Power Consumption Maximum Exterior Dimensions Weight CanoScan LiDE 70 Flatbed CIS (Color Contact Image Sensor) 3-color (RGB) LED 2400 x 4800 dpi 25-19200
-
 1
1 -
 2
2
 |
 |

Checking the Package Contents
1
Scanner
2
USB Interface Cable
3
Stand
4
CanoScan Setup Utility CD-ROM
5
Quick Start Guide
Comprobación del contenido del paquete
1
Escáner
2
Cable de interfaz USB
3
Soporte
4
CD-ROM de la Herramienta de instalación CanoScan
5
Guía de inicio rápido
Installing the Software
• Do NOT connect the scanner to a computer before installing the software.
• Quit all running applications before installation, including anti-virus software.
• For Windows 2000/XP, log in as an administrator to install the software.
1
Place the CanoScan Setup Utility CD-ROM in the drive.
CanoScan Setup Utility program starts.
• For Macintosh: Double-click the [Setup] icon. Enter the administrator ID and
password on the authentication dialog box.
2
Click [Easy Install] on the main menu.
3
Click [Install] to start installation.
Carefully read the License Agreement, and then click [Yes] to proceed.
Follow the on-screen instructions to perform the installation.
4
When the Information dialog is displayed, click [OK] to restart your
computer.
• For Macintosh: Skip this step and go to the step 5.
5
Follow the on-screen instructions to register your product.
6
When the installation is complete, click [Exit].
• For Macintosh: Click [Restart] to restart your computer.
Instalación del software
• NO conecte el escáner al ordenador antes de instalar el software.
• Salga de todas las aplicaciones que esté utilizando, incluido el software antivirus,
antes de realizar la instalación.
• Inicie sesión como administrador para instalar el software en Windows 2000/XP.
1
Coloque el CD-ROM de la Herramienta de configuración CanoScan en
la unidad.
Se iniciará el programa de la Herramienta de configuración de CanoScan.
• En Macintosh: haga doble clic en el icono [Setup] (Configuración). Introduzca el
ID de administrador y la contraseña en el cuadro de diálogo de autenticación.
2
Haga clic en [Easy Install] (Instalación simple) en el menú principal.
3
Haga clic en [Install] (Instalar) para iniciar la instalación.
Lea atentamente el Contrato de licencia y, a continuación, haga clic en [Yes]
(Sí) para continuar.
Para realizar la instalación, siga las instrucciones en pantalla.
4
Cuando aparezca el cuadro de diálogo, haga clic en [OK] (Aceptar) para
reiniciar el ordenador.
• En Macintosh: omita este paso y vaya al paso 5.
5
Para registrar el producto, siga las instrucciones en pantalla.
6
Cuando haya finalizado la instalación, haga clic en [Exit] (Salir) para salir.
• En Macintosh: haga clic en [Restart] (Reiniciar) para reiniciar el ordenador.
Preparing the Scanner
1
Slide the lock switch on the bottom of the scanner toward the unlock
mark (
).
• Always lock the scanner when carrying or transporting it.
2
Connect the scanner to the computer with the supplied USB cable.
• Only use the USB cable provided with the scanner. Use of other cables may
lead to a malfunction.
• The scanner does not have a power switch. The power is activated as soon as
the computer is turned on.
• When the scanner is connected to the USB 1.1 port on Windows XP and
“HI-SPEED USB Device Plugged into non-HI-SPEED USB Hub” message
appears, ignore the message. The scanner operates in this condition without
problems.
Preparación del escáner
1
Deslice el interruptor de bloqueo situado en la parte inferior del escáner
hacia la posición de desbloqueo (
).
• Siempre que transporte el escáner, bloquéelo.
2
Conecte el escáner al ordenador con el cable USB suministrado.
• Utilice sólo el cable USB suministrado con el escáner. El uso de otros cables
puede provocar un fallo de funcionamiento.
• El escáner no dispone de interruptor de encendido. La alimentación se activa
cuando se enciende el ordenador.
• Cuando conecte el escáner al puerto USB 1.1 en Windows XP y aparezca el
mensaje “Dispositivo USB de alta velocidad conectado en un concentrador
USB no de alta velocidad”, haga caso omiso a dicho mensaje. El escáner
funcionará sin problemas.
Try Scanning
1
Place a document on the document glass and close the document cover.
2
Start ArcSoft PhotoStudio.
For Windows: Select [start]-[(All) Programs]-[ArcSoft PhotoStudio 5.5], then
click [PhotoStudio 5.5].
For Macintosh: Open [Applications]-[PhotoStudio] folders, then double-click the
[PhotoStudio] icon.
3
Click [File] menu, [Select Source] and select the scanner model.
For Windows: Do not select the one that includes [WIA] in the model name.
4
Click the acquire icon
to start ScanGear.
5
Select the type of document you are scanning in [Select Source] and
click [Preview].
6
Click [Scan] to start scanning.
• Do not move the scanner while it is operating.
7
When prompted to close ScanGear, click [OK].
8
Save the scanned image in ArcSoft PhotoStudio and close the window.
Prueba de escaneado
1
Coloque un documento sobre el cristal de documentos y cierre la tapa
de documentos.
2
Inicie ArcSoft PhotoStudio.
En Windows: seleccione [start] (Inicio)-[(All) Programs] ((Todos los) Programas)-
[ArcSoft PhotoStudio 5.5] y, a continuación, haga clic en [PhotoStudio 5.5].
En Macintosh: abra las carpetas [Applications] (Aplicaciones) y [PhotoStudio] y,
a continuación, haga doble clic en el icono [PhotoStudio].
3
Haga clic en el menú [File] (Archivo), [Select Source] (Seleccionar
origen) y seleccione el modelo de escáner.
En Windows: no seleccione el modelo que incluya el término [WIA] en el nombre.
4
Haga clic en el icono de adquisición
para iniciar ScanGear.
5
Seleccione el tipo de documento que desea escanear en [Select Source]
(Seleccionar origen) y haga clic en [Preview] (Vista preliminar).
6
Haga clic en [Scan] (Escanear) para iniciar el escaneado.
• No mueva el escáner mientras esté en funcionamiento.
7
Cuando se le solicite cerrar ScanGear, haga clic en [OK] (Aceptar).
8
Guarde la imagen escaneada en ArcSoft PhotoStudio y cierre la ventana.
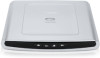
Using the Scanner Buttons
Utilización de los botones del escáner
Refer to the Scanning Guide (on-screen manual) for further information
about ScanGear, CanoScan Toolbox, Scanner Buttons, Troubleshooting
and Setting the Stand. To start the Scanning Guide, double-click the on-
screen manual icon on the desktop.
In this guide, Windows XP screen shots are used to illustrate explanations
common to all operating systems.
Consulte la Guía de escaneado (manual en pantalla) para obtener
información adicional acerca de ScanGear, CanoScan Toolbox, los botones
del escáner, la resolución de problemas y el ajuste del soporte. Para iniciar
la Guía de escaneado, haga doble clic en el icono del manual en pantalla
del escritorio.
En esta guía, se utilizan capturas de pantalla de Windows XP para ilustrar
las explicaciones comunes en todos los sistemas operativos.
/
1
4
5
2
3
Top
Parte
superior
Bottom
Parte
inferior
COPY Button
Prints (copies) the scanned image
with a printer.
PDF Button
Saves the scanned image as a PDF
file.
PHOTO Button
Opens the scanned image in the
bundled application program,
ArcSoft PhotoStudio.
E-MAIL Button
Attaches the scanned image to a
new e-mail message.
QT5-0812-V01
©CANON INC. 2006
PRINTED IN VIETNAM
• For Mac OS X 10.3/10.2.8: Refer to Troubleshooting in the Scanning Guide (on-
screen manual) before using.
Botón COPY
Imprime (copia) la imagen
escaneada con una impresora.
Botón PDF
Guarda la imagen escaneada como
un archivo PDF.
Botón PHOTO
Abre la imagen escaneada
con la aplicación incluida con el
escáner, ArcSoft PhotoStudio.
Botón E-MAIL
Adjunta la imagen escaneada a un
mensaje de correo electrónico nuevo.
• En Mac OS X 10.3/10.2.8: consulte Solución de problemas en la Guía de
escaneado (manual en pantalla) antes de la utilización.