Canon DR 2510C User Manual
Canon DR 2510C - imageFORMULA - Document Scanner Manual
 |
UPC - 013803089622
View all Canon DR 2510C manuals
Add to My Manuals
Save this manual to your list of manuals |
Canon DR 2510C manual content summary:
- Canon DR 2510C | User Manual - Page 1
Introduction Contents Chapter 1 Before Using the Scanner Chapter 2 Setup Chapter 3 Basic Operation Chapter 4 ISIS/TWAIN Driver Settings Chapter 5 Job Registration Tool Settings Chapter 6 Maintenance Chapter 7 Troubleshooting Chapter 8 Appendix INDEX DR-2010C / DR-2510C - Canon DR 2510C | User Manual - Page 2
PURPOSE OF USE OR NON-INFRINGEMENT. CANON ELECTRONICS INC. SHALL NOT BE LIABLE FOR ANY DIRECT, INCIDENTAL, OR CONSEQUENTIAL DAMAGES OF ANY NATURE, OR LOSSES OR EXPENSES RESULTING FROM THE USE OF THIS MATERIAL. Copyright © 2007 CANON ELECTRONICS INC. ALL RIGHTS RESERVED 2 DR-2010C / DR-2510C - Canon DR 2510C | User Manual - Page 3
the Canon DR-2010C/DR-2510C Document Scanner. Please read this manual thoroughly before Manual 3 Chapter 1 Before Using the Scanner 5 1. Important Safety Instructions 5 Installation Location 5 AC Adapter 6 Moving the Scanner 6 Handling 7 Disposal 8 2. Features of the DR-2010C/DR-2510C - Canon DR 2510C | User Manual - Page 4
7 Troubleshooting 72 1. Troubleshooting 72 2. Uninstalling Software 75 Uninstalling the ISIS/TWAIN Driver and Job Registration Tool 75 Uninstalling CapturePerfect 3.0 76 Chapter 8 Appendix 77 Specifications 77 Replacement Parts 78 External Dimensions 79 INDEX 81 4 DR-2010C / DR-2510C - Canon DR 2510C | User Manual - Page 5
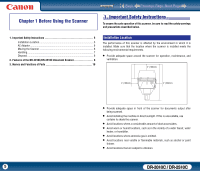
to read the safety warnings and precautions described below. 1. Important Safety Instructions 5 Installation Location 5 AC Adapter 6 Moving the Scanner 6 Handling 7 Disposal 8 2. Features of the DR-2010C/DR-2510C Document Scanner 8 3. Names and Functions of Parts 10 Installation Location - Canon DR 2510C | User Manual - Page 6
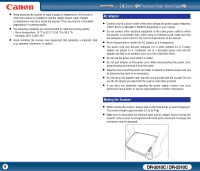
• If you have any questions regarding the power supply, contact your local authorized Canon dealer or service representative for further information. Moving the Scanner • When moving the scanner, always hold these items connected, the plugs and connectors may be damaged. 6 DR-2010C / DR-2510C - Canon DR 2510C | User Manual - Page 7
switch OFF, and disconnect the power plug from the power outlet. Then, contact your local authorized Canon dealer or service representative for further information. • Do not drop the scanner, or subject it to impact or possible to cut your hand on the edge of a sheet of paper. 7 DR-2010C / DR-2510C - Canon DR 2510C | User Manual - Page 8
„ Fast Document Feeding The DR-2510C can scan a maximum of 25 documents per minute, and the DR-2010C can scan a maximum of supports Hi-Speed USB 2.0. „ Color/Grayscale Support Documents can be scanned in 24-bit color or 256-level grayscale. „ Supports a Variety of Scanning Modes The scanner supports - Canon DR 2510C | User Manual - Page 9
a single image. „ Deskew The scanner straightens scanned images when it detects that the document was placed askew. „ Ultrasonic Double Feed Detection (for the DR-2510C only) Ultrasonic waves are used to detect pages that are fed at the same time as well as the space between pages. Scanning stops if - Canon DR 2510C | User Manual - Page 10
scan here. OPEN button Use to open the front unit. Document Guides Adjust these guides to fit the width of the document. (See p.21) Extension Previous Page Next Page USB Connector Connect a USB cable that supports Hi-Speed USB 2.0 to this connector. Theft Prevention Hole ( 10 DR-2010C / DR-2510C - Canon DR 2510C | User Manual - Page 11
to the Computer 15 3. Turning the Power ON 16 Scanner Recognition 16 11..SSccanannenreSrysStyesmteRmeqRuiereqmueirnetms ents To use the DR-2010C/DR-2510C scanner, your computer must satisfy the following system requirements. • One of the following operating systems: y Microsoft Windows 2000 - Canon DR 2510C | User Manual - Page 12
developed for use with Canon document scanners. NOTE The Setup disc of the DR-2010C/DR-2510C is configured as follows. Install the software using either [Typical Installation] or [Custom Installation]. Menu Screen Typical Installation Read Manuals Custom Installation 12 DR-2010C / DR-2510C - Canon DR 2510C | User Manual - Page 13
it. NOTE When you select [Typical Installation], all of the displayed software and the User Manual will be installed automatically. If you want to reinstall only specific software that you have previously uninstalled, select [Custom Installation] and specify the software. 13 DR-2010C / DR-2510C - Canon DR 2510C | User Manual - Page 14
[Next]. 8 Click [Next]. 11 When the CapturePerfect 3.0 installation is complete, click [Finish]. 9 Read the license agreement → click [Yes] to accept it. 12 Click [Next]. 14 DR-2010C / DR-2510C - Canon DR 2510C | User Manual - Page 15
13 When the User Manual installation is complete, click [Finish]. 14 Click [Exit] to finish installing the software. . 1 Verify that the power switch of the scanner is OFF (O side). 15 Remove the DR-2010C/DR-2510C Setup disc from the CD-ROM drive. 2 Connect the power cord to the AC adapter. 15 - Canon DR 2510C | User Manual - Page 16
that the scanner and computer are connected properly. 2 Press the power switch on the back of the scanner to turn the scanner ON (I side). 16 DR-2010C / DR-2510C - Canon DR 2510C | User Manual - Page 17
recognizes the DR-2010C/DR-2510C as new hardware. Contents Back Previous Page Next Page NOTE If you set the power switch on the back of the scanner to [AUTO], the scanner is linked to be automatically turned ON/OFF in accordance with the power of the computer. 17 DR-2010C / DR-2510C - Canon DR 2510C | User Manual - Page 18
documents up to 39.2" (1000 mm) long by setting the scanner to the Long Document mode. (See "Setting the Long Document Mode," on p. 35.) 18 DR-2010C / DR-2510C - Canon DR 2510C | User Manual - Page 19
297 mm) size are fed one sheet at a time. • Scanning documents before the ink is dry can cause problems with the scanner. Always make sure that the ink on a document is dry before scanning it. • Scanning documents to be scanned correctly, depending on the type of embossment. 19 DR-2010C / DR-2510C - Canon DR 2510C | User Manual - Page 20
document stopper that corresponds with the length of the document you want to scan. Preparing the Document Eject Tray Open the document eject tray. 20 DR-2010C / DR-2510C - Canon DR 2510C | User Manual - Page 21
2 Adjust the document guides to fit the width of the document to be scanned. IMPORTANT There is a load limit mark ( ) on the document guides. Do not stack documents higher than this mark (approximately 50 sheets of 20 lb bond (80 g/m2) paper.) Doing so may cause a paper jam. 21 DR-2010C / DR-2510C - Canon DR 2510C | User Manual - Page 22
Page Next Page 5 Adjust the document guides to fit the width of the document. stops due to a system error or paper jam while the scanner is scanning, resolve the problem, make sure that the scanned image of the last page that was successfully fed has been not being used. 22 DR-2010C / DR-2510C - Canon DR 2510C | User Manual - Page 23
used. Placing Cards 1 Switch the feed selection lever to (Bypass). 2 Adjust the document guides to fit the width of the document to be scanned (See p.21). 3 Place the document at a time. 2 Adjust the document guides to fit the width of the card to be scanned (See p.21). 23 DR-2010C / DR-2510C - Canon DR 2510C | User Manual - Page 24
fold the document in half lengthwise and place it into the feeder. The DR-2010C/DR-2510C will scan both sides and combine the scanned images into a single image. Adjust the document guides to fit the width of the document. Otherwise, the image may scan as skewed or shifted. 24 DR-2010C / DR-2510C - Canon DR 2510C | User Manual - Page 25
. The Scan Batch to File function is used here as an example. For details, see the CapturePerfect 3.0 Operation Guide and CapturePerfect Online Help. 1 From the Windows task bar, click [Start] → point to [All Programs] → [CapturePerfect 3.0] → click [CapturePerfect 3.0]. 25 DR-2010C / DR-2510C - Canon DR 2510C | User Manual - Page 26
7 Place your document (See "3. Placing Documents," on p. 21.). NOTE The [Configure Device Settings] dialog box is displayed only when you select [Canon DR-2510C] or [Canon DR-2010C] for the first time and click [OK], or when you click [Setup] for [Scanner Selection]. 8 From the [Scan] menu, select - Canon DR 2510C | User Manual - Page 27
is used for registering the jobs that are executed when a job button is pressed. 1 From the Windows task bar, click [Start] → point to [All Programs] → [Canon DR-2510C] or [Canon DR-2010C] → click [Job Registration Tool]. 27 - Canon DR 2510C | User Manual - Page 28
Scan Panel The Scan Panel is an application that is installed with the ISIS/TWAIN driver. It is displayed in the system tray when the DR-2010C/DR-2510C driver is started. If Feeding Option in the scan settings is set to [Panel-Feeding] or [Automatic Feeding], the Scan Panel will appear when - Canon DR 2510C | User Manual - Page 29
. The button then returns to normal. Special Scanning This section describes examples of settings that can be specified when scanning with the DR-2010C/DR-2510C. For more information, see Chapter 4, "ISIS/TWAIN Driver Settings," or the Online Help. Enhancing the Text of a Document You can set the - Canon DR 2510C | User Manual - Page 30
conditions, see Chapter 2, "Using the Scanner - Scanning Different Sized Documents," in the Reference Guide. X Skipping Blank Pages You can set the scanning conditions to determine whether a scanned image and Chapter 4, "ISIS/TWAIN Driver Settings - Scanning Side Settings." 30 DR-2010C / DR-2510C - Canon DR 2510C | User Manual - Page 31
] in the [Color drop-out] box. For more information on setting the scanning conditions, see Chapter 4, "ISIS/TWAIN Driver Settings - Enhancing the Red Color." 31 DR-2010C / DR-2510C - Canon DR 2510C | User Manual - Page 32
3.0. For more information on specifying security settings, see the CapturePerfect3.0 Operation Guide. 55..PPrarcatcictaicl EaxlaEmxpalmesples This section provides examples of settings when scanning with the DR-2010C/DR-2510C. Refer to these examples when specifying ISIS/TWAIN driver settings. For - Canon DR 2510C | User Manual - Page 33
been left in the eject tray. 2 Press the OPEN knob from both sides (c), and pull the front unit out and downward to open it (d). d c 33 DR-2010C / DR-2510C - Canon DR 2510C | User Manual - Page 34
pushing until you hear a click. After removing the jammed paper, check to see if the last page was scanned correctly, and then continue scanning. 34 DR-2010C / DR-2510C - Canon DR 2510C | User Manual - Page 35
Document Mode The length of documents that can be scanned with the DR-2010C/DR-2510C is normally 14.02" (356 mm), but you can scan scan the documents one at a time. 3 Right-click [CANON DR-2010C USB] or [CANON DR-2510C USB] → click [Properties]. 1 Click the [Start] button → [Control Panel]. - Canon DR 2510C | User Manual - Page 36
4 Click the [Maintenance] tab → [Long Document Mode (1,000 mm)]. Contents Back Previous Page Next Page 5 Click [Apply] → [OK]. 6 Turn the scanner OFF and then ON again. 36 DR-2010C / DR-2510C - Canon DR 2510C | User Manual - Page 37
the Version 54 1 From the Windows task bar, click [Start] → point to [All Programs] → [CapturePerfect 3.0] → click [CapturePerfect 3.0]. 2 From the [Scan] menu, select [Select Scanner]. 3 Select [Canon DR-2510C] or [Canon DR-2010C] → click [OK]. 37 DR-2010C / DR-2510C - Canon DR 2510C | User Manual - Page 38
. For details on each setting, also refer to the Help. NOTE • The [Configure Device Settings] dialog box is displayed only when you select [Canon DR-2510C] or [Canon DR-2010C] for the first time and click [OK], or when you click [Setup] for [Scanner Selection]. • The settings here are applied when - Canon DR 2510C | User Manual - Page 39
unstable when [Auto Color Detection] is enabled. In that case, [Auto Color Detection] should be disabled. y For details, See "Auto Color Detection," on p. 40. 39 DR-2010C / DR-2510C - Canon DR 2510C | User Manual - Page 40
. y Proportion of Color: change the setting towards "High" when you want to scan a colordocument with a low proportion of color as a black-and-white document. 40 DR-2010C / DR-2510C - Canon DR 2510C | User Manual - Page 41
Settings] dialog box • Depending on the application, operation may become unstable when [Auto- detection] is enabled. In that case, [Auto-detection] should be disabled. 41 DR-2010C / DR-2510C - Canon DR 2510C | User Manual - Page 42
side setting you want to use. - [Simplex] Scan only the front side of documents loaded into the feeder. - [Duplex] Scan both sides of documents. 42 DR-2010C / DR-2510C - Canon DR 2510C | User Manual - Page 43
. NOTE Deskewing SWITCH also may not work properly or cause part of the image to be lost in other cases, depending on the document. 43 DR-2010C / DR-2510C - Canon DR 2510C | User Manual - Page 44
: for the TWAIN driver, one of two dialog box types is displayed depending on the application program used. Scan Area Dialog Box (ISIS Driver) 44 DR-2010C / DR-2510C - Canon DR 2510C | User Manual - Page 45
] setting. Preview Button (TWAIN driver only) Click the [Preview] button to scan one document page and display its preview image in the Area window. 45 DR-2010C / DR-2510C - Canon DR 2510C | User Manual - Page 46
of the front and back of the document pages is different, select this check box to adjust only the contrast of the back side. 46 DR-2010C / DR-2510C - Canon DR 2510C | User Manual - Page 47
. 47 NOTE When the [Custom] check box in the [Gamma Settings] dialog box is selected, all settings on the [Brightness] tab sheet are set automatically. DR-2010C / DR-2510C - Canon DR 2510C | User Manual - Page 48
orientation of the placed document and the specified angle. Document: face down Document Orientation (clockwise) 0 degrees 90 degrees 180 degrees 270 degrees Scanned Image 48 DR-2010C / DR-2510C - Canon DR 2510C | User Manual - Page 49
programs do not support text orientation recognition. Please disable [Text Orientation Recognition] if your application program operates abnormally when it is enabled. 2 Adjust the [Removal level] slider to set the level of bleed through prevention or background removal. 49 DR-2010C / DR-2510C - Canon DR 2510C | User Manual - Page 50
the front and back side of the document. NOTE You can set specify different settings for the front and back side of the document. 50 DR-2010C / DR-2510C - Canon DR 2510C | User Manual - Page 51
feeding when double feeding of document pages is detected. 1 Click the [Others] tab → select the [Detect by Length] or [Detect by Ultrasonic] (for the DR-2510C only) check box under [Double Feed Detection → click [OK]. NOTE If you select [Rapid recovery system] and a paper jam or other error causes - Canon DR 2510C | User Manual - Page 52
pages, after loading the documents, you can adjust the document guide position. [Automatic Feeding] This feeding method is good for scanning batches of same-size documents: scanning starts when the scanner detects loaded documents, and stops when you press the Stop button. 52 DR-2010C / DR-2510C - Canon DR 2510C | User Manual - Page 53
scanning with the adjusted brightness and contrast. Click the Stop button to stop scanning. When scanning is complete, the Prescan dialog box is displayed. 53 DR-2010C / DR-2510C - Canon DR 2510C | User Manual - Page 54
the [Basic] tab → click [About]. 3 Enter a name for [Save user preference as] → click [OK]. 2 Check the content of the [About] dialog box → click [OK]. 54 DR-2010C / DR-2510C - Canon DR 2510C | User Manual - Page 55
Registration Tool Dialog Box 56 New/Editing Dialog Box 56 Admin Dialog Box 60 1 From the Windows task bar, click [Start] → point to [All programs] → [Canon DR-2510C] or [Canon DR-2010C] → click [Job Registration Tool]. 55 - Canon DR 2510C | User Manual - Page 56
] in the [Editing] menu opens the [New/Editing] dialog box. [Close] Button Closes the [Job Registration Tool] dialog box. 56 Job Buttons Attach to E-mail DR-2010C / DR-2510C - Canon DR 2510C | User Manual - Page 57
the [Scan Panel] dialog box. „ Function Select the function to set for each job. When you change functions, the [New/Editing] dialog box is changed. DR-2010C / DR-2510C - Canon DR 2510C | User Manual - Page 58
[Setting] button. „ [Setting] Button This button is enabled to display the corresponding setting dialog box when the [TIFF] or [PDF] file format is selected. 58 DR-2010C / DR-2510C - Canon DR 2510C | User Manual - Page 59
is selected, a standard level of JPEG compression is applied. - If your application program does not support the above compression formats, you may be unable to open scanned image files. In this case, disable network administrator, and then enter the user name and password. 59 DR-2010C / DR-2510C - Canon DR 2510C | User Manual - Page 60
Select this check box when you want to limit the space available in a destination folder by registering the folder number and specifying a warning size. 60 DR-2010C / DR-2510C - Canon DR 2510C | User Manual - Page 61
appears, follow the instructions in the message to either continue scanning or change the save destination before continuing scanning. Monitor Job Dialog Settings „ [Show Monitor Dialog] Check Box Select this check box to display the [Monitor for DR-2510C] or [Monitor for DR-2010C] dialog box - Canon DR 2510C | User Manual - Page 62
the Feeding Roller 65 Removing/Attaching the Retard Roller 67 Removing/Attaching the Document Holding Guide 69 Resetting the Counter 70 CAUTION • When cleaning the scanner and the inside of the and then clean out any paper particles remaining inside the scanner. 62 DR-2010C / DR-2510C - Canon DR 2510C | User Manual - Page 63
as feeding errors. If there are scratches on the sensor glass, contact your local c authorized Canon dealer or service representative. 3 Use compressed air to remove dust and paper particles from the inside of the scanner use a dry, soft cloth to wipe away any moisture. 63 DR-2010C / DR-2510C - Canon DR 2510C | User Manual - Page 64
and thoroughly wrung out. e 7 Wipe the document holding guide with a cloth that has been dampened with water and thoroughly wrung out. Document Holding Guide 10 Reattach the retard roller and feeding roller (See p. 66 is finished. 12 Close the document feed tray. 64 DR-2010C / DR-2510C - Canon DR 2510C | User Manual - Page 65
Do not use excessive force when removing or attaching the rollers and document holding guide. Doing so many damage them. Roller Replacement Cycle When the rollers have (feeding roller, retard roller,) contact your local authorized Canon dealer or service representative. d c 65 DR-2010C / DR-2510C - Canon DR 2510C | User Manual - Page 66
from its shaft, and pull it out of the slot. 3 Push down the lever to lock the shaft of the feeding roller into place. 66 DR-2010C / DR-2510C - Canon DR 2510C | User Manual - Page 67
p. 20). 2 Press the OPEN knob from both sides (c), and pull the front unit out and downward to open it (d). 6 Close the document feed tray. d c 67 DR-2010C / DR-2510C - Canon DR 2510C | User Manual - Page 68
to detach it from its shaft, and pull it out. 3 Push down the lever to lock the shaft of the feeding roller into place. 68 DR-2010C / DR-2510C - Canon DR 2510C | User Manual - Page 69
cover, and slide the document holding guide backwards to remove it. 6 Close the document feed tray. Attaching the Document Holding Guide 1 Fit the hooks (four) of the document holding guide onto the roller cover, and slide the document holding guide forwards to attach it. 69 DR-2010C / DR-2510C - Canon DR 2510C | User Manual - Page 70
[Scanners and Cameras]. 2 Double-click [Printers and Other Hardware] in the working field → click [Scanners and Cameras]. 4 Right-click [CANON DR-2510C USB] or [CANON DR-2010C USB] → click [Properties]. Control Panel (Category View) Printers and Other Hardware Control Panel (Classic View) 70 - Canon DR 2510C | User Manual - Page 71
5 Click the [Maintenance] tab → [Reset]. Contents Back Previous Page Next Page 6 Confirm that the counter for the selected roller is set to 0 → click [OK]. 71 DR-2010C / DR-2510C - Canon DR 2510C | User Manual - Page 72
Open P. 74) Scanning Results Are Not as Expected P. 74) If, after consulting this section, you still cannot resolve the problem, contact your local authorized Canon dealer or service representative. × The Scanner Does Not Turn ON Check the following if the scanner does not turn ON: • Is the power - Canon DR 2510C | User Manual - Page 73
Contact your local authorized Canon dealer or service representative for more information. The scanner does not support the USB cable. Use problems might cause the scanning speed to be slow. Problem Solution Problem Solution Problem Solution Problem Solution Problem . 73 DR-2010C / DR-2510C - Canon DR 2510C | User Manual - Page 74
may be scratched. Contact your local authorized Canon dealer or service representative. Symptoms Problem Solution The scanned image is abnormal in some applications. A function not supported by the application was used. Some applications do not support functions such as auto-detection of the - Canon DR 2510C | User Manual - Page 75
[Start] → [Control Panel]. Uninstalling the ISIS/TWAIN Driver and Job Registration Tool 1 From the Programs list, click [Canon DR-2510C Driver] / [Canon DR2010C Driver] (or [DR-2510C Job Tool] / [DR-2010C Job Tool]) → click [Remove]. 2 Double-click [Add or Remove Programs]. NOTE If you clicked - Canon DR 2510C | User Manual - Page 76
2 Click [Yes] in the [DR-2510C Setup] / [DR-2010C Setup] dialog box. NOTE To remove the Job Registration Tool, click [Yes] in the [Confirm File [Remove Shared File?] dialog box → click [Yes]. After the uninstallation procedure is complete, click [OK]. 3 Click [Finish]. 76 DR-2010C / DR-2510C - Canon DR 2510C | User Manual - Page 77
4 3.2 GHz CPU, 1 GB memory, LTR/A4 document size) Black and White Simplex 200 x 200 dpi 25 pages/min.(DR-2510C), 20 pages/min.(DR-2010C) 300 x 300 dpi 25 pages/min.(DR-2510C), 20 pages/min.(DR-2010C) Duplex 200 x 200 dpi 50 images/min.(DR-2510C), 40 images/min.(DR-2010C) DR-2010C / DR-2510C - Canon DR 2510C | User Manual - Page 78
document holding guide, see "Removing/ Attaching the Document Holding Guide," on p. 69. z Contact your local authorized Canon dealer or service representative for detailed information about the replacement parts. Product specifications are subject to change without notice. 78 DR-2010C / DR-2510C - Canon DR 2510C | User Manual - Page 79
External Dimensions 11.7" (298mm) Contents Back Previous Page Next Page 6.3" (160mm) 9.8" (245mm) (With the document feed tray open) 6.3" (160mm) 19.5" (490mm) 79 DR-2010C / DR-2510C - Canon DR 2510C | User Manual - Page 80
the instructions, may service. For more information regarding return and recycling of WEEE products, please visit www.canon-europe.com. (EEA: Norway, Iceland and Liechtenstein) MODEL NAMES Model DR-2010C is identical to model M11065. Model DR-2010C is the sales name of model M11065. Model DR-2510C - Canon DR 2510C | User Manual - Page 81
52 Bypass mode ...23 C CapturePerfect 3.0 12, 25 Cards, placing 23 Cleaning Document holding guide 64 Main body 62 Rollers ...63 Sensor glass 63 Connecting to the Computer 15 Counter, resetting ...10 Job function ...27 Job Registration Tool 55 K Kensington ...10 81 DR-2010C / DR-2510C - Canon DR 2510C | User Manual - Page 82
S Scan Panel ...28 Scanning methods 25 Service ...72 Setup disc ...12 Custom Installation 12 Read Manuals 12 Typical Installation 12 Software Installing 12 77 System requirements 11 T Troubleshooting 72 Typical Installation 13 U USB connector 10 USB Link switch 8 82 DR-2010C / DR-2510C
-
 1
1 -
 2
2 -
 3
3 -
 4
4 -
 5
5 -
 6
6 -
 7
7 -
8
-
9
-
10
-
11
-
12
-
13
-
14
-
15
-
16
-
17
-
18
-
19
-
20
-
21
-
22
-
23
-
24
-
25
-
26
-
27
-
28
-
29
-
30
-
31
-
32
-
33
-
34
-
35
-
36
-
37
-
38
-
39
-
40
-
41
-
42
-
43
-
44
-
45
-
46
-
47
-
48
-
49
-
50
-
51
-
52
-
53
-
54
-
55
-
56
-
57
-
58
-
59
-
60
-
61
-
62
-
63
-
64
-
65
-
66
-
67
-
68
-
69
-
70
-
71
-
72
-
73
-
74
-
75
-
76
-
77
-
78
-
79
-
80
-
81
-
82
 |
 |

Back
Next Page
Contents
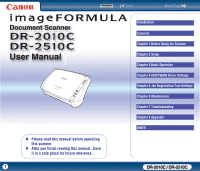
DR-2010C / DR-2510C
DR-2010C / DR-2510C
User Manual
Document Scanner
♦
Please read this manual before operating
this scanner.
♦
After you finish reading this manual, store
it in a safe place for future reference.
1
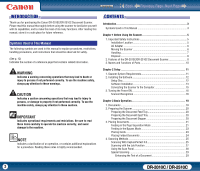
Introduction
Contents
Chapter 1 Before Using the Scanner
Chapter 2 Setup
Chapter 3 Basic Operation
Chapter 4 ISIS/TWAIN Driver Settings
Chapter 5 Job Registration Tool Settings
Chapter 6 Maintenance
Chapter 7 Troubleshooting
Chapter 8 Appendix
INDEX
Cover