Canon DR 2510C Reference Guide
Canon DR 2510C - imageFORMULA - Document Scanner Manual
 |
UPC - 013803089622
View all Canon DR 2510C manuals
Add to My Manuals
Save this manual to your list of manuals |
Canon DR 2510C manual content summary:
- Canon DR 2510C | Reference Guide - Page 1
Document Scanner Reference Guide ♦ Please read this manual before operating this scanner. ♦ After you finish reading this manual, store it in a safe place for future reference. - Canon DR 2510C | Reference Guide - Page 2
ELECTRONICS INC. ALL RIGHTS RESERVED IInNtrToRdOucDtUioCnTION Thank you for purchasing the Canon DR-2010C/DR-2510C Document Scanner. Please read this manual thoroughly before using the scanner to familiarize yourself with its capabilities, and to make the most of its many functions. After reading - Canon DR 2510C | Reference Guide - Page 3
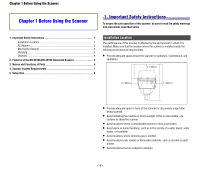
Introduction i Symbols Used in This Manual i Chapter 1 Before Using the Scanner 1 1. Important Safety Instructions 1 Installation Location 1 AC Adapter 2 Moving the Scanner 2 Handling 3 Disposal 4 2. Features of the DR-2010C/DR-2510C Document Scanner 4 3. Names and Functions of Parts - Canon DR 2510C | Reference Guide - Page 4
Instructions 1 Installation Location 1 AC Adapter 2 Moving the Scanner 2 Handling 3 Disposal 4 2. Features of the DR-2010C/DR-2510C Document Scanner 4 3. Names and Functions of Parts 6 4. Scanner System Requirements 7 5. Setup Disc 8 Installation Location The performance of this scanner - Canon DR 2510C | Reference Guide - Page 5
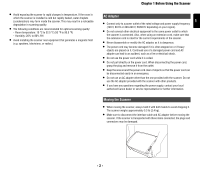
the power cord can be disconnected easily in an emergency. • Do not use an AC adapter other than the one provided with the scanner. Do not use the AC adapter provided with the scanner with other products. • If you have any questions regarding the power supply, contact your local authorized Canon - Canon DR 2510C | Reference Guide - Page 6
outlet. Then, contact your local authorized Canon dealer or service representative to have the unit serviced. • Before moving the scanner, be sure to turn the power switch OFF, and disconnect the power plug from the power outlet. CAUTION • Do not install the scanner on a surface that is unstable or - Canon DR 2510C | Reference Guide - Page 7
/OFF in accordance with the power of the computer. „ USB 2.0 Interface The scanner supports Hi-Speed USB 2.0. „ Color/Grayscale Support Documents can be scanned in 24-bit color or 256-level grayscale. „ Supports a Variety of Scanning Modes The scanner supports the following scanning modes, depending - Canon DR 2510C | Reference Guide - Page 8
the type of document. „ Color Drop-out The scanner is equipped with a Color Drop-out function that enables you to specify a color for the scanner to omit from the image to the application software, without needing to scan the document again. „ Job Function The scanner includes three job buttons for - Canon DR 2510C | Reference Guide - Page 9
. Power Connector Connect the supplied AC adapter to this connector. „ Feed Selection Lever Front Unit Open when clearing paper jams and cleaning the scanner. (See p.22 and p.29) Document Feeder Place the document to scan here. OPEN button Use to open the front unit. Document Guides Adjust - Canon DR 2510C | Reference Guide - Page 10
ents To use the DR-2010C/DR-2510C scanner, your computer must satisfy the following system requirements. • One of the following operating systems: y Microsoft Windows 2000 Professional SP4 or later y Microsoft Windows XP Professional SP2 or later y Microsoft Windows XP Home Edition SP2 or - Canon DR 2510C | Reference Guide - Page 11
DR-2010C/DR-2510C Setup disc. • DR-2010C/DR-2510C Driver The scanner driver for using the DR-2010C/DR-2510C. • CapturePerfect 3.0 An ISIS compatible application developed for use with Canon document scanners. NOTE The Setup disc of the DR-2010C/DR-2510C is configured as follows. Install the software - Canon DR 2510C | Reference Guide - Page 12
21 6. Clearing a Paper Jam 22 7. Other Functions 24 Setting the Long Document Mode 24 11..DDoocucmumenetsnts The scanner can scan documents ranging in size from business cards and checks to LTR/A4. The document sizes that this scanner can scan are shown below. Plain Paper Size Width:1.97" to - Canon DR 2510C | Reference Guide - Page 13
fed one sheet at a time. • Scanning documents before the ink is dry can cause problems with the scanner. Always make sure that the ink on a document is dry before scanning it. • Scanning documents that are written in pencil or similar material may make the rollers and scanning glass dirty, which can - Canon DR 2510C | Reference Guide - Page 14
paper size and type. Preparing the Document Feed Tray Open the document feed tray. NOTE • Documents can be scanned with the document eject tray closed. • Open the document eject tray when you want to stack output documents. • Use the extension tray when the document hangs over the edge of the main - Canon DR 2510C | Reference Guide - Page 15
with the reverse side facing you, and the top of the document facing down. 2 Adjust the document guides to fit the width of the document to be scanned. IMPORTANT There is a load limit mark ( ) on the document guides. Do not stack documents higher than this mark (approximately 50 sheets of 20 lb - Canon DR 2510C | Reference Guide - Page 16
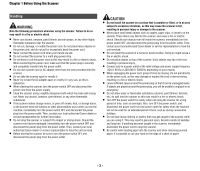
careful of neckties and long hair. If anything gets caught in the scanner, immediately turn OFF the power switch, and disconnect the power cord from the power outlet to stop scanning. • Always smooth out any folds or curls in your documents before placing them into the feeder. If the leading edge of - Canon DR 2510C | Reference Guide - Page 17
eject tray to prevent damage to the scanner while it is not being used. Placing Cards 2 1 Switch the feed selection lever to (Bypass). 2 Adjust the document guides to fit the width of the document to be scanned (See p.12). 3 Place the document with the reverse side facing you, and the top of - Canon DR 2510C | Reference Guide - Page 18
"/A3.) To use the function, fold the document in half lengthwise and place it into the feeder. The DR-2010C/DR-2510C will scan both sides and combine the mode can be used. Place documents one at a time. • Adjust the document guides to fit the width of the document. Otherwise, the image may scan as skewed - Canon DR 2510C | Reference Guide - Page 19
"/A3. When using the Folio function for an irregular document size, click the [Basic] tab of the ISIS/TWAIN driver → click [Auto-detection] in the [Page Size] box → click [OK]. 44..SSccaannninnignMgeMtheotdhsods When scanning with the DR-2010C/DR-2510C, in addition to scanning from an application - Canon DR 2510C | Reference Guide - Page 20
Guide or Chapter 2, "Setup," in the User Manual. For details on scan operations, see Chapter 4, "ISIS/TWAIN Driver Settings," in the User Manual. Scanning with the Job Function The Job Function enables you to scan simply by pressing a job button on the scanner, using the Event function of Windows - Canon DR 2510C | Reference Guide - Page 21
DR-2010C/DR-2510C. For more information, see Chapter 4, "ISIS/TWAIN Driver Settings," in the User Manual, or the Online Help. Enhancing the Text of a Document , see Chapter 4, "ISIS/TWAIN Driver Settings," in the User Manual. Scanning Documents That Include Both Color and Black-and-White Pages You - Canon DR 2510C | Reference Guide - Page 22
/TWAIN Driver Settings," in the User Manual. Monthly Report Monthly Report Monthly Report Monthly Report X Monthly Report Auto Page Size Detection IMPORTANT When scanning multiple documents of different sizes, place the documents so that they cover the entire span of the feed rollers. This - Canon DR 2510C | Reference Guide - Page 23
TWAIN Driver Settings," in the User Manual. X Deskew Off Deskew On Moire Reduction You can set the scanning conditions to reduce the moire effect (a shimmering, wavy pattern) that often appears when scanning color documents scanning conditions, see the CapturePerfect3.0 Operation Guide. - 20 - - Canon DR 2510C | Reference Guide - Page 24
provides examples of settings when scanning with the DR-2010C/DR-2510C. Refer to these examples when specifying ISIS/TWAIN driver settings. For descriptions of particular setting items, see Chapter 4, "ISIS/TWAIN Driver Settings," in the User Manual. Scanning Both Sides of Pages • To scan both - Canon DR 2510C | Reference Guide - Page 25
] box, the scanner detects when the next document is placed and document to continue scanning. Prescan • To confirm images before scanning Select the [Prescan] check box. The [Prescan] dialog box is displayed when scanning starts. (See Chapter 4, "ISIS/TWAIN Driver Settings," in the User Manual - Canon DR 2510C | Reference Guide - Page 26
when [Rapid recovery system] is enabled in the [Others] tab of the ISIS/TWAIN driver settings dialog box, the image data of the document is not saved and scanning stops. This allows you to continue scanning from the document that caused the paper jam after the paper jam is fixed. IMPORTANT Make - Canon DR 2510C | Reference Guide - Page 27
can be scanned with the DR-2010C/DR-2510C is normally 14.02" (356 mm), but you can scan documents up to 39.2" (1000 mm) long by setting the scanner to the Long Document mode. IMPORTANT When scanning in the Long Document mode, click the [Basic] tab of the ISIS/ TWAIN driver properties dialog box and - Canon DR 2510C | Reference Guide - Page 28
Chapter 2 Basic Operation 4 Click the [Maintenance] tab → [Long Document Mode (1,000 mm)]. 5 Click [Apply] → [OK]. 6 Turn the scanner OFF and then ON again. - 25 - - Canon DR 2510C | Reference Guide - Page 29
the Retard Roller 31 Removing/Attaching the Document Holding Guide 33 Resetting the Counter 34 3. Troubleshooting 35 4. Specifications 38 Specifications 38 Replacement Parts 39 External Dimensions 39 FCC REGULATIONS (For 120 V model 40 INDEX 41 CAUTION • When cleaning the scanner and the - Canon DR 2510C | Reference Guide - Page 30
of the scanner. CAUTION Do not spray water or neutral detergent directly on the scanner. Precision Canon dealer or service representative. 5 Clean the c rollers by wiping the exposed part without turning them. Retard roller c d Feeding roller Clean the d rollers while turning them. Wipe the rollers - Canon DR 2510C | Reference Guide - Page 31
has been dampened with water and thoroughly wrung out. 7 Wipe the document holding guide with a cloth that has been dampened with water and thoroughly wrung out. Document Holding Guide 10 Reattach the retard roller and feeding roller (See. p. 30 and p. 32.). 3 11 Close the front unit by gently - Canon DR 2510C | Reference Guide - Page 32
the rollers and document holding guide. Doing so many damage them. Roller Replacement Cycle When the rollers have fed more than 30,000 pages, a roller replacement message appears on the computer. Purchase an exchange roller kit and replace the feeding roller and the retard roller. Removing - Canon DR 2510C | Reference Guide - Page 33
the grooves and pulling it down. Chapter 3 Appendix Attaching the Feeding Roller 1 Insert the feeding roller into the slot inside the roller cover, and align the notch on the roller with the shaft on the main unit. 4 Lift up the roller fixing lever (c), and slide it to the left (d). 3 2 Slide the - Canon DR 2510C | Reference Guide - Page 34
cause damage or personal injury. Removing the Retard Roller 5 Close the front unit by gently pushing it up on both sides until it clicks into place. Make sure that the front unit is completely closed by pushing until you hear a click. 1 Open the document feed tray (See p. 11). 2 Press the OPEN - Canon DR 2510C | Reference Guide - Page 35
inside the front unit and pull it down to open it. Attaching the Retard Roller 1 Insert the retard roller into the slot inside the roller cover, and align the notch on the roller with the shaft on the front unit. 4 Lift up the roller fixing lever (c), and slide it to the right (d). 3 2 Slide the - Canon DR 2510C | Reference Guide - Page 36
click. 1 Open the roller cover, and slide the document holding guide backwards to remove it. 6 Close the document feed tray. Attaching the Document Holding Guide 1 Fit the hooks (four) of the document holding guide onto the roller cover, and slide the document holding guide forwards to attach it - Canon DR 2510C | Reference Guide - Page 37
and Cameras]. 3 2 Double-click [Printers and Other Hardware] in the working field → click [Scanners and Cameras]. 4 Right-click [CANON DR-2510C USB] or [CANON DR-2010C USB] → click [Properties]. Control Panel (Category View) Printers and Other Hardware Control Panel (Classic View) - 34 - Canon DR 2510C | Reference Guide - Page 38
still cannot resolve the problem, contact your local authorized Canon dealer or service representative. × The Scanner Does Not Turn ON Check the following if the scanner does not turn ON: • Is the power switch turned ON? • Is the power cord connected correctly? • Is the power cord inserted into the - Canon DR 2510C | Reference Guide - Page 39
been properly recognized by the computer? • Has the scanner driver been installed? • Has the application software been installed correctly? Has the application software been set up correctly? • Is there a problem in the PC system? IMPORTANT • If documents are not scanned normally even if the - Canon DR 2510C | Reference Guide - Page 40
). Use the document guide adapter to prevent document skew, and select the [Deskew] check box in the Basic tab of the ISIS/TWAIN driver properties dialog box. Symptoms Problem Solution Lines, smudges, or dirt appear on the scanned image. The scanning glass or rollers inside the scanner are dirty - Canon DR 2510C | Reference Guide - Page 41
mode) Desktop sheetfed scanner Width: 1.97" to 8.5" (50 mm to 216 mm) Length: 2.12" to 14.02" (53.9 mm to 356mm)* 14 to 32 lb bond (52 to 128 g/m2) 0.0024" to 0.0059" (0.06 mm to 0.15 mm) 300 x 300 dpi 50 images/min.(DR-2510C), 40 images/min.(DR-2010C) 24-bit Color Simplex 100 x 100 - Canon DR 2510C | Reference Guide - Page 42
Chapter 3 Appendix Replacement Parts Exchange roller kit (product code: 2445B001) Kit to replace the rollers (retard roller, feeding roller) and document holding guide. • For information on replacing the rollers, see "Removing/Attaching the Feeding Roller," on p. 29 and "Removing/Attaching the - Canon DR 2510C | Reference Guide - Page 43
scheme or your household waste disposal service. For more information regarding return and recycling of WEEE products, please visit www.canon-europe.com. (EEA: Norway, Iceland and Liechtenstein) 3 MODEL NAMES Model DR-2010C is identical to model M11065. Model DR-2010C is the sales name of model - Canon DR 2510C | Reference Guide - Page 44
6 Document guides 6 Document holding guide Attaching 33 Removing 33 Documents ...9 Placing ...12 Driver ...8 E Extension tray ...6 F Features ...4 Feed Selection lever 6 Feeding roller Attaching 30 Removing 29 Folded documents, placing 15 Front unit ...6 H Handling ...3 I Installation - Canon DR 2510C | Reference Guide - Page 45
Roller, replacing Counter, resetting 34 Replacement cycle 29 S Scan Panel ...18 Scanning methods 16 Service ...35 Setup disc ...8 Custom Installation 8 Read Manuals 8 Typical Installation 8 Special scanning 11" X 17"/A3 (single-sided 19 B&W and color Troubleshooting 35 Typical Installation 8 - Canon DR 2510C | Reference Guide - Page 46
INC. 1248, SHIMOKAGEMORI, CHICHIBU-SHI, SAITAMA 369-1892, JAPAN CANON U.S.A. INC. ONE CANON PLAZA, LAKE SUCCESS, N.Y. 11042, U.S.A. CANON CANADA INC. 6390 DIXIE ROAD, MISSISSAUGA, ONTARIO L5T 1P7, CANADA CANON EUROPA N.V. BOVENKERKERWEG 59-61, P.O.BOX 2262, 1180 EG AMSTELVEEN, THE NETHERLANDS
-
 1
1 -
 2
2 -
 3
3 -
 4
4 -
 5
5 -
 6
6 -
 7
7 -
8
-
9
-
10
-
11
-
12
-
13
-
14
-
15
-
16
-
17
-
18
-
19
-
20
-
21
-
22
-
23
-
24
-
25
-
26
-
27
-
28
-
29
-
30
-
31
-
32
-
33
-
34
-
35
-
36
-
37
-
38
-
39
-
40
-
41
-
42
-
43
-
44
-
45
-
46
 |
 |

Reference Guide
Document Scanner
♦
Please read this manual before operating this scanner.
♦
After you finish reading this manual, store it in a safe place for
future reference.