Canon DR-3010C User Manual
Canon DR-3010C - imageFORMULA - Document Scanner Manual
 |
UPC - 013803097023
View all Canon DR-3010C manuals
Add to My Manuals
Save this manual to your list of manuals |
Canon DR-3010C manual content summary:
- Canon DR-3010C | User Manual - Page 1
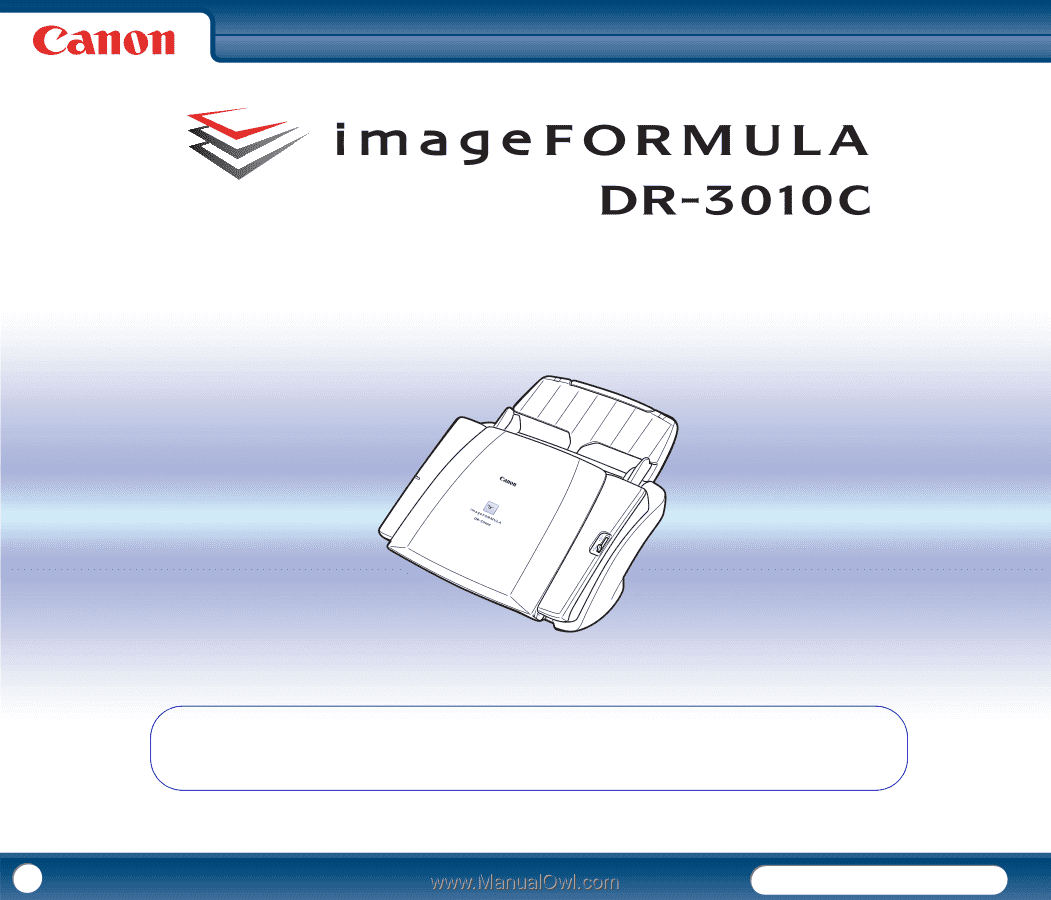
Cover Document Scanner User Manual ♦ Please read this manual before operating this scanner. ♦ After you finish reading this manual, store it in a safe place for future reference. 1 DR-3010C - Canon DR-3010C | User Manual - Page 2
, WARRANTIES AS TO MARKETABILITY, MERCHANTABILITY, FITNESS FOR A PARTICULAR PURPOSE OF USE OR NON-INFRINGEMENT. CANON ELECTRONICS INC. SHALL NOT BE LIABLE FOR ANY DIRECT, INCIDENTAL, OR CONSEQUENTIAL DAMAGES OF ANY NATURE, OR LOSSES OR EXPENSES RESULTING FROM THE USE OF THIS MATERIAL. 2 DR-3010C - Canon DR-3010C | User Manual - Page 3
6 Moving the Scanner 6 Handling 7 Disposal 8 2. Features of the DR-3010C Document Scanner 8 3. Names and Functions of Parts 10 Chapter 2 Setup 12 1. Scanner System Requirements 12 2. Installing the Software 13 Setup Disc 13 Software Installation 14 Connecting the Scanner to the Computer - Canon DR-3010C | User Manual - Page 4
Uninstalling the Software 79 Uninstalling the ISIS/TWAIN Driver and Job Registration Tool 79 Uninstalling CapturePerfect 3.0 80 3. Removing the Document Feed Tray 81 Chapter 8 Appendix 82 Specifications 82 Specifications 82 Replacement Parts 83 External Dimensions 84 INDEX 86 4 DR-3010C - Canon DR-3010C | User Manual - Page 5
described below. 1. Important Safety Instructions 5 Installation Location 5 AC Adapter 6 Moving the Scanner 6 Handling 7 Disposal 8 2. Features of the DR-3010C Document Scanner 8 3. Names and Functions of Parts 10 Installation Location The performance of this scanner is affected by the - Canon DR-3010C | User Manual - Page 6
hold it with both hands to avoid dropping it. The scanner weighs approximately 6.4 lb (2.9 kg). • Make sure to disconnect the interface cable and AC adapter before moving the scanner. If the scanner is transported with these items connected, the plugs and connectors may be damaged. 6 DR-3010C - Canon DR-3010C | User Manual - Page 7
the power switch OFF, and disconnect the power plug from the power outlet. Then, contact your local authorized Canon dealer or service representative to have the unit serviced. • Do not install the scanner in a humid or dusty location. Doing so might cause a fire or electric shock. • Do not place - Canon DR-3010C | User Manual - Page 8
and laws or consult with the retailer who sold you the scanner. 2. Features of the DR-3010C Document Scanner The main features of the DR-3010C document scanner are described below. „ Compact Size The dimensions of the scanner are as follows: 12.2" (310 mm) (W) x 9.1" (230 mm) (H) x 23.0" (583 mm - Canon DR-3010C | User Manual - Page 9
is designed to save energy by entering the sleep mode when it is not scanning documents. „ Bar Code Detection The bar codes within documents can be detected by installing the optional bar code module. NOTE Some functions may not be available, depending on the software you are using. 9 DR-3010C - Canon DR-3010C | User Manual - Page 10
Power Switch This switch is used to turn the scanner ON and OFF. If you set the switch to 'AUTO', the scanner is linked to be automatically turned ON/OFF in accordance with the power of the computer. USB Connector Connect a USB cable that supports Hi-Speed USB 2.0 to this connector. 10 DR-3010C - Canon DR-3010C | User Manual - Page 11
a time (Page Separation mode) (see p.22). Push it down to feed documents that are fastened together, such as invoices, without separating them (Bypass mode). (See p.24.) Paper Eject Stopper Use the paper eject stopper that corresponds to the length of the documents you want to scan. 11 DR-3010C - Canon DR-3010C | User Manual - Page 12
Disc 13 Software Installation 14 Connecting the Scanner to the Computer 16 3. Turning the Power ON 18 Scanner Recognition 18 1. Scanner System Requirements To use the DR-3010C scanner, your computer must satisfy the following system requirements. • Operating systems: y Microsoft Windows 2000 - Canon DR-3010C | User Manual - Page 13
• DR-3010C Driver/Job Registration Tool The scanner driver for using the DR-3010C and the tool to register/set jobs. • CapturePerfect 3.0 An ISIS compatible application developed for use with Canon document scanners. NOTE The Setup disc of the DR-3010C is configured as follows. Install the software - Canon DR-3010C | User Manual - Page 14
] to accept it. NOTE When you select [Typical Installation], all of the displayed software and the User Manual will be installed automatically. If you want to reinstall only specific software that you have previously uninstalled, select [Custom Installation] and specify the software. 14 DR-3010C - Canon DR-3010C | User Manual - Page 15
7 When the driver installation is complete, click [Finish]. 10 Confirm the installation location → click [Next]. 8 Click [Next]. 11 When the CapturePerfect 3.0 installation is complete, click [Finish]. 9 Read the license agreement → click [Yes] to accept it. 12 Click [Next]. 15 DR-3010C - Canon DR-3010C | User Manual - Page 16
When the User Manual installation is complete, click [Finish]. 14 Click [Exit] to finish installing the software. Connecting the Scanner to the Computer Connect the scanner to the computer. IMPORTANT Before connecting the scanner to the computer, verify that the power switch of the scanner is OFF - Canon DR-3010C | User Manual - Page 17
3 Connect the plug of the AC adapter to the power connector on the back of the scanner. 120 V model 4 Use the supplied USB cable to connect the scanner to the computer. 220-240 V model 17 DR-3010C - Canon DR-3010C | User Manual - Page 18
required device driver. IMPORTANT • If you turn the power OFF, wait at least 10 seconds before turning it ON again. • If you will not be using the scanner for an extended period, you should disconnect the power cord from the AC outlet for safety. 3 Windows automatically recognizes the DR-3010C as - Canon DR-3010C | User Manual - Page 19
" (0.06 mm to 0.25 mm) 11 to 54 lb bond (40 to 209 g/m2) 0.002" to 0.01" (0.05 mm to 0.25 mm) * You can scan documents up to 39.2" (1000 mm) long by setting the scanner to the Long Document mode. (See "Setting the Long Document Mode," on p.36.) 19 DR-3010C - Canon DR-3010C | User Manual - Page 20
clean the internal parts of the scanner after scanning such documents. • When scanning a two-sided document that is printed on thin paper, the image on the opposite side of each page may show through. In this case, adjust the scanning intensity in the application software and set the Preventing - Canon DR-3010C | User Manual - Page 21
corresponds with the length of the document you want to scan. NOTE • Documents can be scanned with the document eject tray closed. • Open the document eject tray when you want to stack output documents. • Use the extension tray when the document hangs over the edge of the main tray. 21 DR-3010C - Canon DR-3010C | User Manual - Page 22
first. 2 Adjust the document guides to fit the width of the document to be scanned. IMPORTANT There is a load limit mark ( ) on the document guides. Do not stack documents higher than this mark (approximately 50 sheets of 20 lb bond (80 g/ m2) paper.) Doing so may cause a paper jam. 22 DR-3010C - Canon DR-3010C | User Manual - Page 23
placing them into the feeder. If the leading edge of a document is curled, it may cause a paper jam. • If feeding stops due to a system error or paper jam while the scanner is scanning, resolve the problem, make sure that the scanned image of the last page that was successfully fed has been stored - Canon DR-3010C | User Manual - Page 24
the edge that is fastened together) fed through the scanner first. (See p.22.) IMPORTANT When scanning cards, make sure to set the feed selection lever to (Bypass), and scan the cards one at a time. 2 Adjust the document guides to fit the width of the card to be scanned. (See p.22.) 24 DR-3010C - Canon DR-3010C | User Manual - Page 25
if there is content such as photos, diagrams, or text that spans the fold. • For Folio scanning, only the Bypass mode can be used. Place documents one at a time. • Adjust the document guides to fit the width of the document. Otherwise, the image may scan as skewed or shifted. 25 DR-3010C - Canon DR-3010C | User Manual - Page 26
become the right side of the combined image. • When scanning folded documents, click the [Basic] tab in the Properties for Canon DR-3010C dialog box → select [Folio] from the Scanning Side drop- down list → click [OK]. (See Chapter 4, "ISIS/TWAIN Driver Settings - Scanning Side Settings," on p.43 - Canon DR-3010C | User Manual - Page 27
38. NOTE If [CANON DR-3010C] is not displayed in the list of scanners, reinstall the ISIS/TWAIN driver. (See Chapter 2, "Setup - 2. Installing the Software," on p. 13.) 4 Select the default page size from the Default Page size drop-down list → click [OK]. 7 Place your document. (See "3. Placing - Canon DR-3010C | User Manual - Page 28
the format to save image data, the location to save the file. 1 From the Windows task bar, click [Start] → [All Programs] → [Canon DR3010C] → [Job program that installs with the ISIS/TWAIN driver, and is used for registering the jobs that are executed when the Start key is pressed. 28 DR-3010C - Canon DR-3010C | User Manual - Page 29
file to an e-mail. 3 Click [Close] in the Job Registration Tool dialog box. 4 Place the document. (See "3. Placing Documents," on p.22.) 7 When scanning is complete, the image data is sent with the specified conditions. 8 Click [Close] in the Monitor for DR-3010C dialog box. 29 DR-3010C - Canon DR-3010C | User Manual - Page 30
Scan Panel The Scan Panel is an application that is installed with the ISIS/TWAIN driver. It is displayed in the system tray when the DR-3010C driver is started. If in the [Others] tab in the Properties for Canon DR-3010C dialog box is set to 'Panel-Feeding' or 'Automatic Feeding - Canon DR-3010C | User Manual - Page 31
as a single image. Click the [Basic] tab in the Properties for Canon DR-3010C dialog box → select [Folio] from the Scanning Side drop-down list → click [OK]. For more information on setting the scanning conditions, see "Placing Folded Documents," on p. 25, and Chapter 4, "ISIS/TWAIN Driver Settings - Canon DR-3010C | User Manual - Page 32
tab in the Properties for Canon DR-3010C dialog box → select the colors to omit from the Front and Back drop-down lists → click [OK]. For more information on setting the scanning conditions, see Chapter 4, "ISIS/ TWAIN Driver Settings - Omitting a Specific Color," on p.51. Document to Scan X Color - Canon DR-3010C | User Manual - Page 33
-and-white scanning. Click the [Image processing] tab in the Properties for Canon DR-3010C dialog box → select [Red Enhance] from the Front and Back drop-down lists → click [OK]. For more information on setting the scanning conditions, see Chapter 4, "ISIS/ TWAIN Driver Settings - Enhancing the Red - Canon DR-3010C | User Manual - Page 34
displayed on the display panel of the scanner and the scanning stops. Error Code for a Paper Jam Error Code for a Double Feed CAUTION When removing documents, take care not to cut your hands on the edges of the paper. 1 Remove any documents that have been left in the eject tray. 34 DR-3010C - Canon DR-3010C | User Manual - Page 35
it out, make sure to remove any remaining pieces from inside the scanner. 4 Close the front unit by gently pushing it up on both for Canon DR-3010C dialog box, the image data of the document is not saved and scanning stops. This allows you to continue scanning from the document that caused - Canon DR-3010C | User Manual - Page 36
and Cameras]. If the Control Panel is displayed with the Classic View, double-click [Scanners and Cameras]. IMPORTANT When scanning in the Long Document mode, click the [Basic] tab in the Properties for Canon DR-3010C dialog box → select [Auto-detection] from the Page Size drop-down list → click - Canon DR-3010C | User Manual - Page 37
4 Click the [Maintenance] tab → click the [Long Document mode (1,000 mm)] radio button. 5 Click [Apply] → [OK]. 6 Turn the scanner OFF, and then ON again. 37 DR-3010C - Canon DR-3010C | User Manual - Page 38
Document Background ......... 50 Omitting a Specific Color 51 Enhancing the Red Color 51 Rapid System Recovery 52 Double Feed Detection 52 Feeding Options 53 Prescan 54 Registering Scanning Conditions 55 Checking the Version 55 1. Before Using the Scanner To use the DR-3010C with an ISIS - Canon DR-3010C | User Manual - Page 39
NOTE If [CANON DR-3010C] is not displayed in the list of scanners, reinstall the ISIS/ TWAIN driver. (See Chapter 2, "Setup - 2. Installing the Software," on p. 13.) 4 Select the default page size from the Default Page Size drop-down list → click [OK]. 2. ISIS/TWAIN Driver Properties Dialog Box - Canon DR-3010C | User Manual - Page 40
suit your needs. 1 Click the [Basic] tab in the Properties for Canon DR-3010C dialog box → select the scanning mode from the Mode drop-down list → click [OK]. NOTE • You can select the following modes, according to the type of document you want to scan. Note that some functions may be restricted - Canon DR-3010C | User Manual - Page 41
Settings Tab Basic Image processing Others Auto Color Detection This section describes the procedure for setting the scanner to automatically detect whether a document is in color or black-and-white when scanning. 1 Click the [Basic] tab in the Properties for Canon DR-3010C dialog box → select - Canon DR-3010C | User Manual - Page 42
document with a low proportion of color as a black-and-white document. - [Mode in case Canon DR-3010C dialog box → select the page size from the Page Size drop-down list → click [OK]. NOTE • Click [Auto-detection] to scan the following kinds of documents: - Documents of undetermined size - Documents - Canon DR-3010C | User Manual - Page 43
tab in the Properties for Canon DR-3010C dialog box → select the images. NOTE • Specify one of the settings below according to the page side setting you want to use. - [Simplex] Scan only the front side of documents loaded into the feeder. - [Duplex] Scan both sides of documents. 43 DR-3010C - Canon DR-3010C | User Manual - Page 44
, or if non-blank pages are skipped. Correcting Image Skewing This section describes the procedure for setting the scanner to detect slanted document pages and straighten the scanned images. 1 Click the [Basic] tab in the Properties for Canon DR-3010C dialog box → select the [Deskew] check box - Canon DR-3010C | User Manual - Page 45
] drop-down list → click [OK]. Adjusting the Scan Area This section describes the procedure for scanning part of a document image. 1 Click the [Basic] tab in the Properties for Canon DR-3010C dialog box → click [Area] → click [OK]. NOTE • The [High Speed Moire Reduction] is displayed only when - Canon DR-3010C | User Manual - Page 46
frame around scanned images, reduce the scanning area by moving the slider to the left. y The measurement units for margins are determined by the Unit setting. Preview Button (TWAIN driver only) Click [Preview] to scan one document page and display its preview image in the Area window. 46 DR-3010C - Canon DR-3010C | User Manual - Page 47
scanning. 1 Click the [Brightness] tab in the Properties for Canon DR-3010C dialog box → adjust the [Brightness] slider and [Contrast] the contrast of images to be scanned. - [Used the Back Side Brightness] Check Box If the brightness of the front and back pages of the document are different, - Canon DR-3010C | User Manual - Page 48
adjusting the gamma level for scanning documents. 1 Click the [Brightness] tab in the Properties for Canon DR-3010C dialog box → click [Gamma] color for the custom setting. y The color bar and color of the sample image are changed to show the specified color. - Input method Select the setting - Canon DR-3010C | User Manual - Page 49
the Edge emphasis slider to adjust the contours of the scanned image → click [OK]. 1 Click the [Image processing] tab in the Properties for Canon DR-3010C dialog box → select the angle to rotate the image from the Document Orientation drop-down list → click [OK]. NOTE Move the slider toward - Canon DR-3010C | User Manual - Page 50
pages and pages with dark content on the back side, or to remove the background from document images. 1 Click the [Image processing] tab in the Properties for Canon DR-3010C dialog box → select the [Prevent Bleed Through / Remove Background] check box → click [Setting]. NOTE • When the [Text - Canon DR-3010C | User Manual - Page 51
[OK]. 1 Click the [Image processing] tab in the Properties for Canon DR-3010C dialog box → select [Red Enhance] from the Front and Back drop-down lists under → click [OK]. NOTE You can specify different settings for the front and back side of the document. NOTE You can set - Canon DR-3010C | User Manual - Page 52
describes the procedure for setting the system recovery method used by the scanner when document feeding stops due to a paper jam or other error during scanning. 1 Click the [Others] tab in the Properties for Canon DR-3010C dialog box → select the [Rapid recovery system] check box → click [OK - Canon DR-3010C | User Manual - Page 53
time can be set from 0 to 60 seconds. 1 Click the [Others] tab in the Properties for Canon DR-3010C dialog box → select the document feeding method from the Feeding Option drop-down list → click [OK]. Batch Separation (ISIS driver only) When the separation timing to use when scanning starts with - Canon DR-3010C | User Manual - Page 54
in the Properties for Canon DR-3010C dialog box → select the [Prescan] check box → click [OK]. 2 From the [Scan] menu, select [Scan Batch to File]. Specify the location, file name, and file format to save the image → click [Save] to start scanning. NOTE The Prescan window is for scanning after - Canon DR-3010C | User Manual - Page 55
describes the procedure for checking the version of the ISIS/TWAIN driver you are currently using. 1 Specify the scanning conditions as necessary in the [Basic], [Brightness], [Image processing], and [Others] tabs in the Properties for Canon DR-3010C dialog box. 1 Click the [Basic] tab in the - Canon DR-3010C | User Manual - Page 56
that installs with the ISIS/TWAIN driver, and is used to register jobs that can be executed by the operation panel. Use the following procedure to start the Job Registration Tool. 1 From the Windows task bar, click [Start] → [All Programs] → [Canon DR3010C] → [Job Registration Tool]. 56 DR-3010C - Canon DR-3010C | User Manual - Page 57
Registration Tool Dialog Box This dialog box appears when the Job Registration Tool is started from the Windows Start menu. Save as File Print Registered Job List Displays the number of the registered jobs ] Button Closes the Job Registration Tool dialog box. 57 Attach to E-mail Launcher DR-3010C - Canon DR-3010C | User Manual - Page 58
] Select the function to set for each job. y When you change functions, the New/Editing dialog box is changed. NOTE For more information on the scanner settings, see Chapter 4, "ISIS/TWAIN Driver Settings," on p.38. 58 DR-3010C - Canon DR-3010C | User Manual - Page 59
to users with certain access permission. In this case, users cannot access the shared folder without entering images. y JPEG: This compression format is for saving grayscale and color images. When the [Compression] check box is selected, a standard level of JPEG compression is applied. 59 DR-3010C - Canon DR-3010C | User Manual - Page 60
support the above compression formats, you may be unable to open scanned image files. In this case when the scanner is set of the scanned document. „ [Language image quality. The compression ratio is 10. y [User]: Use to specify the compression ratio from 0 to 100 using the slide bar. 60 DR-3010C - Canon DR-3010C | User Manual - Page 61
in [Launcher] in the [New/Editing] dialog box, you can perform scanning with an application by pressing the Start key on the scanner. The following describes how to register ISIS/TWAIN-compatible applications as events. 1 From the Windows task bar, click [Start] → [Control Panel]. 61 DR-3010C - Canon DR-3010C | User Manual - Page 62
Panel (Category View) Printers and Other Hardware Control Panel (Classic View) 3 Right-click [CANON DR-3010C USB] → click [Properties]. IMPORTANT • Do not change the settings by selecting [Job Tool] in [Scanner events]. The job function may not run normally. • Do not enable [Disable device - Canon DR-3010C | User Manual - Page 63
DR-3010C Job Tool] displayed in the [Send to this application] list. The job function will not run correctly. NOTE • If multiple applications are selected, the [Select Application] dialog box is displayed when the Start key of the scanner the Folder for Saved Images „ [Capacity Warning Settings] - Canon DR-3010C | User Manual - Page 64
instructions in the message to either continue scanning or change the save destination before continuing scanning. Monitor Job Dialog Settings „ [Show Monitor Dialog] Check Box Select this check box to display the Monitor for DR-3010C list. When the scanned image size reaches the specified maximum - Canon DR-3010C | User Manual - Page 65
list in the printing dialog box displayed by clicking [Print] in the [Admin] menu. The size of the document printed is approx. 2.1" x 3.4" (54 mm x 86 mm). NOTE As shown in the job number 3 diagram, the end of job titles with a text string that is too long are abbreviated with '...'. 65 DR-3010C - Canon DR-3010C | User Manual - Page 66
to appear on scanned images. Use compressed air to periodically clean dust and paper particles from the document feed opening and the inside of the scanner. After finishing a large scanning job, turn OFF the scanner and then clean out any paper particles remaining inside the scanner. 66 DR-3010C - Canon DR-3010C | User Manual - Page 67
of the scanner. IMPORTANT Scratches on the sensor glass may cause marks on the images, as well as feeding errors. If there are scratches on the sensor glass, contact your local authorized Canon dealer or service representative. 5 Clean the c rollers by wiping the exposed part without turning - Canon DR-3010C | User Manual - Page 68
until you hear a click. 8 Remove the feed roller and retard roller. (See p.69 and p.71.) IMPORTANT Remove the feed roller and retard roller from the scanner to clean them, and make sure to reattach them to the scanner when cleaning is finished. 12 Close the document eject tray. 68 DR-3010C - Canon DR-3010C | User Manual - Page 69
74.) • For information about the exchange roller kit (feed roller, retard roller, and the document holding guide), contact your local authorized Canon dealer or service representative. 3 Open the roller cover by placing your fingers in the grooves and pulling it down. Roller Cover 69 DR-3010C - Canon DR-3010C | User Manual - Page 70
it to the left to detach it from its shaft, and pull it out of the slot. 2 Slide the roller fixing lever to the right to lock the roller into the hole on the left of the feed roller. 3 Push down the lever to lock the shaft of the feed roller into place. 70 DR-3010C - Canon DR-3010C | User Manual - Page 71
or attaching the retard roller. Using excessive force may cause damage or personal injury. Removing the Retard Roller 5 Close the front unit document eject tray. (See p.21.) 2 Press the OPEN button (c) while pulling the front unit open (d). d c 6 Close the document eject tray. 71 DR-3010C - Canon DR-3010C | User Manual - Page 72
roller fixing lever to the left to lock the roller into the hole on the left of the retard roller. 5 Remove the retard roller by moving it to the right to detach it from its shaft, and pull it out. 3 Push down the lever to lock the shaft of the feed roller into place. 72 DR-3010C - Canon DR-3010C | User Manual - Page 73
click. 1 Open the roller cover, and slide the document holding guide to remove it. 6 Close the document eject tray. Attaching the Document Holding Guide 1 Fit the hooks (four) of the document holding guide onto the roller cover, and slide the document holding guide to attach it. 73 DR-3010C - Canon DR-3010C | User Manual - Page 74
Resetting the Counter After replacing the feed rollers, open the counter settings dialog box and reset the counter. 1 From the Windows task bar, click [Start] → [Control Panel]. 3 Right-click [CANON DR-3010C USB] → click [Properties]. 4 Click the [Maintenance] tab → [Reset]. 2 If the Control - Canon DR-3010C | User Manual - Page 75
75 2. Uninstalling the Software 79 Uninstalling the ISIS/TWAIN Driver and Job Registration Tool 79 Uninstalling CapturePerfect 3.0 80 3. Removing the Document Feed Tray 81 1. Troubleshooting This section describes the possible problems that might occur during use of the scanner and how to - Canon DR-3010C | User Manual - Page 76
been properly recognized by the computer? • Has the scanner driver been installed? • Has the application software been installed correctly? Has the application software been set up correctly? • Is there a problem in the PC system? IMPORTANT • If documents are not scanned normally even if the - Canon DR-3010C | User Manual - Page 77
Use the document guide adapter to prevent document skew. Click the [Basic] tab in the Properties for Canon DR-3010C dialog box → select the [Deskew] check box. Symptoms Problem Solution Lines, smudges, or dirt appear on the scanned image. The scanning glass or rollers inside the scanner are dirty - Canon DR-3010C | User Manual - Page 78
cleaning the scanning glass and rollers, the scanning glass inside the scanner may be scratched. Contact your local authorized Canon dealer or service representative. Symptoms Problem Solution The scanned image is abnormal in some applications. A function not supported by the application was used - Canon DR-3010C | User Manual - Page 79
the Software If the ISIS/TWAIN driver, Job Registration Tool, or CapturePerfect 3.0 are not operating normally, follow the procedure below to uninstall them. Then, reinstall the software from the DR-3010C setup disc. (See "2. Installing the Software," on p.13.) IMPORTANT Log on to Windows as - Canon DR-3010C | User Manual - Page 80
2 Click [Yes] in the DR-3010C Setup dialog box. Uninstalling CapturePerfect 3.0 1 From the Programs list, click [CapturePerfect 3.0] → [Remove]. NOTE To remove the Job File dialog box → click [Yes]. After the uninstallation procedure is complete, click [OK]. 3 Click [Finish]. 80 DR-3010C - Canon DR-3010C | User Manual - Page 81
document feed tray while the back of the document guide is unsnapped from the document feed tray. 1 Push the document guides to the center of the machine. 2 Pull up the document guides while holding the document feed tray to unsnap the document guides from the document feed tray. 81 DR-3010C - Canon DR-3010C | User Manual - Page 82
Specifications Main Unit Specifications 82 Specifications 82 Replacement Parts 83 External Dimensions 84 INDEX 86 Type Desktop sheetfed scanner Scanning Document Size Plain Paper Size Width: 1.97" to 8.5" (50 mm to 216 mm) Length: 2.12" to 14.02" (53.9 mm to 356 mm)* Paper weight - Canon DR-3010C | User Manual - Page 83
the document holding guide, see "Removing/ Attaching the Document Holding Guide," on p. 73. • Contact your local authorized Canon dealer or service representative for detailed information about the replacement parts. Product specifications are subject to change without notice. 83 DR-3010C - Canon DR-3010C | User Manual - Page 84
7.8" (197 mm) (9.1" (230 mm)) (With tray open) External Dimensions 12.2" (310 mm) 11.5" (292 mm) (23.0" (583 mm)) (With tray open) 84 DR-3010C - Canon DR-3010C | User Manual - Page 85
WEEE scheme or your household waste disposal service. For more information regarding return and recycling of WEEE products, please visit www.canon-europe.com. (EEA: Norway, Iceland and Liechtenstein) MODEL NAMES Model DR-3010C is identical to model M11066. Model DR-3010C is the sales name of model - Canon DR-3010C | User Manual - Page 86
22 Double feed detection 52 Driver...13 E Extension tray ...10 86 F Features ...8 Feed roller Attaching 70 Removing 69 Feed Selection lever 11 Folded documents, placing 25 Front unit ...10 H Handling ...7 I Installation location 5 Introduction ...3 ISIS/TWAIN Driver Properties Dialog Box 39 - Canon DR-3010C | User Manual - Page 87
Replacement parts 83 Retard roller Attaching 72 Removing 71 Roller, replacing Counter, resetting 74 Replacement cycle 69 S Scan Panel ...30 Scanning methods 26 Service...75 Setup disc...13 Custom Installation 13 Read Manuals 13 Typical Installation 13 Software Installing 13 Uninstalling
-
 1
1 -
 2
2 -
 3
3 -
 4
4 -
 5
5 -
 6
6 -
 7
7 -
8
-
9
-
10
-
11
-
12
-
13
-
14
-
15
-
16
-
17
-
18
-
19
-
20
-
21
-
22
-
23
-
24
-
25
-
26
-
27
-
28
-
29
-
30
-
31
-
32
-
33
-
34
-
35
-
36
-
37
-
38
-
39
-
40
-
41
-
42
-
43
-
44
-
45
-
46
-
47
-
48
-
49
-
50
-
51
-
52
-
53
-
54
-
55
-
56
-
57
-
58
-
59
-
60
-
61
-
62
-
63
-
64
-
65
-
66
-
67
-
68
-
69
-
70
-
71
-
72
-
73
-
74
-
75
-
76
-
77
-
78
-
79
-
80
-
81
-
82
-
83
-
84
-
85
-
86
-
87
 |
 |
DR-3010C
DR-3010C
Document Scanner
User Manual
♦
Please read this manual before operating this scanner.
♦
After you finish reading this manual, store it in a safe place for future reference.
1
Cover