Canon EOS C300 Mark II WFT-E6 Guide for EOS C300 Mark II Users
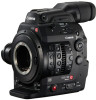
Canon EOS C300 Mark II Manual
 |
View all Canon EOS C300 Mark II manuals
Add to My Manuals
Save this manual to your list of manuals |
Canon EOS C300 Mark II manual content summary:
- Canon EOS C300 Mark II | WFT-E6 Guide for EOS C300 Mark II Users - Page 1
DIE-0478-000 Wireless File Transmitter WFT-E6 Guide for EOS C300 Mark II Users E - Canon EOS C300 Mark II | WFT-E6 Guide for EOS C300 Mark II Users - Page 2
Canon Digital Cinema Camera EOS C300 Mark II to connect the camera to a Wi-Fi network and use the camera's network functions. This guide will explain how to attach the WFT-E6 to the camera the camera's Instruction Manual. Conventions used in this guide Warnings to avoid potential problems. - Canon EOS C300 Mark II | WFT-E6 Guide for EOS C300 Mark II Users - Page 3
the Configuration...17 Browser Remote: Camera Settings 18 Browser Remote: User Settings...19 Checking Settings ...21 2 Using Network Functions 23 Starting Browser Remote...24 Starting the Media Server Mode ...27 3 Troubleshooting 29 Troubleshooting ...30 Precautions Regarding Wi-Fi Networks - Canon EOS C300 Mark II | WFT-E6 Guide for EOS C300 Mark II Users - Page 4
File Transmitter. The transmitter is powered by the camera. Make sure the camera's battery pack is sufficiently charged before using the transmitter. 1 Turn off the camera. ባ ቢ ቤ Î 2 Attach the transmitter. Open the camera's system extension terminal cover (ቢ), align the transmitter's plug - Canon EOS C300 Mark II | WFT-E6 Guide for EOS C300 Mark II Users - Page 5
1 Network Settings Complete the network settings using the camera's menu screens. 5 - Canon EOS C300 Mark II | WFT-E6 Guide for EOS C300 Mark II Users - Page 6
Available Network Functions After you connect the camera to a network via Wi-Fi (A 7), you can use the following network functions. Wi-Fi functions and connection types Function Browser Remote Media Server Description Control the camera remotely from the Web browser of a connected device. - Canon EOS C300 Mark II | WFT-E6 Guide for EOS C300 Mark II Users - Page 7
using a PIN code, you will need to know in advance how to activate the wireless router's WPS function. For details refer to the wireless router's instruction manual. [Search for Access Points] If your access point does not support the WPS function or you cannot activate it, you can have the camera - Canon EOS C300 Mark II | WFT-E6 Guide for EOS C300 Mark II Users - Page 8
cannot be automatically detected by the camera, you can enter all the necessary settings manually. This requires more advanced knowledge of Wi-Fi and network settings. Depending on the country/region of use, some restrictions on outdoor use or camera access point connections may apply when operating - Canon EOS C300 Mark II | WFT-E6 Guide for EOS C300 Mark II Users - Page 9
the current settings, press the CANCEL button. 2 To change the [SSID] (network name), select [Input] and then press SET. Enter the SSID (network name) the camera will use as a Wi-Fi access point using the keyboard screen (A 10). The network name is needed to connect the Wi-Fi enabled device to the - Canon EOS C300 Mark II | WFT-E6 Guide for EOS C300 Mark II Users - Page 10
Access Point Connection 6 To change the [Encryption Key] (password), select [Input] and then press SET. Enter the encryption key (password) the camera will use as a Wi-Fi access point using the keyboard screen. The encryption key (password) is needed to connect the Wi-Fi enabled device to the - Canon EOS C300 Mark II | WFT-E6 Guide for EOS C300 Mark II Users - Page 11
use depending on where you plan to use the camera. 1 Set the camera be displayed on the screen. To use the current settings, select [OK step. 3 Select the method you wish use to set up the access point connection and the access point you plan to use. Continue with the procedure explained in the relevant - Canon EOS C300 Mark II | WFT-E6 Guide for EOS C300 Mark II Users - Page 12
has a WPS button) or using a PIN code issued by the camera. Wireless Routers with a WPS Button 1 Press and hold the WPS button on the wireless router. The length of time required to hold down the WPS button depends on the wireless router. Refer to the instruction manual of your wireless router and - Canon EOS C300 Mark II | WFT-E6 Guide for EOS C300 Mark II Users - Page 13
camera will generate and display an 8-digit PIN code. Enter it into the wireless router's WPS (PIN code) setup screen.* * For most wireless routers, you must use Setup (WPS) using a PIN code, refer to the instruction manual of your wireless router. 2 Within 2 minutes, press SET on the camera. While [ - Canon EOS C300 Mark II | WFT-E6 Guide for EOS C300 Mark II Users - Page 14
the camera. For details about the encryption key, refer to the instruction manual of SET. Enter the encryption key (password) using the keyboard screen (A 10). After confirming the to z and A to Z and some punctuation marks and special symbols. Hexadecimal characters comprise the numbers 0 to 9 - Canon EOS C300 Mark II | WFT-E6 Guide for EOS C300 Mark II Users - Page 15
Setup If you prefer, you can enter manually the details of the Wi-Fi network you want to connect to. Follow the instructions on the screen to complete the procedure. 1 To enter the [SSID] (network name), select [Input] and then press SET. Enter the SSID (network name) using the keyboard screen (A 10 - Canon EOS C300 Mark II | WFT-E6 Guide for EOS C300 Mark II Users - Page 16
[Automatic], IP settings will be assigned automatically. Continue with the procedure to review and save the configuration (A 17). 2 Enter the network's TCP/IP settings manually. Enter the IP address assigned to the camera and the network's subnet mask. If necessary, push the joystick left to - Canon EOS C300 Mark II | WFT-E6 Guide for EOS C300 Mark II Users - Page 17
up/down or turn the SELECT dial to review additional settings before pressing SET. mode (Camera Access Point connection) 2 Save the current more descriptive name to make it easier to identify. Enter the desired name using the keyboard screen (A 10). 3 Save the network configuration. Select [OK - Canon EOS C300 Mark II | WFT-E6 Guide for EOS C300 Mark II Users - Page 18
SET. Enter the desired camera ID (up to 8 characters) using the keyboard screen (A 10). 3 To change the port number, select [Port No.] and then press SET. Using the default number is recommended. To change the port number, push the joystick left/ right to select the digit you wish to change and - Canon EOS C300 Mark II | WFT-E6 Guide for EOS C300 Mark II Users - Page 19
screen. During two-user operation, this would be the main operator controlling the camera. Can access only the [ ] screen. During two-user operation, this The actual passwords will be displayed only for the default users settings. To use the current settings, select [OK] and press SET. The rest of - Canon EOS C300 Mark II | WFT-E6 Guide for EOS C300 Mark II Users - Page 20
Remote: User Settings 4 To change the [Password] for the [Full Control User] or [Camera Control User], select [Input] and then press SET. Enter the desired password using the keyboard screen (A 10). If you selected [Two Users (Camera/Meta)] in step 2, repeat steps 3 and 4 to enter the user name and - Canon EOS C300 Mark II | WFT-E6 Guide for EOS C300 Mark II Users - Page 21
's [Network Settings] status screens. 1 Press an assignable button set to [Status]. For details about using assignable buttons, refer to Assignable Buttons in the camera's Instruction Manual. 2 Push the joystick up/down or turn the SELECT dial to display the four [Network Settings] status screens - Canon EOS C300 Mark II | WFT-E6 Guide for EOS C300 Mark II Users - Page 22
- Canon EOS C300 Mark II | WFT-E6 Guide for EOS C300 Mark II Users - Page 23
2 Using Network Functions After completing the preparations in the previous chapter, you can connect the camera via Wi-Fi to any computer or other supported Wi-Fi enabled device that has a Web browser and use the network functions. 23 - Canon EOS C300 Mark II | WFT-E6 Guide for EOS C300 Mark II Users - Page 24
to the instruction manual of the Wi-Fi enabled device used. 1 For details about compatible devices, operating systems, Web browsers, etc. please visit your local Canon Web site. 2 A Web browser is required that supports JavaScript and is enabled to accept cookies. Preparations on the Camera 1 Set - Canon EOS C300 Mark II | WFT-E6 Guide for EOS C300 Mark II Users - Page 25
) and use this information to log in. The Browser Remote screen will appear. While the device is connected, the network connection indicator will repeatedly illuminate and go out. For details about using the Browser Remote application, refer to Browser Remote in the camera's Instruction Manual. 25 - Canon EOS C300 Mark II | WFT-E6 Guide for EOS C300 Mark II Users - Page 26
Browser Remote. Click/touch [H] (the language selection button) and select the desired language from the list. Most buttons and controls emulate physical controls on the camera and are labeled in English only, regardless of the language selected. 26 - Canon EOS C300 Mark II | WFT-E6 Guide for EOS C300 Mark II Users - Page 27
] > [Network Settings] > [Media Server] Once [Connected] appears on the screen, you can connect the Wi-Fi enabled device to the same network and use the media server function. For details, refer to Media Server in the camera's Instruction Manual. Press SET ([End]) to end the media server mode. 27 - Canon EOS C300 Mark II | WFT-E6 Guide for EOS C300 Mark II Users - Page 28
- Canon EOS C300 Mark II | WFT-E6 Guide for EOS C300 Mark II Users - Page 29
3 Troubleshooting 29 - Canon EOS C300 Mark II | WFT-E6 Guide for EOS C300 Mark II Users - Page 30
Troubleshooting Check this section if you encounter problems connecting to the Wi-Fi network or accessing the camera remotely from a Wi-Fi enabled device. If the problem persists, consult a Canon Service Center (listed on the back cover of the camera's Instruction Manual). Check This First X Are the - Canon EOS C300 Mark II | WFT-E6 Guide for EOS C300 Mark II Users - Page 31
if the transmission rate drops, the connection is lost, or other problems occur. Location of the access point (wireless router) When using a Wi-Fi network indoors, place the access point in the same room where you are using the camera. Place the access point in an open, unobstructed location, where - Canon EOS C300 Mark II | WFT-E6 Guide for EOS C300 Mark II Users - Page 32
camera's screen. Messages are listed alphabetically. If the problem persists, consult a Canon Service Center (listed on the back of the camera's Instruction Manual or perform setup using the [WPS: PIN Code] or [Search for Access Points] option (A 7). No access points found The camera searched for - Canon EOS C300 Mark II | WFT-E6 Guide for EOS C300 Mark II Users - Page 33
activating WPS on the access point and selecting [OK] on the camera. X Start over the WPS procedure from the beginning. The WPS button was not held down long enough. X Refer to the instruction manual of your wireless router. When using WPS to make a wireless connection, keep the WPS button held down - Canon EOS C300 Mark II | WFT-E6 Guide for EOS C300 Mark II Users - Page 34
Fi error. Incorrect encryption method. X Make sure the camera and access point are using the same authentication/encryption method. Wireless communication cannot be used while the wireless microphone is attached Wi-Fi connections cannot be used while an optional WM-V1 Wireless Microphone is attached - Canon EOS C300 Mark II | WFT-E6 Guide for EOS C300 Mark II Users - Page 35
Camera Access Point 9 Camera ID 18 Camera Settings 18 Channel ......... Areas of Use and Restrictions Connection 7 E Encryption 15 I IEEE 802.11a/b/g/n Areas of Use Troubleshooting 30 U URL 24 User name 19, 25 Users Settings 19 W Web browser 24 WEP 15 Wi-Fi specification Areas of Use - Canon EOS C300 Mark II | WFT-E6 Guide for EOS C300 Mark II Users - Page 36
Certified, WPA, WPA2, and the Wi-Fi Certified logo are trademarks of the Wi-Fi Alliance. WPS as used on the camera's settings, onscreen displays and in this guide signifies Wi-Fi Protected Setup. JavaScript is a trademark or registered trademark of Oracle Corporation, its affiliates or subsidiaries - Canon EOS C300 Mark II | WFT-E6 Guide for EOS C300 Mark II Users - Page 37
The information in this guide is current as of July 2015. For information on using the transmitter with accessories introduced after this date, contact your nearest Canon Service Center. DIE-0478-000 © CANON INC. 2015
-
 1
1 -
 2
2 -
 3
3 -
 4
4 -
 5
5 -
 6
6 -
 7
7 -
8
-
9
-
10
-
11
-
12
-
13
-
14
-
15
-
16
-
17
-
18
-
19
-
20
-
21
-
22
-
23
-
24
-
25
-
26
-
27
-
28
-
29
-
30
-
31
-
32
-
33
-
34
-
35
-
36
-
37
 |
 |

Wireless File Transmitter
WFT-E6
Guide for EOS C300 Mark II Users
E
DIE-0478-000