Canon EOS Rebel T1i Digital Photo Professional 3.8 for Macintosh Instruction M
Canon EOS Rebel T1i Manual
 |
View all Canon EOS Rebel T1i manuals
Add to My Manuals
Save this manual to your list of manuals |
Canon EOS Rebel T1i manual content summary:
- Canon EOS Rebel T1i | Digital Photo Professional 3.8 for Macintosh Instruction M - Page 1
Digital Photo Professional Ver. 3.8 Instruction Manual O Content of this Instruction Manual O DPP is used for Digital Photo Professional. O In this manual, the windows used a problem arises. O : Marks tips for using the software skillfully. O : Marks information that should be read before use. O - Canon EOS Rebel T1i | Digital Photo Professional 3.8 for Macintosh Instruction M - Page 2
3. SUPPORT AND UPDATES: Canon is not responsible for providing maintenance or support for use of the SOFTWARE. No updates, fixes or support will material under normal use for a period of ninety (90) days after purchase from an authorized Canon dealer as evidenced by your sales receipt. Your sole - Canon EOS Rebel T1i | Digital Photo Professional 3.8 for Macintosh Instruction M - Page 3
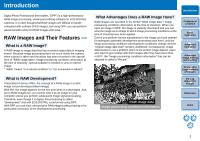
editing software for EOS DIGITAL cameras. It is often thought that RAW images are difficult to handle compared with ordinary JPEG images, but using DPP, you image data itself" remains unaffected. Consequently, image deterioration is not a problem and it is the perfect image data for users who want to - Canon EOS Rebel T1i | Digital Photo Professional 3.8 for Macintosh Instruction M - Page 4
images from a PowerShot camera to a computer. See the Software Starter Guide for details. • Lens aberration correction can only be used with some camera and lens models. • Automatic dust erasure processing and other EOS DIGITAL specific functions cannot be used. Introduction Contents at a Glance - Canon EOS Rebel T1i | Digital Photo Professional 3.8 for Macintosh Instruction M - Page 5
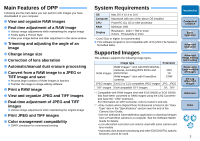
camera and computer O Download images using a card reader ¿ p.7 ¿ p.9 Viewing and Checking RAW Images O Quickly enlarge parts of an image ¿ p.11 O Sort images (check marks) ¿ p.17, p.18 O Correct lens aberration ¿ p.60 O Use a Picture Printing O Print well on a Canon printer ¿ p.40, p.71, - Canon EOS Rebel T1i | Digital Photo Professional 3.8 for Macintosh Instruction M - Page 6
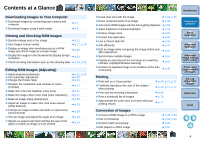
your computer images shot with a camera to checking, editing, saving and printing a downloaded RAW image - is explained here. Introduction Contents at a Glance Starting up DPP 6 Main Window Display 6 Downloading an Image to Your Computer 7 Downloading Images Using Your Card Reader 9 Viewing an - Canon EOS Rebel T1i | Digital Photo Professional 3.8 for Macintosh Instruction M - Page 7
Click ¿ DPP starts up and the main window ([Folder] window) appears. Main window ([Folder] window) Main Window Display In the main window, you can use tabs to select either the [Folder] window or the [Collection] window. The [Folder] window displays the images in folders on your computer, while the - Canon EOS Rebel T1i | Digital Photo Professional 3.8 for Macintosh Instruction M - Page 8
and download the images saved on the memory card inserted in the camera. For downloading images, start up the camera software "EOS Utility" from DPP and use. 2 Start up EOS Utility. O Select the [Tools] menu ` [Start EOS Utility]. 1 Select the save destination for the images. O Select the save - Canon EOS Rebel T1i | Digital Photo Professional 3.8 for Macintosh Instruction M - Page 9
interface cable provided with the camera and turn the camera on. O For detailed instructions on connecting your camera and computer, refer to the "EOS Utility Instruction Manual" (PDF electronic manual). 4 Download images. Click Advantages of using EOS Utility to download images Using EOS Utility - Canon EOS Rebel T1i | Digital Photo Professional 3.8 for Macintosh Instruction M - Page 10
Card Reader You can also download images to the computer using a third-party card reader. 1 Load the memory card into the card reader. 2 Open a images, refer to "Folder Structure and File Names in the Memory Card" in the "EOS Utility Instruction Manual" (PDF electronic manual). Reference Index 9 - Canon EOS Rebel T1i | Digital Photo Professional 3.8 for Macintosh Instruction M - Page 11
files and cannot be played back in DPP. Please use "ImageBrowser", which is compatible with EOS DIGITAL movie files. O When aspect ratio information is attached to the shot image with the EOS-1D Mark IV, EOS-1Ds Mark III, EOS-1D Mark III or EOS 7D, the image is displayed as a trimmed image (p.35 - Canon EOS Rebel T1i | Digital Photo Professional 3.8 for Macintosh Instruction M - Page 12
to close the edit window. O By selecting the [View] menu ` [AF Point] in the edit window, you can display the AF points selected in the camera at the time of shooting. However, AF points are not displayed for images which have had their image size changed and then been converted and - Canon EOS Rebel T1i | Digital Photo Professional 3.8 for Macintosh Instruction M - Page 13
or changing the Picture Style of an image using the tool palette of the edit window. You [RAW], [RGB] and [NR/Lens/ALO] tab sheets according to your editing . Therefore, there are no problems with image deterioration that arise with data called a "Recipe" (p.80). 3Advanced Image Editing and Printing - Canon EOS Rebel T1i | Digital Photo Professional 3.8 for Macintosh Instruction M - Page 14
Saving an Image If you perform the save operation described here, you can save all the adjustment contents (recipe) made with the tool palette to the RAW image. Select the [File] menu ` [Save]. ¿ Your adjustment contents (recipe) are saved to the image. Saving With DPP, you can perform the - Canon EOS Rebel T1i | Digital Photo Professional 3.8 for Macintosh Instruction M - Page 15
Print using a Canon inkjet printer (p.40, p.43) O Print with a high-end Canon printer (p.71) O Print with shooting information (p.69) O Printing a thumbnail list (contact sheet printing) (p.70) Quitting DPP In the main window, select the [Digital Photo Professional] menu ` [Quit Digital - Canon EOS Rebel T1i | Digital Photo Professional 3.8 for Macintosh Instruction M - Page 16
an image, printing a RAW image using a Canon printer and sorting images - is explained here. Efficiently Checking/Sorting Images 16 Sorting Images 17 Sorting Images in the Main Window 18 Arranging Images in the Main Window 18 Arranging by Type 18 Arranging Freely 19 Displaying a RAW Image - Canon EOS Rebel T1i | Digital Photo Professional 3.8 for Macintosh Instruction M - Page 17
the main window can be checked in the quick check window. When [AF Point] is checkmarked, you can display the AF points selected in the camera at the time of shooting. However, AF points are not displayed for images which have had their image size changed and then been converted and - Canon EOS Rebel T1i | Digital Photo Professional 3.8 for Macintosh Instruction M - Page 18
in the main window and then performing step 1. O Switch between images using the keyboard You can also switch between images by pressing the < < > screen display by pressing the < > + keys. O Operate using the menu Each operation can also be performed with the menu which appears by - Canon EOS Rebel T1i | Digital Photo Professional 3.8 for Macintosh Instruction M - Page 19
the < > key. To select multiple consecutive images, click on the first image, and then click on the last image while holding down the key. 18 - Canon EOS Rebel T1i | Digital Photo Professional 3.8 for Macintosh Instruction M - Page 20
moves to the desired location. O You can also select multiple images (p.18) and move them. O The order of rearranged images is maintained until file names (p.75). O Maintain order and change image file names You can use the rename function to maintain the order of images and change the image file - Canon EOS Rebel T1i | Digital Photo Professional 3.8 for Macintosh Instruction M - Page 21
1 Select the [Digital Photo Professional] menu ¿ The main window display updates and the simultaneously shot RAW camera that shoots RAW images . However, if you have used the following functions, the adjustments an image (p.47) • Checkmarks (p.17, p.18) • Rotating an image (p.107, p.114, - Canon EOS Rebel T1i | Digital Photo Professional 3.8 for Macintosh Instruction M - Page 22
Improving the Quality of an Image in the Main Window Create a new thumbnail image for the main window and save to each image. The quality of images in the main window improves and images redraw themselves more quickly. With all the images selected, select the [File] menu ` [Add thumbnail to image - Canon EOS Rebel T1i | Digital Photo Professional 3.8 for Macintosh Instruction M - Page 23
] tab sheet will vary depending on the camera model. Introduction Contents at a Glance 1Basic Operation 2Advanced Operation 3Advanced Image Editing and Printing 4 Processing Large Numbers of Images 5Editing JPEG/TIFF Images Reference Index Convenient uses in the main window O Difference with - Canon EOS Rebel T1i | Digital Photo Professional 3.8 for Macintosh Instruction M - Page 24
adjust images with the tool palette by switching between the [RAW], [RGB] and [NR/Lens/ALO] tab sheets according to your editing requirements. Adjustments similar to those that can be performed with the functions of your camera can be performed using the functions of the [RAW] tool palette. When the - Canon EOS Rebel T1i | Digital Photo Professional 3.8 for Macintosh Instruction M - Page 25
TIFF Images Reference Index The adjustment range is -2.0 to +2.0 (in 0.01-stop increments when entering a value). O Even if the RAW image is from a camera that does not have Picture Style settings, you can still set a Picture Style as long as the RAW image is compatible with DPP (p.3). O You can - Canon EOS Rebel T1i | Digital Photo Professional 3.8 for Macintosh Instruction M - Page 26
camera) Displayed when selecting an image shot with the Picture Style file registered in the camera. Style. Refer to p.56 for how to use Picture Style files. Adjusting Color Tone by Changing adjust the white balance using click white balance (p.26 the white balance, you can use [Color tone] (p.27) - Canon EOS Rebel T1i | Digital Photo Professional 3.8 for Macintosh Instruction M - Page 27
part of an image as the standard for white to make the image appear natural. Using click white balance is effective when using it in parts of an image where white color tone has changed under the influence of a light source. 1 Click 2 Click on a point that is to - Canon EOS Rebel T1i | Digital Photo Professional 3.8 for Macintosh Instruction M - Page 28
Printing Drag the sliders left or right 4 Processing Large Numbers of Images 5Editing JPEG/TIFF Images Display the values of the settings O Color tone: Mainly used for adjusting skin tones. Move the slider to the right to make skin tones more yellow, and to the left to make skin tones redder - Canon EOS Rebel T1i | Digital Photo Professional 3.8 for Macintosh Instruction M - Page 29
Adjusting Monochrome When the Picture Style (p.24) is set to [Monochrome], you can create monochrome photographs with effects similar to filtering and with the look of a single-color photograph. 1 Select [Monochrome] in the [Picture Style] list box. 2 Reverts the image to the original settings - Canon EOS Rebel T1i | Digital Photo Professional 3.8 for Macintosh Instruction M - Page 30
Adjusting Sharpness You can make the overall atmosphere of an image harder or softer. Move the slider to the right to make an image harder and to the left to make an image softer. Reverts the image to the original settings Drag the slider left or right Display the value of the setting Sharpness is - Canon EOS Rebel T1i | Digital Photo Professional 3.8 for Macintosh Instruction M - Page 31
on the [RGB] tab sheet and click the desired automatic adjustment button. O Standard: Standard automatic adjustment. Suitable for most images. O High: Use when the effect achieved in standard automatic adjustment is not strong enough. Reverts the tone curve to the original settings High Standard - Canon EOS Rebel T1i | Digital Photo Professional 3.8 for Macintosh Instruction M - Page 32
Index By selecting the [View] menu ` [AF Point] in the edit window or edit image window, you can display the AF points selected in the camera at the time of shooting. However, AF points are not displayed for images which have had their image size changed and then been converted and - Canon EOS Rebel T1i | Digital Photo Professional 3.8 for Macintosh Instruction M - Page 33
4 Double-click the area you want to enlarge. Doubleclick ¿ The area you double-clicked is enlarged to 100% (actual pixel size). O To change the display position, drag on the image or drag the enlargement display position (p.111) of the tool palette. O Double-click again to revert to the full view ([ - Canon EOS Rebel T1i | Digital Photo Professional 3.8 for Macintosh Instruction M - Page 34
Changing the Thumbnail Display Position to a Horizontal Position Select the [View] menu ` [Change thumbnail position]. O If you select [Change thumbnail position] again, the thumbnail display reverts to the vertical position. Gathering and Editing Images in the Collection Window You can gather any - Canon EOS Rebel T1i | Digital Photo Professional 3.8 for Macintosh Instruction M - Page 35
the [Collection] window the same way as in the [Folder] window (p.18, p.19). You can maintain the order of rearranged images even after quitting You cannot use the following functions in the [Collection] window. • Starting of EOS Utility (p.7), or synchronizing of folders with EOS Utility • Batch - Canon EOS Rebel T1i | Digital Photo Professional 3.8 for Macintosh Instruction M - Page 36
shot with the EOS-1D Mark IV, EOS-1Ds Mark III, EOS-1D Mark III or EOS 7D, the ; adjustment range: -45 to +45 degrees) Use the mouse (click S/T) to adjust the angle the window. O When correcting lens aberrations, it is recommended to perform [Lens aberration correction] before adjusting the - Canon EOS Rebel T1i | Digital Photo Professional 3.8 for Macintosh Instruction M - Page 37
4 Select a ratio and drag the trimming range. Cancel Select a trimming ratio Drag the trimming range O The trimming range can be moved by dragging. O You can enlarge or reduce the size of the trimming range by dragging the four corners of the trimming range. O List of aspect ratios (width : height) - Canon EOS Rebel T1i | Digital Photo Professional 3.8 for Macintosh Instruction M - Page 38
is attached to an image shot with EOS1D Mark IV, EOS-1Ds Mark III, EOS-1D Mark III or EOS 7D, the set trimming range based on the aspect ratio details in the trimming/ angle adjustment window, so using this function is not recommended. For a list of the trimming/angle adjustment window functions, - Canon EOS Rebel T1i | Digital Photo Professional 3.8 for Macintosh Instruction M - Page 39
3Advanced Image Editing and Printing 4 Processing Large Numbers of Images 5Editing JPEG/TIFF Images Reference ¿ Your adjustments are saved to the image. Index The recipe (p.80) can be saved as a separate file from the image and loaded and applied to another image (p.81). 38 - Canon EOS Rebel T1i | Digital Photo Professional 3.8 for Macintosh Instruction M - Page 40
the developing/editing results for the version you are currently using DPP's RAW image development processing technology is continually being the developing or editing results of the version you are currently using as it is, it is recommended that you convert and save images as JPEG image or TIFF - Canon EOS Rebel T1i | Digital Photo Professional 3.8 for Macintosh Instruction M - Page 41
printing software, Easy-PhotoPrint EX or Easy-PhotoPrint. It also explains how to print photographs using other printers. Proceed to the page for the printer you are using. O Printing Photographs with Canon Inkjet Printers Compatible with Easy-PhotoPrint EX (Same page) O Printing Photographs with - Canon EOS Rebel T1i | Digital Photo Professional 3.8 for Macintosh Instruction M - Page 42
1 Select the image to be printed. 2 Start up EPP EX. O Select the [File] menu ` [Plug-in printing] ` [Print with EasyPhotoPrint EX]. ¿ EPP EX starts up. 3 In the EPP EX window, select the [File] menu ` [Preferences]. 4 In [Print Quality], select [Quality Priority], click the [Option] button, and - Canon EOS Rebel T1i | Digital Photo Professional 3.8 for Macintosh Instruction M - Page 43
6 Specify the number of sheets to be printed, and then click [Select Paper]. EPP EX Click to increase the number of sheets to be printed Click 7 Select the paper type, and then click the [Layout/ Print] button. 8 Specify the layout, and then click the [Print] button. Select the layout Click to - Canon EOS Rebel T1i | Digital Photo Professional 3.8 for Macintosh Instruction M - Page 44
reproduction range of Adobe RGB and a Canon inkjet printer To perform this printing, it is necessary to first install EPP version 3.5 or later on your computer. When using an Easy-PhotoPrint EX-compatible inkjet printer, it is recommended that you print using Easy-PhotoPrint EX (p.40). 1 Select the - Canon EOS Rebel T1i | Digital Photo Professional 3.8 for Macintosh Instruction M - Page 45
3 In the EPP window, select the [Easy-PhotoPrint] menu ` [Preferences]. ¿ The [Preferences] window appears. 4 In [Print Quality], select [Quality Priority]. Select Quality Priority 5 Select the [Advanced] tab sheet and check that the EPP image compensation function is disabled. O If not disabled, - Canon EOS Rebel T1i | Digital Photo Professional 3.8 for Macintosh Instruction M - Page 46
1000 images, divide the printing into several jobs. O The printed image's color is not what you expected Change the [Rendering intents when using Easy-PhotoPrint] (p.77) to [Perceptual] (p.123) and print. Introduction Contents at a Glance 1Basic Operation In a Mac OS X 10.6 environment, the Apple - Canon EOS Rebel T1i | Digital Photo Professional 3.8 for Macintosh Instruction M - Page 47
Printing Photographs with a Printer other than Canon Inkjet Printers You can print one image on one sheet of paper. 1 Select the image to be printed. 2 Select the [File] menu ` [Print]. Organizing Images - Canon EOS Rebel T1i | Digital Photo Professional 3.8 for Macintosh Instruction M - Page 48
Creating a Folder for Saving Images You can create a folder for sorting images. 1 In the folder area, select the location where the new folder is to be created. 2 Select the [File] menu ` [Create new folder]. Moving Images You can move or copy images to a separate folder and sort by shooting date - Canon EOS Rebel T1i | Digital Photo Professional 3.8 for Macintosh Instruction M - Page 49
folder is in the destination folder. ¿ The folders are moved or copied to the destination folder. Registering Frequent-Use Folders (Bookmark Registration) You can register frequently used folders in bookmarks. Registered folders appear by clicking the [Bookmark] menu. 1 Select the folder for which - Canon EOS Rebel T1i | Digital Photo Professional 3.8 for Macintosh Instruction M - Page 50
a Picture Style File 56 About the RGB Tool Palette 57 Using the Auto Lighting Optimizer 58 Reducing Noise 59 Correcting Lens Aberration 60 Compatible Cameras 60 Compatible Lenses 60 Making Corrections 62 About Shooting Distance Information Slider 63 Correcting Multiple Images at a Time - Canon EOS Rebel T1i | Digital Photo Professional 3.8 for Macintosh Instruction M - Page 51
Adjusting While Comparing with the Original Image You can display before and after versions of an adjusted image in the same window and adjust while checking the adjustment results. 1 In the edit window, select the [View] menu ` [Before/ after comparison]. Changing How the Window is Split You can - Canon EOS Rebel T1i | Digital Photo Professional 3.8 for Macintosh Instruction M - Page 52
Adjusting by Comparing Multiple Images You can synchronize the display position of multiple edit windows and adjust images while comparing them with each other. 1 In the edit window, display the multiple images to be compared. 2 Align the images. O Align the images for easy comparison. 3 Select the - Canon EOS Rebel T1i | Digital Photo Professional 3.8 for Macintosh Instruction M - Page 53
image has exceeded that set range, you can display the highlighted part in red and the shaded part in blue. 1 Select the [Digital Photo Professional] menu ` [Preferences]. 5 Display the edit window. 6 Select the [View] menu ` [Highlight]. Similarly, select [Shadow]. ¿ On the opened image, if there - Canon EOS Rebel T1i | Digital Photo Professional 3.8 for Macintosh Instruction M - Page 54
advanced adjustment function on the tool palette in the edit window. Adjustments made using the high-level functions of the [RAW] and [RGB] tool palettes, as well as the functions of the [NR/Lens/ALO] tool palette are explained in this section. Adjusting White Balance with Color Temperature White - Canon EOS Rebel T1i | Digital Photo Professional 3.8 for Macintosh Instruction M - Page 55
Adjusting Dynamic Range Dynamic range (width of gradation expression) from dark points to bright points in an image can be adjusted. Move downwards Output highlight points Move to the left or right Input highlight points Move upwards Output shadow points Move to the left or right Input shadow points - Canon EOS Rebel T1i | Digital Photo Professional 3.8 for Macintosh Instruction M - Page 56
Tone Curve Adjustment You can adjust the brightness, contrast and color of a specific area by changing the tone curve (p.122). 1 In the tool palette, select the [RGB] tab sheet. 2 Select the tone curve mode and interpolation method. + click inside the graph to display the menu 3 Make - Canon EOS Rebel T1i | Digital Photo Professional 3.8 for Macintosh Instruction M - Page 57
have downloaded from Canon's web site effective for various scenes or Picture Style files created with "Picture Style Editor". When using a Picture Style Reference Index The Picture Style files that you can apply to the camera are files with the ".PF2" extension only. Furthermore, you cannot - Canon EOS Rebel T1i | Digital Photo Professional 3.8 for Macintosh Instruction M - Page 58
special functions in the [RGB] tool palette, we recommend that you adjust your images at the necessary lowest limit with the [RGB] tool palette after having completed basic adjustment with the [RAW] tool palette. Use the adjustment function of the [NR/Lens/ALO] tool palette (p.112) when applying the - Canon EOS Rebel T1i | Digital Photo Professional 3.8 for Macintosh Instruction M - Page 59
also change the settings of the image shot with the camera's Auto Lighting Optimizer function. This function is compatible only with RAW images shot with EOS-1D Mark IV, EOS 5D Mark II, EOS 7D, EOS 50D, EOS REBEL T2i/550D and EOS REBEL T1i/500D. * ALO stands for Auto Lighting Optimizer. 1 Select the - Canon EOS Rebel T1i | Digital Photo Professional 3.8 for Macintosh Instruction M - Page 60
adjusting the noise reduction level in the [NR/Lens/ ALO] tool palette (p.112) using the [Luminance noise reduction] and [Chrominance Preferences] (p.76). • When [Apply camera settings] is selected, you can pre-set a noise reduction level that suits the camera settings beforehand as the default. • - Canon EOS Rebel T1i | Digital Photo Professional 3.8 for Macintosh Instruction M - Page 61
EOS 7D EOS 50D EOS 40D EOS 30D*2 EOS REBEL T2i/550D EOS REBEL T1i/500D EOS DIGITAL REBEL EOS DIGITAL REBEL XSi/450D XTi/400D DIGITAL EOS DIGITAL REBEL _ _ XS/1000D *1 Requires firmware version 1.1.1 *2 Requires firmware version 1.0.6 Compatible Lenses Ultra wide and wide lenses EF - Canon EOS Rebel T1i | Digital Photo Professional 3.8 for Macintosh Instruction M - Page 62
USM EF-S 18-55mm f/3.5-5.6 IS*3 EF-S 18-135mm f/3.5-5.6 IS*3 EF-S 55-250mm f/4-5.6 IS*3 EF-S 18-200mm f/3.5-5.6 IS*3 _ Aberration correction will not apply to images shot with a combination of lenses *3 *4 *5 and EOS 5D or EOS 30D with the firmware versions below. * You cannot attach an EF-S lens - Canon EOS Rebel T1i | Digital Photo Professional 3.8 for Macintosh Instruction M - Page 63
with the [B] slider. 4 Click the [OK] button. ¿ The [Lens aberration correction] window closes and the result of the corrections is applied to and the image is redisplayed. ¿ The result of the settings of the [Lens aberration correction] window is also displayed in the tool palette. ¿ In the main - Canon EOS Rebel T1i | Digital Photo Professional 3.8 for Macintosh Instruction M - Page 64
while looking at the screen. EOS-1D Mark IV EOS-1Ds Mark III EOS-1D Mark III EOS 5D Mark II EOS 7D EOS 50D EOS 40D EOS REBEL T2i/550D EOS REBEL T1i/500D EOS DIGITAL REBEL EOS DIGITAL REBEL _ XSi/450D XS/1000D O When correcting RAW images shot with the cameras in the table below, it - Canon EOS Rebel T1i | Digital Photo Professional 3.8 for Macintosh Instruction M - Page 65
be used to automatically erase dust spots. 3 When the image has redrawn itself, click the [Apply Dust Delete Data] button. Compatible Cameras EOS-1D Mark IV EOS-1Ds Mark III EOS-1D Mark III EOS 5D Mark II EOS 7D EOS 50D EOS 40D EOS REBEL T2i/550D EOS REBEL T1i/500D EOS DIGITAL REBEL EOS - Canon EOS Rebel T1i | Digital Photo Professional 3.8 for Macintosh Instruction M - Page 66
clicked Even with an image that has Dust Delete Data attached to it in the camera, if there is no dust to remove by DPP from the image, the [Apply spots depending on the type of dust. If this occurs, erase those dust spots using the repair function (p.66) or the copy stamp function (p.68). O The - Canon EOS Rebel T1i | Digital Photo Professional 3.8 for Macintosh Instruction M - Page 67
Manually Erasing Dust (Repair Function) You can erase dust spots in an image by selecting them one by one. 1 In the main window, select the image - Canon EOS Rebel T1i | Digital Photo Professional 3.8 for Macintosh Instruction M - Page 68
speed range expansion set, noticeable noise may make it difficult to view dust spots in the copy stamp window, so using this function is not recommended. Introduction Contents at a Glance 1Basic Operation 2Advanced Operation 3Advanced Image Editing and Printing 4 Processing Large Numbers of Images - Canon EOS Rebel T1i | Digital Photo Professional 3.8 for Macintosh Instruction M - Page 69
image to an unwanted part of the image. 1 Follow steps 1 to 3 in "Manually Erasing Dust (Repair Function)" (p.66). 2 Specify the section to be copied. O Saving the transferred image as a separate image in Photoshop is highly recommended. Setting Work Color Space A different work color space (p.123) - Canon EOS Rebel T1i | Digital Photo Professional 3.8 for Macintosh Instruction M - Page 70
Printing with Shooting Information You can freely lay out one image on one sheet of paper and print together with titles and shooting information, etc. 1 Select one image to be printed. 2 Select the [File] menu ` [Print with detailed setting]. 3 Specify the required settings for printing, and then - Canon EOS Rebel T1i | Digital Photo Professional 3.8 for Macintosh Instruction M - Page 71
Printing a Thumbnail List (Contact Sheet Printing) You can print rows of multiple images on one sheet of paper. To maintain the settings 1 Select images to be printed in a thumbnail list. 2 Select the [File] menu ` [Contact Sheet Prints]. 3 Specify the required settings for printing, and then - Canon EOS Rebel T1i | Digital Photo Professional 3.8 for Macintosh Instruction M - Page 72
following features: O Simple printing of RAW images O Printing in faithful colors O High quality printing using a wide color space of Adobe RGB, etc. and the wide color reproduction range of a high-end Canon inkjet printer To print with DPP, first install Easy-PhotoPrint Pro version 1.3 or later on - Canon EOS Rebel T1i | Digital Photo Professional 3.8 for Macintosh Instruction M - Page 73
to print with the DPP-compatible Canon large-format imagePROGRAF printer. To print with DPP, first install imagePROGRAF Print Plug-In for Digital Photo Professional on your computer. 1 Select the [File] menu ` [Plug-in printing] ` Plug-In for the printer you use. ¿ The Plug-In starts up. 2 Specify - Canon EOS Rebel T1i | Digital Photo Professional 3.8 for Macintosh Instruction M - Page 74
of each window and set. Also, depending on the item, a detailed explanation may be available, so refer to each window. 1 Select the [Digital Photo Professional] menu ` [Preferences]. ¿ The [Preferences] window appears. 2 Select the tab sheet, specify the settings, and then click the [OK] button - Canon EOS Rebel T1i | Digital Photo Professional 3.8 for Macintosh Instruction M - Page 75
are difficult to see in the [50% view] or [Fit to window] display of the edit window and edit image window, use [100% view] or [200% view] to check. O We recommend that you normally set [High quality] for a balance between image quality and display speed. [View images at high speed (moiré reduction - Canon EOS Rebel T1i | Digital Photo Professional 3.8 for Macintosh Instruction M - Page 76
View Settings You can specify settings relating to the display. O Sort order in main window You can set the order of images which have been rearranged in the main window to be maintained or not maintained (p.19). If you checkmark the checkbox, the order of the rearranged images is maintained even - Canon EOS Rebel T1i | Digital Photo Professional 3.8 for Macintosh Instruction M - Page 77
[Color saturation], [Contrast] and [Sharpness] settings will be changed to match the camera's preset settings, when you change the Picture Style. O If you remove the check , since you always shoot with the same conditions, it is also useful when you want to set the same noise reduction level for all - Canon EOS Rebel T1i | Digital Photo Professional 3.8 for Macintosh Instruction M - Page 78
the default settings for each image (p.68). O Display setting (color setting of the monitor) Where a profile (p.122) is attached to the monitor you are using, you can display an image in more faithful colors by setting the profile. O Select the [Monitor profile], click the [Browse] button and in the - Canon EOS Rebel T1i | Digital Photo Professional 3.8 for Macintosh Instruction M - Page 79
p.69, p.70) except for printing using a Canon inkjet printer (p.40, p.43) or linked printing (p.71, p.72). The adjustment function of the printer driver should not be used Even if you set a printer profile, if you use the color adjustment function of the printer driver, the image may print in colors - Canon EOS Rebel T1i | Digital Photo Professional 3.8 for Macintosh Instruction M - Page 80
4 Useful Functions for Processing Large Numbers of RAW Images For users shooting a large amount of RAW images, the convenient function of batch processing large amounts of RAW images is explained here. Introduction Contents at a Glance Utilizing Adjustment Contents (Recipe 80 Saving Recipes as a - Canon EOS Rebel T1i | Digital Photo Professional 3.8 for Macintosh Instruction M - Page 81
includes adjustments made with the tool palette ([RAW], [RGB] and [NR/Lens/ALO]). For this reason, other editing content such as trimming or dust-erasure Printing 4 Processing Large Numbers of Images Contents adjusted using the tool palette can be handled individually as a as with RAW images. 80 - Canon EOS Rebel T1i | Digital Photo Professional 3.8 for Macintosh Instruction M - Page 82
of a recipe file, paste it to an image and check the settings in the tool palette. When only a few settings are adjusted, we recommend you use a file name that describes the contents or that you separately record the adjustments as text information. Loading and Pasting Recipes 1 Select the image to - Canon EOS Rebel T1i | Digital Photo Professional 3.8 for Macintosh Instruction M - Page 83
Batch Apply White Balance to Images (Personal White Balance) The white balance adjustments made to a RAW image shot in a specific shooting environment can be registered as personal white balance. You can then perform efficient white balance adjustment by applying this personal white balance to a - Canon EOS Rebel T1i | Digital Photo Professional 3.8 for Macintosh Instruction M - Page 84
the developing/editing results for the version you are currently using DPP's RAW image development processing technology is continually being the developing or editing results of the version you are currently using as it is, it is recommended that you convert and save images as JPEG image or TIFF - Canon EOS Rebel T1i | Digital Photo Professional 3.8 for Macintosh Instruction M - Page 85
have first been converted and saved as a seperate image, so the transferred image will not disappear after quitting the destination software. The software used here as an example is Adobe Photoshop CS. 1 In the main window, select multiple images to be transferred. 5 Select Photoshop CS. O In the - Canon EOS Rebel T1i | Digital Photo Professional 3.8 for Macintosh Instruction M - Page 86
Batch Change the File Name of Images 1 In the main window, select multiple images of which the file names are to be changed. 2 Select the [Tools] menu ` [Start Rename tool]. ¿ The rename window appears. 3 Specify the required settings (p.121) and click the [Execute] button. O You cannot start up - Canon EOS Rebel T1i | Digital Photo Professional 3.8 for Macintosh Instruction M - Page 87
Assist 88 Adjusting Brightness and Contrast 89 Adjusting Color Tone Using Click White Balance....... 90 Adjusting Hue, Saturation and Sharpness Erasure Processing ..... 98 Compatible Cameras 98 Automatic Dust Erasure Processing in the Main Window 99 Manually Erasing Dust (Repair Function 100 - Canon EOS Rebel T1i | Digital Photo Professional 3.8 for Macintosh Instruction M - Page 88
are no problems with image deterioration that arise with editing and you can readjust your images any number of times. JPEG, TIFF image data Image processing conditions information Contents adjusted using the tool palette can be handled individually as a recicpe file (extension ".vrd") (p.80, p.103 - Canon EOS Rebel T1i | Digital Photo Professional 3.8 for Macintosh Instruction M - Page 89
adjustment from "Standard" and "High". Click the desired automatic adjustment button. O Standard: Standard automatic adjustment. Suitable for most images. O High: Use when the effect achieved in standard automatic adjustment is not strong enough. Reverts the tone curve to the original settings High - Canon EOS Rebel T1i | Digital Photo Professional 3.8 for Macintosh Instruction M - Page 90
Enter numerical values O Brightness: Move the slider to the right to make an image brighter and to the left to make an image darker. O Contrast: Used to adjust modulation and degree of contrast of color. Move the slider to the right to make contrast of an image stronger and to the - Canon EOS Rebel T1i | Digital Photo Professional 3.8 for Macintosh Instruction M - Page 91
part of an image as the standard for white to make the image appear natural. Using click white balance is effective when using it in parts of an image where white color tone has changed under the influence of a light source. 1 Click the [ ] button. 2 Click on a point that - Canon EOS Rebel T1i | Digital Photo Professional 3.8 for Macintosh Instruction M - Page 92
Adjusting Hue, Saturation and Sharpness You can adjust hue (tone) and saturation and make the overall atmosphere of an image harder or softer. Enter numerical values Drag the sliders left or right O Hue: Move the slider to the right to make color tones more yellow, and to the left to make color - Canon EOS Rebel T1i | Digital Photo Professional 3.8 for Macintosh Instruction M - Page 93
Tone Curve Adjustment You can adjust the brightness, contrast and color of a specific area by changing the tone curve (p.122). 1 Select the tone curve mode and interpolation method. + click inside the graph to display the menu 2 Make adjustments. Batch adjusts RGB Adjusts each channel - Canon EOS Rebel T1i | Digital Photo Professional 3.8 for Macintosh Instruction M - Page 94
Adjusting Dynamic Range Dynamic range (width of gradation expression) from dark points to bright points in an image can be adjusted. Move downwards Output highlight points Output highlight point numerical value Move to the right Input shadow points Output shadow point numerical value Input shadow - Canon EOS Rebel T1i | Digital Photo Professional 3.8 for Macintosh Instruction M - Page 95
level for the images without displaying the [NR Preview] window, by adjusting the noise reduction level in the [NR/Lens/ ALO] tool palette (p.112) using the [Luminance noise reduction] and [Chrominance noise reduction] sliders, and then clicking the [Apply] button. 4 Processing Large Numbers of - Canon EOS Rebel T1i | Digital Photo Professional 3.8 for Macintosh Instruction M - Page 96
is attached to an image shot with EOS1D Mark IV, EOS-1Ds Mark III, EOS-1D Mark III or EOS 7D, the trimming range based on the aspect ratio information Drag* (0.01-degree increments; adjustment range: -45 to +45 degrees) Use the mouse (click S/T) to adjust the angle or directly enter the adjustment - Canon EOS Rebel T1i | Digital Photo Professional 3.8 for Macintosh Instruction M - Page 97
4 Select a ratio and drag the trimming range. Cancel Select a trimming ratio Drag the trimming range O The trimming range can be moved by dragging. O You can enlarge or reduce the size of the trimming range by dragging the four corners of the trimming range. O List of aspect ratios (width : height) - Canon EOS Rebel T1i | Digital Photo Professional 3.8 for Macintosh Instruction M - Page 98
is attached to an image shot with EOS1D Mark IV, EOS-1Ds Mark III, EOS-1D Mark III or EOS 7D, the set trimming range based on the aspect ratio image details in the trimming/ angle adjustment window, so using this function is not recommended. For a list of the trimming/angle adjustment window functions, - Canon EOS Rebel T1i | Digital Photo Professional 3.8 for Macintosh Instruction M - Page 99
be used to automatically erase dust spots. 3 When the image has redrawn itself, click the [Apply Dust Delete Data] button. Compatible Cameras EOS-1D Mark IV EOS-1Ds Mark III EOS-1D Mark III EOS 5D Mark II EOS 7D EOS 50D EOS 40D EOS REBEL T2i/550D EOS REBEL T1i/500D EOS DIGITAL REBEL EOS - Canon EOS Rebel T1i | Digital Photo Professional 3.8 for Macintosh Instruction M - Page 100
clicked Even with an image that has Dust Delete Data attached to it in the camera, if there is no dust to remove by DPP from the image, the [ spots depending on the type of dust. If this occurs, erase those dust spots using the repair function (p.100) or the copy stamp function (p.102). O The image - Canon EOS Rebel T1i | Digital Photo Professional 3.8 for Macintosh Instruction M - Page 101
Manually Erasing Dust (Repair Function) You can erase dust spots in an image by selecting them one by one. 1 In the main window, select the image - Canon EOS Rebel T1i | Digital Photo Professional 3.8 for Macintosh Instruction M - Page 102
the repair function. You may be unable to erase lines of dust. In this case, use the copy stamp function (p.102). O The dust-erased image can be reverted to its spots in the copy stamp window, so using this function is not recommended. Index For a list of the copy stamp window functions, refer to - Canon EOS Rebel T1i | Digital Photo Professional 3.8 for Macintosh Instruction M - Page 103
can correct an image by pasting a section copied from another part of the image to an unwanted part of the image. 1 Follow steps 1 to 3 in "Manually Erasing Dust (Repair Function)" (p.100). 2 Specify the section to be copied. O Click on the section that is to be the copy source while holding down - Canon EOS Rebel T1i | Digital Photo Professional 3.8 for Macintosh Instruction M - Page 104
contents to another image (p.38) O Utilizing adjustment contents (recipe) (p.80) Printing Edited JPEG and TIFF images can be printed with the procedures sheet printing) (p.70) O Printing RAW images on a high-end Canon printer (p.71) Re-Editing an Image Only the image processing conditions are - Canon EOS Rebel T1i | Digital Photo Professional 3.8 for Macintosh Instruction M - Page 105
looking for. Troubleshooting 105 Deleting Lens Aberration Correction Window Functions 118 List of Copy Stamp Window Functions 119 List of Convert/Save Multiple Images Window (Batch Processing) Functions 120 List of Rename Window Functions 121 Glossary 122 Index 124 About This Instruction Manual - Canon EOS Rebel T1i | Digital Photo Professional 3.8 for Macintosh Instruction M - Page 106
that is only available for RAW images shot with EOS-1D Mark IV, EOS 5D Mark II, EOS 7D, EOS 50D, EOS REBEL T2i/550D and EOS REBEL T1i/500D. You cannot apply the Auto Lighting Optimizer's adjustment contents to RAW images shot with other cameras. Color appears weak in the image when viewed with - Canon EOS Rebel T1i | Digital Photo Professional 3.8 for Macintosh Instruction M - Page 107
matched. Using a Canon printer use the color adjustment function of the printer driver EOS 10D and EOS DIGITAL REBEL/300D DIGITAL may not display image information (p.10, p.21). Deleting the Software (Uninstalling) O Quit any applications before uninstalling the software. O Log into the account used - Canon EOS Rebel T1i | Digital Photo Professional 3.8 for Macintosh Instruction M - Page 108
selection of all images window (p.115) Check marks (p.18) Removes check marks (p.18) Folder path Image rotation (90 degree units) Toolbar p.77) Display mode*4 Number of selected images Recipe attachment status (p.80) Number of displayed images CMYK simulation display (p.77) *1 To switch - Canon EOS Rebel T1i | Digital Photo Professional 3.8 for Macintosh Instruction M - Page 109
List of Main Window (Collection Window) Functions (p.33) Switches to the edit image window Shows/hides the tool palette Selects all images Cancels selection of all images Check marks Removes check marks Image rotation (90 degree units) Toolbar [Collection] tab sheet*1 [Folder] tab sheet Batch - Canon EOS Rebel T1i | Digital Photo Professional 3.8 for Macintosh Instruction M - Page 110
Introduction Contents at a Glance Check mark (p.17, p.18) Brightness adjustment value*1 (p.24) White balance icon*1 64 to p.68, p.98 to p.102) Lens aberration correction mark (p.62) Trimming range*6 (p.35 with EOS- 1D Mark IV, EOS-1Ds Mark III, EOS-1D Mark III or EOS 7D, the image is displayed as - Canon EOS Rebel T1i | Digital Photo Professional 3.8 for Macintosh Instruction M - Page 111
List of Edit Window Functions (p.11, p.23) Path and file name of image Tool palette*1 (p.111, p.112) Introduction Contents at a Glance 1Basic Operation 2Advanced Operation 3Advanced Image Editing and Printing 4 Processing Large Numbers of Images 5Editing JPEG/TIFF Images Reference Information - Canon EOS Rebel T1i | Digital Photo Professional 3.8 for Macintosh Instruction M - Page 112
List of Tool Palette Functions RAW Tool Palette (p.23) RGB Tool Palette (p.57) Brightness adjustment (p.24) White balance adjustment (p.25, p.26, p.53) Picture Style settings (p.24, p.56) Dynamic range adjustment (p.54) Contrast adjustment (p.27) Shadow/highlight adjustment (p.54) Linear setting - Canon EOS Rebel T1i | Digital Photo Professional 3.8 for Macintosh Instruction M - Page 113
ALO Tool Palette (When a RAW image is selected) NR/Lens/ALO Tool Palette (When a JPEG or TIFF image is images (p.59) Chrominance noise reduction for RAW images (p.59) Lens aberration correction tuning button (p.62) Lens aberration correction (p.62) Apply noise reduction button (p.94) Displays - Canon EOS Rebel T1i | Digital Photo Professional 3.8 for Macintosh Instruction M - Page 114
List of NR Preview Window Functions (p.59, p.94) NR check window * When you select a JPEG or TIFF image and display the [NR Preview] window, [TIFF/JPEG] appears and you can reduce luminance noise and chrominance noise for the JPEG and TIFF images. Introduction Enlargement display position - Canon EOS Rebel T1i | Digital Photo Professional 3.8 for Macintosh Instruction M - Page 115
5Editing JPEG/TIFF Images Reference *1 You can select 50% view/100% view (moiré reduction off) by selecting [Preferences] in the [Digital Photo Professional] menu and using [Quick check tool display] in the [View settings] tab sheet. You can also move the display position in the enlarged display by - Canon EOS Rebel T1i | Digital Photo Professional 3.8 for Macintosh Instruction M - Page 116
List of Edit Image Window Functions (p.31, p.33) Shows/hides tool palette Shows/hides thumbnail display area Switches to main window (p.107) Shows/hides grid*4 Image path and file name Enlargement ratio of displayed image Image rotation (90 degree units) Switches between displayed images - Canon EOS Rebel T1i | Digital Photo Professional 3.8 for Macintosh Instruction M - Page 117
List of Convert/Save One Image Window Functions (p.39) Introduction Types of image Type of image Extension Exif-JPEG .JPG Exif-TIFF 8bit .TIF TIFF 16bit .TIF Exif-Tiff 8bit+Exif-JPEG .TIF/.JPG TIFF 16bit+Exif-JPEG .TIF/.JPG Resolution*1 Size changing*4 File name Save destination JPEG - Canon EOS Rebel T1i | Digital Photo Professional 3.8 for Macintosh Instruction M - Page 118
of trimmed range (you can also enter numerical values) Size of trimmed range (you can also enter numerical values) Angle of image adjusted (Drag bar, use the mouse to click S/T or enter numerical values to set angle) Copies the trimmed range and applies (pastes) it to another image*2 Applies the - Canon EOS Rebel T1i | Digital Photo Professional 3.8 for Macintosh Instruction M - Page 119
List of Lens Aberration Correction Window Functions (p.62) Introduction Contents at a Glance displayed at 200%. *2 For RAW images shot with MP-E 65mm f/2.8 1-5x Macro Photo or EF 50mm f/2.5 Compact Macro with Life Size Converter EF, the slider indicator changes to the zoom magnification. 118 - Canon EOS Rebel T1i | Digital Photo Professional 3.8 for Macintosh Instruction M - Page 120
List of Copy Stamp Window Functions (p.64 to p.68, p.98 to p.102) Introduction Full screen display/returns to normal screen Applies Dust Delete Data (p.64, p.98) Types of dust to be erased (p.66, p.100) Specifies the copy source (p.68, p.102) Fixes the copy source position (p.68, p.102) Types of - Canon EOS Rebel T1i | Digital Photo Professional 3.8 for Macintosh Instruction M - Page 121
List of Convert/Save Multiple Images Window (Batch Processing) Functions (p.83) Introduction File names of images to be batch saved Types of image Type of image Extension Exif-JPEG .JPG Exif-TIFF 8bit .TIF TIFF 16bit .TIF Exif-Tiff 8bit+Exif-JPEG .TIF/.JPG TIFF 16bit+Exif-JPEG .TIF/.JPG - Canon EOS Rebel T1i | Digital Photo Professional 3.8 for Macintosh Instruction M - Page 122
List of Rename Window Functions (p.85) Order in which images are sorted Check mark to apply the same name to RAW images and JPEG images recorded simultaneously Check mark to copy the images Click the [Browse] button and set the save destination Sets the new file name Sets the format of information - Canon EOS Rebel T1i | Digital Photo Professional 3.8 for Macintosh Instruction M - Page 123
Glossary RAW image EOS DIGITAL camera RAW images are recorded in an uncompressed 14bit or 12bit is called a "recipe". Further, in DPP, you can perform image editing on JPEG and TIFF images that use "recipes" as with RAW images. bit number Binary unit of information volume in the color of an image - Canon EOS Rebel T1i | Digital Photo Professional 3.8 for Macintosh Instruction M - Page 124
supports the following five kinds of color space. sRGB : Standard color space for Windows. Widely used for the standard color space of monitors, digital cameras : A slightly wider color space than sRGB. Mainly used for printing for business purposes. Wide Gamut RGB : A wider color space than - Canon EOS Rebel T1i | Digital Photo Professional 3.8 for Macintosh Instruction M - Page 125
112 White Balance 25 Adjustment Contents (Recipe 80, 122 Adobe RGB 123 Apple RGB 123 Arrange Images 18, 19 Auto Lighting Optimizer 58 Automatic /Save (Batch Process 83, 120 Personal White Balance 82 Recipe Data 80 Transfer 84 Batch Settings Window 83, 84, 120 Batch Transfer Images - Canon EOS Rebel T1i | Digital Photo Professional 3.8 for Macintosh Instruction M - Page 126
Cameras with the Lens Aberration Correction Function .. 60 Compatible Lenses with the Lens Camera 7 Downloading Images from a Card Reader 9 Dust Delete Data 64, 65, 98, 99 Dust Erasure Processing Automatic Dust Erasure Processing 64, 98 Image Correction (Copy Stamp Function 68, 102 Manual - Canon EOS Rebel T1i | Digital Photo Professional 3.8 for Macintosh Instruction M - Page 127
Enlarged Display (Quick Check Window 114 EOS Utility 7 F False Color Reduction Lens Aberration Correction Window 62, 118 Linear 27 Loading and Pasting (Applying) Recipes 81 Luminance Noise Reduction (JPEG, TIFF Images 94 Luminance Noise Reduction (RAW Images 59 M Main Window 10, 107 Manual - Canon EOS Rebel T1i | Digital Photo Professional 3.8 for Macintosh Instruction M - Page 128
, 103 Recipe 80, 122 Recipe File 80 Re-Editing an Image 40, 103 Registering Folders as Bookmarks 48 Rename Window 85, 121 Rendering Intent (Matching Method 123 Rendering Intents when Using Easy-PhotoPrint 77, 78 Rendering Intents when Using Easy-PhotoPrint 77, 78 Repair (Manual Dust Erasure - Canon EOS Rebel T1i | Digital Photo Professional 3.8 for Macintosh Instruction M - Page 129
30, 88 Toning Effect 28 Tool Palette NR/Lens/ALO Tool Palette 112 RAW Tool Palette 111 RGB Instruction Manual has been reviewed thoroughly. However, if you should notice any errors or omissions, please contact a Canon Service Center. O Please note that irrespective of the above-mentioned, Canon
-
 1
1 -
 2
2 -
 3
3 -
 4
4 -
 5
5 -
 6
6 -
 7
7 -
8
-
9
-
10
-
11
-
12
-
13
-
14
-
15
-
16
-
17
-
18
-
19
-
20
-
21
-
22
-
23
-
24
-
25
-
26
-
27
-
28
-
29
-
30
-
31
-
32
-
33
-
34
-
35
-
36
-
37
-
38
-
39
-
40
-
41
-
42
-
43
-
44
-
45
-
46
-
47
-
48
-
49
-
50
-
51
-
52
-
53
-
54
-
55
-
56
-
57
-
58
-
59
-
60
-
61
-
62
-
63
-
64
-
65
-
66
-
67
-
68
-
69
-
70
-
71
-
72
-
73
-
74
-
75
-
76
-
77
-
78
-
79
-
80
-
81
-
82
-
83
-
84
-
85
-
86
-
87
-
88
-
89
-
90
-
91
-
92
-
93
-
94
-
95
-
96
-
97
-
98
-
99
-
100
-
101
-
102
-
103
-
104
-
105
-
106
-
107
-
108
-
109
-
110
-
111
-
112
-
113
-
114
-
115
-
116
-
117
-
118
-
119
-
120
-
121
-
122
-
123
-
124
-
125
-
126
-
127
-
128
-
129
 |
 |
1
2
3
4
5
Introduction
Contents at
a Glance
Basic
Operation
Advanced
Operation
Advanced
Image Editing
and Printing
Editing
JPEG/TIFF
Images
Index
Processing
Large Numbers
of Images
Reference
O
Content of this Instruction Manual
O
DPP is used for Digital Photo Professional.
O
In this manual, the windows used in the
examples are from Mac OS X 10.4.
O
`
indicates the selection procedure of the menu.
Example: [Digital Photo Professional] menu
`
[Quit Digital Photo Professional].
O
Square brackets are used to indicate items such
as menu names, button names and window
names that appear on the computer screen.
O
Text inside < > indicates a key on the keyboard.
O
**
indicates a reference page.
Click to move to the relevant page.
O
:
Marks helpful information when a problem
arises.
O
:
Marks tips for using the software skillfully.
O
:
Marks information that should be read
before use.
O
:
Marks additional information you may find
helpful.
© CANON INC. 2010
CT1-7185DPPME-000
O
Switching Between Pages
O
Click on arrows on the bottom right of the screen.
: next page
: previous page
: return to a page you had previously
displayed
O
Click on the chapter headings on the right side
of the screen to switch to the contents page of
that chapter. Also, click the item you want to
read about on the table of contents to move to
the relevant page.
O
Help and Shortcut Keys
O
For information about using DPP, refer to Help
from the [Help] menu.
O
Refer to the “Shortcut Key List” in the Help for a
list of shortcut keys which are helpful for quick
operation.
RAW Image Processing, Viewing and Editing Software
Digital Photo Professional
Ver. 3.8
Instruction Manual