Canon FAX-JX200 FAX-JX200/JX201 User'sGuide - Page 22
Canceling Sending, Adjusting the Quality of Your Documents, Setting the Scanning Resolution
 |
View all Canon FAX-JX200 manuals
Add to My Manuals
Save this manual to your list of manuals |
Page 22 highlights
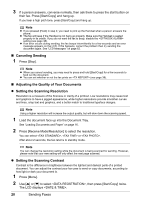
3 If a person answers, converse normally, then ask them to press the start button on their fax. Press [Start/Copy] and hang up. If you hear a high pitch tone, press [Start/Copy] and hang up. Note z If you pressed [Hook] in step 2, you need to pick up the Handset when a person answers the phone. z The fax will beep if the Handset is not hang up properly. Make sure the Handset is seated properly in its cradle. If you do not want the fax to beep, disable the setting (see page 38). z If an error occurs during sending, the fax beeps intermittently for a few seconds and an error message appears on the LCD. If this happens, correct the problem then try sending the document again. See "LCD Messages" on page 62. „ Canceling Sending 1 Press [Stop]. Note z When you cancel sending, you may need to press and hold [Start/Copy] for a few seconds to feed out the document. z You can set whether or not the fax prints an (see page 38). „ Adjusting the Quality of Your Documents z Setting the Scanning Resolution Resolution is a measure of the fineness or clarity of a printout. Low resolutions may cause text and graphics to have a jagged appearance, while higher resolutions provide smoother curves and lines, crisp text and graphics, and a better match to traditional typeface designs. Note Using a higher resolution will increase the output quality, but will slow down the scanning speed. 1 Load the document face up into the Document Tray. See "Loading Documents and Paper" on page 16. 2 Press [Receive Mode/Resolution] to select the resolution. You can select , or . After about 2 seconds, the fax returns to standby mode. Note You can change the resolution setting while the document is being scanned for sending. However, please note that your new setting will only affect the next page scanned. z Setting the Scanning Contrast Contrast is the difference in brightness between the lightest and darkest parts of a printed document. You can adjust the contrast your fax uses to send or copy documents, according to how light or dark your document is. 1 Press [Menu]. 2 Use [{] or [}] to select , then press [Start/Copy] twice. The LCD displays . 20 Sending Faxes
-
 1
1 -
2
-
3
-
4
-
5
-
6
-
7
-
8
-
9
-
10
-
11
-
12
-
13
-
14
-
15
-
16
-
 17
17 -
 18
18 -
 19
19 -
 20
20 -
 21
21 -
 22
22 -
 23
23 -
 24
24 -
 25
25 -
 26
26 -
 27
27 -
28
-
29
-
30
-
31
-
32
-
33
-
34
-
35
-
36
-
37
-
38
-
39
-
40
-
41
-
42
-
43
-
44
-
45
-
46
-
47
-
48
-
49
-
50
-
51
-
52
-
53
-
54
-
55
-
56
-
57
-
58
-
59
-
60
-
61
-
62
-
63
-
64
-
65
-
66
-
67
-
68
-
69
-
70
-
71
-
72
-
73
-
74
-
75
-
76
-
77
-
78
 |
 |