Canon FAX-JX200 FAX-JX200/JX201 User'sGuide - Page 27
Delayed Sending, Press [Start/Copy].
 |
View all Canon FAX-JX200 manuals
Add to My Manuals
Save this manual to your list of manuals |
Page 27 highlights
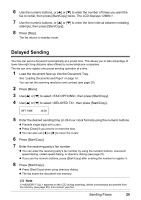
6 Use the numeric buttons, or [{] or [}] to enter the number of times you want the fax to redial, then press [Start/Copy] twice. The LCD displays . 7 Use the numeric buttons, or [{] or [}] to enter the time interval between redialing attempts, then press [Start/Copy]. 8 Press [Stop]. The fax returns to standby mode. Delayed Sending Your fax can send a document automatically at a preset time. This allows you to take advantage of lower late-night long-distance rates offered by some telephone companies. The fax can only register one preset sending operation at a time. 1 Load the document face up into the Document Tray. See "Loading Documents and Paper" on page 16. You can set the scanning resolution and contrast (see page 20). 2 Press [Menu]. 3 Use [{] or [}] to select , then press [Start/Copy]. 4 Use [{] or [}] to select , then press [Start/Copy]. SET TIME 15:00 5 Enter the desired sending time (in 24-hour clock format) using the numeric buttons. z Precede single digits with a zero. z Press [Clear] if you need to re-enter the time. z You can also use [[] or []] to move the cursor. 6 Press [Start/Copy]. 7 Enter the receiving party's fax number. z You can enter the receiving party's fax number by using the numeric buttons, one-touch speed dialing, coded speed dialing, or directory dialing (see page 21). z If you use the numeric buttons, press [Start/Copy] after entering the number to register it. 8 Press [Start/Copy]. z Press [Start/Copy] when using directory dialing. z The fax scans the document into memory. Note If appears on the LCD during scanning, delete unnecessary documents from the memory (see page 35), then rescan your fax. Sending Faxes 25
-
 1
1 -
2
-
3
-
4
-
5
-
6
-
7
-
8
-
9
-
10
-
11
-
12
-
13
-
14
-
15
-
16
-
17
-
18
-
19
-
20
-
21
-
 22
22 -
 23
23 -
 24
24 -
 25
25 -
 26
26 -
 27
27 -
 28
28 -
 29
29 -
 30
30 -
 31
31 -
 32
32 -
33
-
34
-
35
-
36
-
37
-
38
-
39
-
40
-
41
-
42
-
43
-
44
-
45
-
46
-
47
-
48
-
49
-
50
-
51
-
52
-
53
-
54
-
55
-
56
-
57
-
58
-
59
-
60
-
61
-
62
-
63
-
64
-
65
-
66
-
67
-
68
-
69
-
70
-
71
-
72
-
73
-
74
-
75
-
76
-
77
-
78
 |
 |