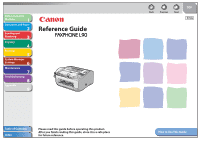
Canon FAXPHONE L90 Reference Guide FAXPHONE L90
Canon FAXPHONE L90 Manual
 |
UPC - 013803082029
View all Canon FAXPHONE L90 manuals
Add to My Manuals
Save this manual to your list of manuals |
Canon FAXPHONE L90 manual content summary:
- Canon FAXPHONE L90 | Reference Guide FAXPHONE L90 - Page 1
Before Using the Machine 1 Document and Paper 2 Sending and Receiving 3 Copying 4 Printing 5 System Manager Settings 6 Maintenance 7 Troubleshooting 8 Appendix 9 Reference Guide Table of Contents Index Please read this guide before operating this product. After you finish reading - Canon FAXPHONE L90 | Reference Guide FAXPHONE L90 - Page 2
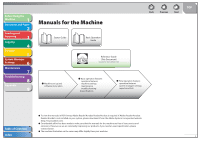
Before Using the Machine 1 Document and Paper 2 Sending and Receiving 3 Copying 4 Printing 5 System Manager Settings 6 Maintenance 7 Troubleshooting 8 Appendix 9 Manuals for the Machine Back Previous Next TOP Table of Contents ˔ To view the manuals in PDF format, Adobe Reader/ - Canon FAXPHONE L90 | Reference Guide FAXPHONE L90 - Page 3
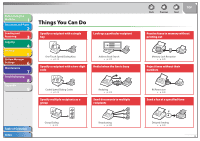
Before Using the Machine 1 Document and Paper 2 Sending and Receiving 3 Copying 4 Printing 5 System Manager Settings 6 Maintenance 7 Troubleshooting 8 Appendix 9 Things You Can Do Specify a recipient with a single key Look up a particular recipient One-Touch Speed Dialing Keys → p. - Canon FAXPHONE L90 | Reference Guide FAXPHONE L90 - Page 4
System Manager Settings 6 Maintenance 7 Troubleshooting 8 Appendix 9 Back Previous Next TOP Send or receive a fax automatically upon request Adjust the density level of scanned images Sort printouts by page order Polling → p. 3-31 Send a fax to be relayed to other fax machines Density - Canon FAXPHONE L90 | Reference Guide FAXPHONE L90 - Page 5
1 Document and Paper 2 Sending and Receiving 3 Copying 4 Printing 5 System Manager Settings 6 Maintenance 7 Troubleshooting 8 Appendix 9 Table of Contents Back Previous Next TOP Manuals for the Machine...i Things You Can Do...ii How to Use This Guide ...xv Using the Top Page...xv - Canon FAXPHONE L90 | Reference Guide FAXPHONE L90 - Page 6
1 Document and Paper 2 Sending and Receiving 3 Copying 4 Printing 5 System Manager Settings 6 Maintenance 7 Troubleshooting 8 Appendix 9 Back Previous Next TOP LCD (Standby Mode)...1-9 Fax Mode...1-9 Copy Mode ...1-9 Handset ...1-10 Maintaining the Handset 1-10 Toner Cartridge - Canon FAXPHONE L90 | Reference Guide FAXPHONE L90 - Page 7
Using the Machine 1 Document and Paper 2 Sending and Receiving 3 Copying 4 Printing 5 System Manager Settings 6 Maintenance 7 Troubleshooting 8 Appendix 9 Back Previous Next TOP Scanning Area ...2-3 Loading Documents ...2-4 Paper Requirements...2-5 Printable Area...2-7 Loading - Canon FAXPHONE L90 | Reference Guide FAXPHONE L90 - Page 8
the Machine 1 Document and Paper 2 Sending and Receiving 3 Copying 4 Printing 5 System Manager Settings 6 Maintenance 7 Troubleshooting 8 Appendix 9 Table of Contents Index Back Previous Next TOP Storing/Editing Address Book 3-7 Storing/Editing One-Touch Speed Dialing Keys/Coded - Canon FAXPHONE L90 | Reference Guide FAXPHONE L90 - Page 9
1 Document and Paper 2 Sending and Receiving 3 Copying 4 Printing 5 System Manager Settings 6 Maintenance 7 Troubleshooting 8 Appendix 9 Table of Contents Index Back Previous Next TOP Receiving Features...3-23 FAX/TEL: Optional Settings 3-23 DRPD: Optional Settings 3-24 Manual - Canon FAXPHONE L90 | Reference Guide FAXPHONE L90 - Page 10
Manager Settings 6 Maintenance 7 Troubleshooting 8 Appendix 9 Back Previous Next TOP Checking and Deleting TX/RX Jobs 3-35 Checking Transmission/Reception Results 3-35 Checking and Deleting Fax Documents Stored in Memory 3-35 4 Copying ...4-1 Basic Copying Method ...4-2 Scan Settings - Canon FAXPHONE L90 | Reference Guide FAXPHONE L90 - Page 11
...6-1 Specifying the System Manager Settings 6-2 Restricting Access to Destinations 6-3 Confirming Entered Fax Numbers 6-3 Restricting Redial ...6-3 7 Maintenance ...7-1 Cleaning the Machine ...7-2 Exterior ...7-2 Interior ...7-2 Fuser Roller...7-6 Scanning area...7-6 Table of Contents Index - Canon FAXPHONE L90 | Reference Guide FAXPHONE L90 - Page 12
a New One 7-12 Recycling Used Cartridges...7-17 The Clean Earth Campaign 7-17 U.S.A. PROGRAM...7-18 CANADA PROGRAM-CANADA PROGRAMME 7-20 Transporting the Machine ...7-23 8 Troubleshooting ...8-1 Clearing Jams ...8-3 Document Jams...8-3 Paper Jams...8-5 LCD Messages...8-10 Error Codes ...8-16 - Canon FAXPHONE L90 | Reference Guide FAXPHONE L90 - Page 13
Before Using the Machine 1 Document and Paper 2 Sending and Receiving 3 Copying 4 Printing 5 System Manager Settings 6 Maintenance 7 Troubleshooting 8 Appendix 9 Table of Contents Index Back Previous Next TOP If is displayed 8-18 Re-Loading the Paper...8-18 - Canon FAXPHONE L90 | Reference Guide FAXPHONE L90 - Page 14
the Machine 1 Document and Paper 2 Sending and Receiving 3 Copying 4 Printing 5 System Manager Settings 6 Maintenance 7 Troubleshooting 8 Appendix 9 Back Previous Next TOP 9 Appendix...9-1 Machine Settings ...9-3 Printing USER DATA LIST 9-3 Accessing the Setting Menu 9-3 Setting - Canon FAXPHONE L90 | Reference Guide FAXPHONE L90 - Page 15
Before Using the Machine 1 Document and Paper 2 Sending and Receiving 3 Copying 4 Printing 5 System Manager Settings 6 Maintenance 7 Troubleshooting 8 Appendix 9 Back Previous Next TOP Summary of Reports and Lists 9-19 Printing Reports Automatically 9-20 TX REPORT...9-20 RX - Canon FAXPHONE L90 | Reference Guide FAXPHONE L90 - Page 16
and Paper 2 Sending and Receiving 3 Copying 4 Printing 5 System Manager Settings 6 Maintenance 7 Troubleshooting 8 Appendix 9 How to Use This Guide ˙ Using the Top Page Before Using the Machine 1 Document and Paper 2 Sending and Receiving 3 Copying 4 Printing 5 System Manager - Canon FAXPHONE L90 | Reference Guide FAXPHONE L90 - Page 17
Topic List Before Using the Machine 1 Document and Paper 2 Sending and Receiving 3 Copying 4 Printing 5 System Manager Settings 6 Maintenance 7 Troubleshooting 8 Appendix 9 1 Before Using the Machine Back Previous Next TOP Machine Components 1-3 Operation Panel 1-6 Operation - Canon FAXPHONE L90 | Reference Guide FAXPHONE L90 - Page 18
Before Using the Machine 1 Document and Paper 2 Sending and Receiving 3 Copying 4 Printing 5 System Manager Settings 6 Maintenance 7 Troubleshooting 8 Appendix 9 Back Previous Next TOP The following symbols are used throughout the manuals for the machine and indicate the warnings, - Canon FAXPHONE L90 | Reference Guide FAXPHONE L90 - Page 19
the Machine 1 Document and Paper 2 Sending and Receiving 3 Copying 4 Printing 5 System Manager Settings 6 Maintenance 7 Troubleshooting 8 Appendix 9 Back Previous Next TOP Legal Notices Trademarks Canon, the Canon logo, and FAXPHONE are trademarks of Canon Inc. Microsoft, Windows - Canon FAXPHONE L90 | Reference Guide FAXPHONE L90 - Page 20
7 Troubleshooting 8 Appendix 9 1 Before Using the Machine Back Previous Next TOP Machine Components 1-3 Operation Panel 1-6 Operation Panel 1-6 LCD (Standby Mode 1-9 Fax Mode 1-9 Copy Mode 1-9 Handset ...1-10 Maintaining the Handset 1-10 Toner Cartridge 1-11 Maintaining the Toner - Canon FAXPHONE L90 | Reference Guide FAXPHONE L90 - Page 21
Using the Machine 1 Document and Paper 2 Sending and Receiving 3 Copying 4 Printing 5 System Manager Settings 6 Maintenance 7 Troubleshooting 8 Appendix 9 Back Previous Next TOP Telephone Line Setting 1-13 Setting the Telephone Line Type 1-13 Timer Settings 1-14 Setting the - Canon FAXPHONE L90 | Reference Guide FAXPHONE L90 - Page 22
and Receiving 3 Copying 4 Printing 5 System Manager Settings 6 Maintenance 7 Troubleshooting 8 Appendix 9 Machine Components Back Previous Next TOP A Document feeder tray Holds documents. B Document feeder tray extension Extension for the document feeder tray. C Paper delivery tray - Canon FAXPHONE L90 | Reference Guide FAXPHONE L90 - Page 23
4 Printing 5 System Manager Settings 6 Maintenance 7 Troubleshooting 8 Appendix 9 Table of Contents Index Back Previous Next TOP H Document delivery tray extension Extension for the document delivery tray. I Document delivery tray Outputs scanned documents. Part of paper stack - Canon FAXPHONE L90 | Reference Guide FAXPHONE L90 - Page 24
the Machine 1 Document and Paper 2 Sending and Receiving 3 Copying 4 Printing 5 System Manager Settings 6 Maintenance 7 Troubleshooting 8 Appendix 9 Table of Contents Index Back Previous Next TOP N Handset For using the machine as a telephone or sending/receiving faxes remotely - Canon FAXPHONE L90 | Reference Guide FAXPHONE L90 - Page 25
Before Using the Machine 1 Document and Paper 2 Sending and Receiving 3 Copying 4 Printing 5 System Manager Settings 6 Maintenance 7 Troubleshooting 8 Appendix 9 Operation Panel ˙ Operation Panel Table of Contents Index Back Previous Next TOP A One-Touch Speed Dialing keys Press - Canon FAXPHONE L90 | Reference Guide FAXPHONE L90 - Page 26
clear entered alphanumeric characters. L [Stop/Reset] key Press to stop a current job or to return the machine to the standby mode. Also, press to switch to the Fax mode when the machine is in the Copy mode. M [Start] key Press to start scanning documents for sending or copying. N Processing - Canon FAXPHONE L90 | Reference Guide FAXPHONE L90 - Page 27
Before Using the Machine 1 Document and Paper 2 Sending and Receiving 3 Copying 4 Printing 5 System Manager Settings 6 Maintenance 7 Troubleshooting 8 Appendix 9 Table of Contents Index Back Previous Next TOP P [System Monitor] key Press to check the sending status, print status, - Canon FAXPHONE L90 | Reference Guide FAXPHONE L90 - Page 28
the Machine 1 Document and Paper 2 Sending and Receiving 3 Copying 4 Printing 5 System Manager Settings 6 Maintenance 7 Troubleshooting 8 Appendix 9 LCD (Standby Mode) ˙ Fax Mode having shown. - If the machine remains idle for one minute, the display returns to the - Canon FAXPHONE L90 | Reference Guide FAXPHONE L90 - Page 29
Before Using the Machine 1 Document and Paper 2 Sending and Receiving 3 Copying 4 Printing 5 System Manager Settings 6 Maintenance 7 Troubleshooting 8 Appendix 9 Handset The handset is used to use the machine as a telephone and a fax machine, and to receive faxes manually. For how to - Canon FAXPHONE L90 | Reference Guide FAXPHONE L90 - Page 30
denotes a document on which the area covered with toner is 5% of the total area of a sheet. Toner Cartridge name: Canon Cartridge 104 Back Previous Next TOP Model Name L90 Type Bundled Supported Canon Genuine Cartridge Canon Cartridge 104 Starter Replacement Canon Cartridge 104 Print Yield - Canon FAXPHONE L90 | Reference Guide FAXPHONE L90 - Page 31
Before Using the Machine 1 Document and Paper 2 Sending and Receiving 3 Copying 4 Printing 5 System Manager Settings 6 Maintenance 7 Troubleshooting 8 Appendix 9 ˙ Maintaining the Toner Cartridge ˔ Keep the toner cartridge away from computer screens, disk drives, and floppy disks. The - Canon FAXPHONE L90 | Reference Guide FAXPHONE L90 - Page 32
Before Using the Machine 1 Document and Paper 2 Sending and Receiving 3 Copying 4 Printing 5 System Manager Settings 6 Maintenance 7 Troubleshooting 8 Appendix 9 Telephone Line Setting ˙ Setting the Telephone Line Type The default setting is . 1. Press [Menu]. 2. Press [ ] - Canon FAXPHONE L90 | Reference Guide FAXPHONE L90 - Page 33
Before Using the Machine 1 Document and Paper 2 Sending and Receiving 3 Copying 4 Printing 5 System Manager Settings 6 Maintenance 7 Troubleshooting 8 Appendix 9 Timer Settings ˙ Setting the Sleep Mode When the machine remains idle for a certain period of time, it automatically enters - Canon FAXPHONE L90 | Reference Guide FAXPHONE L90 - Page 34
Before Using the Machine 1 Document and Paper 2 Sending and Receiving 3 Copying 4 Printing 5 System Manager Settings 6 Maintenance 7 Troubleshooting 8 Appendix 9 ˙ Setting Daylight Saving Time In some countries or areas, time is advanced throughout the summer season. This is called " - Canon FAXPHONE L90 | Reference Guide FAXPHONE L90 - Page 35
Before Using the Machine 1 Document and Paper 2 Sending and Receiving 3 Copying 4 Printing 5 System Manager Settings 6 Maintenance 7 Troubleshooting 8 Appendix 9 press [OK]. 20. Press [Stop/Reset] to return to the standby mode. Table of Contents Index Back Previous Next TOP 1-16 - Canon FAXPHONE L90 | Reference Guide FAXPHONE L90 - Page 36
Before Using the Machine 1 Document and Paper 2 Sending and Receiving 3 Copying 4 Printing 5 System Manager Settings 6 Maintenance 7 Troubleshooting 8 Appendix 9 2 Document and Paper Back Previous Next TOP Document Requirements 2-2 Scanning Area 2-3 Loading Documents 2-4 Paper - Canon FAXPHONE L90 | Reference Guide FAXPHONE L90 - Page 37
Before Using the Machine 1 Document and Paper 2 Sending and Receiving 3 Copying 4 Printing 5 System Manager Settings 6 Maintenance 7 Troubleshooting 8 Appendix 9 Table of Contents Index Document Requirements Size (W x L) Max. 8 1/2" x 15 3/4" (Max. 216 x 400 mm) Min. 5 7/8" x 4 1/8" - Canon FAXPHONE L90 | Reference Guide FAXPHONE L90 - Page 38
Before Using the Machine 1 Document and Paper 2 Sending and Receiving 3 Copying 4 Printing 5 System Manager Settings 6 Maintenance 7 Troubleshooting 8 Appendix 9 Scanning Area Make sure your document's text and graphics fall within the shaded area in the following diagram. Note that - Canon FAXPHONE L90 | Reference Guide FAXPHONE L90 - Page 39
Before Using the Machine 1 Document and Paper 2 Sending and Receiving 3 Copying 4 Printing 5 System Manager Settings 6 Maintenance 7 Troubleshooting 8 Appendix 9 Loading Documents 1. Adjust the slide guides to the width of the documents. 2. Fan the document stack and even the edges. - Canon FAXPHONE L90 | Reference Guide FAXPHONE L90 - Page 40
Machine 1 Document and Paper 2 Sending and Receiving 3 Copying 4 Printing 5 System Manager Settings 6 Maintenance 7 Troubleshooting 8 Appendix 9 Paper Requirements Paper Size Setting which has been printed on using a thermal transfer printer (Do not copy on the reverse side.) ˔ The - Canon FAXPHONE L90 | Reference Guide FAXPHONE L90 - Page 41
the Machine 1 Document and Paper 2 Sending and Receiving 3 Copying 4 Printing 5 System Manager Settings 6 Maintenance 7 Troubleshooting 8 the transparencies designed for laser printers. Canon recommends you to use Canon type transparencies with this machine. Table of Contents Index - Canon FAXPHONE L90 | Reference Guide FAXPHONE L90 - Page 42
Before Using the Machine 1 Document and Paper 2 Sending and Receiving 3 Copying 4 Printing 5 System Manager Settings 6 Maintenance 7 Troubleshooting 8 Appendix 9 Printable Area The shaded area indicates the approximate printable area of LTR paper and envelope. Note that the margin - Canon FAXPHONE L90 | Reference Guide FAXPHONE L90 - Page 43
7 Troubleshooting 8 Appendix 9 Loading Paper To load paper in the paper feeder, see "Set Up the Machine," in the Starter Guide. ˙ Loading Envelopes ˔ Use standard envelopes with diagonal seams and flaps. ˔ Make sure to set the correct envelope size in the printer driver. (See Online Help.) ˔ To - Canon FAXPHONE L90 | Reference Guide FAXPHONE L90 - Page 44
Using the Machine 1 Document and Paper 2 Sending and Receiving 3 Copying 4 Printing 5 System Manager Settings 6 Maintenance 7 Troubleshooting 8 Appendix 9 2. Lift the paper stack cover and pull it out completely. Make sure the back end of the cover does not catch the front paper guide - Canon FAXPHONE L90 | Reference Guide FAXPHONE L90 - Page 45
Before Using the Machine 1 Document and Paper 2 Sending and Receiving 3 Copying 4 Printing 5 System Manager Settings 6 Maintenance 7 Troubleshooting 8 Appendix 9 5. Adjust the side paper guides to the size of the stack. If the paper guides are not adjusted correctly for the size of - Canon FAXPHONE L90 | Reference Guide FAXPHONE L90 - Page 46
Machine 1 Document and Paper 2 Sending and Receiving 3 Copying 4 Printing 5 System Manager Settings 6 Maintenance 7 Troubleshooting 8 Appendix 9 Setting Paper Size and Type The default setting PAPER H>. 9. Press [Stop/Reset] to return to the standby mode. Table of Contents Index 2-11 - Canon FAXPHONE L90 | Reference Guide FAXPHONE L90 - Page 47
Settings 6 Maintenance 7 Troubleshooting 8 Appendix 9 3 Sending and Receiving Back Previous Next TOP Basic Sending Method 3-5 Scan Settings ...3-6 Image Quality 3-6 Density 3-6 Storing/Editing Address Book 3-7 Storing/Editing One-Touch Speed Dialing Keys/ Coded Speed Dialing Codes - Canon FAXPHONE L90 | Reference Guide FAXPHONE L90 - Page 48
the Machine 1 Document and Paper 2 Sending and Receiving 3 Copying 4 Printing 5 System Manager Settings 6 Maintenance 7 Troubleshooting 8 Appendix 9 Back Previous Next TOP Specifying Recipients 3-14 Using One-Touch Speed Dialing Keys 3-14 Using Coded Speed Dialing Codes 3-14 - Canon FAXPHONE L90 | Reference Guide FAXPHONE L90 - Page 49
1 Document and Paper 2 Sending and Receiving 3 Copying 4 Printing 5 System Manager Settings 6 Maintenance 7 Troubleshooting 8 Appendix 9 Table of Contents Index Back Previous Next TOP Receiving Features 3-23 FAX/TEL: Optional Settings 3-23 DRPD: Optional Settings 3-24 Manual - Canon FAXPHONE L90 | Reference Guide FAXPHONE L90 - Page 50
Using the Machine 1 Document and Paper 2 Sending and Receiving 3 Copying 4 Printing 5 System Manager Settings 6 Maintenance 7 Troubleshooting 8 Appendix 9 Back Previous Next TOP Canceling TX/RX Jobs 3-34 Checking and Deleting TX/RX Jobs 3-35 Checking Transmission/Reception - Canon FAXPHONE L90 | Reference Guide FAXPHONE L90 - Page 51
[Stop/Reset]. 2. Set documents. Insert the document top edge first in the ADF with the printed side facing up. (See "Loading Documents," on p. 2-4.) 3. Enter the fax number with the numeric keys. You can also specify the fax number with one-touch speed dialing keys, coded speed dialing codes, or - Canon FAXPHONE L90 | Reference Guide FAXPHONE L90 - Page 52
Using the Machine 1 Document and Paper 2 Sending and Receiving 3 Copying 4 Printing 5 System Manager Settings 6 Maintenance 7 Troubleshooting 8 Appendix 9 Scan Settings You can adjust the image quality and density of the document you send. The higher image quality you set, the better - Canon FAXPHONE L90 | Reference Guide FAXPHONE L90 - Page 53
Before Using the Machine 1 Document and Paper 2 Sending and Receiving 3 Copying 4 Printing 5 System Manager Settings 6 Maintenance 7 Troubleshooting 8 Appendix 9 Storing/Editing Address Book This machine provides you with various ways to specify the fax/ telephone numbers besides - Canon FAXPHONE L90 | Reference Guide FAXPHONE L90 - Page 54
Before Using the Machine 1 Document and Paper 2 Sending and Receiving 3 Copying 4 Printing 5 System Manager Settings 6 Maintenance 7 Troubleshooting 8 Appendix 9 5. Enter the recipient name (max. 20 characters, including spaces) with the numeric keys, then press [OK]. Ex. NAME Can - Canon FAXPHONE L90 | Reference Guide FAXPHONE L90 - Page 55
the Machine 1 Document and Paper 2 Sending and Receiving 3 Copying 4 Printing 5 System Manager Settings 6 Maintenance 7 Troubleshooting 8 Appendix 9 Editing One-Touch Speed Dialing Keys/Coded Speed Dialing Codes 1. Press [Menu]. 2. Press [ ] or [ ] to select , then - Canon FAXPHONE L90 | Reference Guide FAXPHONE L90 - Page 56
the Machine 1 Document and Paper 2 Sending and Receiving 3 Copying 4 Printing 5 System Manager Settings 6 Maintenance 7 Troubleshooting 8 Appendix 9 Deleting One-Touch Speed Dialing Keys/Coded Speed Dialing Codes 1. Press [Menu]. 2. Press [ ] or [ ] to select , then - Canon FAXPHONE L90 | Reference Guide FAXPHONE L90 - Page 57
Before Using the Machine 1 Document and Paper 2 Sending and Receiving 3 Copying 4 Printing 5 System Manager Settings 6 Maintenance 7 Troubleshooting 8 Appendix 9 5. Enter the group name (max. 20 characters, including spaces) with the numeric keys, then press [OK]. To register another - Canon FAXPHONE L90 | Reference Guide FAXPHONE L90 - Page 58
Before Using the Machine 1 Document and Paper 2 Sending and Receiving 3 Copying 4 Printing 5 System Manager Settings 6 Maintenance 7 Troubleshooting 8 Appendix 9 Deleting Recipients from Group 1. Press [Menu]. 2. Press [ ] or [ ] to select , then press [OK]. 3. - Canon FAXPHONE L90 | Reference Guide FAXPHONE L90 - Page 59
Machine 1 Document and Paper 2 Sending and Receiving 3 Copying 4 Printing 5 System Manager Settings 6 Maintenance 7 Troubleshooting 8 Appendix 9 Deleting Group Dialing 1. Press [Menu]. 2. Press [ ] or [ ] to select - Canon FAXPHONE L90 | Reference Guide FAXPHONE L90 - Page 60
Book," on p. 3-7.) 1. Set documents. If you want to adjust the image quality and density, see "Scan Settings," on p. 3-6. 2. Press [Coded Dial]. 3. Enter the desired two-digit code (00 to 99) with the numeric keys. Ex. =012XXXXXXX [*01]CANON If you entered a wrong code, press [Stop/Reset], then try - Canon FAXPHONE L90 | Reference Guide FAXPHONE L90 - Page 61
7 Troubleshooting 8 Appendix 9 ˙ Group Dialing To use this feature, you must register recipients in a group dialing beforehand. (See "Storing/Editing Address Book," on p. 3-7.) 1. Set documents. If you want to adjust the image quality and density, see "Scan Settings," on p. 3-6. 2. Press the one - Canon FAXPHONE L90 | Reference Guide FAXPHONE L90 - Page 62
Document and Paper 2 Sending and Receiving 3 Copying 4 Printing 5 System Manager Settings 6 Maintenance 7 Troubleshooting 8 Appendix 9 4. Press [ ] or [ ] to find the required recipient. - The recipients are listed in the order of one-touch speed dialing keys (01 to 15), and coded CANON - Canon FAXPHONE L90 | Reference Guide FAXPHONE L90 - Page 63
. For details on how to connect the handset or an external telephone to the machine, see "Before FAX Setting," in the Starter Guide. 2. Set documents. If you want to adjust the image quality and density, see "Scan Settings," on p. 3-6. 3. Press [Hook] or pick up the handset or the handset of your - Canon FAXPHONE L90 | Reference Guide FAXPHONE L90 - Page 64
Before Using the Machine 1 Document and Paper 2 Sending and Receiving 3 Copying 4 Printing 5 System Manager Settings 6 Maintenance 7 Troubleshooting 8 Appendix 9 Fax Dialing Features ˙ Switching Temporarily to Tone Dialing If your machine is set for pulse dialing, use the procedure - Canon FAXPHONE L90 | Reference Guide FAXPHONE L90 - Page 65
5 System Manager Settings 6 Maintenance 7 Troubleshooting 8 Appendix 9 ˙ Redialing Redialing can be done manually or automatically. For automatic redialing, you can set how many times the machine redials and the time between redials. Redialing Manually 1. Set documents. 2. Press [Redial - Canon FAXPHONE L90 | Reference Guide FAXPHONE L90 - Page 66
pause within the number. Make sure the LCD shows the fax mode. If the LCD shows the copy mode, press [Stop/Reset]. 1. Set documents. 2. Use the numeric keys to dial the international access code. For details on international access codes, contact your local telephone company. 3. If necessary, press - Canon FAXPHONE L90 | Reference Guide FAXPHONE L90 - Page 67
Before Using the Machine 1 Document and Paper 2 Sending and Receiving 3 Copying 4 Printing 5 System Manager Settings 6 Maintenance 7 Troubleshooting 8 Appendix 9 4. Use the numeric keys to dial the country code, the area code, and the fax/telephone number of the recipient. 5. If - Canon FAXPHONE L90 | Reference Guide FAXPHONE L90 - Page 68
Copying 4 Printing 5 System Manager Settings 6 Maintenance 7 Troubleshooting 8 Appendix 9 Basic Receiving Method Follow this procedure to set the machine for receiving faxes. The default setting is . Any data stored in the memory, including received fax documents, will be deleted if - Canon FAXPHONE L90 | Reference Guide FAXPHONE L90 - Page 69
Manager Settings 6 Maintenance 7 Troubleshooting 8 Appendix 9 Receiving Features You can set the fax receive mode to suit your needs, set the machine to receive fax documents into memory (memory lock), and use the external telephone connected to the machine to receive faxes manually (remote - Canon FAXPHONE L90 | Reference Guide FAXPHONE L90 - Page 70
Before Using the Machine 1 Document and Paper 2 Sending and Receiving 3 Copying 4 Printing 5 System Manager Settings 6 Maintenance 7 Troubleshooting 8 Appendix 9 ˙ DRPD: Optional Settings When you select in , select the ring pattern assigned by your telephone company. - Canon FAXPHONE L90 | Reference Guide FAXPHONE L90 - Page 71
stored in memory. For toner empty, the machine automatically starts printing when the error is cleared. - The machine memory can store up to 346 fax jobs or approximately 346 pages.* * Based on the condition that the other party sends the fax by FAXPHONE L90 with ITU-T Standard Chart No.1, standard - Canon FAXPHONE L90 | Reference Guide FAXPHONE L90 - Page 72
Using the Machine 1 Document and Paper 2 Sending and Receiving 3 Copying 4 Printing 5 System Manager Settings 6 Maintenance 7 Troubleshooting 8 Appendix 9 6. If you want to set a password, press [ ] or [ ] to select , then press [OK]. If you do not need to set a password - Canon FAXPHONE L90 | Reference Guide FAXPHONE L90 - Page 73
the Machine 1 Document and Paper 2 Sending and Receiving 3 Copying 4 Printing 5 System Manager Settings 6 Maintenance 7 Troubleshooting 8 Appendix 9 ˙ Remote Reception Remote reception enables you to use an external telephone connected to the machine to receive faxes manually. This - Canon FAXPHONE L90 | Reference Guide FAXPHONE L90 - Page 74
Before Using the Machine 1 Document and Paper 2 Sending and Receiving 3 Copying 4 Printing 5 System Manager Settings 6 Maintenance 7 Troubleshooting 8 Appendix 9 ˙ Selecting the Receive Mode for Printing You can select whether the machine stores all received pages in the memory before - Canon FAXPHONE L90 | Reference Guide FAXPHONE L90 - Page 75
desired setting, then press [OK]. : Reduces the documents automatically depending on the length of the documents. : Prints documents on a paper without reducing the size. : Cuts off the end of a document that does not fit on one page up to 1 in. (24mm). When the height of the area to - Canon FAXPHONE L90 | Reference Guide FAXPHONE L90 - Page 76
Before Using the Machine 1 Document and Paper 2 Sending and Receiving 3 Copying 4 Printing 5 System Manager Settings 6 Maintenance 7 Troubleshooting 8 Appendix 9 Advanced Features The machine provides the following additional fax modes: broadcasting, delayed sending, polling, and - Canon FAXPHONE L90 | Reference Guide FAXPHONE L90 - Page 77
Using the Machine 1 Document and Paper 2 Sending and Receiving 3 Copying 4 Printing 5 System Manager Settings 6 Maintenance 7 Troubleshooting 8 [OK]. Ex. TX TIME SET.=20:00 5. Use the numeric keys, one-touch speed dialing keys, coded speed dialing codes, or [Address Book] key - Canon FAXPHONE L90 | Reference Guide FAXPHONE L90 - Page 78
Receiving Polling receiving enables you to retrieve documents stored in remote machines for polling. 1. Press [Add.Mode]. 2. Press [ ] or [ ] to select , then press [OK]. 3. Use the numeric keys, one-touch speed dialing keys, coded speed dialing codes, or [Address Book] key to enter - Canon FAXPHONE L90 | Reference Guide FAXPHONE L90 - Page 79
and Receiving 3 Copying 4 Printing 5 System Manager Settings 6 Maintenance 7 Troubleshooting 8 Appendix 9 ˙ Relay Relay enables you to send a document to a remote machine (relay station), which in turn sends the document to other destinations. (The remote machine needs to have the relay - Canon FAXPHONE L90 | Reference Guide FAXPHONE L90 - Page 80
Using the Machine 1 Document and Paper 2 Sending and Receiving 3 Copying 4 Printing 5 System Manager Settings 6 Maintenance 7 Troubleshooting 8 Appendix 9 Canceling TX/RX Jobs Follow the procedure below to cancel an ongoing job (sending or receiving). 1. Press [Stop/Reset]. 2. When - Canon FAXPHONE L90 | Reference Guide FAXPHONE L90 - Page 81
Machine 1 Document and Paper 2 Sending and Receiving 3 Copying 4 Printing 5 System Manager Settings 6 Maintenance 7 Troubleshooting 8 Appendix 9 Back Previous Next TOP Checking Press [Stop/Reset] to return to the standby mode. ˙ Checking and Deleting Fax Documents Stored in Memory - Canon FAXPHONE L90 | Reference Guide FAXPHONE L90 - Page 82
Before Using the Machine 1 Document and Paper 2 Sending and Receiving 3 Copying 4 Printing 5 System Manager Settings 6 Maintenance 7 Troubleshooting 8 Appendix 9 4 Copying Back Previous Next TOP Basic Copying Method 4-2 Scan Settings ...4-3 Image Quality 4-3 Density 4-3 Zoom - Canon FAXPHONE L90 | Reference Guide FAXPHONE L90 - Page 83
Manager Settings 6 Maintenance 7 Troubleshooting 8 Appendix 9 Basic Copying Method Follow this procedure to make a copy. 1. Set documents. For documents you can copy, see "Document Requirements," on p. 2-2. 2. Press [Copy]. The copy mode automatically resets to the fax mode after one minute - Canon FAXPHONE L90 | Reference Guide FAXPHONE L90 - Page 84
Settings 6 Maintenance 7 Troubleshooting 8 Appendix 9 Scan Settings Before pressing [Start] to begin copying, you can adjust the settings to better suit the document to be scanned. These settings return to the default values if the machine remains idle for one minute or if you press [Stop/Reset - Canon FAXPHONE L90 | Reference Guide FAXPHONE L90 - Page 85
Before Using the Machine 1 Document and Paper 2 Sending and Receiving 3 Copying 4 Printing 5 System Manager Settings 6 Maintenance 7 Troubleshooting 8 Appendix 9 Adjusting Manually 1. Press [Copy]. 2. Press [Density] repeatedly to select the manual mode. 3. Press [ ] or [ ] to - Canon FAXPHONE L90 | Reference Guide FAXPHONE L90 - Page 86
Machine 1 Document and Paper 2 Sending and Receiving 3 Copying 4 Printing 5 System Manager Settings 6 Maintenance 7 Troubleshooting 8 Appendix 9 Canceling Copy Jobs Follow this procedure to cancel an outgoing job. 1. Press [Stop/Reset]. 2. When the message appears - Canon FAXPHONE L90 | Reference Guide FAXPHONE L90 - Page 87
Using the Machine 1 Document and Paper 2 Sending and Receiving 3 Copying 4 Printing 5 System Manager Settings 6 Maintenance 7 Troubleshooting 8 Appendix 9 5 Printing Back Previous Next TOP Printing Documents 5-2 Advanced Printing Features 5-3 Collate Printing 5-3 Checking and - Canon FAXPHONE L90 | Reference Guide FAXPHONE L90 - Page 88
Troubleshooting 8 Appendix 9 Printing Documents Follow this procedure to print a document from your computer. Make sure that the printer driver is installed. To check if the driver is installed, see "Software Settings with Computer" in the Starter Guide. For details on the printer driver settings - Canon FAXPHONE L90 | Reference Guide FAXPHONE L90 - Page 89
print documents collated into sets arranged in page order. For example, when printing multiple copies of a 3-page document, the print order is 1, 2, 3, 1, 2, 3, and so on. 1. From an open document on an application, click [File] → [Print]. 2. Select the printer icon for the machine ([Canon L90/L160 - Canon FAXPHONE L90 | Reference Guide FAXPHONE L90 - Page 90
Machine 1 Document and Paper 2 Sending and Receiving 3 Copying 4 Printing 5 System Manager Settings 6 Maintenance 7 Troubleshooting 8 Appendix 9 Checking list, and check the status of the print jobs. If you want to delete the job, go to step 4. Otherwise, press [Stop/ Reset] to return - Canon FAXPHONE L90 | Reference Guide FAXPHONE L90 - Page 91
1 Document and Paper 2 Sending and Receiving 3 Copying 4 Printing 5 System Manager Settings 6 Maintenance 7 Troubleshooting 8 Appendix 9 6 System Manager Settings Back Previous Next TOP Specifying the System Manager Settings 6-2 Restricting Access to Destinations 6-3 Confirming - Canon FAXPHONE L90 | Reference Guide FAXPHONE L90 - Page 92
Before Using the Machine 1 Document and Paper 2 Sending and Receiving 3 Copying 4 Printing 5 System Manager Settings 6 Maintenance 7 Troubleshooting 8 Appendix 9 Back Previous Next TOP Specifying the System Manager Settings You can set a password for the System Manager. Once the - Canon FAXPHONE L90 | Reference Guide FAXPHONE L90 - Page 93
5 System Manager Settings 6 Maintenance 7 Troubleshooting 8 Appendix 9 Back Previous Next TOP Restricting Access to Destinations You can send the documents with following restrictions or settings. - Confirming Entered Fax Numbers - Restricting Redial ˙ Confirming Entered Fax Numbers You - Canon FAXPHONE L90 | Reference Guide FAXPHONE L90 - Page 94
Before Using the Machine 1 Document and Paper 2 Sending and Receiving 3 Copying 4 Printing 5 System Manager Settings 6 Maintenance 7 Troubleshooting 8 Appendix 9 3. Press [ ] or [ ] to select , then press [OK]. 4. Press [ ] or [ ] to select , then - Canon FAXPHONE L90 | Reference Guide FAXPHONE L90 - Page 95
Settings 6 Maintenance 7 Troubleshooting 8 Appendix 9 7 Maintenance Back Previous Next TOP Cleaning the Machine 7-2 Exterior 7-2 Interior 7-2 Fuser Roller 7-6 Scanning area 7-6 Replacing the Toner Cartridge 7-8 Redistributing Toner 7-8 Replacing the Toner Cartridge with a New One - Canon FAXPHONE L90 | Reference Guide FAXPHONE L90 - Page 96
Manager Settings 6 Maintenance 7 Troubleshooting 8 Appendix 9 Cleaning the Machine Note the following before cleaning your machine: - Make sure no document for the machine to dry, then reconnect the power cord. ˙ Interior Clean the machine's print area periodically to prevent toner powder and - Canon FAXPHONE L90 | Reference Guide FAXPHONE L90 - Page 97
Machine 1 Document and Paper 2 Sending and Receiving 3 Copying 4 Printing 5 System Manager Settings 6 Maintenance 7 Troubleshooting the toner cartridge to light, place it in its protective bag or wrap it in a thick cloth. - Do not open the drum protective shutter on the toner cartridge. - Canon FAXPHONE L90 | Reference Guide FAXPHONE L90 - Page 98
Before Using the Machine 1 Document and Paper 2 Sending and Receiving 3 Copying 4 Printing 5 System Manager Settings 6 Maintenance 7 Troubleshooting 8 Appendix 9 5. Use a clean, soft, dry, lint-free cloth to remove any toner or paper debris from the machine's interior. - Do not touch - Canon FAXPHONE L90 | Reference Guide FAXPHONE L90 - Page 99
the Machine 1 Document and Paper 2 Sending and Receiving 3 Copying 4 Printing 5 System Manager Settings 6 Maintenance 7 Troubleshooting 8 Appendix 9 8. Insert the toner cartridge so that the guide (A) on the left side of the toner cartridge fits into the groove inside the machine and - Canon FAXPHONE L90 | Reference Guide FAXPHONE L90 - Page 100
dirty copies or faxes to be sent. If your documents have black streaks or appear dirty after copying them using the ADF, this may be caused by pencil lead rubbing off the documents and onto the roller. Clean the ADF scanning area and roller. 1. Disconnect the power cord from the machine. 2. Lift the - Canon FAXPHONE L90 | Reference Guide FAXPHONE L90 - Page 101
Before Using the Machine 1 Document and Paper 2 Sending and Receiving 3 Copying 4 Printing 5 System Manager Settings 6 Maintenance 7 Troubleshooting 8 Appendix 9 3. Lower the scanning platform (A) in the document delivery slot. 4. Gently wipe the scanning glass (A) and white sheet (B) - Canon FAXPHONE L90 | Reference Guide FAXPHONE L90 - Page 102
Before Using the Machine 1 Document and Paper 2 Sending and Receiving 3 Copying 4 Printing 5 System Manager Settings 6 Maintenance 7 Troubleshooting 8 Appendix 9 Replacing the Toner Cartridge When the toner is running low, the message appears on the LCD. - Canon FAXPHONE L90 | Reference Guide FAXPHONE L90 - Page 103
Before Using the Machine 1 Document and Paper 2 Sending and Receiving 3 Copying 4 Printing 5 System Manager Settings 6 Maintenance 7 Troubleshooting 8 Appendix 9 2. Open the toner cover by the notch (A). 3. Remove the toner cartridge. Do not touch the rollers and parts which have - Canon FAXPHONE L90 | Reference Guide FAXPHONE L90 - Page 104
Using the Machine 1 Document and Paper 2 Sending and Receiving 3 Copying 4 Printing 5 System Manager Settings 6 Maintenance 7 Troubleshooting 8 Appendix 9 5. Hold the toner cartridge by its handle (A). Do not open the drum protective shutter (A). Always hold the toner cartridge by its - Canon FAXPHONE L90 | Reference Guide FAXPHONE L90 - Page 105
Using the Machine 1 Document and Paper 2 Sending and Receiving 3 Copying 4 Printing 5 System Manager Settings 6 Maintenance 7 Troubleshooting 8 Appendix 9 8. Push the toner cartridge to make sure it is properly set in the machine. 9. Close the toner cover. Be careful not to get your - Canon FAXPHONE L90 | Reference Guide FAXPHONE L90 - Page 106
Before Using the Machine 1 Document and Paper 2 Sending and Receiving 3 Copying 4 Printing 5 System Manager Settings 6 Maintenance 7 Troubleshooting 8 Appendix 9 ˙ Replacing the Toner Cartridge with a New One 1. Close the paper delivery tray extension (A), and then the paper delivery - Canon FAXPHONE L90 | Reference Guide FAXPHONE L90 - Page 107
Before Using the Machine 1 Document and Paper 2 Sending and Receiving 3 Copying 4 Printing 5 System Manager Settings 6 Maintenance 7 Troubleshooting 8 Appendix 9 4. Remove the new toner cartridge from the protective bag. Do not open the drum protective shutter (A). Save the protective - Canon FAXPHONE L90 | Reference Guide FAXPHONE L90 - Page 108
Before Using the Machine 1 Document and Paper 2 Sending and Receiving 3 Copying 4 Printing 5 System Manager Settings 6 Maintenance 7 Troubleshooting 8 Appendix 9 6. Hold the toner cartridge with one hand, and pull the seal completely out. - If toner is adhered on the removed seal, be - Canon FAXPHONE L90 | Reference Guide FAXPHONE L90 - Page 109
Machine 1 Document and Paper 2 Sending and Receiving 3 Copying 4 Printing 5 System Manager Settings 6 Maintenance 7 Troubleshooting 8 Appendix 9 8. The arrow (A) on the toner cartridge should be facing away from you and pointing down. 9. Insert the toner cartridge so that the guide - Canon FAXPHONE L90 | Reference Guide FAXPHONE L90 - Page 110
Before Using the Machine 1 Document and Paper 2 Sending and Receiving 3 Copying 4 Printing 5 System Manager Settings 6 Maintenance 7 Troubleshooting 8 Appendix 9 12. Open the paper delivery tray (A) and the extension (B). Table of Contents Index Back Previous Next TOP 7-16 - Canon FAXPHONE L90 | Reference Guide FAXPHONE L90 - Page 111
Before Using the Machine 1 Document and Paper 2 Sending and Receiving 3 Copying 4 Printing 5 System Manager Settings 6 Maintenance 7 Troubleshooting 8 Appendix 9 Recycling Used Cartridges Canon has instituted a worldwide recycling program for cartridges called "The Clean Earth - Canon FAXPHONE L90 | Reference Guide FAXPHONE L90 - Page 112
Before Using the Machine 1 Document and Paper 2 Sending and Receiving 3 Copying 4 Printing 5 System Manager Settings 6 Maintenance 7 Troubleshooting 8 Appendix 9 - Cartridges collected through this program are not refilled. - You are not entitled to a tax deduction or rebate for the - Canon FAXPHONE L90 | Reference Guide FAXPHONE L90 - Page 113
Before Using the Machine 1 Document and Paper 2 Sending and Receiving 3 Copying 4 Printing 5 System Manager Settings 6 Maintenance 7 Troubleshooting 8 Appendix 9 - Place as many cartridges as possible into one box. Carefully seal the box with tape; or - Call 1-800-OK-Canon to receive - Canon FAXPHONE L90 | Reference Guide FAXPHONE L90 - Page 114
Before Using the Machine 1 Document and Paper 2 Sending and Receiving 3 Copying 4 Printing 5 System Manager Settings 6 Maintenance 7 Troubleshooting 8 Appendix 9 - Give the shipment to your UPS driver when you receive your next regular delivery (UPS may charge a fee for customers who - Canon FAXPHONE L90 | Reference Guide FAXPHONE L90 - Page 115
Before Using the Machine 1 Document and Paper 2 Sending and Receiving 3 Copying 4 Printing 5 System Manager Settings 6 Maintenance 7 Troubleshooting 8 Appendix 9 Option B: Volume Box Return (eight or more cartridges) We encourage you to use this option as a more efficient way to ship - Canon FAXPHONE L90 | Reference Guide FAXPHONE L90 - Page 116
Using the Machine 1 Document and Paper 2 Sending and Receiving 3 Copying 4 Printing 5 System Manager Settings 6 Maintenance 7 Troubleshooting 8 Appendix 9 - For further information about The Clean Earth Campaign in Canada, please call or write to Canon. 1-800-667-2666 Canon Canada Inc - Canon FAXPHONE L90 | Reference Guide FAXPHONE L90 - Page 117
Before Using the Machine 1 Document and Paper 2 Sending and Receiving 3 Copying 4 Printing 5 System Manager Settings 6 Maintenance 7 Troubleshooting 8 Appendix 9 Transporting the Machine Follow this procedure to avoid vibration damage to the machine when transporting it over a long - Canon FAXPHONE L90 | Reference Guide FAXPHONE L90 - Page 118
Before Using the Machine 1 Document and Paper 2 Sending and Receiving 3 Copying 4 Printing 5 System Manager Settings 6 Maintenance 7 Troubleshooting 8 Appendix 9 4. Remove the toner cartridge. - To avoid exposing the toner cartridge to light, place it in its protective bag or wrap it - Canon FAXPHONE L90 | Reference Guide FAXPHONE L90 - Page 119
Receiving 3 Copying 4 Printing 5 System Manager Settings 6 Maintenance 7 Troubleshooting 8 Appendix 9 7. Fold the document delivery tray extension (A), and then push the document delivery tray (B) into the machine. Do not open or close the document delivery tray extension without extending - Canon FAXPHONE L90 | Reference Guide FAXPHONE L90 - Page 120
7 Troubleshooting 8 Appendix 9 8 Troubleshooting Back Previous Next TOP Clearing Jams...8-3 Document Jams 8-3 Paper Jams 8-5 LCD Messages 8-10 Error Codes ...8-16 If is displayed 8-18 Re-Loading the Paper 8-18 Changing the Paper Size Setting 8-18 General Problems - Canon FAXPHONE L90 | Reference Guide FAXPHONE L90 - Page 121
Using the Machine 1 Document and Paper 2 Sending and Receiving 3 Copying 4 Printing 5 System Manager Settings 6 Maintenance 7 Troubleshooting 8 Appendix 9 Back Previous Next TOP Sending/Receiving Problems 8-21 Sending Problems 8-21 Receiving Problems 8-24 Copying Problems 8-30 - Canon FAXPHONE L90 | Reference Guide FAXPHONE L90 - Page 122
2 Sending and Receiving 3 Copying 4 Printing 5 System Manager Settings 6 Maintenance 7 Troubleshooting 8 Appendix 9 Clearing Jams When or appears on the LCD display, remove jammed paper from the machine first, then from the paper feeder if - Canon FAXPHONE L90 | Reference Guide FAXPHONE L90 - Page 123
Printing 5 System Manager Settings 6 Maintenance 7 Troubleshooting 8 Appendix 9 2. Lift the paper stack cover and pull it out completely. Make sure the back end of the cover does not catch the front paper guide. 3. Lower the scanning platform (A) in the document delivery slot. Back Previous - Canon FAXPHONE L90 | Reference Guide FAXPHONE L90 - Page 124
Machine 1 Document and Paper 2 Sending and Receiving 3 Copying 4 Printing 5 System Manager Settings 6 Maintenance 7 Troubleshooting 8 Appendix 9 6. Insert the paper stack cover. Make sure the back end of the cover does not catch and lower the scanning platform. 7. Lower the document - Canon FAXPHONE L90 | Reference Guide FAXPHONE L90 - Page 125
Manager Settings 6 Maintenance 7 Troubleshooting 8 Appendix 9 2. Open the toner cover by the notch (A). Always open the toner cover first before removing jammed paper inside the machine. Back Previous Next TOP 3. Remove the toner cartridge. - To avoid exposing the toner cartridge to - Canon FAXPHONE L90 | Reference Guide FAXPHONE L90 - Page 126
Before Using the Machine 1 Document and Paper 2 Sending and Receiving 3 Copying 4 Printing 5 System Manager Settings 6 Maintenance 7 Troubleshooting 8 Appendix 9 4. Gently pull jammed paper out of the machine. - Do not touch the fixing assembly (A) as it becomes very hot during use. - - Canon FAXPHONE L90 | Reference Guide FAXPHONE L90 - Page 127
the Machine 1 Document and Paper 2 Sending and Receiving 3 Copying 4 Printing 5 System Manager Settings 6 Maintenance 7 Troubleshooting 8 Appendix 9 7. Insert the toner cartridge so that the guide (A) on the left side of the toner cartridge fits into the groove inside the machine and - Canon FAXPHONE L90 | Reference Guide FAXPHONE L90 - Page 128
the Machine 1 Document and Paper 2 Sending and Receiving 3 Copying 4 Printing 5 System Manager Settings 6 Maintenance 7 Troubleshooting 8 Appendix 9 11. Lift the paper stack cover and pull it out completely. Make sure the back end of the cover does not catch the front paper guide. 12 - Canon FAXPHONE L90 | Reference Guide FAXPHONE L90 - Page 129
Before Using the Machine 1 Document and Paper 2 Sending and Receiving 3 Copying 4 Printing 5 System Manager Settings 6 Maintenance 7 Troubleshooting 8 Appendix 9 LCD Messages See the following when the LCD displays error and status messages. ALREADY REGISTERED Description The same - Canon FAXPHONE L90 | Reference Guide FAXPHONE L90 - Page 130
time. This message appears when is set to in the of the menu. Action Check if the fax number is correct, then enter the same fax number as the first one after pressing [Start]. CHECK SCANNING AREA Description The scanning platform is - Canon FAXPHONE L90 | Reference Guide FAXPHONE L90 - Page 131
Before Using the Machine 1 Document and Paper 2 Sending and Receiving 3 Copying 4 Printing 5 System Manager Settings 6 Maintenance 7 Troubleshooting 8 Appendix 9 CLOSE COVER TONER COVER Description The toner cover is not closed completely. Action Check the toner cover, and make - Canon FAXPHONE L90 | Reference Guide FAXPHONE L90 - Page 132
Settings 6 Maintenance 7 Troubleshooting 8 Appendix 9 MEMORY FULL Description Action Action Action Description Action The machine is full of jobs. Print, send, or delete any documents stored in memory. Divide the document stack into a few parts and try again one by one. Send the document - Canon FAXPHONE L90 | Reference Guide FAXPHONE L90 - Page 133
Check if the software is installed properly or if the printer cable is properly connected. Action Check if the memory is full. Back Previous Next TOP REGISTERING KEY CANNOT REGISTER Description Action SET DOCUMENT Description Action SYSTEM ERROR EXXX Description Action The selected one - Canon FAXPHONE L90 | Reference Guide FAXPHONE L90 - Page 134
7 Troubleshooting 8 Appendix 9 SET PAPER AGAIN SET TONER AGAIN Description Paper is not loaded properly, or the toner cartridge is not set. Action Load paper properly. (For instructions on how to load paper in the paper feeder, see "Set Up the Machine," in the Starter Guide. Set the toner - Canon FAXPHONE L90 | Reference Guide FAXPHONE L90 - Page 135
Using the Machine 1 Document and Paper 2 Sending and Receiving 3 Copying 4 Printing 5 System Manager Settings 6 Maintenance 7 Troubleshooting 8 Appendix 9 Back Previous Next TOP Error Codes An error code is a four-digit code shown on an ERROR TX REPORT or an ERROR RX REPORT - Canon FAXPHONE L90 | Reference Guide FAXPHONE L90 - Page 136
Action 0080 Description Action The sender may not be using a G3 fax machine. Make sure the sender's machine is compatible with your machine. Reception was manually canceled on the machine. Ask the sender to resend the document if necessary. The machine's memory is full. Print, send, or delete any - Canon FAXPHONE L90 | Reference Guide FAXPHONE L90 - Page 137
Machine 1 Document and Paper 2 Sending and Receiving 3 Copying 4 Printing 5 System Manager Settings 6 Maintenance 7 Troubleshooting ] to select the paper size same as paper loaded into the machine, then press [OK]. 6. Press [Stop/Reset] to return to the standby mode. 7. Press [OK] to - Canon FAXPHONE L90 | Reference Guide FAXPHONE L90 - Page 138
Before Using the Machine 1 Document and Paper 2 Sending and Receiving 3 Copying 4 Printing 5 System Manager Settings 6 Maintenance 7 Troubleshooting 8 Appendix 9 General Problems The machine has no power. Q Is the power cord plugged in securely? A Check that the power cord is - Canon FAXPHONE L90 | Reference Guide FAXPHONE L90 - Page 139
5 System Manager Settings 6 Maintenance 7 Troubleshooting 8 Appendix 9 Paper Feeding Problems Paper does not feed properly. Q Is the paper loaded correctly? A Make sure the paper is correctly loaded. (See "Set Up the Machine," in the Starter Guide.) Q Does the machine contain too many - Canon FAXPHONE L90 | Reference Guide FAXPHONE L90 - Page 140
Troubleshooting 8 Appendix 9 Sending/Receiving Problems ˙ Sending Problems Cannot send a fax. Q Is the machine set for the correct telephone line type? A Make sure the machine is set for the correct telephone line type. (See "Before FAX Setting," in the Starter Guide.) Q Is the document - Canon FAXPHONE L90 | Reference Guide FAXPHONE L90 - Page 141
System Manager Settings 6 Maintenance 7 Troubleshooting 8 Appendix 9 Q Are there other documents being sent from memory? A Allow time for the documents to finish sending. Q Has an error occurred during transmission? A Check the LCD for an error message. (See "LCD Messages," on p. 8-10 - Canon FAXPHONE L90 | Reference Guide FAXPHONE L90 - Page 142
Is the recipient's machine working properly? A Check the machine by making a copy. If the copy is clear, the problem may be in the recipient's machine. If the copy is spotted or dirty, clean the scanner components. (See "Scanning Area," on p. 2-3.) Q Is the document loaded correctly? A Make - Canon FAXPHONE L90 | Reference Guide FAXPHONE L90 - Page 143
[Start]. Q Is set to ? A When is set to , you need to enter the fax number again after pressing [Start]. (See "Confirming Entered Fax Numbers," on p. 6-3.) ˙ Receiving Problems Cannot receive a fax automatically. Q Is the machine set to receive - Canon FAXPHONE L90 | Reference Guide FAXPHONE L90 - Page 144
reception? calls automatically, the receive mode must be set to , , or . If you have set A Check the LCD for an error message. (See "LCD , confirm that an answering machine is Messages," on p. 8-10.) connected to the machine and that it is turned on with an - Canon FAXPHONE L90 | Reference Guide FAXPHONE L90 - Page 145
] when documents are set on the ADF, it automatically switches to manual sending. Print quality is poor. Q Is the toner low or unevenly distributed? A Redistribute the toner inside the toner cartridge. If the problem persists, replace the toner cartridge. (See "Replacing the Toner Cartridge - Canon FAXPHONE L90 | Reference Guide FAXPHONE L90 - Page 146
the toner cartridge. (See "Set Up the Machine," in the Starter Guide.) Q Is the toner cartridge installed properly? A Make sure the toner cartridge is installed properly. (See "Set Up the Machine," in the Starter Guide.) Q Is the cartridge out of toner? A Replace the toner cartridge. (See - Canon FAXPHONE L90 | Reference Guide FAXPHONE L90 - Page 147
the paper feeder. Q Is the toner low or unevenly distributed? A Redistribute the toner inside the toner cartridge. If the problem persists, replace the toner cartridge. (See "Replacing the Toner Cartridge," on p. 7-8.) Q Is the printing method for received documents set to ? A If you - Canon FAXPHONE L90 | Reference Guide FAXPHONE L90 - Page 148
Manager Settings 6 Maintenance 7 Troubleshooting 8 Appendix 9 You cannot get documents from information services. Q Is your machine set to the tone dialing type of the telephone line? A Press [Tone] to set the tone dialing. Q Do you receive messages from the information services such - Canon FAXPHONE L90 | Reference Guide FAXPHONE L90 - Page 149
Is the toner cartridge installed properly? A Make sure the toner cartridge is installed properly. (See "Set Up the Machine," in the Starter Guide.) Q Is the cartridge out of toner? A Replace the toner cartridge. (See "Replacing the Toner Cartridge," on p. 7-8.) Q Does the document meet the - Canon FAXPHONE L90 | Reference Guide FAXPHONE L90 - Page 150
Settings 6 Maintenance 7 Troubleshooting 8 Appendix 9 Paper jams occur. A Make sure the scanning platform is fully closed. (See "Paper Jams," on p. 8-5.) Q Is the paper loaded correctly? A Make sure the document is correctly loaded. (See "Set Up the Machine," in the Starter Guide - Canon FAXPHONE L90 | Reference Guide FAXPHONE L90 - Page 151
Before Using the Machine 1 Document and Paper 2 Sending and Receiving 3 Copying 4 Printing 5 System Manager Settings 6 Maintenance 7 Troubleshooting 8 Appendix 9 Printing Problems Nothing prints. Q Is the power cord plugged in securely? A Check that the power cord is securely - Canon FAXPHONE L90 | Reference Guide FAXPHONE L90 - Page 152
Using the Machine 1 Document and Paper 2 Sending and Receiving 3 Copying 4 Printing 5 System Manager Settings 6 Maintenance 7 Troubleshooting 8 Appendix 9 Printout is spotted or dirty. A If the copy is spotted or dirty, clean the scanning components and machine's interior (See - Canon FAXPHONE L90 | Reference Guide FAXPHONE L90 - Page 153
Using the Machine 1 Document and Paper 2 Sending and Receiving 3 Copying 4 Printing 5 System Manager Settings 6 Maintenance 7 Troubleshooting 8 Appendix 9 Cannot print documents from a computer. Q Is the printer driver properly installed? A Make sure that the printer driver is - Canon FAXPHONE L90 | Reference Guide FAXPHONE L90 - Page 154
Manager Settings 6 Maintenance 7 Troubleshooting 8 Appendix 9 Telephone Problems Cannot dial. Q A Q A Q A Is the telephone cable connected properly? Make sure the cable is connected properly. (See "Before FAX Setting," in the Starter Guide.) Is the power cord plugged in securely? Check that - Canon FAXPHONE L90 | Reference Guide FAXPHONE L90 - Page 155
Before Using the Machine 1 Document and Paper 2 Sending and Receiving 3 Copying 4 Printing 5 System Manager Settings 6 Maintenance 7 Troubleshooting 8 Appendix 9 If a Power Failure Occurs If a power failure occurs, machine functions will be limited as follows: - Depending on your - Canon FAXPHONE L90 | Reference Guide FAXPHONE L90 - Page 156
website. http://www.canontechsupport.com/ ˙ Customer Support (Canada) Canon Canada Inc., offers a full range of customer technical support options*: - For step-by-step troubleshooting, e-mail technical support, the latest driver or document downloads, and answers to frequently asked questions, visit - Canon FAXPHONE L90 | Reference Guide FAXPHONE L90 - Page 157
the Machine 1 Document and Paper 2 Sending and Receiving 3 Copying 4 Printing 5 System Manager Settings 6 Maintenance 7 Troubleshooting 8 Appendix 9 9 Appendix Back Previous Next TOP Machine Settings 9-3 Printing USER DATA LIST 9-3 Accessing the Setting Menu 9-3 Setting Menu - Canon FAXPHONE L90 | Reference Guide FAXPHONE L90 - Page 158
Using the Machine 1 Document and Paper 2 Sending and Receiving 3 Copying 4 Printing 5 System Manager Settings 6 Maintenance 7 Troubleshooting 8 Appendix 9 Table of Contents Index Back Previous Next TOP ADJUST./CLEANING 9-15 REPORT SETTINGS 9-15 SYSTEM SETTINGS 9-17 Summary - Canon FAXPHONE L90 | Reference Guide FAXPHONE L90 - Page 159
Before Using the Machine 1 Document and Paper 2 Sending and Receiving 3 Copying 4 Printing 5 System Manager Settings 6 Maintenance 7 Troubleshooting 8 Appendix 9 Machine Settings You can adjust the machine settings from the Setting Menu to customize the way the machine works. To see - Canon FAXPHONE L90 | Reference Guide FAXPHONE L90 - Page 160
Before Using the Machine 1 Document and Paper 2 Sending and Receiving 3 Copying 4 Printing 5 System Manager Settings 6 Maintenance 7 Troubleshooting 8 Appendix 9 3. Press [ ] or [ ] to select a submenu, then press [OK]. For details on the submenu, see "Setting Menu," on p. 9-5. 4. To - Canon FAXPHONE L90 | Reference Guide FAXPHONE L90 - Page 161
Before Using the Machine 1 Document and Paper 2 Sending and Receiving 3 Copying 4 Printing 5 System Manager Settings 6 Maintenance 7 Troubleshooting 8 Appendix 9 Setting Menu Back Previous Next TOP Depending on the country of purchase, some settings may not be available. PAPER - Canon FAXPHONE L90 | Reference Guide FAXPHONE L90 - Page 162
Using the Machine 1 Document and Paper 2 Sending and Receiving 3 Copying 4 Printing 5 System Manager Settings 6 Maintenance 7 Troubleshooting 8 Appendix 9 COMMON SETTINGS Setting Item 1. TONER SAVER MODE 2. DISPLAY LANGUAGE COPY SETTINGS Setting Item 1. STANDARD SETTINGS 1. IMAGE - Canon FAXPHONE L90 | Reference Guide FAXPHONE L90 - Page 163
Before Using the Machine 1 Document and Paper 2 Sending and Receiving 3 Copying 4 Printing 5 System Manager Settings 6 Maintenance 7 Troubleshooting 8 Appendix 9 FAX SETTINGS 1. RX MODE Setting Item 2. USER SETTINGS 1. UNIT TELEPHONE # 2. UNIT NAME 3. TEL LINE TYPE 4. STANDARD - Canon FAXPHONE L90 | Reference Guide FAXPHONE L90 - Page 164
Machine 1 Document and Paper 2 Sending and Receiving 3 Copying 4 Printing 5 System Manager Settings 6 Maintenance 7 Troubleshooting 8 Appendix 9 FAX SETTINGS 3. TX SETTINGS 1. AUTO REDIAL ON 1. REDIAL TIMES 2. REDIAL INTERVAL OFF 2. DIALING LINE CHCK 4. RX SETTINGS 1. FAX/TEL OPT. SET - Canon FAXPHONE L90 | Reference Guide FAXPHONE L90 - Page 165
handset or an external telephone may ring one or two times.) Sets whether to use remote receiving. (See "Remote Reception," on p. 3-27.) The machine enables remote receiving. You can dial a code on remote extension to start receiving a document. A combination of two characters using 0 to 9 (default - Canon FAXPHONE L90 | Reference Guide FAXPHONE L90 - Page 166
Before Using the Machine 1 Document and Paper 2 Sending and Receiving 3 Copying 4 Printing 5 System Manager Settings 6 Maintenance 7 Troubleshooting 8 Appendix 9 FAX SETTINGS 5. RX PRINT MEMORY RX PRINT RX 6. RX TERMINAL ID 7. RX RESTRICTION OFF ON 5. PRINTER SETTINGS 1. RX REDUCTION - Canon FAXPHONE L90 | Reference Guide FAXPHONE L90 - Page 167
5 System Manager Settings 6 Maintenance 7 Troubleshooting 8 Appendix 9 FAX SETTINGS 2. CONT. PRINTING Back Previous Next TOP Sets whether to continue printing when toner has run out. This function is only for printing fax documents and reports. (See "Replacing the Toner Cartridge," on - Canon FAXPHONE L90 | Reference Guide FAXPHONE L90 - Page 168
Using the Machine 1 Document and Paper 2 Sending and Receiving 3 Copying 4 Printing 5 System Manager Settings 6 Maintenance 7 Troubleshooting 8 Appendix 9 ADDRESS BOOK SET. Setting Item 1. 1-TOUCH SPD DIAL NAME TEL NUMBER ENTRY OPTIONAL SETTING OFF ON SUBADDRESS PASSWORD 2. CODED DIAL - Canon FAXPHONE L90 | Reference Guide FAXPHONE L90 - Page 169
Using the Machine 1 Document and Paper 2 Sending and Receiving 3 Copying 4 Printing 5 System Manager Settings 6 Maintenance 7 Troubleshooting 8 Appendix 9 ADDRESS BOOK SET. OPTIONAL SETTING OFF ON SUBADDRESS PASSWORD 3. GROUP DIAL NAME PRINTER SETTINGS Setting Item 1. ERROR TIME OUT - Canon FAXPHONE L90 | Reference Guide FAXPHONE L90 - Page 170
Before Using the Machine 1 Document and Paper 2 Sending and Receiving 3 Copying 4 Printing 5 System Manager Settings 6 Maintenance 7 Troubleshooting 8 Appendix 9 TIMER SETTINGS Setting Item 1. DATE&TIME SETTING 2. DATE TYPE SELECT 3. AUTO SLEEP 4. DAYLIGHT SV.TIME OFF ON 1. START DATE - Canon FAXPHONE L90 | Reference Guide FAXPHONE L90 - Page 171
the Machine 1 Document and Paper 2 Sending and Receiving 3 Copying 4 Printing 5 System Manager Settings 6 Maintenance 7 Troubleshooting 8 Appendix 9 ADJUST./CLEANING Setting Item 1. FIX.UNIT CLEANING 2. SPECIAL MODE U REPORT SETTINGS Setting Item 1. SETTINGS 1. TX REPORT PRINT ERROR - Canon FAXPHONE L90 | Reference Guide FAXPHONE L90 - Page 172
Machine 1 Document and Paper 2 Sending and Receiving 3 Copying 4 Printing 5 System Manager Settings 6 Maintenance 7 Troubleshooting 8 Appendix 9 REPORT SETTINGS 2. LIST PRINT 1. TX REPORT 2. RX REPORT 3. ACTIVITY REPORT 4. MEMORY DATA LIST 5. MEMORY IMAGE PRNT 6. 1-TOUCH LIST 7. CODED - Canon FAXPHONE L90 | Reference Guide FAXPHONE L90 - Page 173
Before Using the Machine 1 Document and Paper 2 Sending and Receiving 3 Copying 4 Printing 5 System Manager Settings 6 Maintenance 7 Troubleshooting 8 Appendix 9 SYSTEM SETTINGS Setting Item 1. SYS. MANAGER INFO 1. SYSTEM PASSWORD 2. COMMUNICATIONS 1. MEMORY LOCK OFF ON 1. PASSWORD 2. - Canon FAXPHONE L90 | Reference Guide FAXPHONE L90 - Page 174
the Machine 1 Document and Paper 2 Sending and Receiving 3 Copying 4 Printing 5 System Manager Settings 6 Maintenance 7 Troubleshooting 8 Appendix 9 SYSTEM SETTINGS 3. ACCESS TO DEST. 1. RESTRICT REDIAL 2. CONFIRM FAX NO. 4. UPDATE FIRMWARE Back Previous Next TOP Sets restriction - Canon FAXPHONE L90 | Reference Guide FAXPHONE L90 - Page 175
to all the coded speed dialing. GROUP DIAL LIST Lists groups registered for group dialing. USER DATA LIST Lists all the current settings and registered sender information. LOST REPORT Lists received documents that were lost from the memory due to power cut. Cannot be manually printed out - Canon FAXPHONE L90 | Reference Guide FAXPHONE L90 - Page 176
Before Using the Machine 1 Document and Paper 2 Sending and Receiving 3 Copying 4 Printing 5 System Manager Settings 6 Maintenance 7 Troubleshooting 8 Appendix 9 Back Previous Next TOP Printing Reports Automatically TX REPORT, RX REPORT, and ACTIVITY REPORT can be set to print - Canon FAXPHONE L90 | Reference Guide FAXPHONE L90 - Page 177
Machine 1 Document and Paper 2 Sending and Receiving 3 Copying 4 Printing 5 System Manager Settings 6 Maintenance 7 Troubleshooting during Manual TX ˔ Error code: For descriptions of error codes, See "Error Codes," on p. 8-16. Back Previous Next TOP ˙ RX REPORT The default setting is - Canon FAXPHONE L90 | Reference Guide FAXPHONE L90 - Page 178
only if registered in their machine) ˔ START TIME: Date and time of transaction ˔ PAGE: Number of pages received ˔ RESULT: Result of transaction, transaction duration - OK: Reception successful - NG: Reception failed ˔ Error code: For descriptions of error codes, see "Error Codes," on p. 8-16. Back - Canon FAXPHONE L90 | Reference Guide FAXPHONE L90 - Page 179
the Machine 1 Document and Paper 2 Sending and Receiving 3 Copying 4 Printing 5 System Manager Settings 6 Maintenance 7 Troubleshooting 8 ) ˔ DESTINATION TEL/ID: Name and number of recipient ˔ PAGE: Number of pages sent or received ˔ RESULT: Result of transaction, transaction duration - Canon FAXPHONE L90 | Reference Guide FAXPHONE L90 - Page 180
Using the Machine 1 Document and Paper 2 Sending and Receiving 3 Copying 4 Printing 5 System Manager Settings 6 Maintenance 7 Troubleshooting 8 Appendix 9 Back Previous Next TOP Printing Reports and Lists Manually You can print the following reports and lists manually. - TX - Canon FAXPHONE L90 | Reference Guide FAXPHONE L90 - Page 181
Before Using the Machine 1 Document and Paper 2 Sending and Receiving 3 Copying 4 Printing 5 System Manager Settings 6 Maintenance 7 Troubleshooting 8 Appendix 9 Checking Remaining Memory You can check the amount of available memory by pressing the System Monitor key. 1. Press [ - Canon FAXPHONE L90 | Reference Guide FAXPHONE L90 - Page 182
Before Using the Machine 1 Document and Paper 2 Sending and Receiving 3 Copying 4 Printing 5 System Manager Settings 6 Maintenance 7 Troubleshooting 8 Appendix 9 Checking Print and Scan Counts System monitor allows you to check print and scan counts. 1. Press [System Monitor]. 2. - Canon FAXPHONE L90 | Reference Guide FAXPHONE L90 - Page 183
Settings 6 Maintenance 7 Troubleshooting 8 Appendix 9 Glossary A Activity Report A journal of the machine's transactions, both sent and received. Address Book The Address Book is a feature used for storing fax recipients. The Address Book is divided into one-touch speed dialing keys and coded - Canon FAXPHONE L90 | Reference Guide FAXPHONE L90 - Page 184
the Machine 1 Document and Paper 2 Sending and Receiving 3 Copying 4 Printing 5 System Manager Settings 6 Maintenance 7 Troubleshooting 8 Appendix 9 Coded Speed Dialing Codes A method to specify a recipient registered in Address Book. Press [Coded Dial] and a two-digit code using - Canon FAXPHONE L90 | Reference Guide FAXPHONE L90 - Page 185
Manager Settings 6 Maintenance 7 Troubleshooting 8 Appendix 9 G G3, Group 3 fax machine Defined by CCITT/ITU-T. Uses encoding schemes to transmit image data while reducing the amount of data that needs to be transmitted, thus reducing transmission time. G3 fax machines can transmit one page in - Canon FAXPHONE L90 | Reference Guide FAXPHONE L90 - Page 186
application software, hardware, and operating system used to create those documents. A PDF document can contain any combination of text, graphics, and images. PHOTO The document setting you use for sending or copying documents with intermediate tones, such as photographs. Polling One fax machine - Canon FAXPHONE L90 | Reference Guide FAXPHONE L90 - Page 187
. In a printer, a raster graphic is used as the master image from which a page is printed, because the image can be transferred to paper by printing one raster at a time. Receiving Receiving transmission is also defined as RX or Reception. The machine can be customized to receive fax documents in - Canon FAXPHONE L90 | Reference Guide FAXPHONE L90 - Page 188
Receiving 3 Copying 4 Printing 5 System Manager Settings 6 Maintenance 7 Troubleshooting 8 Appendix 9 S Sending Sending documents is also defined as TX or Transmit. The machine can scan and send documents via fax. Sending speed The rate at which faxes are transmitted through the phone line - Canon FAXPHONE L90 | Reference Guide FAXPHONE L90 - Page 189
3-35 Transmission result 3-35 Checking dialing line 3-20 Clean Earth Campaign 7-17 Cleaning machine Exterior 7-2 Fuser roller 7-6 Interior 7-2 Scanning area 7-6 Clearing jams 8-3 Document jams 8-3 Paper jams 8-5 Clear key 1-7 Coded Dial key 1-8, 3-14 Coded speed dialing codes Deleting 3-10 Editing - Canon FAXPHONE L90 | Reference Guide FAXPHONE L90 - Page 190
Settings 6 Maintenance 7 Troubleshooting 8 Appendix 9 Table of Contents Index Document requirements 2-2 Documents stored in memory Checking 3-35 Deleting 3-35 DRPD 3-24 E Energy Saver key 1-6 Error codes 8-16 External device jack 1-5 F FAX/TEL 3-23 Fax dialing features 3-18 Fax mode 1-9 Fax - Canon FAXPHONE L90 | Reference Guide FAXPHONE L90 - Page 191
27 Replacing the toner cartridge 7-8 Reports and lists 9-19 REPORT SETTINGS 9-3, 9-15 Restricting access to destinations Confirm entered fax numbers 6-3 RX REPORT Printing automatically 9-21 S Scanning area 2-3 Scan settings Copying 4-3 Sending 3-6 Sending and receiving 3-1 Sending documents Address - Canon FAXPHONE L90 | Reference Guide FAXPHONE L90 - Page 192
Machine 1 Document and Paper 2 Sending and Receiving 3 Copying 4 Printing 5 System Manager Settings 6 Maintenance 7 Troubleshooting 8 Appendix 9 Troubleshooting Clearing jams 8-3 Copying 8-30 Error codes 8-16 General 8-19 If a power failure occurs 8-36 If you cannot solve a problem - Canon FAXPHONE L90 | Reference Guide FAXPHONE L90 - Page 193
Using the Machine 1 Document and Paper 2 Sending and Receiving 3 Copying 4 Printing 5 System Manager Settings 6 Maintenance 7 Troubleshooting 8 Appendix 9 Table of Contents Index CANON INC. 30-2, Shimomaruko 3-chome, Ohta-ku, Tokyo 146-8501, Japan CANON U.S.A., INC. One Canon Plaza
-
 1
1 -
 2
2 -
 3
3 -
 4
4 -
 5
5 -
 6
6 -
 7
7 -
8
-
9
-
10
-
11
-
12
-
13
-
14
-
15
-
16
-
17
-
18
-
19
-
20
-
21
-
22
-
23
-
24
-
25
-
26
-
27
-
28
-
29
-
30
-
31
-
32
-
33
-
34
-
35
-
36
-
37
-
38
-
39
-
40
-
41
-
42
-
43
-
44
-
45
-
46
-
47
-
48
-
49
-
50
-
51
-
52
-
53
-
54
-
55
-
56
-
57
-
58
-
59
-
60
-
61
-
62
-
63
-
64
-
65
-
66
-
67
-
68
-
69
-
70
-
71
-
72
-
73
-
74
-
75
-
76
-
77
-
78
-
79
-
80
-
81
-
82
-
83
-
84
-
85
-
86
-
87
-
88
-
89
-
90
-
91
-
92
-
93
-
94
-
95
-
96
-
97
-
98
-
99
-
100
-
101
-
102
-
103
-
104
-
105
-
106
-
107
-
108
-
109
-
110
-
111
-
112
-
113
-
114
-
115
-
116
-
117
-
118
-
119
-
120
-
121
-
122
-
123
-
124
-
125
-
126
-
127
-
128
-
129
-
130
-
131
-
132
-
133
-
134
-
135
-
136
-
137
-
138
-
139
-
140
-
141
-
142
-
143
-
144
-
145
-
146
-
147
-
148
-
149
-
150
-
151
-
152
-
153
-
154
-
155
-
156
-
157
-
158
-
159
-
160
-
161
-
162
-
163
-
164
-
165
-
166
-
167
-
168
-
169
-
170
-
171
-
172
-
173
-
174
-
175
-
176
-
177
-
178
-
179
-
180
-
181
-
182
-
183
-
184
-
185
-
186
-
187
-
188
-
189
-
190
-
191
-
192
-
193
 |
 |
1
2
3
4
5
6
7
8
9
Back
Next
Previous
TOP
Before Using the
Machine
Document and Paper
Sending and
Receiving
Copying
Printing
System Manager
Settings
Maintenance
Troubleshooting
Appendix
How to Use This Guide
Table of Contents
Index
Reference Guide
Please read this guide before operating this product.
After you finish reading this guide, store it in a safe place
for future reference.