Canon FAXPHONE L90 Reference Guide FAXPHONE L90 - Page 60
Specifying Recipients, Using One-Touch Speed Dialing Keys, Using Coded Speed Dialing Codes
 |
UPC - 013803082029
View all Canon FAXPHONE L90 manuals
Add to My Manuals
Save this manual to your list of manuals |
Page 60 highlights
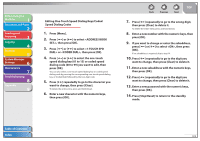
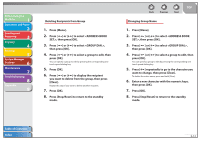
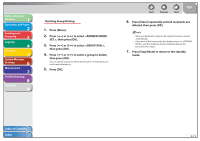
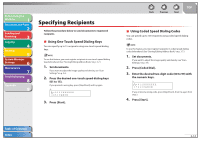
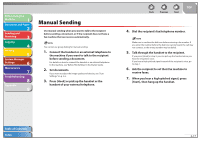
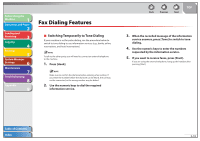
Before Using the Machine 1 Document and Paper 2 Sending and Receiving 3 Copying 4 Printing 5 System Manager Settings 6 Maintenance 7 Troubleshooting 8 Appendix 9 Specifying Recipients Follow the procedure below to send documents to registered recipients. ˙ Using One-Touch Speed Dialing Keys You can specify up to 15 recipients using one-touch speed dialing keys. To use this feature, you must register recipients in one-touch speed dialing keys beforehand. (See "Storing/Editing Address Book," on p. 3-7.) 1. Set documents. If you want to adjust the image quality and density, see "Scan Settings," on p. 3-6. 2. Press the desired one-touch speed dialing keys (01 to 15). If you pressed a wrong key, press [Stop/Reset] and try again. Ex. =0123XXXXXX [05]CANON 3. Press [Start]. Back Previous Next TOP ˙ Using Coded Speed Dialing Codes You can specify up to 100 recipients using coded speed dialing codes. To use this feature, you must register recipients in coded speed dialing codes beforehand. (See "Storing/Editing Address Book," on p. 3-7.) 1. Set documents. If you want to adjust the image quality and density, see "Scan Settings," on p. 3-6. 2. Press [Coded Dial]. 3. Enter the desired two-digit code (00 to 99) with the numeric keys. Ex. =012XXXXXXX [*01]CANON If you entered a wrong code, press [Stop/Reset], then try again from step 2. 4. Press [Start]. Table of Contents Index 3-14
-
 1
1 -
2
-
3
-
4
-
5
-
6
-
7
-
8
-
9
-
10
-
11
-
12
-
13
-
14
-
15
-
16
-
17
-
18
-
19
-
20
-
21
-
22
-
23
-
24
-
25
-
26
-
27
-
28
-
29
-
30
-
31
-
32
-
33
-
34
-
35
-
36
-
37
-
38
-
39
-
40
-
41
-
42
-
43
-
44
-
45
-
46
-
47
-
48
-
49
-
50
-
51
-
52
-
53
-
54
-
 55
55 -
 56
56 -
 57
57 -
 58
58 -
 59
59 -
 60
60 -
 61
61 -
 62
62 -
 63
63 -
 64
64 -
 65
65 -
66
-
67
-
68
-
69
-
70
-
71
-
72
-
73
-
74
-
75
-
76
-
77
-
78
-
79
-
80
-
81
-
82
-
83
-
84
-
85
-
86
-
87
-
88
-
89
-
90
-
91
-
92
-
93
-
94
-
95
-
96
-
97
-
98
-
99
-
100
-
101
-
102
-
103
-
104
-
105
-
106
-
107
-
108
-
109
-
110
-
111
-
112
-
113
-
114
-
115
-
116
-
117
-
118
-
119
-
120
-
121
-
122
-
123
-
124
-
125
-
126
-
127
-
128
-
129
-
130
-
131
-
132
-
133
-
134
-
135
-
136
-
137
-
138
-
139
-
140
-
141
-
142
-
143
-
144
-
145
-
146
-
147
-
148
-
149
-
150
-
151
-
152
-
153
-
154
-
155
-
156
-
157
-
158
-
159
-
160
-
161
-
162
-
163
-
164
-
165
-
166
-
167
-
168
-
169
-
170
-
171
-
172
-
173
-
174
-
175
-
176
-
177
-
178
-
179
-
180
-
181
-
182
-
183
-
184
-
185
-
186
-
187
-
188
-
189
-
190
-
191
-
192
-
193
 |
 |