Canon GL1 GL1 Instruction Manual
Canon GL1 Manual
 |
View all Canon GL1 manuals
Add to My Manuals
Save this manual to your list of manuals |
Canon GL1 manual content summary:
- Canon GL1 | GL1 Instruction Manual - Page 1
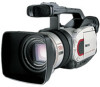
DIGITAL VIDEO CAMCORDER Instruction Manual CAMESCOPE ET LECTEUR VIDEO NUMERIQUES Mode d'emploi VIDEOCAMARA Y GRABADORA DIGITAL Manual de Instrucciones ENGLISH E FRANÇAIS F ESPAÑOL Es NTSC Mini Digital Video Cassette - Canon GL1 | GL1 Instruction Manual - Page 2
otherwise specified in the manual. If such changes or modifications should be made, you could be required to stop operation of the equipment. Canon U.S.A. Inc. One Canon Plaza, Lake Success of important operating and maintenance (servicing) instructions in the literature accompanying the product. 2 - Canon GL1 | GL1 Instruction Manual - Page 3
such as battery power, refer to instructions in this manual. 11. Polarization - The CA-910A Code, ANSI/NFPA No. 70-1984, provides information with respect to proper grounding of the mast and supporting onto the product. 18. Servicing - Do not attempt to service this product yourself as opening or - Canon GL1 | GL1 Instruction Manual - Page 4
you follow the operating instructions. Adjust only those controls that are covered by the operation instructions. Improper adjustment of other service. 20. Replacement Parts - When replacement parts are required, be sure the service technician has used replacement parts that are specified by Canon - Canon GL1 | GL1 Instruction Manual - Page 5
Manual Adjustments ...~ Manual Exposure Adjustment 55 E Important Usage Instructions 2 Adjusting the Focus 58 IMPORTANT SAFETY INSTRUCTIONS ..........3 Using AE Shift 59 Thank you for Choosing a Canon 19 Displaying Data Code 65 Searching the 88 Maintenance 89 Troubleshooting 92 Screen - Canon GL1 | GL1 Instruction Manual - Page 6
for purchasing this E Canon camcorder. Its advanced new camcorder, we recommend that you read this manual thoroughly - there are many sophisticated features which will (p. 8) • Screen Displays (p. 95) • Troubleshooting - in case you run into any problems (p. 92) Note that capital letters are used to - Canon GL1 | GL1 Instruction Manual - Page 7
with a DV terminal for digital-to-digital manual functions, for exceptional creative dubbing (IEEE 1394 standard quality results from using a larger light capturing area for each pixel (and fewer pixels) audio dubbing. Optical Image Stabilizer Canon's optical technology stabilizes your recordings - Canon GL1 | GL1 Instruction Manual - Page 8
33) Self timer button (p. 54) Program selector Easy Recording Auto Shutter-Priority Aperture-Priority Manual Sand & Snow Spotlight PAUSE button (p. 28) STOP button (p. 28) REC button (p. Speaker (p. 27) VOLUME buttons (p. 27) LCD BRIGHT buttons (p. 26) DISPLAY/DATA CODE button (p. 23, 65, 95) 8 - Canon GL1 | GL1 Instruction Manual - Page 9
Carrying handle Zoom control (p. 24) PHOTO button (p. 43) MOVIE MODE switch (p. 46) Strap attachment bar (p. 82) Viewfinder focusing lever (p. 82) Start/stop button (p. 21) Standby lever (p. 21) DV terminal (p. 75) REMOTE terminal (p. 74) Audio/video terminal (p. 30) S-video terminal (p. 30) DV - Canon GL1 | GL1 Instruction Manual - Page 10
Quick Overview E Zoom control (p. 24) START/STOP button (p. 21) Strap attachment bar (p. 82) Accessory shoe (p. 45) Tally lamp (p. 38) Remote sensor (p. 36) Lens hood (p. 15) ND FILTER button (p. 42) FOCUS A/M button (p. 58) EXPOSURE dial (p. 55) D.E. (digital effects) ON/OFF button (p. 52) 10 - Canon GL1 | GL1 Instruction Manual - Page 11
AUDIO DUB. button (p. 81) A/V INSERT button (p. 79) REMOTE SET button (p. 37) START ZOOM /STOP PHOTO W T SELF TIMER MENU TV SCREEN SET DATA CODE AUDIO MIX BALANCE MONITOR ST-1 ST-2 REC PAUSE SEARCH SELECT ZERO SET MEMORY REW PLAY FF AUDIO DUB. -/ STOP +/ A/V INSERT PAUSE SLOW - Canon GL1 | GL1 Instruction Manual - Page 12
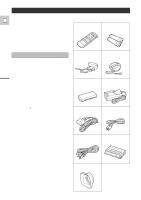
The GL1 System Diagram (Availability differs from area to area) E BP-900 Series Battery Pack VL-10Li Battery Video Light Stereo Microphone (Available commercially) 220EX Speedlite MB-100 Microphone Boom WL-D73 Wireless Controller MiniDV - Canon GL1 | GL1 Instruction Manual - Page 13
views. • There may be some vignetting at the extreme wide angle position. FR-100 Floppy Disk Still Image Recorder Connects to the GL1 or any Canon camcorder with a DV terminal and records still images onto a floppy disk in one of three resolution choices. Images from the disk can then be transferred - Canon GL1 | GL1 Instruction Manual - Page 14
photography. 220EX 380EX 550EX Quick Overview SORY CA UINE VIDE NON GEN This mark identifies genuine Canon video accessories. When you use Canon video equipment, we recommend Canon-brand accessories or products bearing the same mark. O ACCES Provided accessories: WL-D73 Wireless Controller - Canon GL1 | GL1 Instruction Manual - Page 15
the lens cap cord to the position shown in the illustration. 2. Align the hood to the lens with the Canon logo facing to the left. 3. Twist it into position (clockwise), so that the Canon logo is to the top. • You do not need to assert any pressure - screw the hood lightly into - Canon GL1 | GL1 Instruction Manual - Page 16
Powering the GL1 Before operating your camera, you will need to use the power adapter to: E provide power from an AC outlet or charge a battery pack Notes: • The power adapter converts current from a household power socket (100-240 V AC, 50-60 Hz) to the DC current used by your camera. • If the - Canon GL1 | GL1 Instruction Manual - Page 17
Quick Overview Charging and attaching the battery pack E 1 2 3 4 Your battery pack was partially charged before it left the factory. It should have enough power for you to check that your camera is working properly. However, you must charge the battery pack fully if you want it to power the camera - Canon GL1 | GL1 Instruction Manual - Page 18
excepted. Subject to change without notice. When replacement or repair of any product including power supply is required, please return it to the nearest authorized Canon Service Center and have it repaired or replaced with the same number product or equivalent. Quick Overview 18 - Canon GL1 | GL1 Instruction Manual - Page 19
Loading a Cassette EJECT CPLUOSSHE THIS FIRST. E Quick Overview OPEN PUCSLOHSE THIS FIRST. Only use videocassettes marked with the D logo.* Loading and unloading 1. Make sure that you have attached a power source. 2. Slide the OPEN button across to release the cover. • Pull the cover fully open - Canon GL1 | GL1 Instruction Manual - Page 20
Protecting tapes from accidental erasure E REC SAVE REC SAVE Quick Overview To protect your recording from accidental erasure, slide the tab on the cassette so that it exposes the hole and the red mark. (This switch position is usually labeled SAVE or ERASE OFF.) If you load this cassette and - Canon GL1 | GL1 Instruction Manual - Page 21
selector to [ Easy Recording mode. • This selects the camera's Easy Recording program. It allows you to simply point and shoot without making any manual adjustments (see p. 48). 4. Press the start/stop button to begin recording. • There are two start/stop buttons, to give you control from both - Canon GL1 | GL1 Instruction Manual - Page 22
, clean the video heads using a Canon DVM-CL Digital Video Head Cleaning Cassette menu, select LP and then close the menu (for instructions on how to use the menus, refer to page 35 the picture may become distorted during playback and the time code may not be written correctly. • When the camera - Canon GL1 | GL1 Instruction Manual - Page 23
Turning the camera recording displays ON/OFF You can show/hide non-essential camera recording displays by pressing the DISPLAY/DATA CODE button. You cannot hide the following: • Recording displays (REC, PAUSE etc.) • Remaining battery power, flash information display • Caution phrases ("CONDENSATION - Canon GL1 | GL1 Instruction Manual - Page 24
Zooming E W Zoom out Zoom in T ZOOM W T Quick Overview 20× optical zoom Operate the zoom controls from either the side grip, the camera handle or the wireless controller. The camera's 20× zoom lens allows you to choose the best picture angle for each scene: • Press the zoom control towards W - Canon GL1 | GL1 Instruction Manual - Page 25
Using the LCD Screen Open the LCD screen E Push the LCD panel open button and open the panel by pulling it away from the camera. This automatically switches the LCD screen on and the viewfinder off. When you close the LCD panel, the LCD screen automatically switches off and the viewfinder switches - Canon GL1 | GL1 Instruction Manual - Page 26
Adjusting the LCD screen E You can adjust the brightness of the LCD screen. Adjust the level with the +/- LCD BRIGHT buttons. A bar showing the level appears in the display and disappears after 4 seconds. • Press the + button to make the display brighter. • Press the - button to make the display - Canon GL1 | GL1 Instruction Manual - Page 27
Quick Overview Indicators that appear in the LCD display when "mirror" is selected: E REC REC PAUSE EJECT • All indicators appear normally in the viewfinder. Built-in speaker and headphone terminal The camcorder has a built-in speaker and a headphone terminal so you can review the sound track - Canon GL1 | GL1 Instruction Manual - Page 28
backwards, stop playback and press the REW ` button. • If the playback picture is rough (mosaic-like noise), clean the video heads using a Canon DVM-CL Digital Video Head Cleaning Cassette or a commercially available digital video head cleaning cassette. Other playback modes Playback Pause To view - Canon GL1 | GL1 Instruction Manual - Page 29
Special playback These can only be operated from the wireless controller (p. 36). Frame Advance To play back frame by frame, press the +/ae button repeatedly during playback pause. Press and hold to play back continuous frame advance. REC PAUSE SEARCH SELECT ZERO SET MEMORY REW PLAY FF STOP - Canon GL1 | GL1 Instruction Manual - Page 30
VCR in order to play back your recordings. You will need to E attach a power source to the camera (see p. 16). See your TV or VCR instruction manual for further details. If your TV (or VCR) has an S-video input terminal DV IN/OUT A/V IN/ OUT S-150 S-video Cable INPUT S-VIDEO STV-250N - Canon GL1 | GL1 Instruction Manual - Page 31
Videos Holding the camera E For maximum stability, grip the camera in your right hand and keep your right elbow pressed against your body. If necessary support the camera with your left hand. With practice, you will be able to operate the controls by touch, without taking your eye off the action - Canon GL1 | GL1 Instruction Manual - Page 32
should have a definite purpose. Avoid unnecessary or half-hearted movements. Camera moves Use pans to record a landscape or follow a moving subject. Decide the area you want to cover and stand facing the end of your panning angle. Without moving your feet, turn your waist to the starting position - Canon GL1 | GL1 Instruction Manual - Page 33
Turning the Optical Image Stabilizer Off E With most camcorders, even the slightest hand movements will be noticeable during telephoto recording. However, the GL1's Optical Image Stabilizer allows you to obtain steady recordings even at high magnification. Unlike electronic image stabilizers, it - Canon GL1 | GL1 Instruction Manual - Page 34
!5 Confirmation beeps p. 23 VCR M ENU SE L.SE TSE T M ENUC LO SE q DUB MODE REC.SET UP w e W L.REMO TE ... 1 REC MO DE ....SP r t DA TA CODE ...DA TE /T IM E D /T IM E SEL. .DA TE & T IM E y u D ISPLAYS ....ON 6SEC .DA TE ...O FF i VCR M ENU SE L.SE TSE T M ENUC LO SE D ISPLAYS - Canon GL1 | GL1 Instruction Manual - Page 35
and start recording. • You can display the menus on a connected TV screen using the wireless controller's TV SCREEN button. See p. 30 for TV hookup instructions. • The camcorder will remember your chosen menu settings even if you slide the POWER switch to OFF. Using the Full Range of Features 35 - Canon GL1 | GL1 Instruction Manual - Page 36
Using the Wireless Controller/Tally Lamp The supplied wireless controller can operate the E camera from a distance of up to 16 feet (5 m). Point it at the camera's remote sensor while you press the buttons. The tally lamp lights up to let you know that the camera is in range and responding to your - Canon GL1 | GL1 Instruction Manual - Page 37
Setting the remote sensor mode To prevent interference from other Canon wireless controllers being used nearby, there are two remote sensor modes and an off setting. The wireless controller and the camera have to be set - Canon GL1 | GL1 Instruction Manual - Page 38
Turning off the tally lamp E The tally lamp lets you know that the camera is recording. However, its flashing may be reflected into the lens during close-up recording, or when recording through glass. You may therefore decide to turn it off. (see p. 34) TALLY LAMP••ON 1. Open the camera menu and - Canon GL1 | GL1 Instruction Manual - Page 39
the Date and Time E MENU The date and/or time display forms part of the data code. You can choose to display or hide it during playback (see p. 65). Set the , select the time zone with the daylight saving time mark C next to the area. 5. Press the MENU button. Using the Full Range of Features 39 - Canon GL1 | GL1 Instruction Manual - Page 40
E 16 15 14 19 18 20 17 21 1 2 24 23 22 4 3 6 5 7 9 8 10 12 11 13 14 15 16 17 18 19 20 21 22 23 24 1 2 3 4 5 6 7 8 9 10 11 12 13 No. Time zone LONDON PARIS CAIRO MOSCOW DUBAI KARACHI DACCA BANGKOK H. KONG (Hong Kong) TOKYO SYDNEY SOLOMON No. Time zone WELLGTN (Wellington) SAMOA HONOLU - Canon GL1 | GL1 Instruction Manual - Page 41
whether you want the date, the time, or both to show up on your data code display (p. 66). (see p. 34) D/TIME SEL.•DATE & TIME 1. Turn the . It also appears for six seconds when you start playback and have the data code turned off. The six-second auto date will adjust for any time zone changes - Canon GL1 | GL1 Instruction Manual - Page 42
the image may occur. If this happens, using the ND filter should remove this problem. Turn the ND filter on by pressing the ND FILTER button. • ND advise you to switch the ND filter on. (However it doesn't appear in the Manual mode or during exposure lock.) - ND OFF with the "OFF" flashing warns you - Canon GL1 | GL1 Instruction Manual - Page 43
to focus, and F may continue to flash white in the display. Press the PHOTO button down halfway and adjust the focus manually with the focus ring. - If you are using manual focus (p. 58), the F mark starts as a continuous as a white mark. Focus with the focus ring. 3. Press the PHOTO button fully - Canon GL1 | GL1 Instruction Manual - Page 44
button has no half-way setting, press the button fully and the camera immediately takes the "photo". • For even greater versatility attach a Canon Speedlite for flash photography (available as optional accessories, see page 45), when taking still pictures directly from record pause mode. • Only take - Canon GL1 | GL1 Instruction Manual - Page 45
(optional) For SLR-style flash photography, attach a Canon Speedlite 220EX, 380EX or 550EX to the E camcorder of Features Notes: • For full details of how to use the Speedlite, refer to its instruction manual. • If you use the Speedlite in the shutter-priority (Tv) mode, you can choose any - Canon GL1 | GL1 Instruction Manual - Page 46
Choosing the Movie Mode (Normal/Frame) The Frame mode can be used when you want to look at a video, scene by scene, free from field slippage E (the "flicker" that normally occurs when you pause a video). The vertical resolution of the image is improved by 1.5×. During playback, pause the video any - Canon GL1 | GL1 Instruction Manual - Page 47
Searching and Reviewing While Recording Record search When the camera is in record pause mode, you can use record search to play the tape forwards or backwards to find the point where you want to start or restart recording. This is useful when you want to add a new scene to a previously used - Canon GL1 | GL1 Instruction Manual - Page 48
and color phase 16:9 A A A × × A A ON × × × Auto Tv (shutter priority) M A A Av (aperature priority) A M A Manual Sand & Snow M A M A M A Spotlight M × M M × × M M M M M M A=Automatic M=Manual ×=Not available Easy Recording The simplest way to use the camera is with the - Canon GL1 | GL1 Instruction Manual - Page 49
that you now have the option of using any of the camera's manual functions. E AUTO A Giving priority to shutter speed (shutter-priority: Tv When recording in extreme low-light conditions, we recommend the use of a Canon Speedlite (p. 45) or Video Light (available as optional accessories, see page - Canon GL1 | GL1 Instruction Manual - Page 50
reset if you turn the power off or change the recording program. If you use the STANDBY lever, however, the camera remembers your chosen values. Manual (See also p. 55) Select this program for total creative freedom when operating the camcorder. You can set aperture and shutter speeds completely - Canon GL1 | GL1 Instruction Manual - Page 51
Using Digital Effects Add the camera's digital effects during recording for more interesting productions. Except for the fade trigger, all digital effects can be used for both still photos and video, and sound is recorded normally. E Fade Trigger When you start recording, the scene gradually - Canon GL1 | GL1 Instruction Manual - Page 52
Operating the digital effects E 1. Set the camera to record pause mode. 2. Set the program selector to any mode other than [ Easy Recording. 3. Open the camera menu and select D.EFFECT. 4. Select your desired effect and close the menu. • Your chosen effect flashes in the display. • Select OFF to - Canon GL1 | GL1 Instruction Manual - Page 53
Audio Recording Selecting the audio mode E The GL1 can record sound in two audio modes: • 16-bit (48 kHz, 2 channel) for the highest sound quality • 12-bit (32 kHz, 2 from 4 channels) for recording on two channels (stereo 1), leaving two channels (stereo 2) free for you to add new sound at a later - Canon GL1 | GL1 Instruction Manual - Page 54
Setting the Self-Timer E STANDBY LOCK START /STOP SELF TIMER This is useful when you want to include yourself in the picture when recording. 1. Set the camera to record pause mode. 2. Press the self-timer button on the body of the camera or the SELF TIMER button on the wireless controller. • - Canon GL1 | GL1 Instruction Manual - Page 55
standby lever, however, the camcorder remembers your chosen values. • A bar showing the standard exposure appears in the display. • You can also vary the exposure manually in the Auto, Tv and Av modes, but you must first lock the exposure to adjust the shutter speed and iris. Using the Full Range - Canon GL1 | GL1 Instruction Manual - Page 56
q About the shutter speed E Turn the EXPOSURE dial toward + for a slower shutter speed or - for a faster shutter speed. Available shutter speeds: 1/60 sec 1/75 sec 1/90 sec 1/100 sec 1/120 sec 1/150 sec 1/500 sec 1/420 sec 1/360 sec 1/300 sec 1/250 sec 1/600 sec 1/720 sec 1/840 sec - Canon GL1 | GL1 Instruction Manual - Page 57
picture brighter or darker in order to deal with difficult lighting conditions, or to manipulate the mood of the scene. The camera's iris can be manually set to any position from fully closed to fully open. EXPOSURE Using the Full Range of Features To make the recorded image brighter, turn the - Canon GL1 | GL1 Instruction Manual - Page 58
the FOCUS A/M button again. FOCUS A/M Notes: • The picture in the LCD screen may appear out of focus when shooting in dark conditions. • When zooming during manual focus, zoom out wide only after setting the focus at the telephoto end. The focus may be thrown off if you zoom into telephoto after - Canon GL1 | GL1 Instruction Manual - Page 59
intervals (excluding -1.75 and +1.75). • The higher the setting, the brighter the image. 4. Close the menu. Note: • AE shift does not function in the Easy, Manual, Sand & Snow or Spotlight Recording programs. Using the Full Range of Features 59 - Canon GL1 | GL1 Instruction Manual - Page 60
Adjusting Camera Sharpness Change the sharpness level before shooting for more creative videos. E C.SHARPNESS•- + (see p. 34) 1. Select C.SHARPNESS from the camera menu. 2. Set your desired sharpness level. • Adjust toward + for a sharper picture, and toward - to soften the contour. • CP (custom - Canon GL1 | GL1 Instruction Manual - Page 61
Adjusting Color Phase Change the color phase level before shooting for more creative videos. E C.PHASE R G (see p. 34) 1. Select C. (color) PHASE from the camera menu. 2. Set your desired color level. • Adjust toward R for a redder picture, and toward G for a greener picture. • CP (custom - Canon GL1 | GL1 Instruction Manual - Page 62
Using the Zebra Pattern E MENU The zebra pattern is a series of diagonal stripes that appear in the display to highlight areas of overexposure. Use as a guide to setting the aperture (iris) and shutter speed. (see p. 34) ZEBRA OFF 1. Open the camera menu and select ZEBRA. 2. Select the ON - Canon GL1 | GL1 Instruction Manual - Page 63
speed, rather than remaining lit. The result will remain better than with the auto setting, and you can continue recording. Setting the white balance manually will probably work better than auto white balance when shooting: Subjects with one dominant color, such as sky, sea or forest Using the Full - Canon GL1 | GL1 Instruction Manual - Page 64
with light from a single source. Correct white balance cannot be obtained for two types of lighting at once. • You cannot set the white balance manually or use the indoor/outdoor modes when the program selector is set to the [ (Easy Recording) program. • The camera returns to auto white balance - Canon GL1 | GL1 Instruction Manual - Page 65
in play, slow, or still mode. Camera data may be displayed as "- - -" during fast forward, rewind, reverse playback, forward and reverse ×2 playback. Press the DATA CODE button on the wireless controller or the body of the camera. • Press it once to display, once more to hide it. You can also choose - Canon GL1 | GL1 Instruction Manual - Page 66
position is usually labeled SAVE or ERASE OFF). • The data code will read "- - -" in the following situations: - During 00 AM 0 dB F1. 6 1 /2000 1 0 : 00 AM DEC. 1 , 19 99 • The data code will appear in the display even if DISPLAYS (p. 95) has been set to OFF through the VCR menu. Using the Full - Canon GL1 | GL1 Instruction Manual - Page 67
recorded anywhere on a tape (photo search) or between different days or areas of recording (date search). • You can only use this function from the day/area was less than one minute. • Date search playback may start just before or after the beginning of the located section. • If the data code is - Canon GL1 | GL1 Instruction Manual - Page 68
wireless controller at a point you want to return to later. • The time code is replaced by a tape counter that is set to zero with the  The tape counter with  indication disappears from the display and the time code reappears. Notes: • The zero set memory may not function correctly where there - Canon GL1 | GL1 Instruction Manual - Page 69
TV or analog camcorder (analog line- in, p. 76). If you connect another Canon digital video camcorder to the camera instead of a VCR, you can use the . 3. Turn on the VCR and load a blank cassette. • See your VCR instruction manual. 4. Open the VCR menu and select \ DUB MODE. • When you select DUB - Canon GL1 | GL1 Instruction Manual - Page 70
Using the Dubbing Function for the First Time When you use the dubbing function for the first time, or with a E different VCR, you should set your camcorder to send the correct remote control signals to your VCR. The camera will not forget this setting unless you change it. Do not alter it again - Canon GL1 | GL1 Instruction Manual - Page 71
the right RECORDER setting for your VCR. The number indicates the VCR brand. The letter indicates the set of signals. Brand Canon Aiwa Akai Fujitsu Funai Hitachi JVC Mitsubishi NEC Panasonic Blaupunkt Quasar Settings 1-A to 1-C 2-A to 2-C 3-A to 3-C 4-A 5-A 6-A to 6-B 7-A to 7-C 8-A to 8-D 9-A to - Canon GL1 | GL1 Instruction Manual - Page 72
Dubbing to a VCR E 1. Make sure you are in DUB MODE (see p. 69). • WIND THE TAPES AND PAUSE \ SET appears in the display. 2. Set the tape in the VCR to the point where you want to start recording, set it to record pause mode. Set the tape in the camera to the point where you want to start dubbing, - Canon GL1 | GL1 Instruction Manual - Page 73
wanted, or lose the end of the scene. CUT-OUT ADJ. prevents this, by sending the command a little early or late. If you have these problems with your VCR, reset these adjustments. Use the REC.SET UP menu to set the "cut-in" and "cut-out" adjustments. (see p. 70) CUT-IN - Canon GL1 | GL1 Instruction Manual - Page 74
VCR, and set its input selector to LINE. Load a blank cassette, and put the VCR in record pause mode. • See your TV and VCR instruction manuals for details. 3. Turn the camera's POWER switch to VCR, and load your recorded cassette. Basic editing 1. Find a point on your recorded cassette slightly - Canon GL1 | GL1 Instruction Manual - Page 75
single DV cable can handle data in both directions. • If another Canon digital video camcorder is connected, the Dubbing Function can be used for be able to dub tapes recorded with the copyright protective signal. Use a Canon CV-150F DV cable (optional) to connect two digital devices together. When - Canon GL1 | GL1 Instruction Manual - Page 76
/VIDEO selector to VIDEO. • Turn on the VCR. Load your recorded cassette, and put the VCR in playback pause mode. • See your TV and VCR instruction manuals for details. 3. Slide the camera's POWER switch to VCR, and load a blank cassette. Editing 76 - Canon GL1 | GL1 Instruction Manual - Page 77
Basic editing E 1. Find a point on your recorded cassette slightly before the section you want to copy. 2. Start to play it back while you monitor the picture on the TV. 3. Press the 2 and a buttons on the body of the GL1 simultaneously or REC PAUSE on the wireless controller. • S-video and A/V IN/ - Canon GL1 | GL1 Instruction Manual - Page 78
Cable A/V INSERT The tape in the camera: When using the GL1's A/V insert function, only record to tapes recorded in SP mode with continuously recorded time codes. If there are non-recorded portions or portions recorded in LP mode on the tape, recording may be interrupted or you may not be able - Canon GL1 | GL1 Instruction Manual - Page 79
The playback tape Scene to be inserted E Before inserting The tape in the camera Insert start point Insert end point After inserting The tape in the camera The video and audio of the new scene replace that of the old. 1. Connect the camera to the VCR (p. 30), load recorded tapes into both the - Canon GL1 | GL1 Instruction Manual - Page 80
Audio Dubbing You can add sound to the original sound on a prerecorded tape from audio products (AUDIO IN) or with E the internal or an external microphone (MIC IN). Audio added through audio dubbing is dubbed onto Stereo 2. The original sound will not be erased. For best results, add sound to tapes - Canon GL1 | GL1 Instruction Manual - Page 81
OFF CAMERA VCR POWER E AUDIO DUB. (see p. 34) AUDIO DUB.••AUDIO IN 1. Load your recorded tape into the camcorder. 2. Slide the POWER switch to VCR. 3. Open the VCR menu, select AUDIO DUB. 4. Select AUDIO IN or MIC IN with the menu dial and close the menu. 5. Set the tape to the point where - Canon GL1 | GL1 Instruction Manual - Page 82
Preparing the Camera Adjust the viewfinder E • In record pause mode, adjust the viewfinder focusing lever to suit your eyesight. • The viewfinder extends straight out and rotates upwards for comfortable viewing. Store the camera with the viewfinder flush with the body of the camera. • To view with - Canon GL1 | GL1 Instruction Manual - Page 83
Notes on Using the Batteries Charging and recording times E • These times vary - the safest policy is always to have two or three times as many battery packs as you think you will need. • You will get more recording time if you turn the camera off between shots, instead of leaving it in record - Canon GL1 | GL1 Instruction Manual - Page 84
recharge the backup battery. • If you discard this product, dispose of the lithium backup battery separately to prevent pollution. For further information, contact your local Canon service center or dealer. 84 Additional Information - Canon GL1 | GL1 Instruction Manual - Page 85
DANGER! Treat the battery pack with care. E • Keep it away from fire (or it might explode). • Do not expose the battery pack to temperatures greater than 140°F (60°C). Do not leave it near a heater, or inside a car in hot weather, for example. • Do not try to disassemble or modify it. • Do not - Canon GL1 | GL1 Instruction Manual - Page 86
Setting the Audio Mix E OFF CAMERA VCR POWER MIX AUDIO BALANCE MONITOR ST-1 ST-2 When you play back a tape that was recorded in 12-bit mode, you can set the audio output to play: stereo 1 (the original sound), stereo 2 (any new sound, dubbed to the tape after recording), or mix the balance between - Canon GL1 | GL1 Instruction Manual - Page 87
Selecting audio output channels E When you play back a tape whose audio has been recorded on multiple channels, you can change the output channels of that sound. (see p. 34) OUTPUT CH•••L/R 1. Set the camera to VCR, load a tape recorded with multiple-channel audio. 2. Open the VCR menu and select - Canon GL1 | GL1 Instruction Manual - Page 88
Standard holding style For maximum stability, place your right hand through the side grip belt and keep your right elbow pressed against your body. Support the lens with your left hand. Low-angle recording Grip the camera using the top handle and steady the lens with the other hand. Additional - Canon GL1 | GL1 Instruction Manual - Page 89
of electric shock - if the camera does not function properly, take it to qualified service personnel. Storage If you do not intend to use the camera for some time, turn the POWER switch to OFF and store it in an area which is free of dust and moisture, and where the temperature is no - Canon GL1 | GL1 Instruction Manual - Page 90
, the video heads may be dirty. When the video heads are badly contaminated, the camera may show a blank blue screen. • Clean the video heads using Canon's DVM-CL Digital Video Head Cleaning Cassette. If the "noise" remains, repeat the cleaning (up to maximum of five times). • Do not use a wet-type - Canon GL1 | GL1 Instruction Manual - Page 91
moved from a cold place to a warm place. Using the camera while condensation is present can damage both the tape and the camera. Condensation may become a problem: When you take the camera from a cold place to a warm room When a cold room is heated rapidly When the camera is left in a humid room - Canon GL1 | GL1 Instruction Manual - Page 92
Troubleshooting Refer to this checklist first if you have any problems with your camcorder. Possible explanations are given E for each problem your dealer or service outlet if problems persist. Recording/Playback Problem ? Nothing happens • The camera is on manual focus (p. 58). • The viewfinder - Canon GL1 | GL1 Instruction Manual - Page 93
. In these situations, you will often get better results using E manual focus (see p. 58). Focus on something which is about the ) Fast moving objects Slanted subjects Dark subjects Night scenes Recording/Playback (Contd.) Problem ? Some/all of the digital effects don't work, or can't be set - Canon GL1 | GL1 Instruction Manual - Page 94
Miscellaneous E Problem ? The wireless controller doesn't work. ? The tally lamp doesn't flash. ? There are air bubbles inside the lens. ? After sliding the POWER switch to CAMERA, there - Canon GL1 | GL1 Instruction Manual - Page 95
and time on a connected TV, press the wireless controller's DATA CODE button E when the camera is in VCR mode with a tape displays through TV SCREEN in the camera menu. For instructions on how to hook the camera up to your TV, see p. 30. DATA CODE If you slide the POWER switch to OFF while - Canon GL1 | GL1 Instruction Manual - Page 96
RTN Record set up menu (p. 70) The remote sensor is turned off (p. 37). Self-timer countdown (p. 54) Audio mode (p. 53) Data code (p. 65) 0 : 0 0 : 00M Photo mode (p. 43) • Setting the AF F mark flashes white • AF locked F mark lights up green W T • Timer W T 40× W T 100× W T Movie - Canon GL1 | GL1 Instruction Manual - Page 97
setting of shutter speed, F number and gain value (p. 55) The iris is closed. ND Filter (p. 42) Manual focus is selected (p. 58). White balance is (p. 63) Set W Indoor T Outdoor U AE Shift (p. 59) Camera Sharpness (p. 60) and Color Phase (p. 61) The 16:9 effects: the - Canon GL1 | GL1 Instruction Manual - Page 98
page 20. THE TAPE I S SET FOR ERASURE PREVENT ION This records counter information, including hour, minute, second, and frame number on a special data code area on the tape itself. It is reset automatically when a new tape is loaded. In camera mode, the frame number doesn't appear in the display - Canon GL1 | GL1 Instruction Manual - Page 99
Lens: F/1.6-2.9, 20× power zoom, 4.2-84 mm Focusing system: TTL autofocus, manual focusing possible Minimum focusing distance: 3/8 inch (10 mm) on maximum wide approximate. Errors and omissions excepted. Subject to change without notice. Canon is a trademark of Canon Inc. 99 Additional Information - Canon GL1 | GL1 Instruction Manual - Page 100
Digital Effects, 51 Digital Video, 7 Digital Zoom, 7, 24 Displaying Data Code, 65 Dubbing Function, 69 DV Dubbing, 75 Additional Information ‰ Easy 19 Low-angle Recording, 88 LP Mode, 22 ˜ Maintenance, 89 Manual Focus, 58 Manual Recording Program, 50 Menus, 34 Microphone, 80 Mirror, 26 Movie - Canon GL1 | GL1 Instruction Manual - Page 101
Camcoder, 16 Pre-marked Position, 68 Preparing the Camera, 82 Problems, 92 Â Recharging the Battery Pack, 83 Record Pause Mode, Tally Lamp, 36 Tape Protection, 20 Telephoto, 24 Temperature, 85, 89 Time Code, 98 Tripod, 31 Troubleshooting, 92 TV, 30, 95 Tv Recording Mode, 49 Ë Using the Camera - Canon GL1 | GL1 Instruction Manual - Page 102
respect to such non-Canon brand items is given instruction manual, or service performed by other than a CUSA Center or Service Facility. (b) Use of parts or supplies (other than those sold by CUSA) which cause damage to the DV Camcorder or cause abnormally frequent service calls or service problems - Canon GL1 | GL1 Instruction Manual - Page 103
to follow instructions contained in the instruction manual; ii) the use of accessories, attachments, products, supplies, parts or devices with this Canon product that do not conform to Canon specifications or that cause abnormally frequent service problems; iii) repairs or services performed by - Canon GL1 | GL1 Instruction Manual - Page 104
MEXICANA, S. DE R.L. DE C.V. Periferico Sur No. 4124 Col. Ex-Rancho de Anzaldo C.P. 01900 México, D.F., México CANON LATIN AMERICA, INC. 6505 Blue Lagoon Drive Suite 325 Miami FL 33126 USA CANON HONGKONG COMPANY LTD. 9/F, The Hong Kong Club Building, 3A Chater Road, Central, Hong Kong PUB.DIM-312A
-
 1
1 -
 2
2 -
 3
3 -
 4
4 -
 5
5 -
 6
6 -
 7
7 -
8
-
9
-
10
-
11
-
12
-
13
-
14
-
15
-
16
-
17
-
18
-
19
-
20
-
21
-
22
-
23
-
24
-
25
-
26
-
27
-
28
-
29
-
30
-
31
-
32
-
33
-
34
-
35
-
36
-
37
-
38
-
39
-
40
-
41
-
42
-
43
-
44
-
45
-
46
-
47
-
48
-
49
-
50
-
51
-
52
-
53
-
54
-
55
-
56
-
57
-
58
-
59
-
60
-
61
-
62
-
63
-
64
-
65
-
66
-
67
-
68
-
69
-
70
-
71
-
72
-
73
-
74
-
75
-
76
-
77
-
78
-
79
-
80
-
81
-
82
-
83
-
84
-
85
-
86
-
87
-
88
-
89
-
90
-
91
-
92
-
93
-
94
-
95
-
96
-
97
-
98
-
99
-
100
-
101
-
102
-
103
-
104
 |
 |
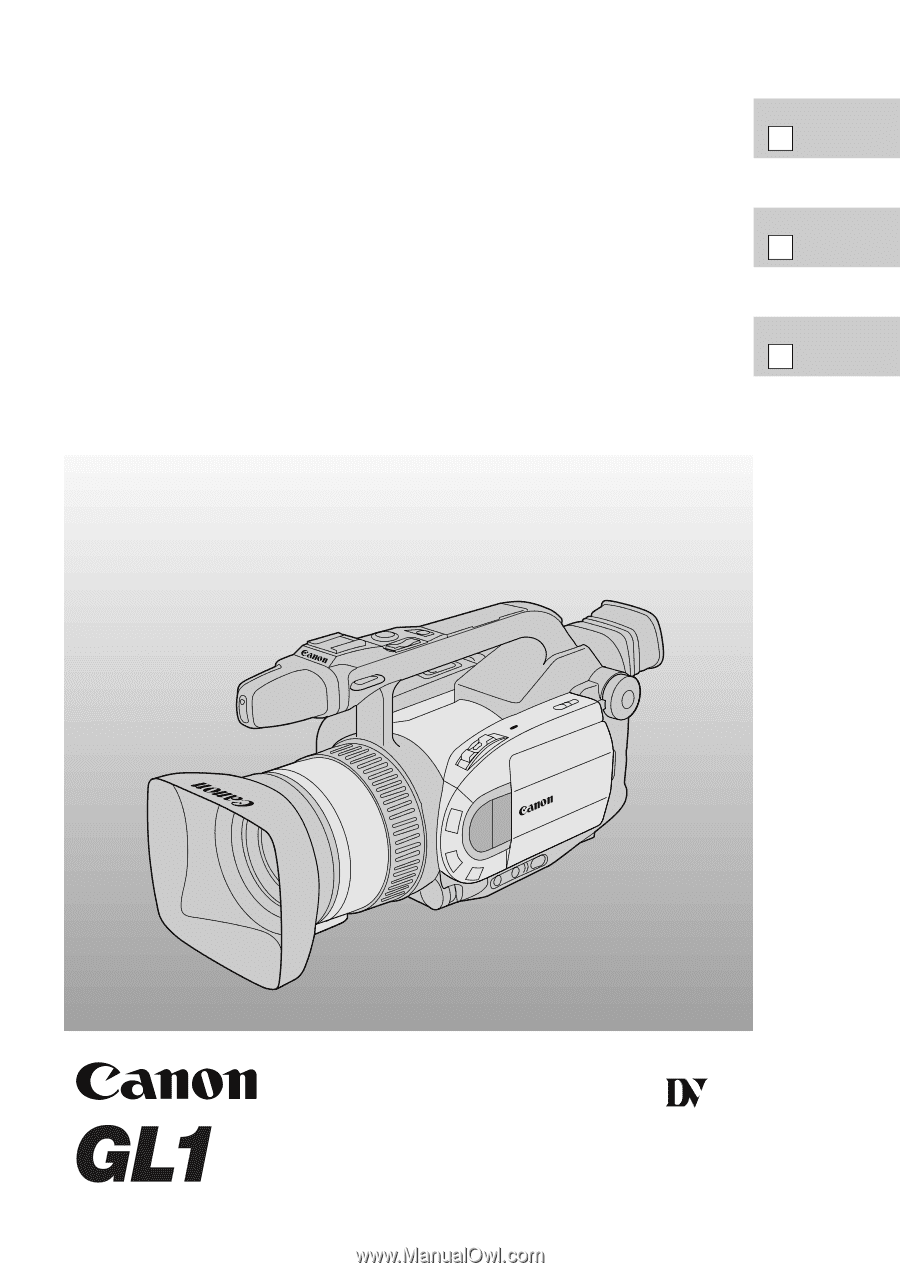
DIGITAL VIDEO CAMCORDER
Instruction Manual
CAMESCOPE ET LECTEUR VIDEO NUMERIQUES
Mode d’emploi
VIDEOCAMARA Y GRABADORA DIGITAL
Manual de Instrucciones
ENGLISH
FRANÇAIS
ESPAÑOL
E
F
Es
Mini
Digital
Video
Cassette
NTSC