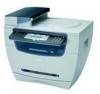
Canon MF5770 imageCLASS MF5700 Series Basic Guide
Canon MF5770 - ImageCLASS B/W Laser Manual
 |
UPC - 013803045048
View all Canon MF5770 manuals
Add to My Manuals
Save this manual to your list of manuals |
Canon MF5770 manual content summary:
- Canon MF5770 | imageCLASS MF5700 Series Basic Guide - Page 1
Basic Guide Series - Canon MF5770 | imageCLASS MF5700 Series Basic Guide - Page 2
imageCLASS MF5700 Series Basic Guide - Canon MF5770 | imageCLASS MF5700 Series Basic Guide - Page 3
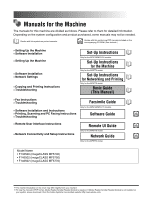
and PC Faxing Instructions Software Guide CD-ROM • Troubleshooting • Remote User Interface Instructions Remote UI Guide CD-ROM Only for the MF5770 model. • Network Connectivity and Setup Instructions Network Guide CD-ROM Only for the MF5770 model. Model Name • F146500 (imageCLASS MF5730 - Canon MF5770 | imageCLASS MF5700 Series Basic Guide - Page 4
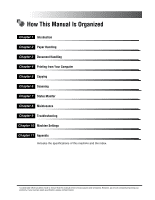
Is Organized Chapter 1 Introduction Chapter 2 Paper Handling Chapter 3 Document Handling Chapter 4 Printing from Your Computer Chapter 5 Copying Chapter 6 Scanning Chapter 7 Status Monitor Chapter 8 Maintenance Chapter 9 Troubleshooting Chapter 10 Machine Settings Chapter 11 Appendix Includes the - Canon MF5770 | imageCLASS MF5700 Series Basic Guide - Page 5
. . . . xiii About the Part Containing Mercury (Applicable Only to the USA xiii Important Safety Instructions xiv Installation xiv Power Supply xv Handling xvi Maintenance and Inspections xvii Consumables xix Other Warnings xix Chapter 1 Introduction Customer Support 1-1 For Canadian Users - Canon MF5770 | imageCLASS MF5700 Series Basic Guide - Page 6
the Paper Size and Type (Common for Cassette and Multi-Purpose Feeder 2-10 Specifying the Paper Size 2-10 Specifying the Paper Type 2-11 Orientation of the Document and the Paper Loading 2-12 Selecting the Paper Output Area 2-13 Paper Type and Paper Output Area 2-13 Face Down Paper Output - Canon MF5770 | imageCLASS MF5700 Series Basic Guide - Page 7
10 When Placing a Document on the Platen Glass 5-11 Reserve Copy 5-12 Chapter 6 Scanning Before Scanning 6-1 Scanning Methods 6-2 More Information 6-3 Chapter 7 Status Monitor Checking 8-7 Recycling Used Cartridges 8-7 The Clean Earth Campaign 8-8 THE Canon CARTRIDGE RECYCLING PROGRAM 8-8 vi - Canon MF5770 | imageCLASS MF5700 Series Basic Guide - Page 8
Problems 9-18 Scanning Problems 9-19 General Problems 9-20 If You Cannot Solve the Problem 9-21 Chapter 10 Machine Settings Accessing the Machine Settings 10-1 Menu Descriptions 10-2 PAPER SETTINGS 10-2 COMMON SETTINGS 10-3 COPY SETTINGS 10-5 PRINTER SETTINGS 10-6 TIMER SETTINGS 10 - Canon MF5770 | imageCLASS MF5700 Series Basic Guide - Page 9
Preface Thank you for purchasing Canon imageCLASS MF5700 Series. Please read this manual thoroughly before operating the machine in order to familiarize yourself with its capabilities, and to make the most of its many functions. After reading this manual, store it in a safe place for future - Canon MF5770 | imageCLASS MF5700 Series Basic Guide - Page 10
the LCD. Illustrations Used in This Manual Unless otherwise mentioned, illustrations used in this manual are those taken when no optional equipment is attached to the imageCLASS MF5770. The model imageCLASS MF5770 is used for illustration purposes in this manual. When there is any difference between - Canon MF5770 | imageCLASS MF5700 Series Basic Guide - Page 11
in Subpart B of Part 15 of the FCC Rules. Do not make any changes or modifications to the equipment unless otherwise specified in this manual. If such changes or modifications should be made, you could be required to stop operation of the equipment. Canon U.S.A. Inc. One Canon Plaza, Lake Success - Canon MF5770 | imageCLASS MF5700 Series Basic Guide - Page 12
Laser Safety This product complies with 21 CFR Chapter 1 Subchapter J as a Class I laser product under the U.S. Department of Health and Human Services specified in this manual may result in hazardous radiation exposure. The label shown below is attached to the laser scanner assembly within the - Canon MF5770 | imageCLASS MF5700 Series Basic Guide - Page 13
Trademarks Canon, the Canon logo, and imageCLASS are trademarks of Canon Inc. Other product and company names herein may be the trademarks of their respective owners. Copyright Copyright 2005 by Canon Inc. All rights reserved. No part of this publication may be reproduced or transmitted in any form - Canon MF5770 | imageCLASS MF5700 Series Basic Guide - Page 14
non-exhaustive list of these documents is set forth below. This list is intended to be a guide only. If you are uncertain about Paper Money • Money Orders • Certificates of Deposit • Postage Stamps (canceled or uncanceled) • Identifying Badges or Insignias • Selective Service or Draft Papers • Checks - Canon MF5770 | imageCLASS MF5700 Series Basic Guide - Page 15
Authorized Service Facilities or the Canon Customer Care Center. - Necklaces and other metal objects - Cups, vases, flowerpots, and other containers filled with water or liquids CAUTION • Do not install the machine in unstable locations, such as unsteady platforms or inclined floors, or in locations - Canon MF5770 | imageCLASS MF5700 Series Basic Guide - Page 16
install and always stays between 50°F and 90.5°F (10°C and 32.5°C). • Make sure the relative humidity connect or disconnect the power cord with wet hands, as this may result in electrical shock. • Do not connect extension cord must be used, however, use one rated for voltages of 120 V AC and over - Canon MF5770 | imageCLASS MF5700 Series Basic Guide - Page 17
the power cord when it is connected to a power outlet, unplug instructions in the guides included with your machine. Adjust only those controls that are covered by the instructions in the guides servicing. Handling WARNING • Do not attempt to disassemble Canon Authorized Service Facilities or the Canon - Canon MF5770 | imageCLASS MF5700 Series Basic Guide - Page 18
Do not drop paper clips, staples, or Canon Authorized Service Facilities or the Canon laser beam cannot escape from the machine during any phase of user operation. Read the following remarks and instructions If the power cord is connected for a long period of flammable substances. Check detergent for - Canon MF5770 | imageCLASS MF5700 Series Basic Guide - Page 19
with cold water. Washing them with warm water will set the toner, and make it impossible to remove the toner stains. • When removing paper which has become jammed inside the machine, remove the jammed paper gently to prevent the toner on the paper from scattering and getting into your eyes or mouth - Canon MF5770 | imageCLASS MF5700 Series Basic Guide - Page 20
as this may cause the toner or paper to ignite, resulting in burns or a fire. • When discarding used toner cartridges, put the cartridges in a bag to prevent the toner remaining inside the cartridges and consult a physician. CAUTION Follow all warnings and instructions marked on the machine. xix - Canon MF5770 | imageCLASS MF5700 Series Basic Guide - Page 21
xx - Canon MF5770 | imageCLASS MF5700 Series Basic Guide - Page 22
, contact Canon Authorized Service Facilities or the Canon Customer Care Center at 1-800-828-4040 between the hours of 8:00 A.M. to 8:00 P.M. EST Monday through Friday and 10:00 A.M. to 8:00 P.M. on Saturday. For interactive troubleshooting, e-mail technical support, the latest driver downloads and - Canon MF5770 | imageCLASS MF5700 Series Basic Guide - Page 23
Inc., offers a full range of customer technical support* options: • For interactive troubleshooting, e-mail technical support, the latest driver downloads and answers to frequently asked questions (www.canon.ca) 1 • Automated interactive telephone support on most current products 24 hours, 7 days - Canon MF5770 | imageCLASS MF5700 Series Basic Guide - Page 24
it when you install the cartridge, or remove jammed paper. h Multi-purpose feeder Used when printing paper one by one manually. i Cassette Holds the paper supply. j Telephone line jack Connect the telephone cable. (Only for the MF5750/MF5770 models.) k External device jack Connect an external device - Canon MF5770 | imageCLASS MF5700 Series Basic Guide - Page 25
a 1 b Introduction a Platen glass cover Open it when you place documents on the platen glass for copying or scanning. b Platen glass Place documents. 1-4 Main Components of the Machine - Canon MF5770 | imageCLASS MF5700 Series Basic Guide - Page 26
USB (Universal Serial Bus) cable. b Ethernet port Connect the network cable. (Only for the MF5770 model.) c Face up cover Open it when you output paper face up, or remove jammed paper. d e d Power socket Connect the power cord. e External cover Protects paper supply in the cassette from dirt and - Canon MF5770 | imageCLASS MF5700 Series Basic Guide - Page 27
copy job is stored in the memory. b Alarm indicator Flashes red when the machine has a problem such as a paper jam. (The error message is displayed in the LCD.) c COPY key Switches the standby display to the Copy mode. d FAX key Switches the standby display to the Fax mode. e SCAN key Switches the - Canon MF5770 | imageCLASS MF5700 Series Basic Guide - Page 28
Cancels copying and other operations, and returns to the standby display. p Set key Determines the contents you set or register. q Collate / 2on1 key Sorts bc d e fgh i j 01 02 03 04 05 06 07 08 09 10 11 12 Redial / Pause Coded Dial Directory COPY Alarm In Use / Memory Status - Canon MF5770 | imageCLASS MF5700 Series Basic Guide - Page 29
Copy ratio Paper size Introduction Exposure ■ Scan Mode Image quality Copy quantity NOTE • When the machine is plugged in, the LCD displays for a while, then the standby display appears. • The standby display in the Fax mode appears only with the MF5750/MF5770 models. (See - Canon MF5770 | imageCLASS MF5700 Series Basic Guide - Page 30
from your computer - When receiving faxes* - When you pick up the handset of the telephone connected to the machine* - When receiving a call* * Only for the MF5750/MF5770 models. Setting the Energy Saver Mode Manually l 1 Press [Energy Saver]. The LCD is turned off and the Energy Saver key lights - Canon MF5770 | imageCLASS MF5700 Series Basic Guide - Page 31
Restoring from the Energy Saver Mode Manually 1 Press [Energy Saver]. The Energy Saver key goes off and the machine enters the standby mode. 1 NOTE The machine can be restored from the energy saver mode immediately. However, it may vary according to room temperature and circumstances. - Canon MF5770 | imageCLASS MF5700 Series Basic Guide - Page 32
Failure to do so will cause paper creases and a paper jam. ■ Unacceptable Paper Do not copy on the following types of copy stock. Doing so may result in paper jams. • Severely curled or wrinkled paper • Transparencies designed for full-color copiers or printers • Paper which has already been copied - Canon MF5770 | imageCLASS MF5700 Series Basic Guide - Page 33
■ Acceptable Paper Paper Size Paper Weight Paper Type Cassette/Multi-Purpose Feeder Letter, Legal, A4, Executive, B5, A5, Envelope: COM10*, Monarch*, DL*, ISO-C5* 17 lb to 34 lb (64 g/m2 to 128 g/m2) Plain paper, Recycled paper, Heavy paper, Transparency, Envelope * Only for the multi-purpose - Canon MF5770 | imageCLASS MF5700 Series Basic Guide - Page 34
in place. Doing so may damage the paper feeding assembly inside the machine. NOTE • The paper in the multi-purpose feeder is fed prior to the paper in the cassette. • The cassette holds up to approximately 250 sheets of 17 lb (64 g/m2) paper. Loading Paper in the Cassette 1 Pull out the cassette - Canon MF5770 | imageCLASS MF5700 Series Basic Guide - Page 35
lever on the paper guide at the rear of the cassette, slide the paper guide to the mark indicating the desired paper size. 2 ● When Loading Legal Size Paper: ❑ Pull the blue tab (A) and extend the cassette (B). Set the paper guide to LTR (C). B C A IMPORTANT If the paper guide is not adjusted - Canon MF5770 | imageCLASS MF5700 Series Basic Guide - Page 36
(logo side) and load it so that the top of the paper feeds first in the cassette. 2 5 While holding the lock release lever on the paper guide on left side of the cassette, slide the paper guide to the mark indicating the desired paper size. The paper guides on the sides of the cassette move together - Canon MF5770 | imageCLASS MF5700 Series Basic Guide - Page 37
the cassette into the machine, paper jams may occur. 7 Specify the size and the type of the paper you load. For details on how to specify the paper size and type, see "Specifying the Paper Size and Type (Common for Cassette and Multi-Purpose Feeder)," on p. 2-10. Loading Paper in the Multi-Purpose - Canon MF5770 | imageCLASS MF5700 Series Basic Guide - Page 38
Handling 1 Slide the paper guides to the mark of the desired paper size. 2 IMPORTANT If the paper guides are not adjusted correctly for the size of the paper, the quality of your printouts may be adversely affected. 2 Insert the paper square into the multi-purpose feeder with the print side up - Canon MF5770 | imageCLASS MF5700 Series Basic Guide - Page 39
how to specify the paper size and type, see "Specifying the Paper Size and Type (Common for Cassette and Multi-Purpose Feeder)," on p. 2-10. Loading an Envelope in the Multi-Purpose Feeder Use the multi-purpose feeder when you want to copy or print an envelope one by one. 2 IMPORTANT The recommended - Canon MF5770 | imageCLASS MF5700 Series Basic Guide - Page 40
side up and the right edge (i.e., closer to the stamp) first. 2 3 Specify the size and the type of the paper you load. For details on how to specify the paper size and type, see "Specifying the Paper Size and Type (Common for Cassette and Multi-Purpose Feeder)," on p. 2-10. Paper Handling Loading - Canon MF5770 | imageCLASS MF5700 Series Basic Guide - Page 41
➞ press [Set]. You can select from the following paper sizes: , , , , , , , , , and . NOTE Select , , , or for envelopes. 6 Press [Stop/Reset] to return to the standby display. 2-10 - Canon MF5770 | imageCLASS MF5700 Series Basic Guide - Page 42
curls excessively when printed with selected, select . *2 If print fixing is not sufficient when printed with selected, select . 6 Press [Stop/Reset] to return to the standby display. Specifying the Paper Size and Type (Common for Cassette - Canon MF5770 | imageCLASS MF5700 Series Basic Guide - Page 43
of the document and the orientation of the paper in the cassette or in the multi-purpose feeder are as shown below. ADF Document 2 Platen glass Document Paper Handling Paper Cassette Multipurpose feeder Copy 2-12 Specifying the Paper Size and Type (Common for Cassette and Multi-Purpose - Canon MF5770 | imageCLASS MF5700 Series Basic Guide - Page 44
Output Area Select the suitable paper output area depending on the paper type and your purpose. Paper Type Plain Paper Recycled Paper Paper Output Area face up face down face up face down The Number of Output Sheets 1 sheet approx. 60 sheets (17 lb to 24 lb (64 g/m2 to 90 g/m2)) 1 sheet approx - Canon MF5770 | imageCLASS MF5700 Series Basic Guide - Page 45
order. Close the face up cover, and pull out the output tray. IMPORTANT • Do not place the delivered paper back on the output tray. Doing so may result in paper jams. • Do not place objects other than paper on the output tray. Doing so may result in paper jams. 2-14 Selecting the Paper Output Area - Canon MF5770 | imageCLASS MF5700 Series Basic Guide - Page 46
. • Remove the delivered paper one by one. 2 IMPORTANT • Do not pull the paper forcibly. • This machine has no face up output tray. Remove the delivered paper with your hand. • Do not place an object in front of the face up paper output to prevent a paper jam. Selecting the Paper Output Area 2-15 - Canon MF5770 | imageCLASS MF5700 Series Basic Guide - Page 47
Paper Handling 2 2-16 Selecting the Paper Output Area - Canon MF5770 | imageCLASS MF5700 Series Basic Guide - Page 48
you can scan or copy with this machine and how to set them on the platen glass. Document Requirements The documents you place of paper (e.g., tracing paper*1, transparencies*1, etc.) Book ADF Plain paper (multiple page documents of the same size, thickness, and weight or one page documents) Size - Canon MF5770 | imageCLASS MF5700 Series Basic Guide - Page 49
usual. Problem Documents • Make sure any glue, ink, or correction fluid on the document is completely dry before placing it on the platen glass or loading it in the ADF. • Remove all fasteners (staples, paper clips, etc.) before loading the document in the ADF. • To prevent document jams in the - Canon MF5770 | imageCLASS MF5700 Series Basic Guide - Page 50
to a standard paper size (e.g., LTR or A4), align the document between the appropriate paper size marks. • If you do not know the size of your document, or if your document does not match any of the paper size marks, align the center of your document with the ➞ mark. Setting Up Documents 3-3 - Canon MF5770 | imageCLASS MF5700 Series Basic Guide - Page 51
Document Handling The illustration below shows how to place a LTR-size document on the platen glass. 3 3 Gently lower the platen glass cover. The document is now ready for machine first, then tap the edges of multiple page documents on a flat surface to even the stack. 3-4 Setting Up Documents - Canon MF5770 | imageCLASS MF5700 Series Basic Guide - Page 52
(guaranteed), or 50 sheets (21 lb(80 g/m2)) or paper stack within 8 mm thickness including curled sheets (temperature: 15°C to 27°C, humidity: 20% to 80%) (reference) documents can be loaded in the ADF. If the documents exceed the capacity of the ADF, paper jams may occur. Setting Up Documents 3-5 - Canon MF5770 | imageCLASS MF5700 Series Basic Guide - Page 53
The Paper Path of the ADF 1 2 The machine scans documents 3 from the first page. Scanning unit 3 NOTE • When documents are loaded in the ADF above and remains there. • When documents are not loaded in the ADF, the scanning unit moves to scan it. Document Handling 3-6 Setting Up Documents - Canon MF5770 | imageCLASS MF5700 Series Basic Guide - Page 54
If not, please see the Set-Up Instructions (for MF5730/MF5750 users), Set-Up Instructions for Networking and Printing (for MF5770 users) or Chapter 1, "Installation," in the Software Guide. Check if the machine is selected as the default printer. • You can check if your machine is set as the default - Canon MF5770 | imageCLASS MF5700 Series Basic Guide - Page 55
2 Click the corresponding printer driver icon. 3 From the [File] menu, click [Set as Default Printer] (Windows 98/ Me: [Set as Default]). 4 Printing from Your Computer 4-2 Before Printing - Canon MF5770 | imageCLASS MF5700 Series Basic Guide - Page 56
paper in the cassette or the multi-purpose feeder. For details on how to load paper, see "Loading Paper," printer to be used in the [General] tab sheet in the [Print] dialog box, then specify the print settings in the corresponding tab sheet (Only for Windows 2000). 6 Specify the required settings - Canon MF5770 | imageCLASS MF5700 Series Basic Guide - Page 57
XP/Server 2003: ❑ Click [start] on the Windows task bar ➞ select [Printers and Faxes]. ● On Windows 98/Me/2000: ❑ Click [Start] on the Windows task bar ➞ select [Settings] ➞ [Printers]. 4 2 Double-click the corresponding printer driver icon. 3 Right click on the print job ➞ click [Cancel]. NOTE - Canon MF5770 | imageCLASS MF5700 Series Basic Guide - Page 58
More Information For detailed information on all printing features, see Chapter 2, "Printing," in the Software Guide. 4 Printing from Your Computer More Information 4-5 - Canon MF5770 | imageCLASS MF5700 Series Basic Guide - Page 59
4 Printing from Your Computer 4-6 More Information - Canon MF5770 | imageCLASS MF5700 Series Basic Guide - Page 60
Copying 5 CHAPTER This chapter explains how to make copies, adjust scan settings to improve the image quality, and enlarge or reduce the copy sizes. It also describes the special copy features. Documents You Can Copy For information on the types of documents you can copy, their requirements, and - Canon MF5770 | imageCLASS MF5700 Series Basic Guide - Page 61
to 99 copies. 4 Adjust any necessary settings for your document. • Specify the size and the type of the paper you load in the cassette or the multi-purpose feeder. (See "Specifying the Paper Size and Type (Common for Cassette and Multi-Purpose Feeder)," on p. 2-10.) • Press [Image Quality] to select - Canon MF5770 | imageCLASS MF5700 Series Basic Guide - Page 62
follow the instructions in the LCD. You can also cancel copying using [Status Monitor]. (See "Confirming and Deleting a Copy Job," on p. 7-3.) • When you cancel copying while scanning a document from the ADF, the document may jam in the ADF. If the paper jam occurs, the LCD displays - Canon MF5770 | imageCLASS MF5700 Series Basic Guide - Page 63
You can select from the following: - 200% MAX. Copying - 129% STMT ➞ LTR - 100% - 78% LGL ➞ LTR - 64% - 50% MIN. NOTE • If the setting of menu in the Menu is set to or , the preset copy ratios will be as follows: A: 50%, 70%, 100%, 141% and 200%; AB - Canon MF5770 | imageCLASS MF5700 Series Basic Guide - Page 64
with the 2 on 1 copy function. • To return the copy ratio to 100%, press [Enlarge / Reduce] several times to display 5 ratio ➞ press [Set]. You can also return the ratio to 100% using a preset copy ratio. (See "Enlarging/ Reducing Using Preset Copy Ratios," on p. 5-4.) Copying - Canon MF5770 | imageCLASS MF5700 Series Basic Guide - Page 65
for documents with text and photographs. NOTE Copy exposure automatically changes to manual mode when or is set. Adjusting the Exposure (Density) You can adjust the copy exposure automatically or manually according to how light or dark your document is. Adjusting Automatically - Canon MF5770 | imageCLASS MF5700 Series Basic Guide - Page 66
[Exposure] to select the manual mode. 2 Press [((-)] or [)(+)] to adjust the copy exposure ➞ press [Set]. For a lighter copy exposure, press [((-)]. For a darker copy exposure, press [)(+)]. EXPOSURE -LT 01 1 0 0 % LTR DK+ ➞ TEXT/PHOTO NOTE When setting the exposure lighter, the indicator - Canon MF5770 | imageCLASS MF5700 Series Basic Guide - Page 67
order. - 2 on 1 Reduces two documents to fit on a single paper. - Reserve Copy Reserves the next job while the machine is printing out. in of the Menu is set to , the collate copy feature is automatically set. (See of "Menu Descriptions," on p. 10-5.) 5-8 Special - Canon MF5770 | imageCLASS MF5700 Series Basic Guide - Page 68
document being scanned stops in the ADF. Press [Set] to make the document come out automatically. If the document does not come out, it may be jammed in the ADF. Follow the procedure in "Removing Jammed Paper from the ADF," on p. 9-7 to clear the paper jam in the ADF. If this happens, reduce the - Canon MF5770 | imageCLASS MF5700 Series Basic Guide - Page 69
[Stop/Reset] to return to the standby display, and reduce the documents to be one sheet. Documents Copy Copying 2 on 1 1 2 1 2 NOTE • This function is not available with an enlarging or reducing function. • This function is available only when the paper size setting is set 10 Special Features - Canon MF5770 | imageCLASS MF5700 Series Basic Guide - Page 70
document being scanned stops in the ADF. Press [Set] to make the document come out automatically. If the document does not come out, it may be jammed in the ADF. Follow the procedure in "Removing Jammed Paper from the ADF," on p. 9-7 to clear the paper jam in the ADF. When Placing a Document on the - Canon MF5770 | imageCLASS MF5700 Series Basic Guide - Page 71
document specified in step 3 will be printed out. 7 Press [Set]. NOTE If the image quality mode is set to other than when making a 2 on 1 copy NOTE The machine can store up to 10 copy jobs in memory. 1 Press [Stop/Reset] twice to return to the standby display while the machine is printing - Canon MF5770 | imageCLASS MF5700 Series Basic Guide - Page 72
being scanned stops in the ADF. 5 Press [Set] to make the document come out automatically. If the document does not come out, it may be jammed in the ADF. Follow the procedure in "Removing Jammed Paper from the ADF," on p. 9-7 to clear the paper jam in the ADF. All of the scanned documents - Canon MF5770 | imageCLASS MF5700 Series Basic Guide - Page 73
Copying 5 5-14 Special Features - Canon MF5770 | imageCLASS MF5700 Series Basic Guide - Page 74
(for MF5730/MF5750 users), Set-Up Instructions for Networking and Printing (for MF5770 users) or Chapter 1, "Introduction" in the Software Guide. Check if the scanner driver is installed on your computer by following this procedure. 1 Open the [Scanners and Cameras] folder (Windows 98/Me/2000: the - Canon MF5770 | imageCLASS MF5700 Series Basic Guide - Page 75
to your computer: • Using a TWAIN- or WIA- (Windows XP) compliant Windows application • Using [SCAN] on the operation panel of the platen glass or load it in the ADF. For details on how to place documents, see "Setting Up Documents," on p. 3-3. Scanning 2 Press [SCAN] ➞ [Start] on the machine. If - Canon MF5770 | imageCLASS MF5700 Series Basic Guide - Page 76
More Information For detailed information on all scanning features, see Chapter 3, "Scanning," in the Software Guide. 6 Scanning More Information 6-3 - Canon MF5770 | imageCLASS MF5700 Series Basic Guide - Page 77
6 Scanning 6-4 More Information - Canon MF5770 | imageCLASS MF5700 Series Basic Guide - Page 78
machine, and to confirm or delete them as needed. Checking the Status of the Jobs Stored in the Machine Use STATUS - REPORT STATUS - COPY STATUS * Only for the MF5750/MF5770 models. NOTE [Status Monitor] is disabled in the Scan mode. Checking the Status of the Jobs Stored in the Machine 7-1 - Canon MF5770 | imageCLASS MF5700 Series Basic Guide - Page 79
➞ press [Set]. NOTE • If there is no job, is displayed. • If there is only one fax job, go to step 4. to return to the standby display. NOTE For detailed information on all fax features, see the Facsimile Guide. 7-2 Checking the Status of the Jobs - Canon MF5770 | imageCLASS MF5700 Series Basic Guide - Page 80
is displayed. • If there is only one copy job, go to step 4. 3 Press [((-)] or [)(+)] to confirm the job number, and the quantity of copies. Job number 0001 12:00 2 1 Number Quanyity of pages of copies per copy 4 If you want to delete the copy job, press [Set]. Checking the Status of the Jobs - Canon MF5770 | imageCLASS MF5700 Series Basic Guide - Page 81
to the standby display. Confirming and Deleting a Print Job 1 Press [Status Monitor]. 2 Press [((-)] or [)(+)] to select ➞ press [Set]. NOTE • If there is no job, is displayed. • If there is only one print job, go to step - Canon MF5770 | imageCLASS MF5700 Series Basic Guide - Page 82
report job, press [Set]. 5 If you decide to delete the job, press [((-)] for . NOTE To cancel deleting the job, press [)(+)] for . Once the job is deleted, the job cannot be restored. 7 6 Press [Stop/Reset] to return to the standby display. Status Monitor Checking the Status of the - Canon MF5770 | imageCLASS MF5700 Series Basic Guide - Page 83
7 Status Monitor 7-6 Checking the Status of the Jobs Stored in the Machine - Canon MF5770 | imageCLASS MF5700 Series Basic Guide - Page 84
the machine, replace the toner cartridge, and repack and power cord before cleaning the machine. • For the MF5750/MF5770 models, print any received faxes stored in the memory before only for about 3 minutes. • Do not use tissue paper, paper towels, or similar materials for cleaning; they can stick to - Canon MF5770 | imageCLASS MF5700 Series Basic Guide - Page 85
to wipe the read area clean. Take particular care to clean at the locations where the black lines are appearing on copies. If you have trouble getting the glass clean, wipe with a cloth moistened with water or a mild neutral detergent, and then wipe the glass dry with another cloth. 8 Paste, ink - Canon MF5770 | imageCLASS MF5700 Series Basic Guide - Page 86
, or correction fluid on the document is still wet. This is what causes black lines on copies. Whenever you load a document in the ADF, always check to make sure that any paste, ink, or correction fluid that is on the document is completely dry. • When cleaning the read area of the - Canon MF5770 | imageCLASS MF5700 Series Basic Guide - Page 87
to Replace the Cartridge The cartridge is a consumable item and should be replaced when the toner runs out. If white streaks or light bands appear on the printouts, the toner is running low. - Paper feeding direction - NOTE Before handling the cartridge, see the precautions in "Handling and Storing - Canon MF5770 | imageCLASS MF5700 Series Basic Guide - Page 88
cartridge with a new one. For details on how toner is 5% of the total area of an A4-size sheet. • The actual number of printouts that can be made per cartridge depends in part on 8 the exposure setting size documents or documents with less dot coverage, you may be able to print more sheets of paper - Canon MF5770 | imageCLASS MF5700 Series Basic Guide - Page 89
jammed paper to come into contact with your hands or clothing. If they become dirty, wash them 8 immediately with cold water. Washing with warm water will set the toner, and make it impossible to remove the toner stains. • Always hold the cartridge as shown so that the side with the instructions - Canon MF5770 | imageCLASS MF5700 Series Basic Guide - Page 90
Humidity: 35% to 85% • Be sure to remove the toner cartridge from the machine when disposing of the machine. • protective bag so that the side with the written instructions faces up. Then, place the cartridge into its location. Recycling Used Cartridges Canon has instituted a worldwide recycling - Canon MF5770 | imageCLASS MF5700 Series Basic Guide - Page 91
an array of resources. Maintenance Becoming a part of this worthwhile program is easy. When your cartridge is of no further use, simply follow the instructions detailed for U.S. or Canadian residents. We appreciate your support of The Canon Cartridge Recycling Program. 8 Working together we - Canon MF5770 | imageCLASS MF5700 Series Basic Guide - Page 92
We encourage you to use this option as a more efficient way to ship cartridges. • Place as many cartridges as possible into one box. 8 Carefully seal the box with tape; or • Call 1-800-OK-Canon to receive your free eight cartridge collection box. Maintenance When to Replace the Cartridge 8-9 - Canon MF5770 | imageCLASS MF5700 Series Basic Guide - Page 93
, please call 1-800-OK-Canon for special shipping information. Maintenance Please Note: Do not send defective cartridges for replacement. 8 Defective cartridges under warranty should be exchanged by an authorized dealer or service facility as provided in the warranty. 8-10 When to Replace the - Canon MF5770 | imageCLASS MF5700 Series Basic Guide - Page 94
returning label. For Alaska and Hawaii Canon set up alternative mail service with the U.S. Postal Service. Please call 1-800-OK-Canon to receive U.S. Postal Service merchandise returning label. ■ Option A: UPS Pick-up • Give the shipment to your UPS driver when you receive your next regular - Canon MF5770 | imageCLASS MF5700 Series Basic Guide - Page 95
in the box of your new cartridge. Seal the box. • Apply the Canon Canada Inc./Canada Post label provided in this brochure. Canon's labels are specially marked so that Canon pays the postage. • Deposit your empty cartridge in any full size street mailbox or take it to your local Canada Post outlet or - Canon MF5770 | imageCLASS MF5700 Series Basic Guide - Page 96
Conservancy of Canada. This donation is utilized in Canada. For further information about The Clean Earth Campaign in Canada, please call or write to Canon. 1-800-667-2666 Canon Canada Inc. Corporate Customer Relations 6390 Dixie Road Mississauga, ON L5T 1P7 8 When to Replace the Cartridge 8-13 - Canon MF5770 | imageCLASS MF5700 Series Basic Guide - Page 97
Maintenance Replacing the Cartridge This section describes how to remove the used cartridge and replace it with a new one. Before replacing the cartridge, be sure to read the section "When to Replace the Cartridge," on p. 8-4. NOTE Before handling the cartridge, see the precautions in " - Canon MF5770 | imageCLASS MF5700 Series Basic Guide - Page 98
4 Rock the cartridge 5 or 6 times to distribute the toner evenly. 5 Place the cartridge on a flat and stable surface. Fold the tab (A) on the sealing tape (B) as shown below, and pull it out straight while supporting the cartridge. Make sure that the tab itself is detached from the cartridge. B 8 - Canon MF5770 | imageCLASS MF5700 Series Basic Guide - Page 99
the projections (A) on both sides of the cartridge to the guides (B) in the machine, then gently slide the cartridge into the B C 8 7 Close the front cover. NOTE If the LCD displays , reset the machine by opening the front cover and then closing it. 8-16 Replacing the - Canon MF5770 | imageCLASS MF5700 Series Basic Guide - Page 100
be damaged or the quality of your printouts may be adversely affected. 1 Unplug the power cord. 2 If the machine is connected to a telephone or your computer, remove the telephone line or printer cable. 3 Open the front cover. 4 Grip the end of the cartridge, and remove it from the machine. In - Canon MF5770 | imageCLASS MF5700 Series Basic Guide - Page 101
Maintenance Carrying the Machine by the Sides Pull out the cassette completely, and remove the extension cover. Push in the output tray, and close the document feeder tray. Grip the handles on both sides of the machine and lift it carefully, as shown in the illustration above. CAUTION When carrying - Canon MF5770 | imageCLASS MF5700 Series Basic Guide - Page 102
shock. NOTE When removing jammed paper from inside the machine, take care not to allow the toner on the jammed paper to come into contact with your hands or clothing. If they become dirty, wash them immediately with cold water. Washing with warm water will set the toner, and make it impossible - Canon MF5770 | imageCLASS MF5700 Series Basic Guide - Page 103
items might be damaged if they come into contact with the parts inside the machine. • To avoid possible damage to the machine, do not touch the pins (A) near the left end of the transfer roller (B). A B • When removing the jammed paper, do not touch the transfer roller as its surface is very - Canon MF5770 | imageCLASS MF5700 Series Basic Guide - Page 104
with a thick cloth to prevent exposure to light. 3 Open the face up cover (A) and push down the green paper release levers (B) on both sides of the face up paper output. B B A 4 Hold both sides of the jammed paper and carefully move it inward, then gently pull it out. 9 5 Roll the leading end of the - Canon MF5770 | imageCLASS MF5700 Series Basic Guide - Page 105
has not entered the imaging area, pull the paper forwards and roll it inwards. IMPORTANT • Do not pull the jammed paper forward from the cassette. It may cause a machine malfunction. • Do not pull the jammed paper upward; the toner on the paper will stain the machine and cause a permanent reduction - Canon MF5770 | imageCLASS MF5700 Series Basic Guide - Page 106
from the machine. Troubleshooting 8 Carefully pull the jammed paper straight out through the rollers. If the jammed paper is badly folded, similar to the folds of an accordion, ease the jammed paper loose and then pull it out of the machine. 9 9 Close the front cover. 10 Pull out the cassette - Canon MF5770 | imageCLASS MF5700 Series Basic Guide - Page 107
release levers back to their original position. If the levers are left pushed down, the paper jam error will not be resolved. • Never push down the paper release levers while printing. This could result in damage to the fixing assembly. 13 Insert the cartridge back into the machine, then close - Canon MF5770 | imageCLASS MF5700 Series Basic Guide - Page 108
LCD displays , or . NOTE Do not open the platen glass cover until the jammed paper is removed. Doing so will result in damaging the document and the paper. 1 Open the ADF and gently remove the jammed paper from the ADF. 9 2 Widen the document guides until they stop - Canon MF5770 | imageCLASS MF5700 Series Basic Guide - Page 109
3 Open the ADF and gently remove the jammed paper from the document output tray. NOTE After removing jammed paper, even edges of the document before loading it in the ADF again. 9 Troubleshooting 9-8 Clearing Jams - Canon MF5770 | imageCLASS MF5700 Series Basic Guide - Page 110
surface to even the stack. CHECK PAPER SIZE Cause The size of the paper in the cassette or multi-purpose feeder is different from that of the paper specified in of the Menu. Remedy Load the correct paper size or change in of the Menu. (See"Loading - Canon MF5770 | imageCLASS MF5700 Series Basic Guide - Page 111
CHECK PRINTER Cause A problem has occurred in the machine. Remedy Reset the machine by opening the front cover and then closing it. If the message persists, unplug the machine from the power supply and contact Canon Authorized Service Facilities or the Canon Customer Care Center. CHECK PRINTER - Canon MF5770 | imageCLASS MF5700 Series Basic Guide - Page 112
Check if the job that immediately follows the job being processed has been deleted on the spooled job list. Disconnect the USB cable and connect it again, or unplug the machine and plug it in again to clear the error message. REC. PAPER JAM Cause There is a paper jam. Remedy Clear the paper jam - Canon MF5770 | imageCLASS MF5700 Series Basic Guide - Page 113
cassette is not tilted or inserted at an angle. Troubleshooting Paper feeds skewed. (Printing is skewed.) Q Is paper loaded correctly? 9 A Make sure the paper stack in the cassette or multi-purpose feeder is loaded properly, and that the paper guides are adjusted correctly. (See "Loading - Canon MF5770 | imageCLASS MF5700 Series Basic Guide - Page 114
. They will cause a paper jam. Please use transparencies recommended by Canon. Paper feeds curled. 9 Q Is the proper paper loaded? A Check if the proper paper is loaded in the cassette or multi-purpose feeder. (See Chapter 2, "Paper Handling.") Troubleshooting Paper Feeding Problems 9-13 - Canon MF5770 | imageCLASS MF5700 Series Basic Guide - Page 115
feeder. (See Chapter 2, "Paper Handling.") A Check if the appropriate paper type is selected in in of the Menu. (See "Specifying the Paper Type," on p. 2-11.) Repeated paper jams occur. Q Is the proper paper loaded? A Check that the size, thickness and type of - Canon MF5770 | imageCLASS MF5700 Series Basic Guide - Page 116
Troubleshooting Copying Problems The machine will not make a copy. Q Is the cartridge installed correctly? A Make sure the cartridge is installed correctly. (See the Set-Up Instructions (for MF5730/MF5750 users) or Set-Up Instructions for the Machine (for MF5770 users).) Q Is the sealing - Canon MF5770 | imageCLASS MF5700 Series Basic Guide - Page 117
correctly? A Make sure the cartridge is installed correctly. (See the Set-Up Instructions (for MF5730/MF5750 users) or Set-Up Instructions for the Machine (for MF5770 users).) Q Is any toner left in a cartridge? Troubleshooting A See "When to Replace the Cartridge," on p. 8-4, and replace - Canon MF5770 | imageCLASS MF5700 Series Basic Guide - Page 118
the 2 on 1 copy function. The edges of copies are dirty when you make copies. Q Is the paper size set correctly? A Specify the appropriate paper size in in of the Menu. (See "Specifying the Paper Size," on p. 2-10.) Troubleshooting Print Quality Problems 9-17 - Canon MF5770 | imageCLASS MF5700 Series Basic Guide - Page 119
the problem is fixed, the Alarm indicator will turn off, and the LCD will return to the standby mode. If the Alarm indicator remains flash, unplug the machine, and contact Canon Authorized Service Facilities or the Canon Customer Care Center. Troubleshooting Printout does not match paper size - Canon MF5770 | imageCLASS MF5700 Series Basic Guide - Page 120
3-4.) A Make sure the ADF is closed. Q Is the USB cable connected securely? A Check that the USB cable is connected securely to the machine and your computer. Disconnect the USB cable, and approximately 1/8" (3 mm) from the edge of the platen glass. Troubleshooting Scanning Problems 9-19 - Canon MF5770 | imageCLASS MF5700 Series Basic Guide - Page 121
Set-Up Instructions (for MF5730/MF5750 users) or Set-Up Instructions for the Machine (for MF5770 users).) Nothing appears in the LCD. Q Is the power cord plugged in securely? Troubleshooting A Check machine, and contact Canon Authorized Service Facilities or the Canon Customer Care Center. - Canon MF5770 | imageCLASS MF5700 Series Basic Guide - Page 122
, contact Canon Authorized Service Facilities or the Canon Customer Care Center at 1-800-828-4040 between the hours of 8:00 A.M. to 8:00 P.M. EST Monday through Friday and 10:00 A.M. to 8:00 P.M. on Saturday. For interactive troubleshooting, e-mail technical support, the latest driver downloads and - Canon MF5770 | imageCLASS MF5700 Series Basic Guide - Page 123
Troubleshooting 9 9-22 If You Cannot Solve the Problem - Canon MF5770 | imageCLASS MF5700 Series Basic Guide - Page 124
return automatically to the settings you set previously. Change to the previous settings again if necessary. To specify or register the settings of the fax function, see Chapter 8, "Machine Settings," in the Facsimile Guide. (Only for the MF5750/MF5770 models.) Accessing the Machine Settings 10-1 - Canon MF5770 | imageCLASS MF5700 Series Basic Guide - Page 125
>, see Chapter 8, "Machine Settings," in the Facsimile Guide. (Only for the MF5750/ MF5770 models.) PAPER SETTINGS Name 1. CASSETTE 1. PAPER SIZE 2. PAPER TYPE Machine Settings 2. MP TRAY 1. PAPER SIZE 10 2. PAPER TYPE Descriptions Selects the paper size for the paper cassette. LTR, LGL, A4 - Canon MF5770 | imageCLASS MF5700 Series Basic Guide - Page 126
cord is plugged in, or after the auto clear function activates, the standby display of the selected mode appears. The Copy mode is selected as to 3 (1) 10 The reception end tone does not sound. The reception end tone sounds. 1 to 3 (1) Sets the printing end tone settings. The printing end - Canon MF5770 | imageCLASS MF5700 Series Basic Guide - Page 127
CALLING VOLUME 8. LINE MONITOR VOL. 3. TONER SAVER MODE OFF ON 4. DISPLAY LANGUAGE * Only for the MF5750/MF5770 models. Descriptions A scanning end tone line monitor volume. 0 to 3 (1) Sets the toner saver mode. The toner saver mode is turned off. The toner saver mode is turned on. Shows the - Canon MF5770 | imageCLASS MF5700 Series Basic Guide - Page 128
copy quantity. 1 to 99 (1) Sets the auto sort function. The auto sort function is turned off. The auto sort function is turned on. The paper size group can be selected. If the paper size group is changed, the preset copy ratios will also change. 10 Preset copy ratios: 50%, 64%, 78%, 100%, 129 - Canon MF5770 | imageCLASS MF5700 Series Basic Guide - Page 129
Descriptions Sets the length of time before the machine returns an error when no data is received from the computer. The error time out is on. Sets the time out period. 5SEC to 300SEC (15SEC) The error time out is off. (The factory default setting is in bold face.) Machine Settings 10 10-6 Menu - Canon MF5770 | imageCLASS MF5700 Series Basic Guide - Page 130
END DATE/TIME OFF * Only for the MF5750/MF5770 models. Descriptions Sets the current date and time. year, month, day Sets the auto clear function. If the machine remains idle for a set amount of time, the display returns to the standby mode. Sets the time until the machine returns to the standby - Canon MF5770 | imageCLASS MF5700 Series Basic Guide - Page 131
Machine Settings 10 10-8 Menu Descriptions - Canon MF5770 | imageCLASS MF5700 Series Basic Guide - Page 132
Indirect Electrostatic Transfer System Toner Projection System Canon's RAPID Fusing System™ Approx. 600 dpi x 600 dpi 256 Platen glass: Up to LTR size Sheets, books, and three-dimensional objects (up to 4.4 lb (2 kg)) ADF: Up to LGL size Cassette Feeding: 17 lb to 34 lb (64 g/m2 to 128 g/m2 - Canon MF5770 | imageCLASS MF5700 Series Basic Guide - Page 133
(148 mm × 105 mm) Non-image Area Paper: Max. 13/64" (5 mm) at each edge Envelope: Max. 13/64" (5 mm) at each edge Warm-up Time Approx. 240 sec. * (temperature: 68°F (20°C), humidity: 65%; from when the machine is plugged in until the standby display appears) * Warm-up time may differ depending - Canon MF5770 | imageCLASS MF5700 Series Basic Guide - Page 134
, we recommended using paper and transparencies recommended by Canon. Some types of paper available at office supply stores may not be suitable for this machine. If you have any questions about paper and transparencies, consult Canon Authorized Service Facilities or the Canon Customer Care Center - Canon MF5770 | imageCLASS MF5700 Series Basic Guide - Page 135
11 CHECK PAPER SIZE message, 9-9 CHECK PRINTER COVER message, 9-10 CHECK PRINTER message, 9-10 Cleaning ADF Area, 8-2 machine's exterior, 8-1 periodic, 8-1 scanning area, 8-2 Clear key, 1-6 Clearing Jams, 9-1 Collate copy, 5-8 11-4 Index Collate / 2on1 key, 1-7 COMMON SETTINGS settings, 10-3 COPY - Canon MF5770 | imageCLASS MF5700 Series Basic Guide - Page 136
Front cover, 1-3 G General Problems, 9-20 I Image Quality adjusting, 5-6 key, 1-7 In Use / Memory indicator, 1-6 INSTALL CARTRIDGE, 9-10 J Jammed paper removing from the ADF, 9-7 K KEYPAD VOLUME settings, 10-3 L LCD, 1-6 LCD Messages, 9-9 LINE MONITOR VOL. setting, 10-4 Loading an envelope in the - Canon MF5770 | imageCLASS MF5700 Series Basic Guide - Page 137
feeding problems, 9-12 jam, 2-1, 9-1, 9-7 loading, 2-3 orientation, 2-12 output area, 2-13 printing area, 2-2 requirements, 2-1 type, 2-11, 2-13 Paper output area face down, 2-14 face up, 2-15 PAPER SETTINGS settings, 10-2 PAPER SIZE GROUP setting, 10-5 PAPER SIZE settings, 10-2 PAPER - Canon MF5770 | imageCLASS MF5700 Series Basic Guide - Page 138
, 9-11 W Weight document, 3-1 machine, 11-2 paper, 2-2 Z Zoom, 5-5 ZOOM RATIO setting, 10-5 T Telephone line jack, 1-3 TONER SAVER setting, 10-4 Transporting, 8-17 Tray document feeder, 1-3 document output, 1-3 output, 1-3 Troubleshooting, 9-1 TX DONE TONE setting, 10-3 Appendix U 11 USB port - Canon MF5770 | imageCLASS MF5700 Series Basic Guide - Page 139
3-chome, Ohta-ku, Tokyo 146-8501, Japan CANON U.S.A., INC. One Canon Plaza, Lake Success, NY 11042, U.S.A. CANON CANADA INC. 6390 Dixie Road Mississauga, Ontario L5T 1P7, Canada CANON EUROPA N.V. Bovenkerkerweg 59-61 1185 XB Amstelveen, The Netherlands CANON FRANCE S.A.S. 17, quai du Président Paul
-
 1
1 -
 2
2 -
 3
3 -
 4
4 -
 5
5 -
 6
6 -
 7
7 -
8
-
9
-
10
-
11
-
12
-
13
-
14
-
15
-
16
-
17
-
18
-
19
-
20
-
21
-
22
-
23
-
24
-
25
-
26
-
27
-
28
-
29
-
30
-
31
-
32
-
33
-
34
-
35
-
36
-
37
-
38
-
39
-
40
-
41
-
42
-
43
-
44
-
45
-
46
-
47
-
48
-
49
-
50
-
51
-
52
-
53
-
54
-
55
-
56
-
57
-
58
-
59
-
60
-
61
-
62
-
63
-
64
-
65
-
66
-
67
-
68
-
69
-
70
-
71
-
72
-
73
-
74
-
75
-
76
-
77
-
78
-
79
-
80
-
81
-
82
-
83
-
84
-
85
-
86
-
87
-
88
-
89
-
90
-
91
-
92
-
93
-
94
-
95
-
96
-
97
-
98
-
99
-
100
-
101
-
102
-
103
-
104
-
105
-
106
-
107
-
108
-
109
-
110
-
111
-
112
-
113
-
114
-
115
-
116
-
117
-
118
-
119
-
120
-
121
-
122
-
123
-
124
-
125
-
126
-
127
-
128
-
129
-
130
-
131
-
132
-
133
-
134
-
135
-
136
-
137
-
138
-
139
 |
 |
Basic Guide
Series