Canon MP360 MultiPASS MP370/360 Software Guide
Canon MP360 - MultiPASS Color Inkjet Manual
 |
UPC - 013803037128
View all Canon MP360 manuals
Add to My Manuals
Save this manual to your list of manuals |
Canon MP360 manual content summary:
- Canon MP360 | MultiPASS MP370/360 Software Guide - Page 1
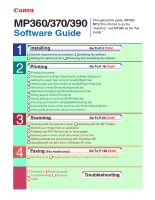
370/390 Software Guide Throughout this guide, MP360/ MP370 is referred to as the "machine," and MP390 as the "fax model." 1 2 3 4 Installing Go To P.3 Click! System requirements and software Installing the software Setting the default printer Removing and reinstalling the software Printing Go - Canon MP360 | MultiPASS MP370/360 Software Guide - Page 2
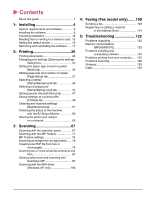
WIA driver (Windows XP only 106 4: Faxing (Fax model only)....... 109 Sending a fax 109 Registering or editing a recipient in the Address Book 114 5: Troubleshooting 122 Problems outputting 122 Memory card problems (MP390/MP370 123 Problems installing and uninstalling software 124 Problems - Canon MP360 | MultiPASS MP370/360 Software Guide - Page 3
stands for Windows 2000 and Windows XP. Copyright © 2003 Canon Inc. All rights reserved. This guide may not be reproduced in any form, in whole or part, without the prior written consent of Canon Inc. Trademark acknowledgments Adobe Photoshop is a registered trademark, and Adobe Photo Deluxe is - Canon MP360 | MultiPASS MP370/360 Software Guide - Page 4
®Millennium Edition operating system: Microsoft®Windows®2000 Professional operating system: Microsoft®Windows®XP Professional/Home Edition operating system: Microsoft®Word: Windows 98 Windows Me Windows 2000 Windows XP Word The information described in this guide is subject to change without prior - Canon MP360 | MultiPASS MP370/360 Software Guide - Page 5
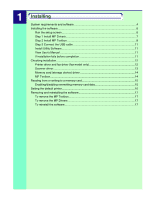
screen 6 Step 1 Install MP Drivers 7 Step 2 Install MP Toolbox 8 Step 3 Connect the USB cable 11 Install Utility Software 11 View User's Manual 11 If installation fails before completion 11 Checking installation...12 Printer driver and fax driver (fax model only 12 Scanner driver...13 Memory - Canon MP360 | MultiPASS MP370/360 Software Guide - Page 6
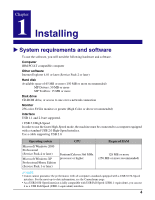
a computer equipped with a standard USB 2.0 High-Speed interface. Use a cable supporting USB 2.0. Operating system Microsoft Windows 2000 Professional (Service Pack 4 or later) Microsoft Windows XP Professional/Home Edition (Service Pack 1 or later) CPU Pentium/Celeron 566 MHz processor or higher - Canon MP360 | MultiPASS MP370/360 Software Guide - Page 7
made computers, or store-brand computers. • When installing the MP Drivers in Windows 2000, you must have Service Pack 4 or later version installed. • When installing the MP Drivers in Windows XP, you must have Service Pack 1 or later version installed. • USB Full-Speed (USB 1.1 equivalent) In order - Canon MP360 | MultiPASS MP370/360 Software Guide - Page 8
on the network drive. • If you have an older version of the MultiPASS Suite software installed on your computer, delete this version before installing the new version. • When installing the software in Windows 2000/XP, you must log on as Administrator or have Administrator privileges. NOTE If - Canon MP360 | MultiPASS MP370/360 Software Guide - Page 9
1 In the [Setup] screen, click [Install MP Drivers]. 2 Follow the on-screen instructions to install the software. z When restarting your computer is necessary in the [InstallShield Wizard Complete] screen. Leave the setting selected on [Yes, I want to restart my computer now.] (With - Canon MP360 | MultiPASS MP370/360 Software Guide - Page 10
then double-click [Setup (Setup.exe)]. If you are installing from a copy saved on a network or hard disk, double-click [Setup (Setup.exe)] in the copy. IMPORTANT If the screen above is not displayed, installation of the MP Drivers is not complete. J "Problems installing and uninstalling software" 8 - Canon MP360 | MultiPASS MP370/360 Software Guide - Page 11
1 In the [Setup] screen, click [Install MP Toolbox]. 2 Click [Next]. 3 Click [Continue]. 4 Follow the on-screen instructions to install the software. 5 When the [Choose Destination Location] dialog box appears, click [Next]. 9 - Canon MP360 | MultiPASS MP370/360 Software Guide - Page 12
6 Click [Next]. 7 Click [Finish]. 10 - Canon MP360 | MultiPASS MP370/360 Software Guide - Page 13
Step 3 Connect the USB cable IMPORTANT If the screen above is not displayed, installation of the MP Drivers or MP Toolbox is not complete. J "Problems installing and uninstalling software" 1 Check that the machine is turned on. 2 Connect the USB cable to the machine and computer USB ports. When you - Canon MP360 | MultiPASS MP370/360 Software Guide - Page 14
the software" Printer driver and fax driver (fax model only) On the Windows taskbar, click [Start], point to [Settings], then click [Printers] (Windows XP: On the Start menu, click [Printers and Faxes]). In the open window, if the printer and fax icons for the machine is present, installation has - Canon MP360 | MultiPASS MP370/360 Software Guide - Page 15
[Control Panel]). In the open window, double-click [Scanners and Cameras](Windows XP: Click [Printers and Other Hardware], then click [Scanners and Cameras]). If the scanner icon for the machine is present, installation has been successful. Example: Windows XP window Example: Windows 2000 window 13 - Canon MP360 | MultiPASS MP370/360 Software Guide - Page 16
card icon for the machine is displayed as the [Removable Disk], installation has been successful. Windows XP window Windows 98/Me/2000 window MP Toolbox If the [Canon MP Toolbox 4.1] icon is displayed on the Windows desktop, installation has been successful. [Canon MP Toolbox 4.1] icon 14 - Canon MP360 | MultiPASS MP370/360 Software Guide - Page 17
IMPORTANT Windows 2000: If the setting for the machine is not recognized on your computer, a delayed write failed error may /Set]. Press [Stop/Reset] to switch to standby mode. 7 Press [COPY] or [SCAN] to select a mode. You cannot overwrite in PHOTO mode. 8 Insert a memory card into - Canon MP360 | MultiPASS MP370/360 Software Guide - Page 18
any other settings. In the [Print] dialog box, you will no longer need to select the machine. You can change the default printer setting as follows. IMPORTANT Windows 2000: Just installing the printer driver may not apply the [Set as Default Printer] setting to that printer. Be sure to follow the - Canon MP360 | MultiPASS MP370/360 Software Guide - Page 19
or MP Drivers any longer, or if they are not installed correctly, remove them. When removing the software from a Windows 2000/XP Windows taskbar, click [Start], point to [(All) Programs], [Canon], and [MP Toolbox 4.1] in order. Then click [Uninstall Toolbox]. 3 Follow the on-screen instructions - Canon MP360 | MultiPASS MP370/360 Software Guide - Page 20
to fit the paper size (Fit-to-page printing 29 Scaled printing ...29 Printing multiple pages on one sheet (Page layout printing 30 Poster printing ...31 Duplex printing ...34 Duplex printing and binding a document into a booklet (Booklet printing 32 Setting background printing (Windows 98/Me only - Canon MP360 | MultiPASS MP370/360 Software Guide - Page 21
print head 54 Printing the nozzle check pattern 56 Resetting the ink counter 57 Setting for slow-drying paper (Custom Settings 58 Controlling operating noise (Quiet Mode 59 Checking the status of the machine with the BJ Status Monitor 60 To start the BJ Status Monitor 60 To cancel printing - Canon MP360 | MultiPASS MP370/360 Software Guide - Page 22
connect the USB cable. 1 Load paper in the machine. 2 Open the application from which you will print the document, and select the command to print. (This in most cases will be [Print] in the File menu.) To print with the current printer driver settings, click the print button on the Toolbar. Example - Canon MP360 | MultiPASS MP370/360 Software Guide - Page 23
Printer] or [Name], select the machine, then click [Preferences] or [Properties]. 4 On the [Main] tab, select [Preview before printing]. 5 Click [OK]. 6 In the [Print] dialog box, click [Print] or [OK]. The preview will be displayed. Example: [BJ Preview] dialog box 7 To print, click [Start Printing - Canon MP360 | MultiPASS MP370/360 Software Guide - Page 24
-screen instructions. NOTE You can configure the settings on the [Main] tab easier. Just answering some questions enables you to change settings such as [Media Type] properly. z Manually In the [Printer Properties] dialog box, change settings on each tab. J "Setting the paper type and print quality - Canon MP360 | MultiPASS MP370/360 Software Guide - Page 25
Preferences] dialog box, on the [Main] tab, click [Print Advisor] and follow the on-screen instructions. z Manually In the [Printer Properties] or [Printing Preferences] dialog box, change settings on each tab. J "Setting the paper type and print quality/[Main] tab" J "Setting page size and number - Canon MP360 | MultiPASS MP370/360 Software Guide - Page 26
Preferences] dialog box, on the [Main] tab, you can change settings such as print media type, paper source, and print quality. To open the [Printer Properties] or [Printing Preferences] dialog box J "Changing print settings (Opening the settings dialog box)" [Main] tab [Media Type] Select the - Canon MP360 | MultiPASS MP370/360 Software Guide - Page 27
[Auto] For automatic color correction by the printer driver. z [Manual] For color adjustment with detailed specifications. J "Setting a custom color adjustment" [Grayscale Printing] Select to print a color document in black and white. [Preview before printing] Select if you want to display a preview - Canon MP360 | MultiPASS MP370/360 Software Guide - Page 28
] dialog box, on the [Main] tab. To open the [Printer Properties] or [Printing Preferences] dialog box J "Changing print settings (Opening the settings dialog box)" 1 In [Color Adjustment], select [Manual], then click [Set]. 2 In the [Manual Color Adjustment] dialog box, move the sliders to the left - Canon MP360 | MultiPASS MP370/360 Software Guide - Page 29
size is not supported by your printer. [Fit-to-Page Printing] will be set in [Printing Type]." Click [OK] to automatically select fit-to-page printing. J"Enlarging/reducing to fit the paper size (Fit-to-page printing)" [Orientation] Select print orientation. Select [Portrait] to print the contents - Canon MP360 | MultiPASS MP370/360 Software Guide - Page 30
] Select to make your data larger than the paper size and print over the entire surface of the paper without any white borders. If you select borderless printing, you cannot select the [Printer Paper Size], [Printing Type], or [Duplex Printing] setting on the [Page Setup] tab, or settings on the - Canon MP360 | MultiPASS MP370/360 Software Guide - Page 31
during spooling] settings. J "Setting background printing (Windows 98/Me only)" Printing on a custom paper size On the [Page Setup] tab, in [Page Size] or [Printer Paper Size], you can set a custom paper size. In the [Printer Properties] or [Printing Preferences] dialog box, on the [Page Setup] tab - Canon MP360 | MultiPASS MP370/360 Software Guide - Page 32
background printing (Windows 98/Me only)" 1 In [Printing Type], select [Page Layout Printing]. 2 In [Page Size], select the paper size specified in the application. 3 In [Orientation], select the same orientation as specified in the application. 4 In [Printer Paper Size], select the paper size - Canon MP360 | MultiPASS MP370/360 Software Guide - Page 33
In [Printing Type], select [Poster Printing]. 2 In [Page Size], select the paper size specified in the application. 3 In [Orientation], select the same orientation as specified in the application. 4 In [Printer Paper Size], select the paper size loaded in the machine. 5 Click [Specify]. Windows XP - Canon MP360 | MultiPASS MP370/360 Software Guide - Page 34
in [Printer Paper Size] and [Image divisions], and regardless of the document size. 7 To print cutting lines on the paper, select [Print "Cut/Paste" lines in margins]. To print the words "cut" and "paste," select [Print "Cut/Paste" in margins]. Windows 2000/XP: Specify the print range. To print all - Canon MP360 | MultiPASS MP370/360 Software Guide - Page 35
the entire surface of the paper without leaving any margins, select [Borderless Printing]. The document is enlarged to fill the entire paper before being printed. Paper you can use Photo Paper Pro, Photo Paper Plus Glossy, Matte Photo Paper, Glossy Photo Paper. Document settings in the application - Canon MP360 | MultiPASS MP370/360 Software Guide - Page 36
printing is not active. J "Setting background printing (Windows 98/Me only)" 1 Load paper in the machine. 2 Open the [Printer Properties] or [Printing Preferences] dialog box. J "Changing print printing on one side of the paper is completed. 8 Follow the on-screen instructions to turn the paper - Canon MP360 | MultiPASS MP370/360 Software Guide - Page 37
Follow the on-screen instructions for turning the paper over. 9 Click [OK]. Printing on the reverse sides of the paper will begin. Setting background printing (Windows 98/Me only) You can set the machine to perform background printing. In the [Printer Properties] or [Printing Preferences] dialog box - Canon MP360 | MultiPASS MP370/360 Software Guide - Page 38
printing. J "Borderless printing" • Windows 98/Me: You cannot use this setting if background printing is not active. J "Setting background printing (Windows page only]. 4 In the [Printer Properties] or [Printing Preferences] dialog box, click [OK]. The software includes some pre-defined stamps but - Canon MP360 | MultiPASS MP370/360 Software Guide - Page 39
the steps below. To open the [Printer Properties] or [Printing Preferences] dialog box J "Changing print settings (Opening the settings dialog box)" . z Windows 2000/XP: J "Specifying the text and color of a text stamp (Windows 2000/XP)" J "Specifying an image for a graphic stamp (Windows 2000/XP - Canon MP360 | MultiPASS MP370/360 Software Guide - Page 40
Specifying the text and color of a text stamp (Windows 2000/XP) In the [Stamp Settings] dialog box, follow the steps below. To open the [Stamp Settings] dialog box J "Creating or changing a stamp" 1 On the [ - Canon MP360 | MultiPASS MP370/360 Software Guide - Page 41
color. Click [OK]. 5 In the [Stamp Settings] dialog box, click [OK]. 6 If asked to confirm, click [OK]. Specifying an image for a graphic stamp (Windows 2000/XP) In the [Stamp Settings] dialog box, follow the steps below. To open the [Stamp Settings] dialog box J "Creating or changing a stamp" 1 On - Canon MP360 | MultiPASS MP370/360 Software Guide - Page 42
area] to make the white areas in the image transparent. 6 Click [OK]. 7 If asked to confirm, click [OK]. Specifying the text and color of a stamp (Windows 98/Me) In the [Stamp Settings] dialog box, follow the steps below. To open the [Stamp Settings] dialog box J "Creating or changing a stamp" 1 On - Canon MP360 | MultiPASS MP370/360 Software Guide - Page 43
3 On the [Color] tab, select a color. z To select a color in [Palette] Click the color you want. z To define a custom stamp color Click a color in the palette closest to the color you want, then select [Detailed color adjustment]. Move the slider for each of the colors listed until you obtain the - Canon MP360 | MultiPASS MP370/360 Software Guide - Page 44
], then select or enter the [X-Position] and [Y-Position] coordinates for the position of the stamp. To rotate a text stamp You can rotate a stamp. IMPORTANT Windows 2000/XP: You can only rotate a stamp when [Text] is selected in [Stamp Type] on the [Stamp] tab. In [Orientation], select or enter the - Canon MP360 | MultiPASS MP370/360 Software Guide - Page 45
Saving or deleting a stamp To save a stamp In the [Stamp Settings] dialog box, follow the steps below. To open the [Stamp Settings] dialog box J "Creating or changing a stamp" 1 On the [Save settings] tab, in [Title], enter a name for the stamp. 2 Click [Save] or [Save overwrite]. If you enter a - Canon MP360 | MultiPASS MP370/360 Software Guide - Page 46
the background on the first page of your document only, select [Background first page only]. 3 In the [Printer Properties] or [Printing Preferences] dialog box, click [OK]. The software includes some pre-defined background images but you can customize these if necessary. J "Saving a new image as - Canon MP360 | MultiPASS MP370/360 Software Guide - Page 47
Preferences] dialog box, on the [Stamp/Background] tab, follow the steps below. To open the [Printer Properties] or [Printing Preferences] dialog box J "Changing print settings (Opening the settings dialog box)" 1 On the [Stamp/Background] tab, clear the [Background] setting. 2 Click [Select - Canon MP360 | MultiPASS MP370/360 Software Guide - Page 48
Preferences] dialog box, on the [Stamp/Background] tab, follow the steps below. To open the [Printer Properties] or [Printing Preferences] dialog box J "Changing print settings (Opening the settings dialog box)" 1 Click [Select Background]. 2 On the [Save settings] tab, in [Backgrounds], select - Canon MP360 | MultiPASS MP370/360 Software Guide - Page 49
Setting background printing (Windows 98/Me only)" To open the [Printer Properties] or [Printing Preferences] dialog box J "Changing print settings use this setting with grayscale printing. J "Setting the paper type and print quality/[Main] tab" [Vivid Photo] Select to print an image in vivid color. - Canon MP360 | MultiPASS MP370/360 Software Guide - Page 50
that have been enlarged by your application. This setting is useful when printing low-resolution images from Internet Web pages. [Photo Optimizer PRO] Select to connect images taken with a digital camera or acquired by a scanner. This setting is effective for use with images which have faded, or - Canon MP360 | MultiPASS MP370/360 Software Guide - Page 51
] tabs to their factory predefined settings. To save a print profile In the [Printer Properties] or [Printing Preferences] dialog box, follow the steps below. To open the [Printer Properties] or [Printing Preferences] dialog box J "Changing print settings (Opening the settings dialog box)" 1 On the - Canon MP360 | MultiPASS MP370/360 Software Guide - Page 52
Profiles], click the desired profile. 2 Click [Retrieve from Profiles]. When prompted to confirm, click [OK]. To delete a print profile 1 On the [Profiles] tab, in [Printing Profiles], click the profile you wish to delete. 2 Click [Delete]. When prompted to confirm, click [OK]. To restore the - Canon MP360 | MultiPASS MP370/360 Software Guide - Page 53
cleaning J "Cleaning the print head" For print head alignment J "Aligning the print head" For printing the nozzle check pattern J "Printing the nozzle check pattern" For ink counter reset J "Resetting the ink counter" For custom settings J "Setting for slow-drying paper (Custom Settings)" For quiet - Canon MP360 | MultiPASS MP370/360 Software Guide - Page 54
the print head Cleaning removes blockages in the print head nozzles. Clean the print head if printing is blurred or a particular color is not printing even though there is enough ink. Please note that if you clean the print head too often, the ink will be consumed quickly. In the [Printer Properties - Canon MP360 | MultiPASS MP370/360 Software Guide - Page 55
2 Similarly to [Cleaning], select [All Colors], [Black] or [Color], then click [Execute]. 3 Click [OK]. 4 Click [OK]. 53 - Canon MP360 | MultiPASS MP370/360 Software Guide - Page 56
the print head is being aligned. 1 Load Letter/A4 paper in the machine. 2 On the [Maintenance] tab, click [Print Head Alignment]. 3 Click [OK]. 4 Click [OK]. 5 When printing of the pattern is completed, click [Yes]. If the pattern does not print, check that the ink tanks are securely inserted. 54 - Canon MP360 | MultiPASS MP370/360 Software Guide - Page 57
BAD SAMPLE Least solid box GOOD SAMPLE Most solid box 6 In the samples of printed pattern A, find the one in which the vertical lines are least obvious, then enter the number. In the same way, enter the number of the B-K - Canon MP360 | MultiPASS MP370/360 Software Guide - Page 58
is blurred or if a particular color is not printing even though there is enough ink. You can see the condition of the print head by looking at the nozzle check pattern. In the [Printer Properties] or [Printing Preferences] dialog box, on the [Maintenance] tab, follow the steps below. To open - Canon MP360 | MultiPASS MP370/360 Software Guide - Page 59
] tab, follow the steps below. To open the [Printer Properties] or [Printing Preferences] dialog box J "Changing print settings (Opening the settings dialog box)" 1 On the [Maintenance] tab, click [Ink Counter Reset]. 2 Select the ink tank to reset the counter. 3 Confirm that the machine is turned - Canon MP360 | MultiPASS MP370/360 Software Guide - Page 60
Click [Start], then click [Printers and Faxes]. In the [Printers and Faxes] window, right-click the printer icon, then click [Printing Preferences].) 2 On the [Maintenance] tab, click [Custom Settings]. 3 Adjust the [Ink Drying Wait Time] settings. If you are printing on paper that takes a long time - Canon MP360 | MultiPASS MP370/360 Software Guide - Page 61
], then click [Printers]. In the [Printers] window, right-click the printer icon for the machine, then click [Properties] (Windows 2000: [Printing Preferences]). (Windows XP: Click [Start], then click [Printers and Faxes]. In the [Printers and Faxes] window, right-click the printer icon, then click - Canon MP360 | MultiPASS MP370/360 Software Guide - Page 62
you if an error has occurred, if ink is running low, and how you should fix problems. To start the BJ Status Monitor 1 Open the [Printer Properties] or [Printing Preferences] dialog box. To open the [Printer Properties] or [Printing Preferences] dialog box J "Changing print settings (Opening the - Canon MP360 | MultiPASS MP370/360 Software Guide - Page 63
the explanation and take steps to fix the problem (Windows 98/Me: Refer to the [Guide] tab). z Red An error has occurred. Read the explanation and take steps to fix the problem (Windows 98/Me: Refer to the [Guide] tab). Bottom left (ink information) The ink tanks are displayed as a picture. An icon - Canon MP360 | MultiPASS MP370/360 Software Guide - Page 64
To display a list of printing jobs Click [Display Print Queue]. A list of jobs currently being printed or jobs waiting in the print queue will be displayed. You can temporarily halt or cancel printing jobs. 62 - Canon MP360 | MultiPASS MP370/360 Software Guide - Page 65
driver. J "Sharing the printer in Windows 2000/XP" 6 In the [Printer Properties] or [Printing Preferences] dialog box, click [OK]. Installing the printer driver on a client system You cannot install the printer driver on a client system that has an older version of the MultiPASS Suite installed - Canon MP360 | MultiPASS MP370/360 Software Guide - Page 66
for the shared printer. 6 Click [Additional Drivers]. 7 Follow the on-screen instructions. z In the [Additional Drivers] dialog box, when you are prompted to select the operating system you want supported, select the operating system of the client system. For Windows 2000, select [Windows 95 or 98 - Canon MP360 | MultiPASS MP370/360 Software Guide - Page 67
] main screen 68 To set up in the [Settings] dialog box 69 To set up in the [Scanners and Cameras] dialog box 70 Scanning with the MP Toolbox 71 MP Toolbox settings ...74 Scanner settings ...74 Save scanned image to 76 Scanning an image from an application 78 Creating one PDF file - Canon MP360 | MultiPASS MP370/360 Software Guide - Page 68
Advanced Mode - [Color] tab - Histogram 102 Advanced Mode - [Color] tab - Tone curve 103 Advanced Mode - [Halftone] tab 104 Determining resolution 105 Scanning with the WIA driver (Windows XP only 106 Scanning from the [Scanners and Cameras] dialog box 106 Setting preferences in the WIA - Canon MP360 | MultiPASS MP370/360 Software Guide - Page 69
Chapter 3 Scanning X Scanning with the operation panel By pressing the [Black Start] or [Color Start] key on the machine, you can scan documents to your computer. Pressing the [Black Start] key has the same effect as clicking the [Save-1] button in the MP Toolbox. Pressing the [Color Start] key has - Canon MP360 | MultiPASS MP370/360 Software Guide - Page 70
Save-2] button. To set up in the [MP Toolbox] main screen 1 On the Windows desktop, double-click [Canon MP Toolbox 4.1]. Alternatively, on the Windows taskbar, click [Start], point to [(All) programs], [Canon], then [MP Toolbox 4.1]. Then click [Toolbox 4.1]. The MP Toolbox will open. 2 Drag select - Canon MP360 | MultiPASS MP370/360 Software Guide - Page 71
To set up in the [Settings] dialog box 1 In the MP Toolbox, click [Settings]. 2 In [BLACK Button] under [Button Link], select a function button for the operation of the [Black Start] key on the machine. Similarly, in [COLOR Button], select a function button for the [Color Start] key. 3 Click [OK]. - Canon MP360 | MultiPASS MP370/360 Software Guide - Page 72
[Control Panel]). 2 In the open window, double-click [Scanners and Cameras] (Windows XP: Click [Printers and Other Hardware], then click [Scanners and Cameras]). 3 Right-click the printer icon for the machine, then click [Properties]. (Windows 98/2000: Click the printer icon for the machine, then - Canon MP360 | MultiPASS MP370/360 Software Guide - Page 73
face-down on the platen glass. 2 On the Windows desktop, double-click [Canon MP Toolbox 4.1]. Alternatively, on the Windows taskbar, click [Start], point to [(All) programs], [Canon], then [MP Toolbox 4.1]. Then click [Toolbox . z [OCR] The document will be scanned and read by the OCR software. 71 - Canon MP360 | MultiPASS MP370/360 Software Guide - Page 74
images to], select an application. If you want to keep the same settings for future scans, click [Apply]. 5 Click [Start]. If you selected [Use the scanner driver to make advanced settings] in step 4, ScanGear MP will appear. 72 - Canon MP360 | MultiPASS MP370/360 Software Guide - Page 75
] in step 3, the scanned image will be displayed in the application after scanning. Send the e-mail message or perform OCR conversion. (If you have not installed the application on the Setup CD-ROM, or if you have not configured the [Link scanned images to] setting, scanning stops and a dialog box - Canon MP360 | MultiPASS MP370/360 Software Guide - Page 76
following settings when scanning with the MP Toolbox. Scanner settings [Select source] Displays where the document is to scan texts crisply, particularly to process it with OCR software. The document is scanned in grayscale and then converted to printed materials. The scanning of a document will take longer - Canon MP360 | MultiPASS MP370/360 Software Guide - Page 77
z [Color (Photos)] Scans a document as a color image with the Descreen driver to make advanced settings] If you select this item and then click [Start], the ScanGear MP dialog box will appear and you can make advanced settings for scanning. Configure [Scanner settings] such as [Scan mode] and [Paper - Canon MP360 | MultiPASS MP370/360 Software Guide - Page 78
[My Documents] folder, and your document will be saved in this folder. [Put pictures in a subfolder using today's date] You can either directly save an [Settings for E-mail program] dialog box, select [None (Attach Manually)]. In this case, the application will not open so you must open the image - Canon MP360 | MultiPASS MP370/360 Software Guide - Page 79
IMPORTANT The software is compatible with the e-mail software Outlook Express, Microsoft Outlook, EUDORA, and Netscape Messenger. If you do not want to assign an application, click [Link Deletion]. When asked to confirm, click [Yes]. 77 - Canon MP360 | MultiPASS MP370/360 Software Guide - Page 80
etc.). 3 Select the scanner driver. Windows XP: You can use the ScanGear MP or the WIA driver as the scanner driver. - To use ScanGear MP, select [Canon MP370], [Canon MP360], or [Canon MP390]. - To use the WIA driver, select [WIA Canon MP370], [WIA Canon MP360], or [WIA Canon MP390]. 4 If necessary - Canon MP360 | MultiPASS MP370/360 Software Guide - Page 81
the Windows desktop, double-click [Canon MP Toolbox 4.1]. Alternatively, on the Windows taskbar, click [Start], point to [(All) programs], [Canon], photos or illustrations to be further compressed, reducing the file size. 6 Click [Start]. ScanGear MP will open if you selected [Use the scanner driver - Canon MP360 | MultiPASS MP370/360 Software Guide - Page 82
z When ScanGear MP is displayed [ScanGear MP] dialog box Adjust your settings, then click [Scan]. For settings J "Setting preferences and scanning with ScanGear MP" As each document is scanned, the following dialog box will appear. 7 As you continue to scan, position the next document and click [ - Canon MP360 | MultiPASS MP370/360 Software Guide - Page 83
• The scanned document will be saved in the following location depending on your computer environment. - If the [My Documents] folder contains the [My Pictures] folder, a folder with the scanning date will be created in the [My Pictures] folder, and your document will be saved in this folder. - If - Canon MP360 | MultiPASS MP370/360 Software Guide - Page 84
• The following types of documents may not be cropped accurately. - Photos that have an overall whitish appearance - Photos that have a whitish border - Documents other than photos (particularly documents printed on white paper, hand-written text, business cards etc.) Placing the document You can - Canon MP360 | MultiPASS MP370/360 Software Guide - Page 85
documents J "Scanning two or more small documents at one time" 2 On the Windows desktop, double-click [Canon MP Toolbox 4.1]. Alternatively, on the Windows taskbar, click [Start], point to [(All) programs], [Canon], then [MP Toolbox 4.1]. Then click [Toolbox 4.1]. The MP Toolbox will open. 3 Click - Canon MP360 | MultiPASS MP370/360 Software Guide - Page 86
MP Toolbox Click a button in the MP Toolbox, select [Use the scanner driver to make advanced settings], adjust other settings, then click [Start]. z Scan from an application Windows XP: If the system is set up for the WIA driver, switch to ScanGear MP (J "Scanning an image from an application" ) and - Canon MP360 | MultiPASS MP370/360 Software Guide - Page 87
scanner driver to make advanced settings], adjust other settings, then click [Start]. z Scan from an application Windows XP: If the system is set up for the WIA driver as a separate document. To delete all the dotted lines, click [Reset]. 7 If you wish to adjust the frame of dotted lines drag the - Canon MP360 | MultiPASS MP370/360 Software Guide - Page 88
8 Click [Scan]. Scanning of the multiple documents will begin. 86 - Canon MP360 | MultiPASS MP370/360 Software Guide - Page 89
, you can review with the preview scanning a document, you can either select [Use the scanner driver to make advanced settings] in the MP Toolbox before scanning, or scan from an application. (If you are scanning from an application in Windows - Canon MP360 | MultiPASS MP370/360 Software Guide - Page 90
Mode) dialog box 1 Place the document face-down on the platen glass. 2 In [Type of original], select the document type. z [Photo] To scan color photos (color, 300dpi) z [Magazine] To scan color magazines (color,150dpi, with the Descreen function) z [Newspaper] To scan text and line drawings - Canon MP360 | MultiPASS MP370/360 Software Guide - Page 91
platen glass. 2 Select settings for [Color Mode], [Output Resolution] and [Paper Size]. J "Advanced Mode - [Main] tab settings" 3 Click [Preview]. parameters of a scan" 5 If you want to print the document at a reduced or enlarged size, specify the [Print Size]. J "Advanced Mode - [Main] tab settings - Canon MP360 | MultiPASS MP370/360 Software Guide - Page 92
Scanning of the image will begin. Advanced Mode Toolbar With the Advanced Mode Toolbar, you can make adjustments to the preview image and also select a part of the image displayed. To enlarge or reduce the preview image 1 On the Toolbar, click (Zoom button). 2 To enlarge, click on the image. To - Canon MP360 | MultiPASS MP370/360 Software Guide - Page 93
To detach and move the Toolbar 1 To detach the Toolbar from the ScanGear MP dialog box, click and hold on the edge of the Toolbar, then drag the Toolbar. It will return to its original position if you double-click on the title of the Toolbar. The Toolbar will adhere to a position if you drag it to - Canon MP360 | MultiPASS MP370/360 Software Guide - Page 94
[Black and White] Select this mode when outputting photos and other documents to monochrome printer. The image is displayed in black and white. Select this mode to scan texts crisply, particularly to process it with OCR software. The image is displayed in black and white. The document is scanned - Canon MP360 | MultiPASS MP370/360 Software Guide - Page 95
after previewing. If you change the setting in [Paper Size] after previewing, the preview image will be Delete]. To remove all the cropping, click [Reset]. J "[Multi-Crop] in ScanGear MP (Advanced dpi are 96 x 96 pixels. [Print Size] For setting the print size (output size) of the scanning parameters - Canon MP360 | MultiPASS MP370/360 Software Guide - Page 96
using ScanGear MP, select [Color (Magazine)] in [Scan mode] to activate [Descreen]. NOTE • Printed photographs and pictures are displayed as a collection of fine dots. If you scan without descreen, the is selected by default. It is effective for scanning photos etc. which have a soft focus. 94 - Canon MP360 | MultiPASS MP370/360 Software Guide - Page 97
image. IMPORTANT • For scanning printed materials, the [None] setting for some types of photos. [Color Settings] Click Canon ColorGear Color matching] Select to automatically match the scanner, monitor and color printer colors, thus reducing time and trouble to manually match the monitor and printer - Canon MP360 | MultiPASS MP370/360 Software Guide - Page 98
] tab, click [Preferences]. You can adjust the following settings on the [Settings 1] tab. [When application hides driver user interface] Color mode cannot be changed in applications such as OCR software which will not display the ScanGear MP dialog box (UI off mode), and consequently the document - Canon MP360 | MultiPASS MP370/360 Software Guide - Page 99
the image is scanned. This setting is not selected by default. Some applications will automatically quit ScanGear MP after scanning irrespective of this setting. [Test Scanner] You cannot perform this test. 97 - Canon MP360 | MultiPASS MP370/360 Software Guide - Page 100
following settings on the [Settings 2] tab. [Enable 48/16 bit output] You cannot select this setting. [Sound settings] You can set up the scanner to play music during scanning or play a sound when scanning is completed. Click [Sound settings], then select [Play music during scanning] and/or [Play - Canon MP360 | MultiPASS MP370/360 Software Guide - Page 101
tab but no tab will be displayed in [Text Enhanced] mode or when [Canon ColorGear Color matching] is selected. When you adjust settings on the [Color] tab be available. To view the preview image without auto tone adjustment, click [Reset]. The [Apply] will then become available and you will be able - Canon MP360 | MultiPASS MP370/360 Software Guide - Page 102
if [Color] or [Grayscale] is selected in [Color Mode] on the [Main] tab. In ScanGear MP Advanced Mode, follow the steps below. 1 Click [Reset] in [Auto tone]. 2 On the [Color] tab, click (Brightness/Contrast). 3 For a color image, in [Channel], select a color to adjust either [Red], [Green], or - Canon MP360 | MultiPASS MP370/360 Software Guide - Page 103
equation of the monitor gamma value) below. 1/ monitor gamma value = scanner gamma value The gamma is active if [Color] or [Grayscale] is manufacturer of your monitor. In ScanGear MP Advanced Mode, follow the steps below. 1 Click [Reset] in [Auto tone]. 2 On the [Color] tab, click (Gamma). 3 For a - Canon MP360 | MultiPASS MP370/360 Software Guide - Page 104
active if [Color] or [Grayscale] is selected in [Color Mode] on the [Main] tab. In ScanGear MP Advanced Mode, follow the steps below. 1 Click [Reset] in [Auto tone]. 2 On the [Color] tab, click (Histogram). 3 For a color image, in [Channel], select a color to adjust either [Red], [Green], or [Blue - Canon MP360 | MultiPASS MP370/360 Software Guide - Page 105
active if [Color] or [Grayscale] is selected in [Color Mode] on the [Main] tab. In ScanGear MP Advanced Mode, follow the steps below. 1 Click [Reset] in [Auto tone]. 2 On the [Color] tab, click (Tone curve). 3 For a color image, in [Channel], select a color to adjust either [Red], [Green], or [Blue - Canon MP360 | MultiPASS MP370/360 Software Guide - Page 106
at which black and white is divided is called Threshold. • By adjusting the threshold, you can sharpen characters in a text document and reduce back-printing such as in newspapers. In ScanGear MP Advanced Mode, follow the step below. 1 Move the [Threshold] slider to the right to increase the - Canon MP360 | MultiPASS MP370/360 Software Guide - Page 107
as a certain percentage of ink pigment so scanning your document at half the resolution of the printer should be fine. For example, if you are using a 600 dpi color printer, you should scan your document at [300 dpi]. Printing to scale For example, if you want to print a document which is twice - Canon MP360 | MultiPASS MP370/360 Software Guide - Page 108
from the [Scanners and Cameras] dialog box 1 On the Windows taskbar, click [Start], then click [Control Panel]. 2 Click [Printers and Other Hardware], [Scanners and Cameras], then [WIA Canon MP370], [WIA Canon MP360], or [WIA Canon MP390]. 3 Follow the instructions displayed in [Scanner and Camera - Canon MP360 | MultiPASS MP370/360 Software Guide - Page 109
the WIA driver (Windows XP only)" 1 Click [Adjust the quality of the scanned picture]. When you displayed the dialog box from the [Scanners and dpi. J "Determining resolution" z To revert to the original settings, click [Reset]. 3 Click [OK] to activate the scan settings you specified and to close - Canon MP360 | MultiPASS MP370/360 Software Guide - Page 110
Opening the Address Book for the first time 115 Registering a recipient (WAB contact) in the Address Book 117 Searching and removing a recipient 118 Designating a different Windows Address Book 119 Importing an Address Book 120 - Canon MP360 | MultiPASS MP370/360 Software Guide - Page 111
as Word), click the Print command. NOTE In most Windows applications, the command is [Print] on the File menu. [Print] dialog box (Example) [Print] dialog box in Word 2 In the [Print] dialog box, in the [Select Printer] or [Name] list, select [Canon MP390 FAX], then click [Print] or [OK]. 109 - Canon MP360 | MultiPASS MP370/360 Software Guide - Page 112
the T will be sent as a tone signal. DT detection function (Europe). PSTN/PBX switchover function (Europe). To make the number easier to read. You cannot insert a space at the front of a number. 110 - Canon MP360 | MultiPASS MP370/360 Software Guide - Page 113
choose a recipient from the Recipient List, click [Add to Recipient List], then click [OK]. [Send Fax] dialog box The name in the Address Book will print at the top of the fax received by the recipient. To add a recipient to the Address Book J "Registering or editing a recipient in the Address Book - Canon MP360 | MultiPASS MP370/360 Software Guide - Page 114
to Address Book]. If you are opening the Address Book for the first time, the [Setup Windows Address Book] dialog box will appear. J "Opening the Address Book for the first time" If (WAB contact) in the Address Book" 4 Follow the instructions in the [Send Fax] dialog box .J "Sending a fax" 112 - Canon MP360 | MultiPASS MP370/360 Software Guide - Page 115
File menu. 2 In the [Print] dialog box, in [Select Printer] or [Name], select [Canon MP390 FAX], then click one of the following: Windows XP: [Preferences]; Windows 2000: [Fax Options] tab; Windows 98/Me/2000/XP: [Properties]. Fax Options dialog box 3 Specify the paper size and orientation. 4 Click - Canon MP360 | MultiPASS MP370/360 Software Guide - Page 116
Start], point to [Settings], then click [Printers] (Windows XP: On the Start menu, click [Printers and Faxes]). 2 Do one of the following. z Windows 2000/XP: Right-click the [Canon MP390 FAX] icon, then click [Printing Preferences]. z Windows 98/Me: Right-click the [Canon MP390 FAX] icon, then click - Canon MP360 | MultiPASS MP370/360 Software Guide - Page 117
box will be displayed. When recipients are registered in the Windows Address Book When no recipients are registered in the Windows Address Book z To create a Windows Address Book (WAB file) for the MP (exclusively for this software) Click [Create new Windows Address Book file for MP], then click [OK - Canon MP360 | MultiPASS MP370/360 Software Guide - Page 118
Address Book, you can use it with other applications that use Windows Address Books. If you choose this option, you will not be able to later create a separate Address Book file of the MP (exclusively for this software). When you click [OK], the [Address Book] dialog box, [Select Recipient from - Canon MP360 | MultiPASS MP370/360 Software Guide - Page 119
in the Address Book. A WAB contact is a recipient's contact information registered in a Windows Address Book. With the [Address Book] dialog box displayed, follow the steps below. Business] tab, enter the fax number. The recipient's name will print at the top of the fax received by the recipient. 117 - Canon MP360 | MultiPASS MP370/360 Software Guide - Page 120
To edit a contact entry With the [Address Book] dialog box displayed, follow the steps below. J"Registering or editing a recipient in the Address Book" 1 In the [Address Book] dialog box, click the entry to edit in the Recipient list, and then click [Properties]. 2 In the [Properties] dialog box, - Canon MP360 | MultiPASS MP370/360 Software Guide - Page 121
Start], point to [Settings], then click [Printers] (Windows XP: On the Start menu, click [Printers and Faxes]). 2 Do one of the following. z Windows 2000/XP: Right-click the [Canon MP390 FAX] icon, then click [Printing Preferences]. z Windows 98/Me: Right-click the [Canon MP390 FAX] icon, then click - Canon MP360 | MultiPASS MP370/360 Software Guide - Page 122
click [All files and Folders]). 2 In the file name box, enter ".wab," then click [Search Now] (Windows XP: Click [Search]). 3 From the found Windows Address Book files, double-click an existing Windows Address Book file to open. 4 In the File menu, in [Import], select [Address Book]. 5 Select the - Canon MP360 | MultiPASS MP370/360 Software Guide - Page 123
5 Troubleshooting Problems outputting...122 Memory card problems (MP390/MP370 123 Problems installing and uninstalling software 124 Problems printing from your computer 125 Problems scanning ...126 - Canon MP360 | MultiPASS MP370/360 Software Guide - Page 124
5 Troubleshooting X Problems outputting Cannot print at all, cannot print correctly 1. The [Alarm] lamp is flashing. If it is flashing, (J User's Guide). 2. The ink tanks are not installed correctly. Lift the scan unit until it locks into place, and open the inner cover, then check that the ink - Canon MP360 | MultiPASS MP370/360 Software Guide - Page 125
the print head may become extremely hot. Do not under any circumstances touch it. X Memory card problems (MP390/MP370) Memory card is not recognized 1. The memory card is not correctly inserted into the card slot. • Reinsert the memory card into the card slot securely. (J User's Guide) • Reinsert - Canon MP360 | MultiPASS MP370/360 Software Guide - Page 126
starts Windows starts before the USB device, your computer will start even with a memory card inserted in the machine. For details on BIOS settings, refer to your computer's documentation. X Problems installing and uninstalling software MP Drivers/MP Toolbox 1. You have not followed the instructions - Canon MP360 | MultiPASS MP370/360 Software Guide - Page 127
instructions in the BJ Status Monitor. (J "Checking the status of the machine with the BJ Status Monitor" ) If appears: Clear the paper jam or whatever is preventing the print head holder from moving, then cancel printing from your computer and press [OK/Set]. (J User's Guide - Canon MP360 | MultiPASS MP370/360 Software Guide - Page 128
document, meaningless characters and symbols are printed. Edit the document and try printing again. If this does not work, there is a problem with the application software. Contact the service center for the application software. 11. You are printing on coated paper. In the Properties dialog box, on - Canon MP360 | MultiPASS MP370/360 Software Guide - Page 129
and Cameras].) 4. In the [Scanners and Cameras] window, if [Canon MP370], [Canon MP360], or [Canon MP390] (Windows XP: [WIA Canon MP370], [WIA Canon MP360], or [WIA Canon MP390]) is present, the machine is recognized. If not, uninstall the software and install it. (J "Removing and reinstalling - Canon MP360 | MultiPASS MP370/360 Software Guide - Page 130
dialog box is displayed. 2. Select [Use the scanner driver to make advanced settings]. Then click [Start] [Scanners and Cameras] icon and changed the settings, but the settings were not activated (Windows 2000 Check the application's manual or contact the application software manufacturer. 4. You are - Canon MP360 | MultiPASS MP370/360 Software Guide - Page 131
software, spreadsheet software and database software or a combination of these. Auto Sheet Feeder (ASF) Part of a printer in which paper used for printing is placed. When printing, the ASF automatically feeds the paper into the printer. B Background printing To print used in many Canon products. crop - Canon MP360 | MultiPASS MP370/360 Software Guide - Page 132
reproduction of the colors in a scanner, monitor and printer as closely as possible. Image Color Management can only be used when printing from an application which supports ICM. import To bring in information created in another application. install To copy software to a designated location on - Canon MP360 | MultiPASS MP370/360 Software Guide - Page 133
before printing/scanning. printer driver Software for controlling the printer. R reinstall To remove installed software and install again. S scanner driver Software for controlling the scanner. The machine is provided with two drivers: The ScanGear MP and the WIA driver (for use with Windows XP - Canon MP360 | MultiPASS MP370/360 Software Guide - Page 134
for downloading images from scanners or digital cameras. The printer includes a TWAIN-compliant driver (ScanGear MP) and a WIA-compliant driver. The WIAdriver can only be used with Windows XP. With either driver, you can scan documents with the printer in applications which support the TWAIN - Canon MP360 | MultiPASS MP370/360 Software Guide - Page 135
28, 32 Borderless Printing 28, 33 Brightness 100 C Calibration 95 Canon ColorGear Color matching 95, 129 CD-ROM drive 4 Cleaning 51 Clear 90 Client system 63 Collate 28 Color Auto crop 75 balance 26 documents 96 Magazine 74 Multi-Scan 75, 83 Photos 75 Color Adjustment 25 Color - Canon MP360 | MultiPASS MP370/360 Software Guide - Page 136
MP drivers checking installation 12 installing 7 removing 17 MP Toolbox 71 checking installation 14 Install ing 8 removing 17 settings 74 MP Windows Address Book 115 Multi-Crop 85, 93 Multi-page PDF 130 Multi-Scan 75, 83, 84 N Network printer 63 Noise Reduction 48 Normal-size Printing - Canon MP360 | MultiPASS MP370/360 Software Guide - Page 137
63 sharing (Windows 2000/XP 64 Printer driver checking installation 12 Printer Paper Size 27 Printer sharing 63 Printing 20 canceling 61 displaying preview before 25 orientation 27 previewing 20 quality 24 reducing data size 26 type 27 [Profiles] tab 49 Put pictures in a subfolder - Canon MP360 | MultiPASS MP370/360 Software Guide - Page 138
of original 88 U Unsharp Mask 94 Upper limit of attached file 75 USB 132 Connecting 11 V Vivid Photo 47 W WAB contact 117, 132 When application hides driver user interface 96 WIA 132 WIA driver 106 settings 107 Windows Address Book 132 using a different Address Book 119 Z Zoom 90 136
-
 1
1 -
 2
2 -
 3
3 -
 4
4 -
 5
5 -
 6
6 -
 7
7 -
8
-
9
-
10
-
11
-
12
-
13
-
14
-
15
-
16
-
17
-
18
-
19
-
20
-
21
-
22
-
23
-
24
-
25
-
26
-
27
-
28
-
29
-
30
-
31
-
32
-
33
-
34
-
35
-
36
-
37
-
38
-
39
-
40
-
41
-
42
-
43
-
44
-
45
-
46
-
47
-
48
-
49
-
50
-
51
-
52
-
53
-
54
-
55
-
56
-
57
-
58
-
59
-
60
-
61
-
62
-
63
-
64
-
65
-
66
-
67
-
68
-
69
-
70
-
71
-
72
-
73
-
74
-
75
-
76
-
77
-
78
-
79
-
80
-
81
-
82
-
83
-
84
-
85
-
86
-
87
-
88
-
89
-
90
-
91
-
92
-
93
-
94
-
95
-
96
-
97
-
98
-
99
-
100
-
101
-
102
-
103
-
104
-
105
-
106
-
107
-
108
-
109
-
110
-
111
-
112
-
113
-
114
-
115
-
116
-
117
-
118
-
119
-
120
-
121
-
122
-
123
-
124
-
125
-
126
-
127
-
128
-
129
-
130
-
131
-
132
-
133
-
134
-
135
-
136
-
137
-
138
 |
 |

MP360/370/390
Software Guide
Throughout this guide, MP360/
MP370 is referred to as the
“machine,” and MP390 as the “fax
model.”
System requirements and software
Installing the software
Setting the default printer
Removing and reinstalling the software
Printing documents
Changing print settings (Opening the settings dialog box)
Setting the paper type and print quality/[Main] tab
Setting page size and number of copies/[Page Setup] tab
Selecting a stamp/[Stamp/Background] tab
Selecting a background/[Stamp/Background] tab
Setting special effects/[Effects] tab
Saving settings as a print profile/[Profiles] tab
Cleaning and machine settings/[Maintenance] tab
Checking the status of the machine with the BJ Status Monitor
Sharing the printer and using it on a network
Scanning with the operation panel
Scanning with the MP Toolbox
Scanning an image from an application
Creating one PDF file from two or more pages
Scanning two or more small documents at one time
Setting preferences and scanning with ScanGear MP
Scanning with the WIA driver (Windows XP only)
Sending a fax
Registering or editing a recipient in the Address Book
1
Installing
Go To P.3
Click!
2
Printing
Go To P.18
Click!
3
Scanning
Go To P.65
Click!
4
Faxing
(Fax model only)
Go To P.108
Click!
Contents
About this guide
Troubleshooting
Glossary
Index
Troubleshooting