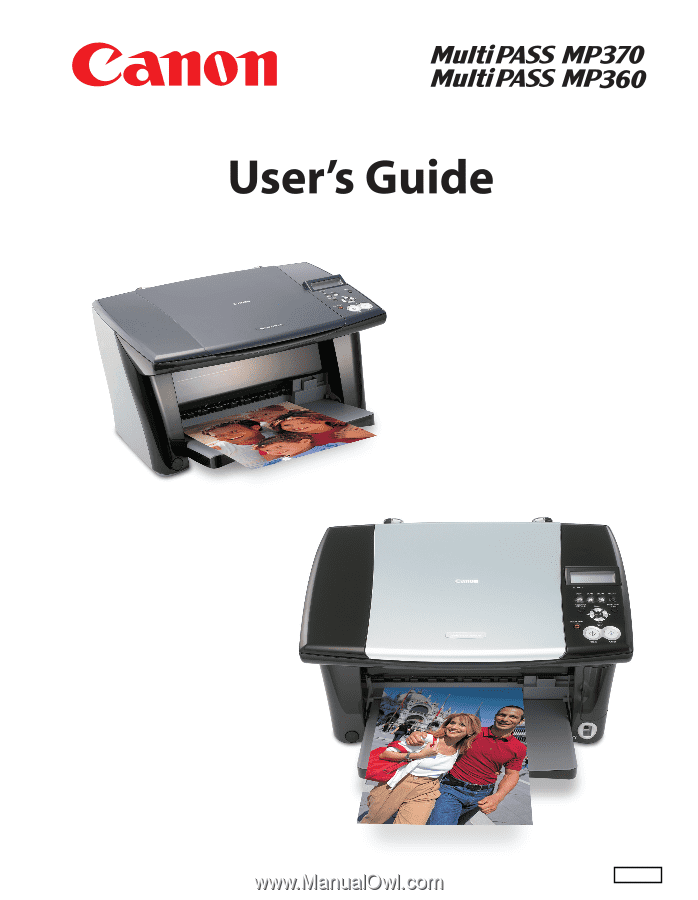
Canon MP370 MultiPASS MP370/360 User's Guide
Canon MP370 - MultiPass Multifunction Manual
 |
UPC - 013803037111
View all Canon MP370 manuals
Add to My Manuals
Save this manual to your list of manuals |
Canon MP370 manual content summary:
- Canon MP370 | MultiPASS MP370/360 User's Guide - Page 1
ENG - Canon MP370 | MultiPASS MP370/360 User's Guide - Page 2
any form, in whole or in part, without the prior written consent of Canon U.S.A., Inc. © 2003 Canon U.S.A., Inc. Disclaimer Canon U.S.A., Inc. has reviewed this manual thoroughly in order that it will be an easy-to-use guide to your Canon MP370/360 Series. All statements, technical information and - Canon MP370 | MultiPASS MP370/360 User's Guide - Page 3
machine. After following instructions in the Set-Up Sheet, read this guide for instructions on printing from your computer, direct photo printing from select digital cameras and memory cards (MP370 only), copying, and scanning. Software Guide (Electronic documentation) This guide is available on - Canon MP370 | MultiPASS MP370/360 User's Guide - Page 4
Advisor 72 Changing Print Settings Manually 72 9 Scanning About Scanning Images 73 Before Scanning 73 Scanning Methods 73 Scanning Using The MP Toolbox 74 Scanning From An Application Software ..... 75 Scanning With The Operation Panel Of The Machine 76 10 Maintenance Replacing Ink Tanks 77 - Canon MP370 | MultiPASS MP370/360 User's Guide - Page 5
Print Head 86 Using The Calibration Function 87 Setting The Power Save Timer 88 Cleaning Your Machine 89 Cleaning The Platen Glass And Document Cover 89 Cleaning The Exterior 89 Cleaning The Roller 89 11 Troubleshooting Problems Installing And Uninstalling Software 90 MP Drivers/MP Toolbox - Canon MP370 | MultiPASS MP370/360 User's Guide - Page 6
symbols used in this guide. The following symbols are used to indicate important instructions. Be sure to obey these instructions. WARNING Indicates a highly recommended. See Set-Up Sheet Refer to the Set-Up Sheet for more information. See Software Guide Refer to the Software Guide (included on - Canon MP370 | MultiPASS MP370/360 User's Guide - Page 7
guide. machine default document paper menu PC click, double-click PC point PC right-click /(Slash) General term used to represent the MP370 or MP360. A setting machine. Paper on which you can print with the machine. A list of settings from which you select an item to set up or change. A menu has - Canon MP370 | MultiPASS MP370/360 User's Guide - Page 8
you for purchasing the Canon MP370/360. Your machine incorporates the following functions in one simple-to-operate device: Photo printer Prints photo-quality images from any digital camera or memory card, (MP370 only) without using a computer. Copier Makes color or black & white copies. Also - Canon MP370 | MultiPASS MP370/360 User's Guide - Page 9
into the card slots. Tray extension Supports printouts. Grasping the notch, pull this out before copying or printing. When not being used, keep it to load a document to be processed. Direct print port Used to connect a PictBridge- or Canon Bubble Jet Direct(for digital camera)* corresponding - Canon MP370 | MultiPASS MP370/360 User's Guide - Page 10
printing from or scanning to the computer. Lights when a memory card is inserted into the card slot. This lamp flashes while the machine is reading or writing data print head. Open this cover when setting the paper thickness lever, replacing the ink tanks, or clearing a paper jam. CAUTION • Printing - Canon MP370 | MultiPASS MP370/360 User's Guide - Page 11
Starts black & white copying or scanning. [Stop/Reset] key Cancels operations and returns the machine to standby mode. [Additional Functions] key Switches the machine to user mode, in which you can customize the settings, including the ink level warning and maintenance settings. [PHOTO PRINT - Canon MP370 | MultiPASS MP370/360 User's Guide - Page 12
to prevent the ink from drying. Turn the machine OFF with [ON/ OFF]. When unplugging the power cord, be sure to unplug it after turning the machine OFF with [ON/OFF]. • When not using the machine for a long time, to prevent degradation of the print head, print or copy in both black & white and in - Canon MP370 | MultiPASS MP370/360 User's Guide - Page 13
Photo Print mode and Photo Index Sheet features, see Chapter 5. • Default settings are shown in bold type. COPY MP370/360 PHOTO MP370 PRINT PHOTO PRINT MODE 2 on 1 *1 BORDERLESS COPY *2 IMAGE REPEAT *3 AUTO MANUAL VERTICAL HORIZONTAL MIRROR IMAGE ENTIRE IMAGE INDEX SELECT PAPER SIZE LTR - Canon MP370 | MultiPASS MP370/360 User's Guide - Page 14
, see Chapter 12. Additional MP370/360 Functions USER DATA INK VOLUME LOW INK WARNING ON OFF INK COUNT RESET BLACK INK CHANGED? COLOR INK CHANGED? MAINTENANCE NOZZLE CHECK CLEANING HEAD REFRESHING ALIGN PRINT HEAD ROLLER CLEANING CALIBRATION QUIET PRINTING OFF ON EXTENSION AMOUNT SMALL - Canon MP370 | MultiPASS MP370/360 User's Guide - Page 15
11 3/4 in. (216 mm × 297 mm) • 1 sheet • PC 10 documents for Multi-Scan Max. 3/4 in. (20 mm) NOTE • PC Multi-Scan is a function for scanning multiple documents (small-size documents) at a time. For more information, see Software Guide, located on your Setup CD-ROM. Chapter 2 Document Handling 13 - Canon MP370 | MultiPASS MP370/360 User's Guide - Page 16
X Loading Documents To copy or scan a document, set it on the platen glass. NOTE • Make sure any glue, ink, or correction fluid on the document is completely dry before loading. • Make sure no staples or clips are attached to the document before loading. 1 Lift - Canon MP370 | MultiPASS MP370/360 User's Guide - Page 17
Limit Approx. 100 sheets (20 lb. or 75 g/m2) Approx. 10 envelopes PC Printer Driver Setting for [Paper Type] [Plain Paper] [Envelope] Canon Specialty Media Canon recommends that you use genuine Canon paper to insure optimal print quality. Paper Type High Resolution Paper Glossy Photo Paper Matte - Canon MP370 | MultiPASS MP370/360 User's Guide - Page 18
× 4 3/8 in./ 220 mm × 110 mm) Printing from your computer • You may be able to load other envelopes, but Canon cannot guarantee consistent performance. • Do not use the following types of envelopes since they may cause problems: - Envelopes with windows, holes, perforations, cutouts, double flaps - Canon MP370 | MultiPASS MP370/360 User's Guide - Page 19
Remove the sheets from the paper output tray before the count reaches 10. • Do not use the loading support sheet included with this paper. • If the ink takes a long time to dry, remove each sheet as soon as it is printed. Printing from your computer • This is paper that is thick to suppress gloss - Canon MP370 | MultiPASS MP370/360 User's Guide - Page 20
reaches 20. • For other than 4" × 6" cards, remove the paper from the paper output tray before the count reaches 10. Photo Paper Pro guidelines • Do not touch the print surface until the ink is dry (approx. 30 minutes). Colors in dark images may appear indistinct at first, but will become clearer - Canon MP370 | MultiPASS MP370/360 User's Guide - Page 21
output tray as soon as it is printed. • Do not touch the printed surface or stack the transparencies until the ink has dried. • If you are storing as it is printed. • Refer to the manuals supplied with the T-shirt transfer for details on how to use this paper. • When copying, set the paper type to - Canon MP370 | MultiPASS MP370/360 User's Guide - Page 22
17 lb. or 64 g/m2) -Very thick paper (more than 28 lb. or 105 g/m2) *Other than Canon genuine paper. -Postcards print surface. Print quality will deteriorate if the print surface is damaged or becomes dirty. • Do not touch the print surface until the ink has dried. • Some paper may curl and the print - Canon MP370 | MultiPASS MP370/360 User's Guide - Page 23
place. • Printing with the inner cover open may result in injury. 5 Return the scan unit to its original position. • The LCD displays the following message. INK TANK CHANGED? - YES NO + 6 Press [X]. NOTE • When not replacing an ink tank, be sure to press [X], and no other key. Chapter 3 Paper - Canon MP370 | MultiPASS MP370/360 User's Guide - Page 24
described in Chapter 5. • PC For documents printed from your computer, you can specify the paper size and type on your computer. (See Software Guide, located on your Setup CD-ROM) X Loading Paper Loading Paper Other Than Envelopes Follow this procedure: 1 Set the paper thickness lever to the right - Canon MP370 | MultiPASS MP370/360 User's Guide - Page 25
paper thickness lever to the right. NOTE • For details on setting the paper thickness lever, see page 21. 2 Open the multi-purpose tray, then pull out the tray extension. 3 Prepare the envelopes for loading. IMPORTANT • Press - Canon MP370 | MultiPASS MP370/360 User's Guide - Page 26
4 Place the stack of envelopes (print side up) in the multi-purpose tray , and pinch the paper guide and adjust it to the left side of the stack . • Load the envelopes in the multi-purpose tray with the short side down. IMPORTANT • Make - Canon MP370 | MultiPASS MP370/360 User's Guide - Page 27
information on the types of documents you can copy, their requirements, and details on loading them, see Chapter 2. X Setting The Paper Size And Type For copying, on the operation panel, you need to set the size and type of paper loaded in the multi-purpose tray. NOTE • For details on paper, see - Canon MP370 | MultiPASS MP370/360 User's Guide - Page 28
. NOTE • In order to obtain optimal quality print results, when copying photographs, use Canon-recommended Photo Paper Pro or Photo Paper Plus. 7 Press [Set]. X Making Copies When making color or black & white copies, you can adjust the print resolution and density. You can also change reduction - Canon MP370 | MultiPASS MP370/360 User's Guide - Page 29
, or [Black] for black & white copying. • The machine starts copying. NOTE • To cancel copying, press [Stop/Reset]. X Adjusting available when is selected as the paper type. (See page 25) 3 Press [Set]. NOTE • When using , if the quality is different from that expected, select < - Canon MP370 | MultiPASS MP370/360 User's Guide - Page 30
DK+ 2 Use [W] or [X] to select the exposure. • Pressing [W] decreases the density, and pressing [X] increases the density. 3 Press [Set]. NOTE • To cancel, press [Stop/Reset]. X Reducing Or Enlarging A Copy You can reduce or enlarge copies using three different methods: 1 Preset copy ratios You - Canon MP370 | MultiPASS MP370/360 User's Guide - Page 31
Press [Menu] once until appears. 1.ENLARGE/REDUCE W PRESET RATIO X 2 Use [W] or [X] to select . 1.ENLARGE/REDUCE W ZOOM X 3 Press [Set]. Ex: ZOOM 25-400% - 100% + 4 Use [W] or [X] to select a copy ratio between 25% and 400%. • Pressing [W] decreases the copy ratio - Canon MP370 | MultiPASS MP370/360 User's Guide - Page 32
or enlarge the image to fit the size of the paper you are printing on. NOTE • Some document sizes may not be correctly detected. Follow select . 1.ENLARGE/REDUCE W FIT-TO-PAGE X 3 Press [Set]. X Advanced Copy Features The following advanced copy features are available: 2 on - Canon MP370 | MultiPASS MP370/360 User's Guide - Page 33
. NOTE • If appears on the LCD when copying, set the image quality to and try copying again. (See page 27) • can load at a time in the multi-purpose tray, see page 15. 4 Adjust the settings for your document as necessary. NOTE • To select the paper size and type, see page - Canon MP370 | MultiPASS MP370/360 User's Guide - Page 34
scan, press [Set]. 9 Press [Color] for color copying, or [Black] for black & white copying. • Press the same key you pressed in step 7. IMPORTANT • If you do not press the same key you pressed in step 7, the machine does not start copying. NOTE • To cancel copying, press [Stop/Reset]. • To continue - Canon MP370 | MultiPASS MP370/360 User's Guide - Page 35
size. • Use [W] or [X] to select , , , , or as the paper type, then press [Set]. 8 Press [Color]. NOTE • Pressing [Black] does not start copying. • You can select the amount of image that extends off the paper. (See page 42) Chapter 4 Copying 33 - Canon MP370 | MultiPASS MP370/360 User's Guide - Page 36
of times it repeats the image, or you can specify the number. IMPORTANT • When manually setting the number of times to copy the image, you must set the paper size before copying. (See page 25) • When manually setting the number of times to copy the image, your original image must be no larger than - Canon MP370 | MultiPASS MP370/360 User's Guide - Page 37
on to. 2 2 repeats Printing result 3 3 repeats Printing result Document Document 2. Press [Set]. Ex: VERTICAL HORIZONTAL 2 Set]. 7. Go to step 9. 9 Press [Color] for color copying, or [Black] for black & white copying. NOTE • To cancel copying, press [Stop/Reset]. • Press [Stop/Reset - Canon MP370 | MultiPASS MP370/360 User's Guide - Page 38
. 5.SPECIAL COPY W 2 on 1 X 6 Use [W] or [X] to select . 5.SPECIAL COPY W MIRROR IMAGE X 7 Press [Set]. 0 1 Ex: 100% LTR NORMAL MIRROR 8 Press [Color] for color copying, or [Black] for black & white copying. NOTE • To cancel copying, press [Stop/Reset]. 36 Copying Chapter 4 - Canon MP370 | MultiPASS MP370/360 User's Guide - Page 39
select . 5.SPECIAL COPY W ENTIRE IMAGE X 7 Press [Set]. 0 1 Ex: 90% LTR NORMAL ENTIRE IMAGE 8 Press [Color] for color copying, or [Black] for black & white copying. NOTE • To cancel copying, press [Stop/Reset]. • For some documents, part of the document may not be copied. Chapter - Canon MP370 | MultiPASS MP370/360 User's Guide - Page 40
Chapter 5 Photo Printing From A Memory Card (MP370) There are several ways you can print photos directly from a memory card, without using a computer. In particular, if you use a Photo Index Sheet, you can easily specify photographs and set printing options. Step 1 Make sure the machine is turned ON - Canon MP370 | MultiPASS MP370/360 User's Guide - Page 41
if formatted with a computer. • For information on memory cards compatible with your digital camera, see the manual supplied with your digital camera. • PC To use your computer to read or write data on a memory card, see Software Guide, located on your Setup CD-ROM. • PC If you have copied image - Canon MP370 | MultiPASS MP370/360 User's Guide - Page 42
a Compact Flash card adapter while the adapter is in the card slot. For more information, see the manual supplied with your Compact Flash card adapter. • PC If you are using an SD Secure Digital memory card side (labeled side) facing outside. 40 Photo Printing From A Memory Card (MP370) Chapter 5 - Canon MP370 | MultiPASS MP370/360 User's Guide - Page 43
image data. Removing A Memory Card Follow this procedure: CAUTION • If an error occurs during printing from data on the memory card. 1 Press [ON/OFF] to turn OFF the machine. • PC If you have been writing to a memory card in Windows 2000, wait at least 10 Printing From A Memory Card (MP370) 41 - Canon MP370 | MultiPASS MP370/360 User's Guide - Page 44
printing: 1. Press [PHOTO PRINT]. 2. Press [Menu] once until appears. 3. Use [W] or [X] to select the printing method, and then press [Set]. 2. Use [W] or [X] to select . USER DATA 4.EXTENSION AMOUNT 42 Photo Printing From A Memory Card (MP370) Chapter 5 - Canon MP370 | MultiPASS MP370/360 User's Guide - Page 45
paper. - : Enlarges the amount of image that extends off the paper. 5. Press [Set]. 6. Press [Stop/Reset] to switch the machine to standby mode. Setting Vivid Photo Printing Enabling this setting will make photographs appear more vibrant, especially blues and greens. It is also effective - Canon MP370 | MultiPASS MP370/360 User's Guide - Page 46
to enable or disable date printing. - OFF: Disables date printing. - ON: Enables date printing. NOTE • Printing will take longer when this setting is enabled. • You cannot set date printing from the machine for DPOF printing. (See page 59) 44 Photo Printing From A Memory Card (MP370) Chapter 5 - Canon MP370 | MultiPASS MP370/360 User's Guide - Page 47
of copies (fill in the respective circle under the photograph you want to print). Follow the procedure as described. Mark this to print same Photo Index Sheet again. * If you mark this, all other marked settings will be disregarded. Follow this procedure: 1 Turn ON the machine, and load letter - Canon MP370 | MultiPASS MP370/360 User's Guide - Page 48
order beginning from the most recently recorded date. Prints image data stored on the memory card according to a specified range of recorded dates. z If you select : 1. Go to step 7. z If you select : 1. Press [Set]. SHEET (LTR or A4) W LAST 30 IMAGES X 2. Use - Canon MP370 | MultiPASS MP370/360 User's Guide - Page 49
• If more than 30 photographs are to be printed, the machine prints them on more than one Photo Index Sheet. 8 Fill in the appropriate circles ( ) with a dark pencil or a black ink pen to select the photographs to print and print settings. Good example Bad example Check mark Line only Light - Canon MP370 | MultiPASS MP370/360 User's Guide - Page 50
the machine is printing. • If the platen glass is soiled, the machine may not read the settings. NOTE • To cancel printing, press [Stop/Reset]. • To continue to print photographs using the subsequent Photo Index Sheets, repeat steps 8 to 14. 48 Photo Printing From A Memory Card (MP370) Chapter 5 - Canon MP370 | MultiPASS MP370/360 User's Guide - Page 51
6 Press [Set]. Ex: 2.SELECT PAPER SIZE W *LTR X 7 Use [W] or [X] to select the paper size. - : - : Letter size Card size - : Card size - : A4 size 8 Press [Set]. Ex: 3.SELECT PAPER TYPE W *PHOTO PAPER PRO X Chapter 5 Photo Printing From A Memory Card (MP370) 49 - Canon MP370 | MultiPASS MP370/360 User's Guide - Page 52
in step 9, you cannot enable vivid photo printing. 16 Press [Set]. Ex: [ALL IMAGES] PRO LTR 17 Press [Color]. NOTE • To cancel printing, press [Stop/Reset]. • Pressing [Black] does not start printing. • The image printed is enlarged or reduced automatically according to the paper size - Canon MP370 | MultiPASS MP370/360 User's Guide - Page 53
X Index Printing With the MP370, you can print an index to check all the image data on the memory card, and select the settings for individual images and print them according to your preference. The operation flow is as follows: Print an index to see thumbnails of all the images on the memory card. - Canon MP370 | MultiPASS MP370/360 User's Guide - Page 54
40) 3 Press [PHOTO PRINT]. 4 Press [Menu] once until appears. 1.PHOTO PRINT MODE W *INDEX X 5 Use [W] or [X] to select . 1.PHOTO PRINT MODE W *INDEX X 6 Press [Set]. Ex: 2.SELECT PAPER SIZE W *LTR X 52 Photo Printing From A Memory Card (MP370) Chapter 5 - Canon MP370 | MultiPASS MP370/360 User's Guide - Page 55
results, when printing photographs, use Canon-recommended Photo Paper Pro or Photo Paper Plus. • If you selected or in step 7, you can only select , , or . 10 Press [Set]. 11 Select whether to enable date printing or not. (See - Canon MP370 | MultiPASS MP370/360 User's Guide - Page 56
to select the number of copies of the photograph you want to print (max. 99 copies). NOTE • For the number of sheets of paper you can load at a time in the multi-purpose tray, page 15. 10 Press [Set]. Ex: 4.SELECT PAPER SIZE W *LTR X 54 Photo Printing From A Memory Card (MP370) Chapter 5 - Canon MP370 | MultiPASS MP370/360 User's Guide - Page 57
to obtain optimal quality print results, when printing photographs, use Canon-recommended Photo Paper Pro printing. 20 Press [Set]. • Use [W] or [X] to view your settings on the LCD. Ex: [SINGLE IMAGE] PRO LTR X [SINGLE IMAGE] W NO.001 01 Chapter 5 Photo Printing From A Memory Card (MP370 - Canon MP370 | MultiPASS MP370/360 User's Guide - Page 58
• To cancel printing, press [Stop/Reset]. • The image printed is enlarged or reduced automatically according to the paper size printed onto. Depending on the paper size you are printing onto, image cropping may occur, with or without using the borderless printing feature. • Pressing [Black] does not - Canon MP370 | MultiPASS MP370/360 User's Guide - Page 59
8 Press [Set]. Ex: 5.SELECT PAPER SIZE W *LTR X 9 Use [W] or [X] to select the paper size. - : - : - : Letter size Card size Card size - : A4 size 10 Press [Set]. Ex: 6.SELECT PAPER TYPE W *PHOTO PAPER PRO X Chapter 5 Photo Printing From A Memory Card (MP370) 57 - Canon MP370 | MultiPASS MP370/360 User's Guide - Page 60
11, you cannot enable vivid photo printing. 18 Press [Set]. • Use [W] or [X] to view your settings on the LCD. Ex: [SELECT RANGE] PRO LTR X [SELECT RANGE] W NO.001-010 19 Press [Color]. NOTE • To cancel printing, press [Stop/Reset]. • The image printed is enlarged or reduced automatically - Canon MP370 | MultiPASS MP370/360 User's Guide - Page 61
: - Paper size - Paper type - Borderless printing - Vivid photo printing 4 Press [Color]. • The machine starts printing according to the DPOF settings. NOTE • To cancel printing, press [Stop/Reset]. • Pressing [Black] does not start printing. Chapter 5 Photo Printing From A Memory Card (MP370) 59 - Canon MP370 | MultiPASS MP370/360 User's Guide - Page 62
Directly 6 From A Digital Camera (MP370) Connecting a PictBridge compatible or Canon Bubble Jet Direct compatible digital camera or digital video camcorder to the MP370 enables you to print captured images directly without using a computer. When printing directly, use the USB cable supplied with - Canon MP370 | MultiPASS MP370/360 User's Guide - Page 63
X Paper Types For A Digital Camera You can use the following genuine Canon paper: Digital Camera Setting Paper Type Card #1 Photo Paper Pro Card #2 Photo Paper Plus Glossy purpose tray, load it with the glossy side facing up. Chapter 6 Photo Printing Directly From A Digital Camera (MP370) 61 - Canon MP370 | MultiPASS MP370/360 User's Guide - Page 64
the digital camera will automatically turn ON. If not, turn it ON manually. 4 Display the image you want to print in the replay mode. • If the camera will not change to the replay mode, refer to your digital camera user's manual for instructions on changing the camera to the replay mode. • When the - Canon MP370 | MultiPASS MP370/360 User's Guide - Page 65
NOTE • For the operation, print error messages and troubleshooting of the digital camera, refer to your digital camera user's manual. • For print error messages and troubleshooting of the machine, see page 110. • For the operation, print error messages and troubleshooting of the digital video - Canon MP370 | MultiPASS MP370/360 User's Guide - Page 66
contained on the Setup CD-ROM supplied with this machine, please do so now. For instructions, see Set-Up Sheet or Software Guide. NOTE • For details on all features of the software, see Software Guide, located on your Setup CD-ROM. X System Requirements To successfully install and operate the - Canon MP370 | MultiPASS MP370/360 User's Guide - Page 67
increases data-transfer software in Windows 2000, you must have Service Pack* 1 or later version installed. *Service Pack is a set of modification programs provided by Microsoft Corporation. For how to acquire Service Pack, contact Microsoft Corporation. IMPORTANT • While the machine is printing - Canon MP370 | MultiPASS MP370/360 User's Guide - Page 68
see Software Guide or the manual supplied with each software. MP Drivers z Printer driver (See Software Guide, located on your Setup CD-ROM) Enables you to print from any Windows application that supports printing. z Scanner driver (ScanGear MP, WIA driver (only for Windows XP)) (See Software Guide - Canon MP370 | MultiPASS MP370/360 User's Guide - Page 69
Administrator or have Administrator privileges. When uninstalling the software from Windows XP, you must log on as Administrator. IMPORTANT • When uninstalling the MP Drivers, first uninstall the MP Toolbox. If the MP Drivers are uninstalled beforehand, [Canon] may remain in [(All) Programs] of the - Canon MP370 | MultiPASS MP370/360 User's Guide - Page 70
any open software applications, including virus checkers. 2 Click [Start] on the taskbar, point to [(All) Programs], [Canon], and [MP Drivers], then click [Uninstall Drivers]. 3 In [Please select the device to delete], select the name of this machine ([MP370 Series] or [MP360 Series]), then click - Canon MP370 | MultiPASS MP370/360 User's Guide - Page 71
From Your Computer X Before Printing Before printing, confirm as follows. Is The Software (MP Drivers) Installed? If the software is not yet installed, see Software Guide, located on your Setup CD-ROM. Is The Machine Specified As [Set as Default Printer]? You can confirm whether the machine is - Canon MP370 | MultiPASS MP370/360 User's Guide - Page 72
Installing the MP Drivers enables you to print from application software supporting a print function. The print procedure varies slightly depending on the application software. The basic print procedure is explained here. For the actual operation, see the manuals of the application software to be - Canon MP370 | MultiPASS MP370/360 User's Guide - Page 73
Software Guide, located on your Setup CD-ROM. You can define print settings in two ways: z Changing print settings with the Print Advisor: Displays as a wizard that guides you through a series of questions to select the appropriate print settings for your document. z Changing print settings manually - Canon MP370 | MultiPASS MP370/360 User's Guide - Page 74
box, on the [Main] tab, click [Print Advisor]. 4 Follow the instructions on the screen. Changing Print Settings Manually Follow this procedure: 1 Open the document in the application software, and select the command to print. • This in most cases will be [Print] in the [File] menu or toolbar. 2 In - Canon MP370 | MultiPASS MP370/360 User's Guide - Page 75
to text data. X Before Scanning Before scanning images, confirm as follows: z Is the software (MP Drivers and MP Toolbox) installed? If the software is not yet installed, see Software Guide, located on your Setup CD-ROM. z Does the document to be scanned meet the requirements for setting on the - Canon MP370 | MultiPASS MP370/360 User's Guide - Page 76
enable you to select which scanner to use. Also, you can change the correspondence between the MP Toolbox buttons and the [Black] and [Color] keys. When the utility software on the Setup CD-ROM are installed, one part will be registered in the MP Toolbox buttons. [OCR] button ScanSoft OmniPage - Canon MP370 | MultiPASS MP370/360 User's Guide - Page 77
software to which you will scan the document and select the command to scan (such as [Import], [Acquire image], etc.). 3 Select the scanner driver. • With Windows XP, you can use the ScanGear MP or the WIA driver as the scanner driver. - When using ScanGear MP, select [Canon MP370] or [Canon - Canon MP370 | MultiPASS MP370/360 User's Guide - Page 78
] has the same effect as clicking [Save-2] in the MP Toolbox. Pressing [Black] has the same effect as clicking [Save-1]. You can change the setting for [Save-1] and [Save-2], or assign the same operations as the other buttons. (See Software Guide, located on your Setup CD-ROM) Follow this procedure - Canon MP370 | MultiPASS MP370/360 User's Guide - Page 79
: z Black ink tank: BCI-24 Black z Color ink tank: BCI-24 Color z Guidelines CAUTION • Keep the print head and ink tanks out of the reach of children. If a child inadvertently ingests ink, consult a physician immediately. • To ensure optimum printing results and to avoid printing problems, Canon - Canon MP370 | MultiPASS MP370/360 User's Guide - Page 80
paper output tray does not open, press the Open button to open the paper output tray. • The print head holder moves to the middle. 1 2 Click 3 Open the inner cover. CAUTION • Do not try to manually move or stop the print head holder. • Do not touch any metal parts. 78 Maintenance Chapter 10 - Canon MP370 | MultiPASS MP370/360 User's Guide - Page 81
• Set a black ink tank in the right slot of the print head. • Set a color ink tank in the left slot of the print head. 7 If you need to replace another ink tank, repeat steps 4 to 6. 8 Close the inner cover. CAUTION • Press the center of the inner cover until the cover locks into place. Chapter 10 - Canon MP370 | MultiPASS MP370/360 User's Guide - Page 82
computer. (See Software Guide, located on your Setup CD-ROM) • The ink counter cannot be reset while the [Alarm] lamp is lit. Follow this procedure: 1 Press [Additional Functions]. USER DATA 1.INK VOLUME 2 Use [W] or [X] to select . USER DATA 1.INK VOLUME 80 Maintenance Chapter 10 - Canon MP370 | MultiPASS MP370/360 User's Guide - Page 83
[W] or [X] to select . INK VOLUME 2.INK COUNT RESET 5 Press [Set]. • The LCD displays a message asking if you replaced the black ink tank. BLACK INK CHANGED? - YES NO + NOTE • Do not press any keys other than [W] or [X]. 6 If you replaced the black ink tank, press [W]. If you - Canon MP370 | MultiPASS MP370/360 User's Guide - Page 84
) If there is no improvement, Step 4 Replace the ink tanks. (See page 78) If there is no improvement, If there is no improvement, Step 3 Replace the ink tanks. (See page 78) If there is no improvement, The print head may be damaged. Contact the Canon Customer Care Center. 82 Maintenance Chapter - Canon MP370 | MultiPASS MP370/360 User's Guide - Page 85
the print head is operating properly. NOTE • PC You can also print the nozzle check pattern from your computer. (See Software Guide, located on your Setup CD-ROM) Follow this procedure: 1 Load letter- or A4-size plain paper in the multi-purpose tray. 2 Press [Additional Functions]. USER DATA 1.INK - Canon MP370 | MultiPASS MP370/360 User's Guide - Page 86
Pattern This section describes how to confirm the nozzle check pattern and print head position pattern. 1 2 3 NOTE • If the ink level is low, the nozzle check pattern is not printed correctly. If the ink level is low, replace the relevant ink tank. (See page 78) z If the lines are broken, or white - Canon MP370 | MultiPASS MP370/360 User's Guide - Page 87
periodically when it is ON. • PC You can also clean the print head from your computer. (See Software Guide, located on your Setup CD-ROM) Follow this procedure: 1 Press [Additional Functions]. 2 Use [W] or [X] to select . 3 Press [Set]. 4 Use [W] or [X] to select or - Canon MP370 | MultiPASS MP370/360 User's Guide - Page 88
Software Guide, located on your Setup CD-ROM) Follow this procedure: 1 Load letter- or A4-size plain paper in the multi-purpose tray. 2 Press [Additional Functions]. 3 Use [W] or [X] to select . 4 Press [Set]. 5 Use [W] or [X] to select . MAINTENANCE 4.ALIGN PRINT - Canon MP370 | MultiPASS MP370/360 User's Guide - Page 89
9 Press [Set]. Ex: CHANGE H VALUE BO 10 Repeat steps 8 and 9 for columns B to K. Using The Calibration Function If the color tone of copies or scans of photos differs from that of the original, you can use the calibration function to adjust the color tone printed. Follow this procedure: 1 Press [ - Canon MP370 | MultiPASS MP370/360 User's Guide - Page 90
2 Use [W] or [X] to select . USER DATA 7.POWER SAVE TIMER 3 Press [Set]. Ex: POWER SAVE TIMER 1 HOUR 4 Use [W] or [X] to select the time to switch the machine to Power Save mode. - : Switches the machine to Power Save mode if any key on the operation panel is not pressed - Canon MP370 | MultiPASS MP370/360 User's Guide - Page 91
you have trouble getting the Set]. ROLLER CLEANING • The machine starts cleaning the roller. 7 When cleaning has finished, repeat steps 2 to 6 for a total of three times. 8 Load letter- or A4-size plain paper in the multi-purpose tray and repeat steps 2 to 6 an additional three times. Chapter 10 - Canon MP370 | MultiPASS MP370/360 User's Guide - Page 92
Uninstall the earlier version of the software following the the software installed. (Canon instructions in the Software Guide of that version, and reinstall the MultiPASS is registered as a new version. startup item in the Start menu program.) X MP Toolbox Only Cause Action Installation is - Canon MP370 | MultiPASS MP370/360 User's Guide - Page 93
No]. Whichever you click, installation thereafter will continue trouble-free. Also, the installed MP Drivers can be used without problem. z Cannot use the software after upgrading to Windows XP. Cause Action OS was upgraded to Windows XP Uninstall the software and then reinstall it. (See page 67 - Canon MP370 | MultiPASS MP370/360 User's Guide - Page 94
your computer. Clearing Jams From The Multi-purpose Tray Follow this procedure: 1 Gently pull out any jammed paper from the multi-purpose tray. 2 Press [Set]. • PC If you are printing from an application software, follow the instructions displayed on your computer. 92 Troubleshooting Chapter 11 - Canon MP370 | MultiPASS MP370/360 User's Guide - Page 95
operating properly? If the roller is not operating properly, contact the Canon Customer Care Center. Do the sheets of paper stick together? Fan the edges of the paper. Is the paper guide adjusted correctly? Adjust the paper guide correctly. Does the paper stack exceed the Troubleshooting 93 - Canon MP370 | MultiPASS MP370/360 User's Guide - Page 96
Copy Or Print X Cannot Print At All, Cannot Print Correctly When Copying Or Printing From A Computer Cause Action Ink has run low or out. Check whether the ink tanks are empty. Replace the ink tanks if necessary. The print head is dirty. Clean the print head. (See page 85) The [Alarm] lamp is - Canon MP370 | MultiPASS MP370/360 User's Guide - Page 97
into the multi-purpose tray. Pinch the paper guide and adjust it to the left side of the stack. The paper thickness lever is not set When the paper thickness lever is set incorrectly and you print or correctly. copy documents with large quantities of ink such as documents with a lot of details - Canon MP370 | MultiPASS MP370/360 User's Guide - Page 98
with will take time, and copying will appear to have stopped. Wait until fine mode. data is processed. If you are copying a document with a large printing area (with small margins) or are copying multiple sets, copying may stop to allow the ink time to dry. 96 Troubleshooting Chapter 11 - Canon MP370 | MultiPASS MP370/360 User's Guide - Page 99
Problems (MP370 data is not in JPEG format. Check the image data in your digital camera or computer. Or, the size of the image data may be too large. If you cannot print the photograph directly from the machine's card reader, open the data and print it from your computer. Chapter 11 Troubleshooting - Canon MP370 | MultiPASS MP370/360 User's Guide - Page 100
is set to Press [Additional Functions] and set to . or Photo Print mode is entered. problem: 1. Assign the network drive to a different drive letter. 2. Restart your computer. X PC The [Unplug/Eject] Icon Does Not Appear (Windows Troubleshooting Chapter 11 - Canon MP370 | MultiPASS MP370/360 User's Guide - Page 101
. In the computer's BIOS settings, if you set up the order so that the hard disk that starts Windows starts before the USB device, your computer will start even with a memory card inserted in the machine. For details on BIOS settings, refer to your computer's manual. Chapter 11 Troubleshooting 99 - Canon MP370 | MultiPASS MP370/360 User's Guide - Page 102
Follow the instructions in the BJ Status Monitor. (See Software Guide, located on your Setup CD-ROM) If appears: Clear the paper jam (see page 92) or foreign object that is preventing the print head holder from moving, then cancel printing from your computer and press [Set]. If - Canon MP370 | MultiPASS MP370/360 User's Guide - Page 103
is not set up for printer Set up the server for printer sharing. (See Software Guide, located on sharing. your Setup CD-ROM) The server is not set up to allow Set up the server to allow your system access to the shared printer. your system access to the shared printer. PC Problems Scanning - Canon MP370 | MultiPASS MP370/360 User's Guide - Page 104
Panel] window, click [Printers and Other Hardware], then [Scanners and Cameras].) 4. In the [Scanners and Cameras] window, if [Canon MP370] or [Canon MP360] (Windows XP: [WIA Canon MP370] or [WIA Canon MP360]) is present, the machine is recognized. If not, uninstall the software and reinstall - Canon MP370 | MultiPASS MP370/360 User's Guide - Page 105
you want to open for that button. (See Software Guide, located on your Setup CD-ROM) X You Opened The Properties Dialog Box From The [Scanners and Cameras] Icon And Changed The Settings, But The Settings Were Not Activated (Windows 2000) Cause The settings are not activated because you have not - Canon MP370 | MultiPASS MP370/360 User's Guide - Page 106
or reduce the image display in the application. The image will be large if resolution is high. It will be small if resolution is low. Set the resolution as necessary. (See Software Guide, located on your Setup CD-ROM) 104 Troubleshooting Chapter 11 - Canon MP370 | MultiPASS MP370/360 User's Guide - Page 107
. X The Paper Output Tray Cannot Be Opened Cause Action The machine is not placed on a flat Place the machine on a flat surface. surface. Chapter 11 Troubleshooting 105 - Canon MP370 | MultiPASS MP370/360 User's Guide - Page 108
jam occurs while printing, the [Alarm] lamp flashes. Check the cause of the error below and take corrective actions. z If a message appears: 1 Check the message appearing on the LCD. 2 Follow the instructions and correct the error. • For LCD messages, see page 107. 3 Press [Set] to resume operation - Canon MP370 | MultiPASS MP370/360 User's Guide - Page 109
computer. by the computer. CARTRIDGE JAMMED The print head holder cannot Clear the paper jam or whatever is page 92 move. This is normally due to a obstructing the print head holder paper jam. and then press [Set]. Do not attempt to move the print head holder manually. CHECK PAPER SIZE The - Canon MP370 | MultiPASS MP370/360 User's Guide - Page 110
, you can continue printing by pressing [Set]. However, note that ink may run out. If print quality deteriorates or the printout is blank, replace the ink tank. COVER OPEN You opened the scan unit during an operation. Return the scan unit to its original - position. DATA IN MEMORY You are - Canon MP370 | MultiPASS MP370/360 User's Guide - Page 111
head cleaning) is nearly full. Contact the Canon Customer Care - Center. WRONG CARTRIDGE The print head is not installed correctly. Install the print head. If the message - remains on the LCD, the print head may be defective. Contact the Canon Customer Care Center. Chapter 11 Troubleshooting - Canon MP370 | MultiPASS MP370/360 User's Guide - Page 112
is not reset, the remaining ink level may not be displayed properly. • For more details, refer to the user's manual for the digital camera or digital video camcorder. For a problem with the digital camera or digital video camcorder, contact the service center for the camera. Error Message On - Canon MP370 | MultiPASS MP370/360 User's Guide - Page 113
is located and the page description of the setting. page page page 3 Press [COPY], [PHOTO PRINT] (MP370) or [Additional Functions], depending on the function key under which the setting is located. z If you press [COPY] or [PHOTO PRINT] (MP370): 1. Press [Menu] repeatedly until the menu under which - Canon MP370 | MultiPASS MP370/360 User's Guide - Page 114
you have finished, press [Stop/Reset], if necessary. NOTE • The asterisk on the LCD indicates the current setting. Settings To find the setting you want to change, see the following menu lists. NOTE • Default settings are shown in bold type. Function key: [COPY] Menu: ENLARGE/REDUCE Name - Canon MP370 | MultiPASS MP370/360 User's Guide - Page 115
the original image to fit the selected paper size. Settings - - 1/2/3/4 1/2/3/4 - Details page 31 page 32 page 34 page 36 page 37 Function key: [PHOTO PRINT] (MP370) Menu: PHOTO PRINT MODE (MP370) Name Description INDEX Prints thumbnails of all the images stored on the memory card, assigning - Canon MP370 | MultiPASS MP370/360 User's Guide - Page 116
the black ink tank. COLOR INK CHANGED? Resets the ink counter for the color ink tank. Settings ON OFF YES = (W) NO = (X) YES = (W) NO = (X) Details page 77 page 80 Menu: MAINTENANCE Name Description NOZZLE CHECK Prints the nozzle check pattern. CLEANING Performs normal print head cleaning - Canon MP370 | MultiPASS MP370/360 User's Guide - Page 117
- Selects the language for LCD messages. Setting ENGLISH FRENCH SPANISH PORTUGUESE Menu: POWER SAVE TIMER Name Description - Sets the time until Power Save mode is enabled. Setting 1 HOUR 4 HOURS 8 HOURS Details - Details page 42 Details Software Guide Details - Details page 88 Chapter 12 - Canon MP370 | MultiPASS MP370/360 User's Guide - Page 118
Settings For Paper Types For Copying Paper type displayed in LCD PLAIN type. NOTE • In order to obtain optimal quality print results when copying photographs, use Canon-recommended Photo Paper Pro or Photo Paper Plus. For Photo Printing (MP370) Paper type displayed in LCD PHOTO PAPER PRO PLAIN - Canon MP370 | MultiPASS MP370/360 User's Guide - Page 119
For Photo Index Sheet Printing (MP370) IMPORTANT • For printing a Photo Index Sheet, use only white plain paper. If you print a Photo Index Sheet on paper such as recycled paper that is not very white, it may not be read correctly by the machine. Paper type settings available Plain Paper Photo - Canon MP370 | MultiPASS MP370/360 User's Guide - Page 120
[View User's Manual]. 3 In the [View User's Manual] screen, click the button of the electronic manual you want to view. • You can copy the electronic manuals, such as the Software Guide and Photo Application Guide, to your computer and display start-up icons for the respective manual on the Windows - Canon MP370 | MultiPASS MP370/360 User's Guide - Page 121
start-up icon for each manual will be placed on the Windows desktop. • Double-click the icon of the electronic manual you want to open. NOTE • Go to the following folder if you want to delete the copied manual. \Program Files\Canon\MP Drivers\MP390360 z Not copying manual to your computer: 1. Click - Canon MP370 | MultiPASS MP370/360 User's Guide - Page 122
at one time -Setting preferences and scanning with ScanGear MP -Scanning with the WIA driver (Windows XP only) z Troubleshooting z Glossary z Index XPC About The Photo Application Guide The Photo Application Guide, an HTML file included on the Setup CD-ROM, describes the utility software and how to - Canon MP370 | MultiPASS MP370/360 User's Guide - Page 123
web page without complicated settings. Easy-Web Print also enables you to automatically layout some columns in a specified paper type for printing. z ScanSoft OmniPage SE ScanSoft OmniPage SE is an application that converts PDF and paper documents- letters, contracts, tables, manuals- using OCR - Canon MP370 | MultiPASS MP370/360 User's Guide - Page 124
machine in any way not described in this guide. WARNING You may cause an electric shock/fire . If flammable substances come into contact with electrical parts inside the machine, it may result in fire or the machine at the power supply and contact the Canon Customer Care Center at 757-413-2848. Using - Canon MP370 | MultiPASS MP370/360 User's Guide - Page 125
user serviceable parts inside the machine. The machine contains high-voltage components. Never attempt any maintenance procedure not described in this guide the Canon Alarm] lamp has shut off. If you pull the power plug out of the wall outlet while the [Alarm] lamp is lit or flashing, the print head - Canon MP370 | MultiPASS MP370/360 User's Guide - Page 126
the power immediately by pressing the [ON/OFF] key, and disconnect the power cord. Then, contact the Canon Customer Care Center at 757-413-2848. Do not To ensure proper ventilation, make sure the machine is approximately 4 inches (10 cm) away from walls and other equipment. Do not install the - Canon MP370 | MultiPASS MP370/360 User's Guide - Page 127
guides included with your machine. • If the machine does not operate normally when you have followed the instructions provided in Chapter 11, "Troubleshooting." • If the machine has been dropped or damaged. • If the machine exhibits a distinct change in performance, indicating a need for servicing - Canon MP370 | MultiPASS MP370/360 User's Guide - Page 128
machine while it is printing. Parts inside the machine are moving and this may result in injury. Do not turn the machine upside down. Ink may leak out and stain clothing or the surrounding area. Adjust only those controls that are covered by the instructions in the guides since improper adjustment - Canon MP370 | MultiPASS MP370/360 User's Guide - Page 129
z Print head/Ink tanks For safety reasons, store print heads and ink tanks out of the reach of small children. If a child ingests any ink, consult a doctor immediately. Do not shake print heads or ink tanks. Ink may leak out and stain clothing or the surrounding area. Never touch the print head. - Canon MP370 | MultiPASS MP370/360 User's Guide - Page 130
Product And Use Of Images It may be unlawful to make copies of, scan, print or use reproductions of the following documents. The list provided is non-exhaustive. • Internal revenue stamps (canceled or uncanceled) • Selective service or draft papers • Bonds or other certificates of indebtedness - Canon MP370 | MultiPASS MP370/360 User's Guide - Page 131
X Users In The U.S.A. FCC Notice MP370: H12406 MP360: H12405 This device complies with Part 15 of the FCC Rules. specified in this guide. If such changes or modifications should be made, you could be required to stop operation of the equipment. Canon U.S.A., Inc. One Canon Plaza, Lake Success - Canon MP370 | MultiPASS MP370/360 User's Guide - Page 132
120V/60 Hz • Maximum: Approx. 47.0 W • Standby: Approx. 14.5 W (MP370) Approx. 14.0 W (MP360) Approx. 18.5 lb./8.4 kg • 17 7/8 in. Part 15 Class B, IC • Other: FCC Part 68, IC, Energy Star compliant Multi-purpose tray capacity • Plain paper: approx. 100 sheets (20 lb. or 64 g/m2) or 3/8 in. (10 - Canon MP370 | MultiPASS MP370/360 User's Guide - Page 133
: Printing area: Canon recommends that you print within (dark shade) this area. Printable area: The area where it is possible to print. (light shade) However, printing in this area can adversely affect print quality or paper feed precision. • Paper printable areas: Letter size: 8.0 in. × 10 - Canon MP370 | MultiPASS MP370/360 User's Guide - Page 134
Requirements See page 64. Ink Specifications Ink tank colors/capacity • Black (BCI-24 Black): approx. 300*, approx. 580** • Color (BCI-24 Color): approx. 160** * 1500 characters per page, normal text, at standard and plain paper mode with Windows XP printer driver. ** Based on printing the ISO - Canon MP370 | MultiPASS MP370/360 User's Guide - Page 135
and max. load capacity Recommended paper Print speed Maximum print width Resolution Bubble jet on-demand Automatic feed • Plain paper: approx. 100 sheets (17 lb. or 64 g/m2) or 3/8 in. (10 mm) thick paper stack * For other paper types, see page 15. See page 15. • Black & white: Fast: 18 pages - Canon MP370 | MultiPASS MP370/360 User's Guide - Page 136
Scan Specifications Compatibility Scanning speed Effective scanning width Scanning resolution Scanning image processing TWAIN / WIA (Windows XP) • Black & white text/grayscale (300 dpi): Min. 5.8 seconds/page (letter size)* • Color (150 dpi): Min. 17.4 seconds/page (letter size)* 8 1/2 in. (214 mm) - Canon MP370 | MultiPASS MP370/360 User's Guide - Page 137
78 resetting the ink counter 80 when to replace 77 Ink, specifications 132 Inner cover 8 L LCD (Liquid Crystal Display) 10 LCD messages BLACK INK CHANGED? 107 BLACK INK LOW 107 CANNOT USE THIS CARD TURN OFF AND ON 107 CARD READER BUSY 107 CARTRIDGE JAMMED 107 CHECK PAPER SIZE 107 CHECK PRINTER 107 - Canon MP370 | MultiPASS MP370/360 User's Guide - Page 138
CARD 108 INVALID KEY/SETTING 108 LOAD PAPER 108 MACHINE IN USE CANNOT TURN OFF 108 MEMORY FULL 108 NO FILES ON CARD 109 PROBLEM READING CARD REINSERT MEMORY CARD 109 PROBLEM READING CARD TURN OFF AND ON 109 PUT IN CARTRIDGE 109 WAIT COOLING 109 WASTE INK NEAR FULL 109 WRONG CARTRIDGE 109 Loading - Canon MP370 | MultiPASS MP370/360 User's Guide - Page 139
specifications 134 Set key 9 Settings accessing 111 lists 112 Software components 66 displaying guides stored 118 installing 64 system requirements 64 uninstalling, reinstalling 67 Stop/Reset key 9 T Tray extension 7 U USB connector (for computer) 8 Utility software 121 V Vivid photo printing 43 - Canon MP370 | MultiPASS MP370/360 User's Guide - Page 140
HT1-2234-000-V.1.0 XX2003A © CANON INC. 2003 120V PRINTED IN THAILAND
-
 1
1 -
 2
2 -
 3
3 -
 4
4 -
 5
5 -
 6
6 -
 7
7 -
8
-
9
-
10
-
11
-
12
-
13
-
14
-
15
-
16
-
17
-
18
-
19
-
20
-
21
-
22
-
23
-
24
-
25
-
26
-
27
-
28
-
29
-
30
-
31
-
32
-
33
-
34
-
35
-
36
-
37
-
38
-
39
-
40
-
41
-
42
-
43
-
44
-
45
-
46
-
47
-
48
-
49
-
50
-
51
-
52
-
53
-
54
-
55
-
56
-
57
-
58
-
59
-
60
-
61
-
62
-
63
-
64
-
65
-
66
-
67
-
68
-
69
-
70
-
71
-
72
-
73
-
74
-
75
-
76
-
77
-
78
-
79
-
80
-
81
-
82
-
83
-
84
-
85
-
86
-
87
-
88
-
89
-
90
-
91
-
92
-
93
-
94
-
95
-
96
-
97
-
98
-
99
-
100
-
101
-
102
-
103
-
104
-
105
-
106
-
107
-
108
-
109
-
110
-
111
-
112
-
113
-
114
-
115
-
116
-
117
-
118
-
119
-
120
-
121
-
122
-
123
-
124
-
125
-
126
-
127
-
128
-
129
-
130
-
131
-
132
-
133
-
134
-
135
-
136
-
137
-
138
-
139
-
140
 |
 |
ENG