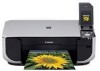
Canon MP470 MP470 series Easy Setup Instructions
Canon MP470 - PIXMA Color Inkjet Manual
 |
UPC - 013803089882
View all Canon MP470 manuals
Add to My Manuals
Save this manual to your list of manuals |
Canon MP470 manual content summary:
- Canon MP470 | MP470 series Easy Setup Instructions - Page 1
Setup Instructions 1 Start Guide. 2 Install the FINE Cartridges a Remove the Black FINE Cartridge from its box. d Push up the FINE Cartridge until it ink cartridge." appears, go to i. i Lift the Scanning Unit (Printer Cover), and pull the Scanning Unit Support down into place. The FINE Cartridge - Canon MP470 | MP470 series Easy Setup Instructions - Page 2
to the machine, then TURN THE MACHINE ON. The MP Drivers will begin identifying the printer port being used. Important If you cannot go to the next procedure after three minutes, refer to "Troubleshooting" instructions in the User's Guide on-screen manual. Macintosh Note • Since Mac® OS 9, Mac OS
-
 1
1 -
 2
2
 |
 |
Start Here
Easy Setup Instructions
a
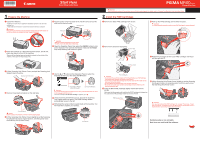
Unpack the Machine.
Confirm the included items against the illustration printed on the lid of the
packing box.
A USB cable is necessary to connect the machine with your computer.
Important
When moving the machine, carry the machine at both ends as shown below. Do
not lift the machine by grasping the Paper Support Extension.
b
Place the machine on a flat and horizontal surface, and do not
place any objects in front of the machine.
Remove all the shipping tapes and protective material on the outside of the
machine. Then open the Paper Output Tray.
c
Lift the Scanning Unit (Printer Cover), and pull the Scanning Unit
Support down into place.
Scanning Unit (Printer Cover)
d
Remove the protective material on the right side.
Protective Material
Caution
Before turning on the machine, remove all of the shipping tapes.
e
Lift the Scanning Unit (Printer Cover) slightly to set the Scanning
Unit Support back to its original position, and then gently close
the Scanning Unit (Printer Cover).
1
Prepare the Machine
f
Plug the power cord in the back of the machine and connect the
other end to the wall outlet.
Power Cord
Document Cover
Important
Make sure that the Document Cover is closed.
Do NOT connect the USB cable at this stage.
g
Open the Operation Panel, then press the
ON/OFF
button to turn
on the machine. The machine will initialize. Wait until the
Power
lamp stops flashing and remains lit green.
h
Use the
{
or
}
button on the Operation Panel to select the
language for the LCD, then press the
OK
button.
(1) Press the
{
or
}
button
to select the language.
(2) Press the
OK
button.
Important
If an unintended language is displayed on the LCD, press the Back button to return
to the Language selection screen.
Once the message “
Set the ink cartridge.
” appears, go to
i
.
i
Lift the Scanning Unit (Printer Cover), and pull the Scanning
Unit Support down into place. The FINE Cartridge Holder
automatically moves to the left.
j
Write down the serial number located inside of the machine. You
will need this to register your product.
Serial Number
•
•
2
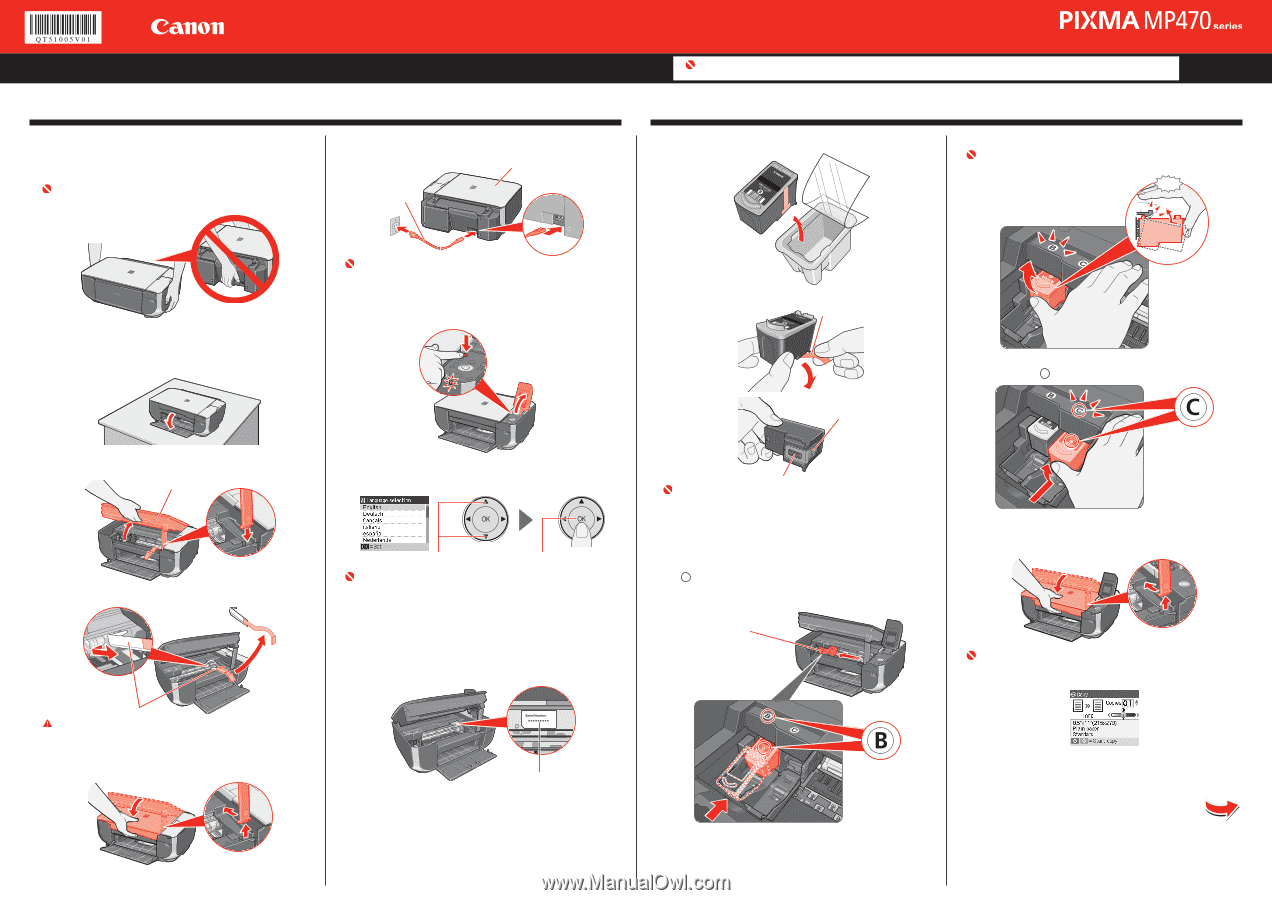
Install the FINE Cartridges
a
Remove the Black FINE Cartridge from its box.
b
Remove the protective tape gently.
Protective Tape
Print Head Nozzles
Electrical Contacts
Important
Do not touch the electrical contacts or Print Head Nozzles on a FINE Cartridge.
The machine may not print out properly if you touch it.
Do not drop or shake FINE Cartridges as this may cause the ink to leak out and
stain your clothes and hands.
Do not reattach the protective tape once you have removed it.
Be careful not to stain your hands or surrounding work area with ink on the
removed protective tape.
c
Insert the Black FINE Cartridge slightly slanted into the left
slot
B
.
Make sure that the procedure for installing the FINE Cartridges is displayed on
the LCD and the FINE Cartridge Holder has moved to the left.
FINE Cartridge Holder
•
•
•
•
d
Push up the FINE Cartridge until it clicks into place.
Important
For correct machine operation, make sure the FINE Cartridge is securely inserted.
Click
e
Repeat the procedure for the Color FINE Cartridge, inserting it
into the right slot
C
.
f
Lift the Scanning Unit (Printer Cover) slightly to set the Scanning
Unit Support back to its original position, and then gently close
the Scanning Unit (Printer Cover).
Important
Once you have installed the FINE Cartridges, the message “Processing... Please
wait momentarily.” is displayed on the LCD. Wait until the copy standby screen is
displayed before proceeding. It takes about one minute.
Hardware setup is now complete.
Next, turn over and install the software.
Photo All-in-One
Important
When cleaning the exterior of the machine, use a soft cloth to wipe it gently. For details, refer to “Cleaning Your Machine” in the
Quick Start Guide
.