Canon MX700 MX700 series Quick Start Guide
Canon MX700 - PIXMA Color Inkjet Manual
 |
UPC - 013803081336
View all Canon MX700 manuals
Add to My Manuals
Save this manual to your list of manuals |
Canon MX700 manual content summary:
- Canon MX700 | MX700 series Quick Start Guide - Page 1
Office All-In-One series Quick Start Guide QT51395V01 - Canon MX700 | MX700 series Quick Start Guide - Page 2
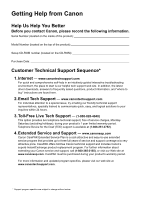
self-help in an intuitively guided interactive troubleshooting environment, the place to start is our helpful tech support web site. In addition, the latest driver downloads, answers to frequently asked questions, product information, and "where to buy" instructions are found here. 2. Email Tech - Canon MX700 | MX700 series Quick Start Guide - Page 3
series Office All-In-One Quick Start Guide - Canon MX700 | MX700 series Quick Start Guide - Page 4
the prior written consent of Canon U.S.A., Inc. © 2007 Canon U.S.A., Inc. Canon U.S.A., Inc. One Canon Plaza Lake Success, NY 11042 Disclaimer Canon U.S.A., Inc. has reviewed this manual thoroughly in order that it will be an easy-to-use guide to your Canon PIXMA MX700 series Office All-In-One - Canon MX700 | MX700 series Quick Start Guide - Page 5
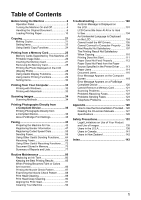
Head Cleaning 89 Print Head Deep Cleaning 90 Aligning the Print Head 91 Cleaning Your Machine 94 Troubleshooting 100 An Error Message Is Displayed on the LCD 101 LCD Cannot Be Seen At All or Is Hard to See 104 An Unintended Language Is Displayed on the LCD 104 Cannot Install the MP Drivers - Canon MX700 | MX700 series Quick Start Guide - Page 6
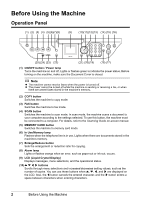
ratio for copying. (8) Alarm lamp Lights or flashes orange when an error, such as paper-out or ink-out, occurs. (9) LCD (Liquid Crystal Display) Displays messages, menu selections, and the operational status. (10) { } [ ] buttons Scrolls through menu selections and increases/decreases setting values - Canon MX700 | MX700 series Quick Start Guide - Page 7
numbers. (15) Black button Starts black & white copying, scanning, or faxing. (16) Stop/Reset button Cancels operations such as copying, scanning, or faxing, or a print job in progress. (17) Color button Starts color copying, photo printing, scanning, or faxing. (18) Coded Dial button Press this - Canon MX700 | MX700 series Quick Start Guide - Page 8
, confirm the following. z The Print Head and ink tanks are set into place. If you are using the machine connected to a computer, confirm also the following. z The machine is connected to your computer (or a compatible device). z The MP Drivers are installed. Note If preparatory operations above are - Canon MX700 | MX700 series Quick Start Guide - Page 9
machine is not operated for about five minutes*. Perform a print operation to restore the display. * You cannot change the wait time before the LCD goes out. Note When you want to restore the display, perform any operation such as copying, faxing, or scanning, or press any button except for the ON - Canon MX700 | MX700 series Quick Start Guide - Page 10
inches / 2 mm in height z 1 sheet for sizes other than these Max. 0.39 inches / 10 mm 0.002 to 0.005 inches / 0.06 to 0.13 mm - 13 to 24 lb / 50 Documents Load originals to copy, scan, or fax on the Platen Glass or the ADF. Note z Make sure any glue, ink, correction fluid, or the like on the - Canon MX700 | MX700 series Quick Start Guide - Page 11
2 Load the original with the side to be copied, scanned, or faxed faced down on the Platen Glass. z To make copies or scan documents printout paper. Refer to "Printing Area" in the User's Guide on-screen manual. z To scan photographs Place the photograph at least 0.4 inches / 10 mm (A) away from - Canon MX700 | MX700 series Quick Start Guide - Page 12
least 0.4 inches / 10 mm (A) apart from each other. (A) (A) (A) (A) 0.4 inches / 10 mm Important z Do scanner to malfunction or the Platen Glass to break. Note z If photographs are placed closer, they may be scanned as a single image. For details, refer to the Scanning Guide on-screen manual - Canon MX700 | MX700 series Quick Start Guide - Page 13
the Document Tray. 3 Load the document in the ADF. Load the document with the side you want to copy, scan, or fax facing up in the ADF. 4 Adjust the Document Guides to match the document width. Note Ensure that the edge of the document stack is in line with the Paper Size - Canon MX700 | MX700 series Quick Start Guide - Page 14
without changing paper source settings, load paper in the Front Tray. „ Using Specialty Media Canon recommends that you use Canon genuine media to ensure optimal print quality. z Photo Quality Media z Glossy Photo Paper z Matte Photo Paper z Photo Paper Plus Double Sided z Photo Paper Plus - Canon MX700 | MX700 series Quick Start Guide - Page 15
Support Load Limit Rear Tray Front Tray 150 sheets 110 sheets 10 envelopes Not loadable*4 80 sheets Not loadable*4 Paper Output Tray Load Limit Media Type Machine Setting 50 sheets Plain paper 1 envelope - 50 sheets - Printer Driver Canon specialty media. Refer to the instruction manual - Canon MX700 | MX700 series Quick Start Guide - Page 16
printed surface nor stack the printed sheets until the ink is fixed. Note For a detailed description of printing media types, refer to "Printing Media" in the User's Guide onscreen manual ) z Paper that is too thick (plain paper, except for Canon genuine paper, weighing more than 28 lb / 105 gsm) z - Canon MX700 | MX700 series Quick Start Guide - Page 17
setting in the printer driver. See "Printing with Windows" on page 32 or "Printing with Macintosh" on page 33. For details on paper source selection using the printer driver, refer to the PC Printing Guide on-screen manual. Paper Source for Fax Printouts To print out received faxes, the machine uses - Canon MX700 | MX700 series Quick Start Guide - Page 18
paper to be jammed. (A) (B) Note z We recommend using genuine Canon photo media when printing photographs. For details on the specialty media Canon provides for use with its various printers, see "Using Specialty Media" on page 10. When Printing on Plain Paper z You can use general copy paper or - Canon MX700 | MX700 series Quick Start Guide - Page 19
paper source with the printer driver. For details, refer to the PC Printing Guide on-screen manual. 3 Load the paper. (A) (1) Load the paper in the Rear Tray with the print side facing UP. (2) Align the paper stack against the Cover Guide on the right side of the Paper Support. (3) Note Make sure - Canon MX700 | MX700 series Quick Start Guide - Page 20
can load A4, Letter, or B5-sized plain paper (such as Canon Super White Paper SW-201) in the Front Tray. You cannot select the paper source with the printer driver. For details, refer to the PC Printing Guide on- screen manual. (2) (1) 3 Load the paper with the print side facing DOWN. (A) (1) - Canon MX700 | MX700 series Quick Start Guide - Page 21
on page 30. z When using the machine connected to a computer, select the size of the loaded paper in Page Size (or Paper Size) in the printer driver. For details on printer driver settings, see "Printing with Windows" on page 32 or "Printing with Macintosh" on page 33. Before Using the Machine 17 - Canon MX700 | MX700 series Quick Start Guide - Page 22
or US Comm. Env. #10-sized envelope. Important z You need to print from the computer to print on envelopes. z Do not Windows®, print guidance will be displayed when envelopes are printed. To prevent display of print guidance, refer to "Printing Envelopes" in the PC Printing Guide on-screen manual - Canon MX700 | MX700 series Quick Start Guide - Page 23
Landscape in Orientation. Important Be sure to set the printer driver setting properly. If you do not, the address will be printed in the wrong direction. Note For details on printer driver settings, see "Printing with Windows" on page 32 or "Printing with Macintosh" on page 33. Before Using the - Canon MX700 | MX700 series Quick Start Guide - Page 24
also select the paper source with the printer driver. For details, refer to the PC Printing Guide on-screen manual. 2 Specify the page size and and Media Type in the printer driver. For details on printer driver settings, see "Printing with Windows" on page 32 or "Printing with Macintosh" on page 33 - Canon MX700 | MX700 series Quick Start Guide - Page 25
Machine On and Off" on page 4. 2 Press the COPY button. 3 Load paper. See "Loading Printing Paper" on page 10. 4 Load the original on the Platen Glass (A) or the ADF. See "Loading Original Documents" the Color button for color copying, or the Black button for black & white copying. Copying 21 - Canon MX700 | MX700 series Quick Start Guide - Page 26
load paper in the Rear Tray. (3) Print quality Adjust print quality according to the original. Note z black or white. (4) Magnification Specify the reduction/enlargement method. For details, refer to "Reducing or Enlarging a Copy" in "Setting Items" in "Copying" of the User's Guide on-screen manual - Canon MX700 | MX700 series Quick Start Guide - Page 27
Tab 2 You can specify whether to enable automatic intensity adjustment. (5) (5) Auto intensity Specify whether the intensity is adjusted automatically. When Auto intensity ON is selected, Auto will be displayed above the intensity slide bar in the Copy standby screen. Important You can change the - Canon MX700 | MX700 series Quick Start Guide - Page 28
Using Useful Copy Functions For details, refer to "Using Useful Copy Functions" in the User's Guide on-screen manual. Reducing or Enlarging a Copy Copying Two Pages to Fit onto a Single Page (2-on-1 Copy) Copying Four Pages to Fit onto a Single Page (4-on-1 Copy) Repeating - Canon MX700 | MX700 series Quick Start Guide - Page 29
Supports Type I/II (3.3 V) z Microdrive z Memory Stick z Memory Stick PRO Memory cards that can be inserted in the Card Slot using the adapter Use the special adapter provided with the card. *2 Requires purchase of a separate compact flash card adapter for xD-Picture card. Printing from a Memory - Canon MX700 | MX700 series Quick Start Guide - Page 30
This machine supports JPEG and TIFF images created by DCF ver. 1.0/2.0 standard compliant digital cameras (Exif ver. 2.2/2.21 compliant). Important Compatible image types are limited to JPEG and TIFF only. Other image or movie types such as RAW images cannot be printed. 26 Printing from a Memory - Canon MX700 | MX700 series Quick Start Guide - Page 31
the right Card Slot. The Access lamp lights up. * Be sure to attach the memory card to the special adapter before inserting it into the Card Slot. Caution z The memory card will stick out of the Card Slot, the Access lamp has lit up. 6 Close the Card Slot Cover. Printing from a Memory Card 27 - Canon MX700 | MX700 series Quick Start Guide - Page 32
. (1) Turn on the machine. See "Turning the Machine On and Off" on page 4. (2) Load paper. See "Loading Printing Paper" on page 10. 2 Insert the memory card. (1) Press the MEMORY CARD button. (2) Insert the memory card into the Card Slot. See "Inserting the Memory Card" on page 27. 3 - Canon MX700 | MX700 series Quick Start Guide - Page 33
choice in the specified layout. Printing on Stickers (Sticker print) Prints your favorite photo with a frame on Canon Photo Stickers. Printing All Photos (Print all photos) Prints all photos saved on the memory card. Printing an Index of All Photos (Photo Index print) Prints an index of all photos - Canon MX700 | MX700 series Quick Start Guide - Page 34
of paper, bordered/borderless, and Date/ file no. (1) (2) (3) (4) (5) Note z Depending on the functions, some setting items cannot be specified in combination. z The print settings are retained even if the machine is turned off. (1) Page size Select the page size of the loaded paper. Important You - Canon MX700 | MX700 series Quick Start Guide - Page 35
the sky as well as on black areas. (6) Face brightener Brightens a darkened face on the photo taken against the light. (7) Image optimizer Corrects and smooths the jagged contours for printing. (8) Brightness Adjusts brightness. (9) Contrast Adjusts contrast. (10) Color hue Adjusts color hue. For - Canon MX700 | MX700 series Quick Start Guide - Page 36
plain paper in the Front Tray. z For details on the printer driver functions, click Help or Instructions to view the online help or the PC Printing Guide on-screen manual. Instructions is only displayed when the on-screen manuals are installed. 7 Click Print (or OK). 32 Printing from Your Computer - Canon MX700 | MX700 series Quick Start Guide - Page 37
OK. 8 Select Print on the application software's File menu. 9 Select Quality & Media in the pop-up menu. 10 Specify the required settings printer driver functions, click to view the PC Printing Guide on-screen manual. If the on-screen manuals are not installed, the PC Printing Guide on-screen manual - Canon MX700 | MX700 series Quick Start Guide - Page 38
scanning printed text, you can use the OCR (Optical Character Recognition) software to Guide on-screen manual. Besides the above-mentioned methods, you can use a TWAIN- or WIA- (Windows Vista and Windows XP only) compliant application software and the Control Panel (Windows Vista and Windows XP - Canon MX700 | MX700 series Quick Start Guide - Page 39
This operation is not necessary for Mac OS X v.10.4.x. For details, refer to "Scanning Methods" in the User's Guide on-screen manual. 2 Turn on the machine. Guide on-screen manual. (4) Press the { or } button to select the scan operation, then press the OK button. 5 Press the Color or the Black - Canon MX700 | MX700 series Quick Start Guide - Page 40
instructions given in the device's instruction manual. Note When printing photos with the PictBridge compliant device connected to the machine, we recommend the use of the AC adapter the Rear Tray. See "Loading Printing Paper" on page 10. Note When printing directly from a PictBridge compliant device - Canon MX700 | MX700 series Quick Start Guide - Page 41
the machine. Perform necessary operations on the PictBridge compliant device before connecting it to this machine according to instructions given in the device's instruction manual. (1) Make sure that the PictBridge compliant device is turned off. (2) Connect the PictBridge compliant device to the - Canon MX700 | MX700 series Quick Start Guide - Page 42
device, be sure to follow the instructions given in the instruction manual of your PictBridge compliant device. Note Canon genuine papers depending on the country or region of purchase. *4 When printing on Photo Paper Plus Semi-gloss 8" x 10" / 203.2 x 254.0 mm (SG-201), select 20 x 25 cm/8" x 10 - Canon MX700 | MX700 series Quick Start Guide - Page 43
a list format that looks like a negative film. Besides the above options, you can also specify to print an index of images in the DPOF*3 print settings menu. *1 Can be selected only on certain Canon-brand PictBridge compliant devices. *2 You can use this option only when A4 or 8.5" x 11" (Letter) is - Canon MX700 | MX700 series Quick Start Guide - Page 44
„ Setting on the Machine This section describes the PictBridge print settings on the machine. Set the print settings to Default on the PictBridge compliant device when you want to print according to the settings on the machine. z Displaying the PictBridge Settings Screen and Specifying the Settings - Canon MX700 | MX700 series Quick Start Guide - Page 45
of a photo. Reduces the noise on blue areas like the sky as well as on black areas. Brightens a darkened face on the photo taken against the light. Corrects and smooths the jagged contours for printing. Adjust brightness. Adjust contrast. Adjust color hue. For example, you can increase red or yellow - Canon MX700 | MX700 series Quick Start Guide - Page 46
. User data and speed dialing settings are retained. If the power disconnects, the following will apply: z You will not be able to send or receive faxes or make copies. z If a telephone is connected to the machine, you can receive voice calls. z Whether you are able to make voice calls depends on - Canon MX700 | MX700 series Quick Start Guide - Page 47
Users in the UK If the connector of the external device cannot be connected to the jack on the machine, you will need to purchase a B.T. adapter to connect as follows: Connect the external device line to the - Canon MX700 | MX700 series Quick Start Guide - Page 48
conditions. For details, refer to the instruction manual supplied with the network device (control devices such as an xDSL modem, terminal adapter, or dial-up router) you are details on ISDN connection and settings, see the manuals supplied with your terminal adapter or dial-up router. 44 - Canon MX700 | MX700 series Quick Start Guide - Page 49
Digital Network) or xDSL (Digital Subscriber Line) connections, contact the telephone company or service provider to confirm your line type. Note z This setting may not be available depending on the country or region of purchase. In this case, you do not need to perform this setting. z You can print - Canon MX700 | MX700 series Quick Start Guide - Page 50
line type, then press the OK button. Rotary pulse: Suitable for pulse dialing. Touch tone: Suitable for tone dialing. Note Rotary pulse may not be supported depending on the country or region of purchase. 46 - Canon MX700 | MX700 series Quick Start Guide - Page 51
print on a fax sent from your machine: 09/01/2007 15:33 FAX 123 coded speed dialing. (E) Page number Note z When sending in black & white, you can set the sender information to print inside or outside the image area. Refer to "TTI position" in "Device Settings" of the User's Guide on-screen manual - Canon MX700 | MX700 series Quick Start Guide - Page 52
number mode (:1). * SP indicates a space. Follow the procedure below to enter letters and numbers when you register names and fax/ phone numbers for the sender information or a coded speed dial. 1 Press the button to switch to uppercase letter mode (:A), lowercase letter mode (:a), or number mode - Canon MX700 | MX700 series Quick Start Guide - Page 53
Device Settings" of the User's Guide on-screen manual. z When the machine is connected to a computer with the MP Drivers installed, the date and time setting with the MP Drivers installed, the setting will be copied to the machine once again. 1 Display the FAX menu. See "Display the FAX menu." on - Canon MX700 | MX700 series Quick Start Guide - Page 54
summer time) begins and ends. Note This setting may not be available depending on the country or region of purchase. 1 Display the FAX menu. See "Display the FAX menu." on page 45. 2 Display the Device settings screen. See "Display the Device settings screen." on page 45. 3 Display the User settings - Canon MX700 | MX700 series Quick Start Guide - Page 55
is set. 7 Set the date and time that summer time ends. (1) Press the { or } button to select End date/time, then press the OK button. Faxing 51 - Canon MX700 | MX700 series Quick Start Guide - Page 56
format) when summer time ends, then press the OK button. Precede single digits with a zero. The summer time end date/time is set. 8 Press the FAX button. 52 - Canon MX700 | MX700 series Quick Start Guide - Page 57
on how to enter or delete characters, see "Guidelines for Entering Numbers, Letters, and Symbols" on page 48. 6 Press the Numeric buttons to enter your fax/telephone number (max. 20 digits, including spaces). To enter a plus sign (+) before the number, press the # button - Canon MX700 | MX700 series Quick Start Guide - Page 58
to enter or delete characters, see "Guidelines for Entering Numbers, Letters, and Symbols" on page 48. You can print the User's data list to confirm the sender information you have registered. See "Printing the User's Data List" on page 78. 7 Press the OK button to finalize your setting. The display - Canon MX700 | MX700 series Quick Start Guide - Page 59
speed dialing. Note For a list of the recipients you have registered, print the coded speed dialing list. See "Printing a List of the Registered Destinations" on page 58. 1 Display the FAX menu. See "Display the FAX menu." on page 45. 2 Press the [ or ] button to select Speed dial registration, then - Canon MX700 | MX700 series Quick Start Guide - Page 60
(3) Press the Numeric buttons to enter the fax/telephone number (max. 60 digits (40 digits for a tone. 4 Press the OK button to finalize registration. Note To continue registering coded speed dialing codes, repeat steps 3 and 4. „ Changing or Deleting Registered Information z Changing a Registered - Canon MX700 | MX700 series Quick Start Guide - Page 61
press the OK button. 5 Press the Numeric buttons to enter the new fax/telephone number (max. 60 digits (40 digits for Korea), including spaces), Numeric buttons (A) or the {, }, [, or ] button (B) to select the coded speed dialing code to delete, then press the OK button. (A) (B) 3 Press the { or - Canon MX700 | MX700 series Quick Start Guide - Page 62
FAX menu. See "Display the FAX menu." on page 45. 2 Display the Print reports/lists screen. (1) Press the [ or ] button to select Print reports/lists, then press the OK button. The Print reports/lists screen is displayed. 3 Print to print the list in numerical order of the speed dial code, or - Canon MX700 | MX700 series Quick Start Guide - Page 63
Adjust the image quality and scan contrast. See "Adjusting the Image Quality (Fax Resolution) or the Scan Contrast" on page 60. Step 3 Dial the recipient's number. Step 4 Send faxes. z Using the Platen Glass (1) Press the Color or the Black button. If you have two or more pages of the original, load - Canon MX700 | MX700 series Quick Start Guide - Page 64
you are sending. (1) Press the FAX button, then press the FAX Quality button. (2) Press the { or } button to select FAX resolution. (3) Press the [ or ] button to select the image quality. Standard: Suitable for text-only documents. Fine: Suitable for fine-print documents. Photo: Suitable for - Canon MX700 | MX700 series Quick Start Guide - Page 65
the Image Quality (Fax Resolution) or the Scan Contrast" on page 60. 2 Dial the recipient's number pressing the Numeric buttons. You can also speed-dial a recipient you have registered. See "Dialing the Coded Speed Dial" on page 63. 3 Press the Color button for color sending, or the Black button for - Canon MX700 | MX700 series Quick Start Guide - Page 66
button, then follow the instructions on the LCD. z Sending Faxes after Confirming Connection (Manual Sending) Use manual sending if you want recipient's fax machine to receive faxes. (5) When you hear a high-pitched signal, press the Color button for color sending, or the Black button for black & - Canon MX700 | MX700 series Quick Start Guide - Page 67
button for black & white sending. Important Color sending is available only when the recipient's fax machine supports color faxing. Note To cancel sending a fax, press the Stop/Reset button. To cancel sending a fax while it is being sent, press the Stop/Reset button, then follow the instructions on - Canon MX700 | MX700 series Quick Start Guide - Page 68
10 fax driver from any application software that has a printing function. For details, refer to the FAX Driver Guide onscreen manual. „ Sending/Receiving Using ECM This machine is set to send/receive faxes in ECM (Error Correction Mode). ECM automatically corrects errors caused by connection troubles - Canon MX700 | MX700 series Quick Start Guide - Page 69
See "Changing the Print Settings" on page 70. Important z The machine cannot receive faxes when the power service provided by your telephone company. (Not available depending on the country or region of purchase.): Select DRPD or Network switch. Note If you do not have a dedicated phone line for fax - Canon MX700 | MX700 series Quick Start Guide - Page 70
Voice call: The telephone will ring. Pick up the handset to answer the call. (C) Fax: The telephone will ring. If you pick up the handset when receiving a fax, press the FAX button, then press the Color or the Black button. Note If the machine is located away from the telephone, pick up the handset - Canon MX700 | MX700 series Quick Start Guide - Page 71
to ON, and then specify the automatic reception start time. Refer to "Manual/auto switch" in "Device Settings" of the User's Guide on-screen manual. z If you have subscribed to Duplex Ringing service in Hong Kong, the machine will receive faxes automatically even if you set the receiving mode of the - Canon MX700 | MX700 series Quick Start Guide - Page 72
Machine to Automatically Switch between Fax and Voice Calls by the Call Ring Patterns (Network Switch): Select Network switch*. * This setting may . (C) Fax: The fax is received automatically when the machine detects the registered fax ring pattern. Note z The name of this service varies depending - Canon MX700 | MX700 series Quick Start Guide - Page 73
a receive mode, then press the OK button. Press the Back button to exit the FAX menu. The receive mode (A) will be displayed on the LCD. (A) „ Setting the Ring Pattern If you subscribe to a Distinctive Ring Pattern Detection service with your telephone company, your telephone company will assign two - Canon MX700 | MX700 series Quick Start Guide - Page 74
Letter-sized paper can be fed from the Front Tray. z If paper of size other than A4, Letter, or Legal is loaded, the received faxes will not be printed and "Received in memory." is displayed. Replace the paper loaded with A4, Letter, or Legal sized paper, then press the OK button. Note - Canon MX700 | MX700 series Quick Start Guide - Page 75
"(215x355) can only be selected when the Rear Tray is selected as the paper source. (2) The paper type is set to Plain paper. (3) Select the fax paper source from Front tray, Rear tray, or Auto feed switch. Note z When Auto feed switch is selected, paper feeds from the paper source specified - Canon MX700 | MX700 series Quick Start Guide - Page 76
memory. "Received in memory." is displayed in fax mode. When the problem is resolved as described, the fax stored in memory is printed automatically. z Ink is low or has run out while receiving a fax: replace the ink tank. z Paper has run out while receiving a fax: load the paper and press the OK - Canon MX700 | MX700 series Quick Start Guide - Page 77
in Memory If the machine was not able to send a fax, or if the machine was not able to print a received fax, the machine stores the unsent or unprinted fax in its memory. You can print a list of stored documents (the memory list) or print a specified document. The memory list shows the transaction - Canon MX700 | MX700 series Quick Start Guide - Page 78
all pages of the document, then press the OK button. If you have canceled receiving a fax in progress by pressing the Stop/Reset button, the fax may be printed after the memory list. (4) To print other documents, return to step (2). To exit, press the Back button or the Stop/ Reset button. z To - Canon MX700 | MX700 series Quick Start Guide - Page 79
„ Deleting a Document in Memory 1 Display the FAX menu. See "Display the FAX menu." on page 45. 2 Display the Memory reference screen. See "Display the Memory reference screen." on page 73. delete other documents, return to step 4. To exit, press the Back button or the Stop/Reset button. Faxing 75 - Canon MX700 | MX700 series Quick Start Guide - Page 80
's Details in Memory In the following cases, the machine is not able to print the received fax and will automatically store the fax in its memory: z Ink is low or has run out while receiving a fax. z Paper has run out while receiving a fax. z Paper Output Tray is closed. z OFF is selected for Auto - Canon MX700 | MX700 series Quick Start Guide - Page 81
setting, refer to "Activity report" in "Device Settings" of the User's Guide on-screen manual. z Printing the Activity Report Manually 1 Display the FAX menu. See "Display the FAX menu." on page 45. 2 Display the Print reports/lists screen. See "Display the Print reports/lists screen." on page 58 - Canon MX700 | MX700 series Quick Start Guide - Page 82
. See "Registering Sender Information" on page 47. z Printing the User's Data List 1 Display the FAX menu. See "Display the FAX menu." on page 45. 2 Display the Print reports/lists screen. See "Display the Print reports/lists screen." on page 58. 3 Print the User's data list. (1) Press the { or - Canon MX700 | MX700 series Quick Start Guide - Page 83
. At purchase, RX Reports are set not to print at all. You can set the machine to print the report every time it receives a document, or only when an error occurs. Note For details on the RX report setting, refer to "RX report" in "Device Settings" of the User's Guide on-screen manual. Faxing 79 - Canon MX700 | MX700 series Quick Start Guide - Page 84
the correct order indicated by the label on the Print Head Holder. The machine cannot print if an ink tank is installed in the incorrect position. z For information on the compatible ink tanks, see the back cover of this guide. z If printing becomes faint or white streaks appear despite sufficient - Canon MX700 | MX700 series Quick Start Guide - Page 85
tank within six months of first use. z Color ink may be consumed even when printing a black-and-white document or when blackand-white printing is specified. Color ink is also consumed in Print Head Cleaning and Print Head Deep Cleaning, which may be necessary to maintain the machine's performance - Canon MX700 | MX700 series Quick Start Guide - Page 86
Scanning Unit (Printer Cover) with both hands, and set the Scanning Unit Support to hold the cover. The Print Head Holder moves to ink tank at a time. Be sure to replace ink tanks one by one when replacing more than one ink tank. z For details on ink lamp flashing speed, see (A) "Getting the Ink - Canon MX700 | MX700 series Quick Start Guide - Page 87
ejected properly. z Be careful not to stain your clothes and hands with ink on the removed protective cap. (E) (F) 5 Install the ink tank. (1) Insert the front end of the ink tank into the Print Head. (G) Make sure the position of the tank matches the label (G). (1) Routine Maintenance - Canon MX700 | MX700 series Quick Start Guide - Page 88
not hold the LCD. Note z If the error message is still displayed after the Scanning Unit (Printer Cover) is closed, see "An Error Message Is Displayed on the LCD" on page 101. z When you start printing after replacing the ink tank, Print Head Cleaning is performed automatically. Do not perform any - Canon MX700 | MX700 series Quick Start Guide - Page 89
a protective cap on the Print Head to prevent the ink from drying. If you remove print or copy in both black & white and in color, or perform Print Head Cleaning, about once a month to prevent degradation of the Print Head. Numerous nozzles are installed in the Print Head for high-precision printing - Canon MX700 | MX700 series Quick Start Guide - Page 90
the problem, the Print Head may be damaged. Contact your Canon service representative. z If the Ruled Lines Are Shifted See "Aligning the Print Head" on page 91. Note You can also perform the maintenance operation from your computer. For details, refer to the PC Printing Guide on-screen manual. 86 - Canon MX700 | MX700 series Quick Start Guide - Page 91
the nozzle check pattern to determine whether the ink ejects properly from the print head nozzles. 1 Make sure that the machine Press the Feed Switch button to select the paper source where you have loaded paper. 4 Print the nozzle check pattern. (1) Press the Menu button. (2) Press the [ or ] button - Canon MX700 | MX700 series Quick Start Guide - Page 92
ink level is low, the nozzle check pattern is not printed correctly. Replace the relevant ink tank. See "Replacing an Ink Tank" on page 80. 1 Check the nozzle check pattern you printed and press the OK button to start Print Head Cleaning. See "Print Head Cleaning" on page 89. 88 Routine Maintenance - Canon MX700 | MX700 series Quick Start Guide - Page 93
nozzle check pattern. Cleaning unclogs the nozzles and restores the print head condition. Note that cleaning the Print Head causes used ink to be absorbed in the ink absorber. Cleaning the Print Head consumes ink, so perform Print Head Cleaning only when necessary. 1 Make sure that the machine is - Canon MX700 | MX700 series Quick Start Guide - Page 94
See "Replacing an Ink Tank" on page 80. (2) If the print head nozzles are still not clean, turn off the machine and perform another Print Head Deep Cleaning after 24 hours. (3) If this does not solve the problem, the Print Head may be damaged. Contact your Canon service representative. 90 Routine - Canon MX700 | MX700 series Quick Start Guide - Page 95
is displayed. (4) Press the { or } button to select Manual head align and then press the OK button. The confirmation screen is displayed. Note If you select Head alignment print, the machine exits the process after printing the current head position adjustment values. (5) Press the { or } button to - Canon MX700 | MX700 series Quick Start Guide - Page 96
6 Adjust the print head position. (1) Check the printed patterns and press the [ or ] button to input the number of the pattern in column A that has the least noticeable streaks. Note If it is - Canon MX700 | MX700 series Quick Start Guide - Page 97
(4) Check the printed patterns and press the [ or ] button to input the number of the pattern in column L that has the least noticeable horizontal streaks. (5) Repeat the procedure for column M, and then press the OK button. Routine Maintenance 93 - Canon MX700 | MX700 series Quick Start Guide - Page 98
may remain inside the machine and cause problems such as a blocked Print Head and poor printing results. Use a soft cloth to If the glass of the ADF (C) is stained with ink, correction fluid, or the like, black streaks may appear on the printed paper when the document is loaded in the ADF. With - Canon MX700 | MX700 series Quick Start Guide - Page 99
„ Cleaning the ADF Caution Be sure to turn off the power and disconnect the power cord before cleaning the machine. 1 Open the Document Tray. 2 Open the Feeder Cover. 3 With a soft, clean, lint-free and dry cloth, wipe (A) off any paper dust from the inside of the Feeder Cover (A). 4 After - Canon MX700 | MX700 series Quick Start Guide - Page 100
side inside the Rear Tray with a moistened cotton swab or the like. Rotate the roller (A) manually as you clean it. Do not touch the roller with your fingers; rotate it with the cotton swab. If this does not solve the problem, contact your Canon service representative. (A) 96 Routine Maintenance - Canon MX700 | MX700 series Quick Start Guide - Page 101
Note Paper is loaded to aid the cleaning process and will not be printed on. 3 Hold the Rear Cover Lever and then press to the the Rear Cover of the mthaecUhsineer,'sreGfeuridtoe "Rear View" in "Main on-screen manual. Components" of 4 Rotate the paper feed roller toward you using (A) a cotton - Canon MX700 | MX700 series Quick Start Guide - Page 102
the machine. If the inside of the machine becomes dirty, printed paper may get dirty, so we recommend performing cleaning regularly. Important from the Rear Tray. 2 Open the Paper Output Tray and extend the Output Support Extension. 3 Fold a single sheet of A4 or Letter-sized plain paper in half - Canon MX700 | MX700 series Quick Start Guide - Page 103
ejected paper. If it is smudged with ink, perform Bottom Plate Cleaning again. If the problem is not resolved after performing Bottom Plate Cleaning twice, the protrusions inside the machine may be stained. Clean them according to instructions - Canon MX700 | MX700 series Quick Start Guide - Page 104
121 z "Problems Receiving Faxes" on page 122 z "Problems Sending Faxes" on page 124 z "Telephone Problems" on page 125 If an Error Occurs When the Machine Is Connected to a Computer When an error occurs in printing such as the machine is out of paper or paper is jammed, a troubleshooting message is - Canon MX700 | MX700 series Quick Start Guide - Page 105
sheet to install the Print Head. If the Print Head is already installed, remove the Print Head once and then reinstall it. If the error is not resolved, the Print Head may be damaged. Contact your Canon service representative. Possible causes are as follows: z Some ink tanks are not installed in the - Canon MX700 | MX700 series Quick Start Guide - Page 106
is no photo data." "The waste ink absorber is almost full. Press [OK] to continue but early replacement recommended. " "Incompatible device detected. Remove the device." "An unsupported USB hub is connected. Remove the hub." "**** Error code" "Scanner is not operating correctly." "The - Canon MX700 | MX700 series Quick Start Guide - Page 107
print the received fax and will store it in its memory. When the problem is resolved as described, the fax stored in memory is printed automatically. z Ink is low or has run out while receiving a fax: replace the ink tank. See "Replacing an Ink , load A4 or Letter-sized paper. Troubleshooting 103 - Canon MX700 | MX700 series Quick Start Guide - Page 108
the Adjust contrast menu in the Maintenance/settings. Refer to "Changing the Machine Settings" in the User's Guide on-screen manual. z If the Power lamp is off The machine is not powered on. Connect the power cord and language you want to be displayed, then press the OK button. 104 Troubleshooting - Canon MX700 | MX700 series Quick Start Guide - Page 109
installation. If the CD-ROM icon is not displayed, restart your computer. If the CD-ROM icon is still not displayed, try different disks and see if they are displayed. If other disks are displayed, there is a problem with the Setup CDROM. Contact your Canon service representative. Troubleshooting - Canon MX700 | MX700 series Quick Start Guide - Page 110
Network Setup Guide for proper installation. If the MP Drivers were not installed correctly, uninstall the MP Drivers, restart your computer, and then reinstall the MP Drivers. Refer to the PC Printing Guide on-screen manual. Note If the installer was forced to be terminated due to a Windows error - Canon MX700 | MX700 series Quick Start Guide - Page 111
Device" on page 36. Confirm by using the printer driver. Refer to the PC Printing Guide on-screen manual. z Check 3: If the problem is not resolved, there may be other causes. See also the sections below. z "Printing Does Not Start/Printing Is Blurred/Colors Are Wrong/Straight Lines Are Misaligned - Canon MX700 | MX700 series Quick Start Guide - Page 112
take the appropriate action depending on the error condition. Make sure all of the orange tape is peeled off the ink tank and the air hole is exposed, as illustrated in (A). If the orange tape is left as in (B), remove all of the orange parts. (A) (B) Print Head nozzles are clogged. The media is - Canon MX700 | MX700 series Quick Start Guide - Page 113
will become stained with ink, causing printed paper to become smudged. Printing. For details, refer to "Printing Area" in the User's Guide on-screen manual. Paper is curled. For Plain Paper Turn the paper over and reload it to print printing. This may improve the print result. Troubleshooting 109 - Canon MX700 | MX700 series Quick Start Guide - Page 114
Settings" in the User's Guide on-screen manual. z Setting with the printer driver Refer to "Print Results Not Satisfactory" in the User's Guide on-screen manual. Especially if you are using plain paper to print images with high intensity, the paper may absorb too much ink and become wavy, causing - Canon MX700 | MX700 series Quick Start Guide - Page 115
Box Directly from Control Panel" in "Opening the Printer Properties Dialog Box (Windows)" of the User's Guide on-screen manual. (2)Click the Maintenance tab and then View Printer Status. The printer status monitor is displayed. (3)Click Display Print Queue. (4)Select Cancel All Documents on the - Canon MX700 | MX700 series Quick Start Guide - Page 116
printing. Once you have prepared the envelopes, load them in the Rear Tray in portrait orientation. If the envelopes are placed in landscape orientation, they will not feed properly. z If the Paper Support "Rear View" in "Main Components" of the User's Guide on-screen manual. 112 Troubleshooting - Canon MX700 | MX700 series Quick Start Guide - Page 117
the printer driver setting, or click Print Options on the Page Setup sheet in the printer driver and select Disable the paper source setting of the application software on the Print Options screen. For the print option setting, refer to the PC Printing Guide on-screen manual. Troubleshooting 113 - Canon MX700 | MX700 series Quick Start Guide - Page 118
if necessary. Note z For details on how to load paper, see "Loading Printing Paper" on page 10. z When reloading the paper in the machine, see "Paper Does Not Feed jammed paper or the paper jam error continues after removing the paper, contact your Canon service representative. 114 Troubleshooting - Canon MX700 | MX700 series Quick Start Guide - Page 119
in "Main Components" of the User's Guide on-screen manual. (4)If you were not able to error continues after removing the paper, contact your Canon service representative. When printing on Legal-sized paper, do not set the last extension segment of the Output Tray Extension upright. Troubleshooting - Canon MX700 | MX700 series Quick Start Guide - Page 120
or the document tears inside the machine, or if the document jam error continues after removing the document, contact your Canon service representative. Note The document may not feed properly depending on the media page 6. If the document still jams, use the Platen Glass instead. Troubleshooting - Canon MX700 | MX700 series Quick Start Guide - Page 121
. z When rescanning the document after clearing the error, rescan it from the first page. If you cannot remove the document or the document tears inside the machine, or if the document jam error continues after removing the document, contact your Canon service representative. Troubleshooting 117 - Canon MX700 | MX700 series Quick Start Guide - Page 122
manual. MP Drivers are not installed properly. The MP Drivers may not be installed properly. Uninstall them following the procedure described in the PC Printing Guide on-screen manual and reinstall them following the procedure described in your setup sheet or the Network Setup Guide. „ Error - Canon MX700 | MX700 series Quick Start Guide - Page 123
your machine's name does not appear in Printer, follow the procedure below to check that the driver for your machine is installed to your computer. (1)Select Print & Fax Preferences in Printer. In Mac OS X v.10.2.8 or 10.3.x, select Edit Printer List in Printer. (2)Check that your machine's name is - Canon MX700 | MX700 series Quick Start Guide - Page 124
to the instruction manual of the device. For other troubles on the device, contact the manufacturer. Error Message On PictBridge Compliant Device "Printer in use" "No paper" "Paper Error" / "Media type error" "Paper jam" "Printer cover open" "No print head" "Waste tank full" / "Ink absorber full - Canon MX700 | MX700 series Quick Start Guide - Page 125
Problems „ ScanGear Won't Start Cause The scanner driver (ScanGear) is not installed. Action Follow the procedure described in your setup sheet or the Network Setup Guide to reinstall the MP Drivers. „ Other Scanning Troubles Refer to the Scanning Guide on-screen manual. Troubleshooting - Canon MX700 | MX700 series Quick Start Guide - Page 126
up memory. Then ask the sender to resend the fax. z Check the LCD for an error message. See "An Error Message Is Displayed on the LCD" on page 101. z Print the Activity report and check for an error. See "Printing the Activity Report Manually" on page 77. Check that the telephone line is connected - Canon MX700 | MX700 series Quick Start Guide - Page 127
start speed. Refer to "RX start speed" in "Device Settings" of the User's Guide on-screen manual. If there is a poor line or connection, reducing the reception start speed may correct the error. Contact the sender and check whether his/her fax machine is operating normally. Troubleshooting 123 - Canon MX700 | MX700 series Quick Start Guide - Page 128
the fax number is correctly registered when speed dialing. See "Registering Coded Speed Dials" on page 55. z Check the LCD for an error message. See "An Error Message Is Displayed on the LCD" on page 101. z Print the Activity report and check for an error. See "Printing the Activity Report Manually - Canon MX700 | MX700 series Quick Start Guide - Page 129
"Device Settings" of the User's Guide on-screen manual. If there is a poor line or connection, reducing the transmission start speed may correct the error. Telephone Problems „ Cannot Dial Cause Action The an answering machine or a computer modem) are connected securely. Troubleshooting 125 - Canon MX700 | MX700 series Quick Start Guide - Page 130
Printing Guide Refer to this guide for full instructions on printer driver setting. FAX Driver Guide (Windows only) Refer to this guide for full instructions on fax driver setting. PC Photo Printing Guide (Windows only) Refer to this guide for instructions on using the various application software - Canon MX700 | MX700 series Quick Start Guide - Page 131
Reading the On-screen Manuals For detailed instructions on installing the on-screen manuals, refer to your setup sheet or the Network Setup Guide. You can view the on-screen manuals in the following way: To view the on-screen manual, double-click the XXX On-screen Manual shortcut icon on the desktop - Canon MX700 | MX700 series Quick Start Guide - Page 132
Support, Paper Output Tray, and Document Tray retracted. Approx. 10.4 kg (Approx. 22.3 lb.) * With the Print Head and ink tanks installed. Scanner driver Maximum scanning size Scanning resolution Gradation (Input/Output) Scan Specifications (Platen Glass) TWAIN / WIA (Windows Vista and Windows XP - Canon MX700 | MX700 series Quick Start Guide - Page 133
for US specifications and Canon FAX Standard chart No.1 for others, both in standard mode.) Black & white Standard: 8 Coded speed dialing (40 destinations) Regular dialing (with Numeric buttons) Automatic redialing Manual redialing (with the Redial/Pause button) Automatic reception Automatic fax - Canon MX700 | MX700 series Quick Start Guide - Page 134
-brand sticker above. Refer to "Printing Media" in the User's Guide on-screen manual. *2 Selected photos are printed in 35 mm film style layout (contact printing layout). This print setting is only available with certain Canon PictBridge compliant devices. You can print shooting Info (Exif Data) on - Canon MX700 | MX700 series Quick Start Guide - Page 135
To upgrade from Windows XP to Windows Vista, first uninstall software bundled with the Canon inkjet printer. Additional System Requirements for On-Screen Manuals Browser: Windows HTML Help Viewer Browser: Help Viewer Note: Microsoft Internet Explorer 5.0 or later must be installed. The on-screen - Canon MX700 | MX700 series Quick Start Guide - Page 136
machine in any way not described in this manual. Warning z This product emits low level other equipment (extension lead/cord, 2- or 3-way adapter, etc.). Never use the machine if the power cord the machine at the power supply and call for service. Periodically, unplug the machine and use a dry - Canon MX700 | MX700 series Quick Start Guide - Page 137
serviceable parts inside the machine. The machine contains high-voltage components. Never attempt any maintenance procedure not described in this guide or electric shocks, install the machine in a location with an ambient temperature range of 5°C to 35°C (41°F to 95°F) and humidity of 10% to 90% ( - Canon MX700 | MX700 series Quick Start Guide - Page 138
service. Do not transport or store the machine on a slant, vertically or upside-down, as the ink may leak and damage the machine. When loading a thick book on the Platen Glass, do not press hard on the Document Cover. The Platen Glass may break and cause injury. For safety reasons, store Print Heads - Canon MX700 | MX700 series Quick Start Guide - Page 139
Use of Images It may be unlawful to make copies of, scan, print, or use reproductions of the following documents. The list provided is non-exhaustive (canceled or uncanceled) z Identifying badges or insignias z Selective service or draft papers z Checks or drafts issued by governmental agencies - Canon MX700 | MX700 series Quick Start Guide - Page 140
Users in the U.S.A. „ Pre-Installation Requirements for MX700 Order Information When ordering service from the telephone company for this equipment, the following may be required. Universal Service Order Code (USOC): RJ11C The Facility Interface Code (FIC): 02LS2 Service Order Code (SOC): 9.0F „ - Canon MX700 | MX700 series Quick Start Guide - Page 141
FAX installation. This equipment generates, uses and can radiate radio frequency energy and, if not installed and used in accordance with the instructions manual. If such changes or modifications should be made, you could be required to stop operation of the equipment. Canon U.S.A., Inc. One Canon - Canon MX700 | MX700 series Quick Start Guide - Page 142
's manual or other documentation for the Product. (b) Use of parts, media, software or supplies (other than those sold by Canon USA), including nonCanon ink cartridges or refilled ink cartridges, that cause damage to the Product or cause abnormally frequent service calls or service problems. (c) If - Canon MX700 | MX700 series Quick Start Guide - Page 143
Canon USA offers a range of customer technical support* options: z Interactive troubleshooting, e-mail technical support, the latest driver downloads the problem. DO NOT INCLUDE ANY OTHER ITEMS WITH THE YOUR PRODUCT IN THE RETURN SHIPPING CARTON, AND BE SURE TO RETAIN YOUR PRINTHEAD, INK CARTRIDGE(S) - Canon MX700 | MX700 series Quick Start Guide - Page 144
your Product with a replacement Product, which will normally be shipped the same day if your request for this service is by 3 p.m. E.T. Monday through Friday, except holidays. Canon USA does not guarantee same day shipment in the event of the occurrence of factors beyond its reasonable control - Canon MX700 | MX700 series Quick Start Guide - Page 145
Users in Canada „ Pre-Installation Requirements for Canon Facsimile Equipment Notice This equipment meets the applicable Industry Canada technical specifications. The Ringer Equivalence Number is an indication of the maximum number of devices - Canon MX700 | MX700 series Quick Start Guide - Page 146
item of Telepermitted equipment of a different make or model, nor does it imply that any product is compatible with all of Telecom's network services. Telepermitted equipment only may be connected to the auxiliary telephone port. The auxiliary telephone port is not specifically designed for 3-wire - Canon MX700 | MX700 series Quick Start Guide - Page 147
PictBridge print settings 38 R Replacing an Ink Tank 80 ink status information 80 Routine Maintenance 80 S Safety Precautions 132 Scanning Images 34 Specialty Media 10 Specifications 128 copy 128 fax 129 general 128 PictBridge 130 scan 128 telephone 129 System Requirements 131 T Troubleshooting 100 - Canon MX700 | MX700 series Quick Start Guide - Page 148
144 - Canon MX700 | MX700 series Quick Start Guide - Page 149
145 - Canon MX700 | MX700 series Quick Start Guide - Page 150
146 - Canon MX700 | MX700 series Quick Start Guide - Page 151
order numbers. Description Ink Tanks PGI-5 Black CLI-8 Cyan CLI-8 Magenta CLI-8 Yellow Canon Specialty Papers All Occasion sheets) Photo Paper Plus Semi-gloss (4" x 6"/ 50 sheets) Photo Paper Plus Semi-gloss (8" x 10" / 20 sheets) Photo Paper Plus Semi-gloss (8.5" x 11"/ 20 sheets) Photo Paper Pro - Canon MX700 | MX700 series Quick Start Guide - Page 152
The following ink tanks are compatible with this product. For information on product specifications, please visit our website at www.usa.canon.com QT5-1395-V01 XXXXXXXX © CANON INC. 2007 PRINTED IN THAILAND
-
 1
1 -
 2
2 -
 3
3 -
 4
4 -
 5
5 -
 6
6 -
 7
7 -
8
-
9
-
10
-
11
-
12
-
13
-
14
-
15
-
16
-
17
-
18
-
19
-
20
-
21
-
22
-
23
-
24
-
25
-
26
-
27
-
28
-
29
-
30
-
31
-
32
-
33
-
34
-
35
-
36
-
37
-
38
-
39
-
40
-
41
-
42
-
43
-
44
-
45
-
46
-
47
-
48
-
49
-
50
-
51
-
52
-
53
-
54
-
55
-
56
-
57
-
58
-
59
-
60
-
61
-
62
-
63
-
64
-
65
-
66
-
67
-
68
-
69
-
70
-
71
-
72
-
73
-
74
-
75
-
76
-
77
-
78
-
79
-
80
-
81
-
82
-
83
-
84
-
85
-
86
-
87
-
88
-
89
-
90
-
91
-
92
-
93
-
94
-
95
-
96
-
97
-
98
-
99
-
100
-
101
-
102
-
103
-
104
-
105
-
106
-
107
-
108
-
109
-
110
-
111
-
112
-
113
-
114
-
115
-
116
-
117
-
118
-
119
-
120
-
121
-
122
-
123
-
124
-
125
-
126
-
127
-
128
-
129
-
130
-
131
-
132
-
133
-
134
-
135
-
136
-
137
-
138
-
139
-
140
-
141
-
142
-
143
-
144
-
145
-
146
-
147
-
148
-
149
-
150
-
151
-
152
 |
 |
Quick Start Guide
Quick Start Guide
Office All-In-One
series
QT51395V01