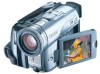
Canon Optura 30 OPTURA40 OPTURA30 Instruction Manual
Canon Optura 30 - Optura 30 MiniDV Camcorder Manual
 |
UPC - 013803040913
View all Canon Optura 30 manuals
Add to My Manuals
Save this manual to your list of manuals |
Canon Optura 30 manual content summary:
- Canon Optura 30 | OPTURA40 OPTURA30 Instruction Manual - Page 1
how to install the software, connect the camcorder to a computer, and download images from a memory card to a computer. For more detailed operational instructions, refer to the PDF format manual provided on the DIGITAL VIDEO SOLUTION DISK For Windows or DIGITAL VIDEO SOLUTION DISK For Macintosh - Canon Optura 30 | OPTURA40 OPTURA30 Instruction Manual - Page 2
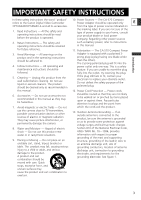
TO REDUCE ANNOYING INTERFERENCE, USE THE RECOMMENDED ACCESSORIES ONLY. COPYRIGHT WARNING: Unauthorized recording of copyrighted materials may infringe on the rights of copyright owners and be contrary to copyright laws. Digital Video Camcorder, OPTURA40/OPTURA30 systems This device complies with - Canon Optura 30 | OPTURA40 OPTURA30 Instruction Manual - Page 3
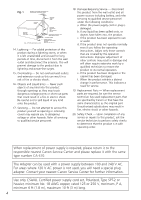
- The CA-570 Compact refers to the Canon Digital Video Camcorder Power Adapter should be operated only E OPTURA40/OPTURA30 A and all its accessories. from the type of power source indicated on 1. Read Instructions - All the safety and operating instructions should be read before the product is - Canon Optura 30 | OPTURA40 OPTURA30 Instruction Manual - Page 4
- Disconnect this product from the wall outlet and all power sources including battery, and refer servicing to qualified service personnel under the following conditions: a. When the power-supply cord or plug is damaged. b. If any liquid has been spilled onto, or objects have fallen into, the - Canon Optura 30 | OPTURA40 OPTURA30 Instruction Manual - Page 5
when you first start using your camcorder, or when you have replaced the backup battery. E Setting the Time Zone/Daylight Saving Time CAMERA PLAY (VCR) CARD CAMERA CARD PLAY ( 37) SYSTEM T.ZONE/DST•••N.Y. 1. Press the MENU button to open the menu. Basic Functions Preparations Button and - Canon Optura 30 | OPTURA40 OPTURA30 Instruction Manual - Page 6
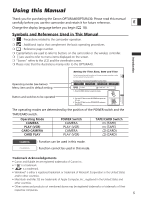
Safety Instructions 3 Using this Manual ...5 Checking Supplied Accessories 8 Components Guide ...9 Basic Functions Preparations Preparing the Power Supply 13 Loading/Unloading a Cassette 16 Installing the Backup Battery 17 Preparing the Camcorder 18 Using the Wireless Controller 20 Setting - Canon Optura 30 | OPTURA40 OPTURA30 Instruction Manual - Page 7
Analog Video Devices (VCR, TV or Camcorder 85 Recording from Digital Video Devices (DV Dubbing 86 Converting Analog Signals into Digital Signals (Analog-Digital Converter) ........87 Audio Dubbing...89 Connecting to a Computer Using a DV (IEEE1394) Cable 92 Using a Memory Card Introduction - Canon Optura 30 | OPTURA40 OPTURA30 Instruction Manual - Page 8
Lens Cap Cord SS-900 Shoulder Strap STV-250N Stereo Video Cable IFC-300PCU USB Cable SDC-8M SD Memory Card (containing sample images) DIGITAL VIDEO SOLUTION DISK For Windows For Macintosh The serial number of this product can be found at the battery attachment unit of the camcorder. Write down - Canon Optura 30 | OPTURA40 OPTURA30 Instruction Manual - Page 9
Components Guide OPTURA40/OPTURA30 E Introduction REC SEARCH + button ( 27) / (fast forward) button ( 32) / CARD + button ( 112) REC SEARCH - button ( 27) / (record review) button ( 27) / (rewind) button ( 31) / CARD - button ( 112) AUDIO LEVEL button* ( 60) DIGITAL EFFECTS button ( 64) DIGITAL - Canon Optura 30 | OPTURA40 OPTURA30 Instruction Manual - Page 10
lever ( 18) Viewfinder ( 18) Strap mount ( 19) CHARGE indicator ( 13) Power indicator ( 13) Start/stop button ( 24, 105) Power switch ( 5) CAMERA OFF PLAY(VCR) NETWORK TAPE/CARD switch ( 5) b Using a tape Using a memory card PHOTO button ( 97) Zoom lever ( 28) Program selector ( 46) Easy recording - Canon Optura 30 | OPTURA40 OPTURA30 Instruction Manual - Page 11
Terminal cover DC IN terminal ( 13) Backup battery compartment ( 17) S S-video terminal ( 35) Terminal cover MIC terminal ( 63) AV terminal ( 34) / (phones) terminal ( 33, 62) DV terminal ( 83, 92) USB terminal ( 123, 134) * OPTURA40 only. Advanced Accessory shoe ( 159) Flash ( 101) Focus ring ( 52 - Canon Optura 30 | OPTURA40 OPTURA30 Instruction Manual - Page 12
75) !1 12bit AUDIO OUT button ( 91) !2 AUDIO DUB. button ( 89) !3 REC PAUSE button ( 85) !4 AV DV button ( 88) !5 REMOTE SET button ( 79) !6 Transmitter !7 MENU button ( 37) !8 SET button ( 37) !9 CARD buttons ( 112) @0 SLIDE SHOW button ( 113) @1 REW button ( 31) @2 PLAY button ( 31) @3 FF - Canon Optura 30 | OPTURA40 OPTURA30 Instruction Manual - Page 13
3. Attach the battery pack to the camcorder. • Remove the terminal cover of the battery pack. • Press lightly and slide it in the direction of the arrow until it clicks. E q w e Charging the Battery Pack 1. Connect the power cord to the adapter. 2. Plug the power cord into a power DC IN terminal - Canon Optura 30 | OPTURA40 OPTURA30 Instruction Manual - Page 14
cable. ❍ Do not connect any products that are not expressly recommended to the camcorder's DC IN terminal or to the power adapter. ❍ You may hear some noise from the power adapter during use. This is not a malfunction. ❍ Do not disconnect and reconnect the power cord while charging a battery pack - Canon Optura 30 | OPTURA40 OPTURA30 Instruction Manual - Page 15
you do not need to completely use or discharge it before charging. ❍ We recommend that you prepare battery packs 2 to 3 times longer than you think you might need. ❍ To conserve battery charge, turn off the camcorder instead of leaving it in record pause mode. Basic Functions Preparations 15 - Canon Optura 30 | OPTURA40 OPTURA30 Instruction Manual - Page 16
cassette compartment cover. Tape w protection tab q The cassette compartment opens automatically. 2. Load/unload the cassette. • Load the cassette with the window facing the grip compartment cover. If the camcorder is connected to a power source, cassettes can be loaded/ unloaded even if the - Canon Optura 30 | OPTURA40 OPTURA30 Instruction Manual - Page 17
Installing the Backup Battery The backup battery allows the camcorder to retain date, time ( 21) and other camcorder settings while the power source is disconnected. Connect a power source to E the camcorder when replacing the backup battery to retain the settings. 1. Open the terminal cover. w 2. - Canon Optura 30 | OPTURA40 OPTURA30 Instruction Manual - Page 18
Viewfinder (Dioptric Adjustment) 1. Turn on the camcorder and keep the LCD panel closed. 2. Pull out the viewfinder. 3. Adjust the dioptric adjustment lever. Attaching the Lens Cap 1. Attach the cord to the lens cap. 2. Pass the grip belt through the loop on the cord. Press the buttons on the lens - Canon Optura 30 | OPTURA40 OPTURA30 Instruction Manual - Page 19
Basic Functions Preparations Attaching the Shoulder Strap Pass the ends through the strap mount and adjust the length of the strap. E SS-900 Shoulder strap 19 - Canon Optura 30 | OPTURA40 OPTURA30 Instruction Manual - Page 20
's remote sensor when you press the buttons. Inserting Batteries The wireless controller operates with two AA (R6) batteries. 1. Open the battery cover. 2. Insert the batteries following the + and - markings. 3. Close the battery cover. ❍ Camcorder and wireless controller are equipped with 2 remote - Canon Optura 30 | OPTURA40 OPTURA30 Instruction Manual - Page 21
you first start using your camcorder, or when you have replaced the backup battery. E Setting the Time Zone/Daylight Saving Time CAMERA PLAY (VCR) CARD CAMERA CARD PLAY ( 37) SYSTEM T.ZONE/DST•••N.Y. 1. Press the MENU button to open the menu. Basic Functions Preparations 2. Turn the - Canon Optura 30 | OPTURA40 OPTURA30 Instruction Manual - Page 22
7. Press the MENU button to close the menu and to start the clock. 16 15 14 19 18 17 20 21 1 2 24 23 22 4 3 6 7 9 10 5 8 12 11 13 14 15 16 17 18 19 20 21 22 23 24 1 2 3 4 5 6 7 8 9 10 11 time zone to the one of your destination, and the camcorder automatically adjusts the clock. 22 - Canon Optura 30 | OPTURA40 OPTURA30 Instruction Manual - Page 23
You can display the date and time in the lower left corner of the screen. CAMERA PLAY (VCR) CARD CAMERA CARD PLAY E ( 37) DISPLAY SETUP/ D/T DISPLAY••OFF 1. Press the MENU button to open the menu. 2. Turn the SET dial to select [DISPLAY SETUP/ ] and press the SET dial. 3. Turn the - Canon Optura 30 | OPTURA40 OPTURA30 Instruction Manual - Page 24
operates correctly. Before you make important recordings, clean the video heads ( 147). Recording 1. Remove the lens cap. 2. Set the camcorder to CAMERA mode. Set the POWER switch to CAMERA and the TAPE/CARD switch to b. q w 3. Push the OPEN button at the LCD panel and open the LCD panel - Canon Optura 30 | OPTURA40 OPTURA30 Instruction Manual - Page 25
can also be adjusted manually ( 60). ❍ The camcorder will shut off after 5 minutes when left in record pause mode to protect tape and video heads. " AUTO POWER OFF" appears 20 seconds before shutoff. To continue recording, turn the POWER switch to OFF and then back to CAMERA. ❍ About the LCD and - Canon Optura 30 | OPTURA40 OPTURA30 Instruction Manual - Page 26
when the battery pack is empty. • When you attach an empty battery pack, the power may turn off without displaying "k". • The actual battery charge may not be indicated accurately depending on the condition under which battery pack and camcorder are used. w Remaining tape Indicates the remaining - Canon Optura 30 | OPTURA40 OPTURA30 Instruction Manual - Page 27
if it has been recorded properly. Press and release the c (record review) button. The camcorder rewinds the tape, plays back the last few seconds, and returns to record pause mode. Record Search CAMERA PLAY (VCR) CARD CAMERA CARD PLAY In record pause mode, this function allows you to play - Canon Optura 30 | OPTURA40 OPTURA30 Instruction Manual - Page 28
Zooming The camcorder automatically switches between optical zooming and digital zooming. Image resolution is slightly lower with the digital zoom. Zoom in T W Zoom out Zoom lever Optical Zoom 14× optical zoom CAMERA PLAY (VCR) 12× optical zoom CARD CAMERA CARD PLAY Move the zoom lever - Canon Optura 30 | OPTURA40 OPTURA30 Instruction Manual - Page 29
Recording Digital Zoom 56×/280× digital zoom (56× in CARD CAMERA mode) CAMERA PLAY (VCR) 48×/240× digital zoom E (48× in CARD CAMERA mode) CARD CAMERA CARD PLAY ( 37) CAMERA SETUP D.ZOOM 56X 1. Press the MENU button to open the menu. 2. Turn the SET dial to select [CAMERA SETUP - Canon Optura 30 | OPTURA40 OPTURA30 Instruction Manual - Page 30
Tips for Making Better Videos Holding the Camcorder For maximum stability, grip the camcorder in your right hand and keep your right elbow pressed against your body. If necessary, support the camcorder with your left fastening screws longer than 0.2 inch (5.5 mm) as it may damage the camcorder. 30 - Canon Optura 30 | OPTURA40 OPTURA30 Instruction Manual - Page 31
playback picture is distorted, clean the video heads using a Canon Head E Cleaning Cassette or a commercially available digital video head-cleaning cassette ( 147). 1. Set the camcorder to PLAY (VCR) mode. Set the POWER switch to PLAY (VCR) and the TAPE/CARD switch to b. q 2. Open the LCD - Canon Optura 30 | OPTURA40 OPTURA30 Instruction Manual - Page 32
playback. 1 (Fast Forward Playback) / ` (Rewind Playback) Plays back the tape at 9.5 times normal speed (forward or reverse). Press and hold the button some special playback modes. ❍ The camcorder stops the tape automatically after 5 minutes in playback pause mode to protect tape and video heads. 32 - Canon Optura 30 | OPTURA40 OPTURA30 Instruction Manual - Page 33
When you use the LCD screen for playback, the camcorder plays back the sound via built-in speaker. The below. CAMERA PLAY (VCR) CARD CAMERA CARD PLAY ( 37) VCR SETUP AV/PHONES ••AV Open the menu and select [VCR SETUP]. Select [AV/PHONES H ], set it to [PHONES H ] and close the menu. ❍ - Canon Optura 30 | OPTURA40 OPTURA30 Instruction Manual - Page 34
CARD CAMERA CARD PLAY ( 37) VCR SETUP AV/PHONES ••AV Open the menu and select [VCR SETUP]. Select [AV/PHONES H ], set it to [AV] and close the menu. TVs with Audio/Video Terminals Refer also to the TV or VCR instruction manual. Signal flow STV-250N Stereo Video Cable (supplied) VIDEO AUDIO - Canon Optura 30 | OPTURA40 OPTURA30 Instruction Manual - Page 35
VCR instruction manual. S Signal flow S-150 S-video Cable (optional) Signal flow STV-250N Stereo Video Cable (supplied) E INPUT S(S1)-VIDEO VIDEO AUDIO the S-150 S-video Cable (optional) to the S-video terminals. 3. Connect the STV-250N Stereo Video Cable to the camcorder's AV terminal and the - Canon Optura 30 | OPTURA40 OPTURA30 Instruction Manual - Page 36
tape with audio recorded on two channels. CAMERA PLAY (VCR) CARD CAMERA CARD PLAY ( 37) AUDIO SETUP OUTPUT CH••••L/R 1. Press the MENU button to open the menu : Sub. 5. Press the MENU button to close the menu. The setting resets to the L/R setting when you turn the camcorder off. 36 - Canon Optura 30 | OPTURA40 OPTURA30 Instruction Manual - Page 37
Menus and Settings Many of the camcorder's advanced functions are selected from menus that appear on the screen. E Advanced Functions MENU button SET dial Selecting Menus and Settings 1. Press the MENU button to open the menu. 2. Turn the SET dial to select a submenu and press the SET dial. 3. - Canon Optura 30 | OPTURA40 OPTURA30 Instruction Manual - Page 38
MENU CAMERA PLAY (VCR) CARD CAMERA CARD PLAY Submenu \CARD MIX Menu Item MIX TYPE ANIMAT. TYPE MIX LEVEL CAMERA SETUP SHUTTER A.SL SHUTTER D. ZOOM IMG STAB i 16:9 WHITE BAL. AF AST LAMP* NIGHT MODE* SKIN DETAIL STILL I. REC VCR SETUP REC MODE AV/PHONES H AUDIO SETUP WIND SCREEN - Canon Optura 30 | OPTURA40 OPTURA30 Instruction Manual - Page 39
Submenu SYSTEM MY CAMERA Menu Item WL. REMOTE BEEP T.ZONE/DST D/TIME SET S-UP SOUND SHTR SOUND OPER. SOUND SELF-T SOUND Setting Options A1, A2, OFF B ON, OFF See list of time zones. OFF, DEFAULT, MY SOUND 79 80 21 E 21 77 Advanced Functions 39 - Canon Optura 30 | OPTURA40 OPTURA30 Instruction Manual - Page 40
PLAY (VCR) MENU CAMERA PLAY (VCR) CARD CAMERA CARD CAMERA Submenu VCR SETUP AUDIO SETUP Menu Item REC MODE AV/PHONES H AV \ DV OUT OUTPUT CH AUDIO DUB. WIND SCREEN MIC ATT* MIC LEVEL* 12bit AUDIO MIX BALANCE Setting Options SP, LP 59 AV, PHONES H 34 ON, OFF 88 L/R, L/L, R/R 36 AUDIO - Canon Optura 30 | OPTURA40 OPTURA30 Instruction Manual - Page 41
Submenu MY CAMERA Menu Item S-UP SOUND SHTR SOUND OPER. SOUND SELF-T SOUND Setting Options OFF, DEFAULT, MY SOUND 77 E Advanced Functions 41 - Canon Optura 30 | OPTURA40 OPTURA30 Instruction Manual - Page 42
CARD CAMERA MENU CAMERA PLAY (VCR) CARD CAMERA CARD PLAY Submenu Menu Item CAMERA SETUP SHUTTER A.SL SHUTTER D. ZOOM WHITE BAL. AF AST LAMP* FOCUS PRI. ND NIGHT MODE* SKIN DETAIL REVIEW CARD SETUP IMG QUALITY IMAGE SIZE MOVIE SIZE FILE NOS. VCR SETUP AV/PHONES H AUDIO SETUP - Canon Optura 30 | OPTURA40 OPTURA30 Instruction Manual - Page 43
Submenu SYSTEM MY CAMERA Menu Item WL. REMOTE BEEP T.ZONE/DST D/TIME SET S-UP SOUND SHTR SOUND OPER. SOUND SELF-T SOUND Setting Options A1, A2, OFF B ON, OFF See list of time zones. OFF, DEFAULT, MY SOUND 79 80 E 21 21 77 Advanced Functions 43 - Canon Optura 30 | OPTURA40 OPTURA30 Instruction Manual - Page 44
CARD PLAY MENU CAMERA PLAY (VCR) CARD CAMERA CARD PLAY Submenu Menu Item Setting Options CARD PRINT ORDERS NO,YES 133 OPERATIONS ALL ERASE (Single Image TRANS.ORDERS NO,YES 138 Display) ALL ERASE IMAGE ERASE CANCEL, SINGLE, ALL 116 FORMAT CANCEL, EXECUTE 121 CARD \ PROTECT - Canon Optura 30 | OPTURA40 OPTURA30 Instruction Manual - Page 45
settings automatically, allowing you to just point and shoot. [ Program AE Modes Auto The camcorder adjusts focus, exposure and other settings automatically. However, you have the option of adjusting the settings manually. Sports Use this mode to record sports scenes (such as tennis or golf) or - Canon Optura 30 | OPTURA40 OPTURA30 Instruction Manual - Page 46
Digital Effects × 16:9 × Card Mix × Microphone attenuator* × Microphone level* A A: Auto setting h: Available ×: Not available Shaded area: Can be used only in CAMERA mode. * OPTURA40 only. h h h h A h h h h h h Selecting the Easy Recording Program CAMERA PLAY (VCR) CARD CAMERA CARD - Canon Optura 30 | OPTURA40 OPTURA30 Instruction Manual - Page 47
PLAY (VCR) 1. Set the program selector to Q. CARD CAMERA CARD PLAY E 2. Press the SET dial. A list of the program AE modes appears. afterimage. - Picture quality may not be as good as in other modes. - The camcorder may have difficulty to focus automatically. Advanced Functions Recording 47 - Canon Optura 30 | OPTURA40 OPTURA30 Instruction Manual - Page 48
Night+ Mode Super Night Mode NIGHT MODE button CAMERA PLAY (VCR) Program selector MENU button SET dial CARD CAMERA CARD PLAY ( 37) CAMERA SETUP NIGHT MODE••• NIGHT+ 1. Set the program selector to Q. 2. Open the menu and select [CAMERA SETUP]. Select [NIGHT MODE], select a setting option - Canon Optura 30 | OPTURA40 OPTURA30 Instruction Manual - Page 49
modes. ❍ White points may appear on the screen. ❍ Autofocus may not work as well as in other modes. In such case, adjust the E focus manually. ❍ Digital zoom and multi-image screen cannot be used while a night mode is activated. ❍ The program AE mode cannot be changed while a night mode is - Canon Optura 30 | OPTURA40 OPTURA30 Instruction Manual - Page 50
close-ups of people, the camcorder automatically softens details to reduce the appearance of skin imperfections for a more complimentary appearance. CAMERA PLAY (VCR) CARD CAMERA CARD PLAY ( 37) CAMERA SETUP SKIN DETAIL••NORMAL Open the menu and select [CAMERA SETUP]. Select [SKIN DETAIL - Canon Optura 30 | OPTURA40 OPTURA30 Instruction Manual - Page 51
Exposure Adjustment When the exposure is locked, you can adjust it manually to handle difficult lighting conditions. The camcorder's iris can be set to any position from fully closed to fully open. CAMERA PLAY (VCR) CARD CAMERA CARD PLAY Turn the SET dial to adjust the brightness of the image - Canon Optura 30 | OPTURA40 OPTURA30 Instruction Manual - Page 52
such case, focus manually. Reflective surfaces Subjects with low contrast or without vertical lines Fast Moving Subjects Through dirty or wet windows Night Scenes FOCUS button Focus ring Zoom lever Program selector CAMERA PLAY (VCR) 1. Set the program selector to Q. CARD CAMERA CARD PLAY - Canon Optura 30 | OPTURA40 OPTURA30 Instruction Manual - Page 53
faraway subjects such as mountains or fireworks. Press the FOCUS button more than 2 seconds after step 2 in Adjusting the Focus Manually. ∞ "MF " appears. ∞ When you operate the zoom or turn the focus ring, " " disappears and the camcorder changes to manual focus. Advanced Functions Recording 53 - Canon Optura 30 | OPTURA40 OPTURA30 Instruction Manual - Page 54
, sunrise or sunset. White sheet or paper MENU button SET dial Zoom lever Program selector CAMERA PLAY (VCR) CARD CAMERA CARD PLAY ( 37) CAMERA SETUP WHITE BAL.•••AUTO 1. Set the program selector to Q. 2. For custom white balance: Point the camcorder at a white object and zoom in until - Canon Optura 30 | OPTURA40 OPTURA30 Instruction Manual - Page 55
the program selector is set to [, white balance is preset to [AUTO]. ❍ The camcorder retains the custom white balance setting even if you turn it off. However, it resets to [AUTO] when you change the position of the TAPE/CARD E switch. ❍ When you have set the custom white balance: - Depending on the - Canon Optura 30 | OPTURA40 OPTURA30 Instruction Manual - Page 56
dial. CAMERA Mode AUTO 1/60 1/100 1/250 1/500 1/1000 1/2000 CARD CAMERA Mode AUTO 1/60 1/100 1/250 6. Close the menu. ❍ If the shutter speed is set to 1/500 or higher in CAMERA mode and you switch to CARD CAMERA mode, it automatically changes to 1/250. ❍ Do not point the camcorder directly at - Canon Optura 30 | OPTURA40 OPTURA30 Instruction Manual - Page 57
to 1/30 in CAMERA mode and 1/15 in CARD CAMERA mode. This allows you to record brightly in places with insufficient lighting. E However, you can set the camcorder not to use a slow shutter speed. CAMERA PLAY (VCR) CARD CAMERA CARD PLAY ( 37) CAMERA SETUP A.SL SHUTTER•ON Open the menu and - Canon Optura 30 | OPTURA40 OPTURA30 Instruction Manual - Page 58
still images. PHOTO button Start/stop button (self-timer) button CAMERA PLAY (VCR) When recording movies 1. Press the (self-timer) button. " " appears. CARD CAMERA CARD PLAY 2. Press the start/stop button. • The camcorder starts recording after a 10-second countdown (2 seconds when using the - Canon Optura 30 | OPTURA40 OPTURA30 Instruction Manual - Page 59
(SP/LP) You can choose between SP (standard play) and LP (long play). LP extends the tape usage by 1.5 times. E CAMERA PLAY (VCR) CARD CAMERA CARD PLAY ( 37) VCR SETUP REC MODE SP To change to LP mode, open the menu and select [VCR SETUP]. Select [REC MODE], set it to [LP] and close the - Canon Optura 30 | OPTURA40 OPTURA30 Instruction Manual - Page 60
IN]. CARD CAMERA CARD PLAY ( 37) AUDIO SETUP MIC LEVEL••••AUTO 1. In CAMERA mode, set the program selector to Q. 2. Open the menu and select [AUDIO SETUP]. Select [MIC LEVEL], set it to [MANUAL] and close the menu. • up in red. 4. Press the AUDIO LEVEL button. The green bar disappears. 60 - Canon Optura 30 | OPTURA40 OPTURA30 Instruction Manual - Page 61
button. E -dB40 12 0 [MIC LEVEL] M is set to [MANUAL] Level indicator Guide (green bar) ❍ The audio level can be changed when the green bar . CAMERA PLAY (VCR) * * Only when [AUDIO DUB.] is set to [MIC IN]. CARD CAMERA CARD PLAY ( 37) AUDIO SETUP MIC ATT OFF Open the menu and - Canon Optura 30 | OPTURA40 OPTURA30 Instruction Manual - Page 62
the procedure below. CAMERA PLAY (VCR) CARD CAMERA CARD PLAY ( 37) VCR SETUP AV/PHONES ••AV Open the menu and select [VCR SETUP]. Select [AV/PHONES H ], set it to [PHONES H ] and close the menu. Adjusting the Headphone Volume CAMERA PLAY (VCR) CARD CAMERA CARD PLAY ( 37) AUDIO - Canon Optura 30 | OPTURA40 OPTURA30 Instruction Manual - Page 63
also to the instruction manual of the microphone. 1. Attach the microphone to the accessory shoe. 2. When using a commercially available microphone, connect it to the MIC terminal. ❍ When recording in silent places, the built-in microphone may pick up the motor noise of the camcorder. In such case - Canon Optura 30 | OPTURA40 OPTURA30 Instruction Manual - Page 64
Using Digital Effects Faders ( 67) Begin or end scenes with a fade to or from black. Fade Trigger (FADE-T) The image gradually fades in. The image gradually fades - Canon Optura 30 | OPTURA40 OPTURA30 Instruction Manual - Page 65
Puzzle (PUZZLE) Zigzag (ZIGZAG) Beam (BEAM) Tide (TIDE) The image appears in 16 pieces. The pieces move around until the puzzle is solved. The image is divided into 16 pieces. The E pieces move around and disappear. The image appears in zigzag from the top of the screen. Black stripes appear - Canon Optura 30 | OPTURA40 OPTURA30 Instruction Manual - Page 66
Effects ( 68) Add flavor to your recordings. Art (ART) The image becomes like a paint (solarization). Black and White (BLK & WHT) The image becomes black and white. Sepia (SEPIA) The image becomes monochrome with a brownish tint. Mosaic (MOSAIC) The image is blurred through enlarging the size of - Canon Optura 30 | OPTURA40 OPTURA30 Instruction Manual - Page 67
i h i i h: Available i: Not available * : Black and White only. Selecting a Fader In CAMERA mode, set the program selector to Q. CAMERA PLAY (VCR) CARD CAMERA CARD PLAY 1. Press the DIGITAL EFFECTS button. [D.EFFECT |], [FADER], [EFFECT] and [MULTI-S] appear. Advanced Functions Recording - Canon Optura 30 | OPTURA40 OPTURA30 Instruction Manual - Page 68
The effect can be activated/deactivated by pressing the ON/OFF button. Selecting an Effect in CARD CAMERA Mode CAMERA PLAY (VCR) CARD CAMERA 1. Press the DIGITAL EFFECTS button. "BLK&WHT" flashes. CARD PLAY 2. Press the ON/OFF button. • "BLK&WHT" stops flashing. • The effect can be activated - Canon Optura 30 | OPTURA40 OPTURA30 Instruction Manual - Page 69
MANUAL]: Playback pause, slow forward/reverse playback - When [S.SPEED] is set to [FAST], [MOD.] or [SLOW]: Playback pause E In CAMERA mode, set the program selector to Q. CAMERA PLAY (VCR) CARD CAMERA CARD PLAY 1. Press the DIGITAL . The multi-image screen is recorded on the tape. 69 - Canon Optura 30 | OPTURA40 OPTURA30 Instruction Manual - Page 70
it. Press the DIGITAL EFFECTS button to open the menu. Select [D.EFFECT |] and press the DIGITAL EFFECTS button. ❍ The camcorder retains the setting even if you turn it off or change the program AE mode. ❍ The image quality may be slightly lower with digital effects. ❍ Digital effects cannot be used - Canon Optura 30 | OPTURA40 OPTURA30 Instruction Manual - Page 71
Magnifying the Image The playback image can be magnified up to 5 times. E Zoom lever SET dial CAMERA PLAY (VCR) CARD CAMERA CARD PLAY 1. Move the zoom lever toward T. • The image is magnified by 2 times. • A frame appears indicating the position of the magnified area. • To further enlarge the - Canon Optura 30 | OPTURA40 OPTURA30 Instruction Manual - Page 72
and exposure (f-stop). When you play back a tape, you can display the data code and select the data code combination you wish to display. DATA CODE button MENU button SET dial Selecting the Date/Time Display Combination CAMERA PLAY (VCR) CARD CAMERA CARD PLAY DISPLAY SETUP/ ( 37) D/TIME SEL - Canon Optura 30 | OPTURA40 OPTURA30 Instruction Manual - Page 73
the camcorder. ❍ Only date and time appear in CARD PLAY mode. Six-Second Auto Date Date and time appear for 6 seconds when you begin playback, or to indicate that date or time zone has changed. CAMERA PLAY (VCR) CARD CAMERA CARD PLAY ( 37) DISPLAY SETUP/ 6SEC.DATE••••OFF Open the menu and - Canon Optura 30 | OPTURA40 OPTURA30 Instruction Manual - Page 74
function to locate the end of the last recorded scene. END SEARCH button CAMERA PLAY (VCR) CARD CAMERA CARD PLAY In stop mode, press the END SEARCH button. • "END SEARCH" appears. • The camcorder rewinds/fast forwards the tape, plays back the last few seconds of the recording and stops the - Canon Optura 30 | OPTURA40 OPTURA30 Instruction Manual - Page 75
will stop at that point when you rewind/fast forward the tape. This function is operated with the wireless controller. REW ` button ZERO SET MEMORY button E PLAY e button STOP 3 button CAMERA PLAY (VCR) CARD CAMERA CARD PLAY 1. Press the ZERO SET MEMORY button at the point you wish to return - Canon Optura 30 | OPTURA40 OPTURA30 Instruction Manual - Page 76
the date/time zone with the date search function. This function is operated with the wireless controller. DATE SEARCH +/buttons STOP 3 button CAMERA PLAY (VCR) CARD CAMERA CARD PLAY Press the + or - button to begin searching. • Press more than once to search for further date changes (up to 10 - Canon Optura 30 | OPTURA40 OPTURA30 Instruction Manual - Page 77
close the menu. ❍ You can save your original images, or the images and sounds contained in the supplied software (ZoomBrowser EX for Windows or ImageBrowser for Macintosh) to the setting options [MY IMAGE] and [MY SOUND]. For details, refer to the Digital Video Software Instruction Manual. ❍ You can - Canon Optura 30 | OPTURA40 OPTURA30 Instruction Manual - Page 78
Changing the Display Language The language used in the camcorder displays and menu items can be changed to German, Spanish, French, Italian, Russian, Simplified Chinese or Japanese. CAMERA PLAY (VCR) CARD CAMERA CARD PLAY ( 37) DISPLAY SETUP/ LANGUAGE •••ENGLISH To change the display - Canon Optura 30 | OPTURA40 OPTURA30 Instruction Manual - Page 79
DUB. PAUSE SLOW 2 AV DV REMOTESET REC PAUSE WIRELESS CONTROLLER WL-D83 START ZOOM /STOP PHOTO W T SELF T. D.EFFECTS MENU TVSCREEN ON/OFF SET ❍ The wireless controller returns to mode 1 when you replace the batteries. Change the mode if necessary. ❍ Make sure that camcorder and wireless - Canon Optura 30 | OPTURA40 OPTURA30 Instruction Manual - Page 80
, and unusual conditions of the camcorder. If you turn off the beep, all camcorder sounds including the ones of the My Camera settings will be turned off. CAMERA PLAY (VCR) CARD CAMERA CARD PLAY ( 37) SYSTEM BEEP ON To turn the beep off, open the menu and select [SYSTEM]. Select [BEEP - Canon Optura 30 | OPTURA40 OPTURA30 Instruction Manual - Page 81
to compensate for horizontal movements; therefore, you may decide to turn it off when you mount the camcorder on a tripod. E CAMERA PLAY (VCR) CARD CAMERA CARD PLAY ( 37) CAMERA SETUP IMG STAB •••ON Open the menu and select [CAMERA SETUP]. Select [IMG STAB i], set it to [OFF] and close the - Canon Optura 30 | OPTURA40 OPTURA30 Instruction Manual - Page 82
LCD backlight is brighter when the camcorder is powered from a household power source. However, you can set the backlight at battery use to the same brightness. CAMERA PLAY (VCR) CARD CAMERA CARD PLAY ( 37) DISPLAY SETUP/ BACKLIGHT••••NORMAL Open the menu and select [DISPLAY SETUP/ ]. Select - Canon Optura 30 | OPTURA40 OPTURA30 Instruction Manual - Page 83
Device Refer also to the instruction manual of the digital video device. Editing Signal flow Commercially available DV cable Recording CAMERA PLAY (VCR) CARD CAMERA CARD PLAY 1. Set the camcorder to PLAY (VCR) mode and load a recorded cassette. If you are connecting via AV terminal, check the - Canon Optura 30 | OPTURA40 OPTURA30 Instruction Manual - Page 84
❍ When connecting a VCR, the quality of the edited tape will be slightly lower than that of the original. ❍ When connecting a digital video device: - If the picture does not appear, reconnect the DV cable or turn the camcorder off and back on again. - Proper operation cannot be guaranteed for all - Canon Optura 30 | OPTURA40 OPTURA30 Instruction Manual - Page 85
Recording from Analog Video Devices (VCR, TV or Camcorder) E You can record videos or TV programs from a VCR or analog camcorder on the tape in the camcorder. CAMERA PLAY (VCR) CARD CAMERA CARD PLAY 1. Connect the camcorder to the analog video device. See Playing Back on a TV Screen ( 34). 2. - Canon Optura 30 | OPTURA40 OPTURA30 Instruction Manual - Page 86
no loss in picture and sound quality. CAMERA PLAY (VCR) CARD CAMERA CARD PLAY 1. Connect the camcorder to the digital video device. See Connecting a Digital Video Device ( 83). 2. Set the camcorder to PLAY (VCR) mode and load a blank cassette. Make sure that [AV\DV OUT] is set to [OFF] ( 88 - Canon Optura 30 | OPTURA40 OPTURA30 Instruction Manual - Page 87
connections. Unload the tape from the camcorder. Refer also to the instruction manual of the connected device. You can also connect a VCR with S (S1)-VIDEO terminal ( 35). Signal flow STV-250N Stereo Video Cable (supplied) VIDEO L AUDIO R Editing Signal flow Commercially available DV cable 87 - Canon Optura 30 | OPTURA40 OPTURA30 Instruction Manual - Page 88
use, set [AV\DV OUT] to [OFF]. If it is set to [ON], digital signals cannot be input via the camcorder's DV terminal. ❍ Depending on the software and the specifications of your computer, you may not be able to transfer converted signals via the DV terminal. ❍ We recommend powering the camcorder from - Canon Optura 30 | OPTURA40 OPTURA30 Instruction Manual - Page 89
also to the instruction manual of the connected device. Editing Audio device (e.g. CD player) OUTPUT AUDIO L R Signal flow STV-250N Stereo Video Cable (supplied) w Connecting a Microphone See Recording with an External Microphone ( 63). Dubbing CAMERA PLAY (VCR) CARD CAMERA CARD PLAY ( 37 - Canon Optura 30 | OPTURA40 OPTURA30 Instruction Manual - Page 90
REMOTESET ZERO SET MEMORY REW PLAY FF 12bit AUDIO OUT STOP AUDIO DUB. PAUSE SLOW 2 AV DV REMOTESET ❍ Use only tapes recorded in SP mode 12-bit audio sound with this camcorder. Audio dubbing will stop if the tape has a blank section or a section recorded in LP mode or 16-bit mode. ❍ When - Canon Optura 30 | OPTURA40 OPTURA30 Instruction Manual - Page 91
balance of both sounds. CAMERA PLAY (VCR) E CARD CAMERA CARD PLAY ( 37) AUDIO SETUP 12bit AUDIO•••STEREO1 1. Open the menu and select [AUDIO Stereo 2. ❍ The camcorder resets to [STEREO1] when you turn the camcorder off. However, the mix balance is memorized by the camcorder. ❍ You can - Canon Optura 30 | OPTURA40 OPTURA30 Instruction Manual - Page 92
) Cable You can transfer recordings to a computer equipped with a IEEE1394 (DV) terminal or IEEE1394 capture board. Use the editing software supplied with your computer/ capture board to transfer video recording from tape to computer. Refer to the instruction manual of the software. A driver is - Canon Optura 30 | OPTURA40 OPTURA30 Instruction Manual - Page 93
access indicator is not flashing before you turn off the camcorder. 2. Open the cover. 3. Push the memory card to release it. Remove the memory card. 4. Close the cover. Card access indicator ❍ This camcorder is compatible with SD Memory Cards or MultiMediaCards only. Do not use any other types of - Canon Optura 30 | OPTURA40 OPTURA30 Instruction Manual - Page 94
the Still Image Size You can choose from 1632 × 1224 pixels, 1280 × 960 pixels and 640 × 480 pixels. CAMERA PLAY (VCR) CARD CAMERA CARD PLAY ( 37) CARD SETUP IMAGE SIZE•••1632 × 1224 Open the menu and select [CARD SETUP]. Select [IMAGE SIZE], set it to [1280×960] or [640×480] and close the - Canon Optura 30 | OPTURA40 OPTURA30 Instruction Manual - Page 95
PLAY (VCR) CARD CAMERA CARD PLAY E ( 37) CARD SETUP MOVIE SIZE•••320×240 Open the menu and select [CARD SETUP]. Select [MOVIE SIZE], set it to [160×120] and close the menu. ❍ Movies are recorded in the Motion JPEG format. ❍ Maximum recording time on a 8 MB SD Memory Card: Image Size 320 - Canon Optura 30 | OPTURA40 OPTURA30 Instruction Manual - Page 96
101-0102 101-0103 When you replace the memory card and record an image. RESET 101 101-0104 101 101-0101 CAMERA PLAY (VCR) CARD CAMERA CARD PLAY ( 37) CARD SETUP FILE NOS CONTINUOUS To change the setting, open the menu and select [CARD SETUP]. Select [FILE NOS.], set it to [RESET] and - Canon Optura 30 | OPTURA40 OPTURA30 Instruction Manual - Page 97
via the DV terminal or AV terminal. You can also record a still E image on the memory card while you record a movie on the tape. TAPE/CARD switch PHOTO button Card access indicator Using a Memory Card CAMERA PLAY (VCR) CARD CAMERA CARD PLAY 1. Set the camcorder to CARD CAMERA mode - Canon Optura 30 | OPTURA40 OPTURA30 Instruction Manual - Page 98
. ❍ The camcorder shuts off when you do not operate it for 5 minutes to save power. " AUTO POWER OFF" appears 20 seconds before shutoff. To continue recording, turn the POWER switch to OFF and then back to CAMERA. Recording a Still Image on a Memory Card While Recording Movies on a Tape When you are - Canon Optura 30 | OPTURA40 OPTURA30 Instruction Manual - Page 99
from devices connected via the S-video terminal or AV terminal (analog line-in function), or via the DV terminal as still images on a memory card. For connecting instructions, refer to page 34 and 83. CAMERA PLAY (VCR) CARD CAMERA CARD PLAY Using a Memory Card 1. Set the camcorder to PLAY (VCR - Canon Optura 30 | OPTURA40 OPTURA30 Instruction Manual - Page 100
When recording from a tape in the camcorder or other video devices: ❍ A still image recorded from an image in 16:9 format will be vertically compressed. ❍ The data code of the still image will reflect the date and time it has been recorded on the memory card. ❍ The size of the still image will be - Canon Optura 30 | OPTURA40 OPTURA30 Instruction Manual - Page 101
on) The flash always fires. (flash off) The flash does not fire. Use this setting in places where flash photography is prohibited. CAMERA PLAY (VCR) CARD CAMERA CARD PLAY Press the (flash) button. • The setting changes with each press of the button. • The symbol of the selected flash mode - Canon Optura 30 | OPTURA40 OPTURA30 Instruction Manual - Page 102
press the EXP button in (auto) or (red-eye reduction, auto) mode. - When recording movies on a tape. - When [STILL I. REC] is set to [OFF] in CAMERA mode. - When a shutter speed of 1/2000 is set in CAMERA mode. However, if (flash on) is selected, the shutter speed becomes set to 1/1000 and the flash - Canon Optura 30 | OPTURA40 OPTURA30 Instruction Manual - Page 103
Flash Light You can also use the optional VFL-1 Video Flash Light with stronger flash. The procedure for selecting the flash mode is the same as for the built-in flash. For instructions on connection and use, refer to the instruction manual of the VFL-1. ❍ The practical range of the flash is approx - Canon Optura 30 | OPTURA40 OPTURA30 Instruction Manual - Page 104
image for 2, 4, 6, 8 or 10 seconds after it has been recorded. CAMERA PLAY (VCR) CARD CAMERA CARD PLAY ( 37) CAMERA SETUP REVIEW 2sec Open the menu and select [CAMERA SETUP]. Select [REVIEW], select a setting option and close the menu. ❍ A still image is displayed as long as you hold the - Canon Optura 30 | OPTURA40 OPTURA30 Instruction Manual - Page 105
, from a tape in the camcorder or from devices connected via the DV terminal or the AV terminal. The sound of a E movie recorded on a memory card will be monaural. CAMERA PLAY (VCR) CARD CAMERA CARD PLAY 1. Press the start/stop button to begin recording. • With SD Memory Cards up to 512 - Canon Optura 30 | OPTURA40 OPTURA30 Instruction Manual - Page 106
the S-video terminal or AV terminal (analog line-in function), or via the DV terminal on a memory card. For connecting instructions, refer to page 34 and 83. CAMERA PLAY (VCR) CARD CAMERA CARD PLAY 1. Set the camcorder to PLAY (VCR) mode. • If a cassette is loaded, make sure the tape is stopped - Canon Optura 30 | OPTURA40 OPTURA30 Instruction Manual - Page 107
the digital zoom. - When exposure is locked. - In Stitch Assist mode. Using a Memory Card Turning Off the Focus-Priority Mode Turn off the Focus-Priority mode if you wish to put timing ahead of focus. CAMERA PLAY (VCR) CARD CAMERA CARD PLAY ( 37) CAMERA SETUP FOCUS PRI.•••ON Open the menu - Canon Optura 30 | OPTURA40 OPTURA30 Instruction Manual - Page 108
CAMERA PLAY (VCR) CARD CAMERA CARD PLAY 60 images These figures are approximate and vary with the recording conditions and subjects. Sufficient space on the memory card is required. Continuous shooting stops when card is full. ❍ The number of frames per second may be lower when " " (camcorder - Canon Optura 30 | OPTURA40 OPTURA30 Instruction Manual - Page 109
Auto Exposure Bracketing CAMERA PLAY (VCR) CARD CAMERA CARD PLAY E Press the PHOTO button. Three still images in different exposures are recorded to the memory card. Make sure that there is sufficient space on the memory card. Using a Memory Card 109 - Canon Optura 30 | OPTURA40 OPTURA30 Instruction Manual - Page 110
using the supplied software (PhotoStitch) on a computer. CARD +/- button CARD CAMERA CARD PLAY 2. Select the direction with the CARD +/- button. CARD + button: clockwise. CARD - button: counterclockwise. 3. Select the program AE mode and zoom on the subject. Adjust focus and exposure manually - Canon Optura 30 | OPTURA40 OPTURA30 Instruction Manual - Page 111
pressing the CARD +/- button to return to the previous image. E • A maximum of 26 images can be recorded. 6. Press the button after the last image. For details on how to merge these images, refer to the Digital Video Software Instruction Manual. ❍ Compose each image so that it overlaps 30 to - Canon Optura 30 | OPTURA40 OPTURA30 Instruction Manual - Page 112
image without displaying them one by one ( 114). 3 button CARD - button CARD + button SLIDE SHOW button e/a button CAMERA PLAY (VCR) CARD CAMERA 1. Set the camcorder to CARD PLAY mode. 2. Press the CARD +/- button to move between images. CARD PLAY 3. To play back a movie, press the e/a button - Canon Optura 30 | OPTURA40 OPTURA30 Instruction Manual - Page 113
turn off the camcorder, change the position of the TAPE/CARD switch, E disconnect the power source, open the memory card cover or remove the memory card while the card access indicator is flashing. Doing so could result in data damage. Slide Show CAMERA PLAY (VCR) CARD CAMERA CARD PLAY 1. Press - Canon Optura 30 | OPTURA40 OPTURA30 Instruction Manual - Page 114
one. The number in the upper right of the screen indicates the image number of the current image by the total number of images. CAMERA PLAY (VCR) CARD CAMERA CARD PLAY Press and hold the CARD + or CARD - button. When you release the button, the image of the displayed image number appears. 114 - Canon Optura 30 | OPTURA40 OPTURA30 Instruction Manual - Page 115
PLAY 1. Select the image you wish to protect. 2. Press the SET dial to open the FILE OPER. menu. In CARD CAMERA mode, the menu appears when you press the SET dial while you are reviewing a still image, or when you press the SET dial right after recording. 3. Select [ PROTECT]. • " " appears and now - Canon Optura 30 | OPTURA40 OPTURA30 Instruction Manual - Page 116
PLAY 1. Select the image you wish to erase. 2. Press the SET dial to open the FILE OPER. menu. In CARD CAMERA mode, the menu appears when you press the SET dial while you are reviewing a still image, or when you press the SET dial right after recording. 3. Select [IMAGE ERASE]. • "ERASE THIS IMAGE - Canon Optura 30 | OPTURA40 OPTURA30 Instruction Manual - Page 117
effects not possible with just a tape with the Card Mix function. Choose one of the sample images provided on the supplied SD Memory Card (such as E picture frames, backgrounds and animations) and combine it with the live video recording. Card Chroma Key (CARD CHROMA) Combines frames with your - Canon Optura 30 | OPTURA40 OPTURA30 Instruction Manual - Page 118
level adjustment: blue area of the card animation image. Live video recording Card mix image CARD + / - button CARD MIX button Program selector MENU button SET dial CAMERA PLAY (VCR) CARD CAMERA CARD PLAY CARD MIX ( 37) MIX LEVEL MIX TYPE CARD CHROMA + 1. Set the program selector to - Canon Optura 30 | OPTURA40 OPTURA30 Instruction Manual - Page 119
camcorder recordings. ❍ Additional sample images are provided on the supplied DIGITAL VIDEO SOLUTION DISK. Refer to Adding Still Images from Your Computer to the Memory Card in the Digital Video Software Instruction Manual. Sample Images Following sample images are pre-recorded on the supplied SD - Canon Optura 30 | OPTURA40 OPTURA30 Instruction Manual - Page 120
on the supplied SD Memory Card, they can be downloaded from the homepage http://www.canondv.com. For details on how to add the downloaded images to the memory card, refer to Adding Still Images from Your Computer to the Memory Card in the Digital Video Software Instruction Manual. PhotoEssentials - Canon Optura 30 | OPTURA40 OPTURA30 Instruction Manual - Page 121
by formatting cannot be recovered. ❍ If you use a memory card other than the supplied one, format it with the camcorder. CAMERA PLAY (VCR) CARD CAMERA CARD PLAY ( 37) CARD OPERATIONS FORMAT 1. Open the menu and select [CARD OPERATIONS]. 2. Select [FORMAT]. [CANCEL] and [EXECUTE] appears - Canon Optura 30 | OPTURA40 OPTURA30 Instruction Manual - Page 122
create a start-up image using a still image on the memory card. CAMERA PLAY (VCR) CARD CAMERA CARD PLAY ( 37) MY CAMERA CREATE START-UP IMAGE 1. Select a still image with the CARD +/- buttons. 2. Open the menu and select [MY CAMERA]. 3. Select [CREATE START-UP IMAGE]. [SET THIS AS START-UP - Canon Optura 30 | OPTURA40 OPTURA30 Instruction Manual - Page 123
printers can be connected to your camcorder: Canon Printers Canon Direct Print/PictBridge compatible CP-Printer camcorder and insert a memory card that contains still images. 2. Turn on the printer. 3. Set the camcorder to CARD PLAY mode. 4. Connect the camcorder to the printer using the cable - Canon Optura 30 | OPTURA40 OPTURA30 Instruction Manual - Page 124
are supplied with two direct interface cables. Use the cable with the USB logo on the connector (DIF-100). ❍ We recommend powering the camcorder from a household power source. ❍ Refer also to the instruction manual of the respective printer. ❍ The print setting menu may differ slightly depending on - Canon Optura 30 | OPTURA40 OPTURA30 Instruction Manual - Page 125
or the printer. - Do not change the position of the TAPE/CARD switch. - Do not detach the cable. - Do not open the memory card cover or remove the memory card. ❍ Images not recorded with this camcorder, uploaded from a computer, edited on a computer and images whose file names have been changed - Canon Optura 30 | OPTURA40 OPTURA30 Instruction Manual - Page 126
in the upper left corner of the camcorder screen after connecting, and refer to the for one still image. 1. In the print setting menu, turn the SET dial to select (COPIES) and model. For details, refer to the instruction manual of your printer. ❍ [BORDERED]: The Canon Bubble Jet Printers. 126 - Canon Optura 30 | OPTURA40 OPTURA30 Instruction Manual - Page 127
Paper Settings 1. In the print setting menu, turn the SET dial to select [PAPER] and press the SET to select a layout option and press the SET dial. Including the Date in the Print 1. In the print setting menu, turn the SET dial to select (date) and press the SET dial. 2. Turn the SET dial to select - Canon Optura 30 | OPTURA40 OPTURA30 Instruction Manual - Page 128
function uses the camcorder's recording information to optimize the image data, yielding high quality prints. 1. In the print setting menu, turn the SET Style PAPER CARD #1*, CARD #2*, CARD #3*, LTR, A4 For details on paper type, refer to the Bubble Jet Printer User Guide. BORDERS BORDERLESS - Canon Optura 30 | OPTURA40 OPTURA30 Instruction Manual - Page 129
and sides may be cropped slightly. ❍ [MULTIPLE] can only be selected when printing on card size paper. ❍ The date print function is not supported by the CP Printers CP-10 and CP-100. 1. In the print setting menu, turn the SET dial to select [STYLE] and press the SET dial. Direct Printing 129 - Canon Optura 30 | OPTURA40 OPTURA30 Instruction Manual - Page 130
the SET dial. (BORDERS) and press 3. Turn the SET dial to select a borders option and press the SET dial. Pressing the MENU button brings you back to the print settings menu. Including the Date in the Print 2. Turn the SET dial to select (DATE) and press the SET dial. 3. Turn the SET - Canon Optura 30 | OPTURA40 OPTURA30 Instruction Manual - Page 131
horizontal). • Pressing the MENU button brings you back to the print settings menu. ❍ About the color of the trimming frame (Canon CP-Printers only): - following operations: - When you turn off the camcorder. - When you disconnect the interface cable. - When you expand the trimming frame beyond its - Canon Optura 30 | OPTURA40 OPTURA30 Instruction Manual - Page 132
Do not connect a USB or DV cable to the camcorder while setting the print orders. CAMERA PLAY (VCR) CARD CAMERA 1. Select the still image RETURN] to close the menu. Selecting in Index Screen Display CAMERA PLAY (VCR) CARD CAMERA CARD PLAY CARD PLAY ( 37) CARD OPERATIONS PRINT ORDER 1. - Canon Optura 30 | OPTURA40 OPTURA30 Instruction Manual - Page 133
] appears. 3. Select [YES]. All " " disappear. 4. Close the menu. Printing CAMERA PLAY (VCR) CARD CAMERA CARD PLAY ( 37) PRINT 1. Connect the printer to the camcorder ( 123). 2. Open the menu and select [\ PRINT]. • The print setting menu appears. • "SET PRINT ORDER" appears, when you connect - Canon Optura 30 | OPTURA40 OPTURA30 Instruction Manual - Page 134
the Digital Video Software Instruction Manual. Users of Windows OS can transfer images by simply pressing the (print/share) button ( 135). ❍ Do not disconnect the USB cable, open the memory card cover, remove the memory card, change the position of the TAPE/CARD switch or turn off the camcorder and - Canon Optura 30 | OPTURA40 OPTURA30 Instruction Manual - Page 135
using the USB cable. See Connecting the Camcorder to a Computer in the Digital Video Software Instruction Manual. 3. Set the auto-launch setting. • Follow the steps 1 to 3 in Starting ZoomBrowser EX in the Digital Video Software Instruction Manual. • The direct transfer menu appears on the - Canon Optura 30 | OPTURA40 OPTURA30 Instruction Manual - Page 136
2. Press the button. • The images are transferred to the computer and displayed in the Main Window of ZoomBrowser EX. • The camcorder displays the transfer menu when transfer is complete. Transferring a Selected Image CAMERA PLAY (VCR) CARD CAMERA CARD PLAY 1. Turn the SET dial to select - Canon Optura 30 | OPTURA40 OPTURA30 Instruction Manual - Page 137
SET dial, E or press the MENU button. ❍ Only still images in JPEG format and movies in Motion JPEG format can be transferred. ❍ When transferring with the button, the camcorder retains the transfer setting even if you turn it off or change the position of the TAPE/CARD switch. When you have - Canon Optura 30 | OPTURA40 OPTURA30 Instruction Manual - Page 138
998 images can be selected. Do not connect a USB or DV cable to the camcorder while setting the transfer orders. CAMERA PLAY (VCR) CARD CAMERA CARD PLAY 1. Select the image you wish to transfer. 2. Press the SET dial to open the FILE OPER. menu. 3. Select [ TRANS.ORDER] and press the SET dial - Canon Optura 30 | OPTURA40 OPTURA30 Instruction Manual - Page 139
cable or DV (IEEE1394) cable. For details on DV Messenger version 2, refer to the DV Network Software Instruction Manual. Connection 1. Install DV Messenger. If you wish to connect the camcorder using a USB cable, you also need to install the Canon USB Video Driver. 2. Connect the power adapter - Canon Optura 30 | OPTURA40 OPTURA30 Instruction Manual - Page 140
a TV for recording, you can select to show the camcorder displays on the TV screen. For playback, you can hide the camcorder displays on the TV screen. CAMERA PLAY (VCR) CARD CAMERA CARD PLAY ( 37) DISPLAY SETUP/ TV SCREEN••••ON Open the menu and select [DISPLAY SETUP/ to [OFF] and close the - Canon Optura 30 | OPTURA40 OPTURA30 Instruction Manual - Page 141
( 56) Manual focus ( 52) White balance ( 54) Card mix ( 117) Digital effects ( 64) Date and time ( 21) AF/AE locked during still image recording ( 98) Flash ( 101) Accessory connected to the Advanced Accessory Shoe Recording reminder ( 26)/ E Self-timer countdown ( 58) Recording mode ( 59) Tape - Canon Optura 30 | OPTURA40 OPTURA30 Instruction Manual - Page 142
PLAY Mode Slide show ( 113) Data code ( 72) Still image quality ( 94) Remaining card capacity for still images ( 100) Still image size ( 94) Movie size ( 95) Remaining card capacity for movies ( 106) Camcorder shake warning ( 57) Protect mark ( 115) File number ( 96) Current image/ total images - Canon Optura 30 | OPTURA40 OPTURA30 Instruction Manual - Page 143
the battery 13 pack. THE TAPE IS SET FOR Cassette is protected. Replace the cassette or change the 150 ERASURE PREVENTION position of the protect switch. REMOVE THE CASSETTE Camcorder stopped operating to protect the tape. Unload 16 and reload the cassette. CHECK THE DV INPUT DV cable is - Canon Optura 30 | OPTURA40 OPTURA30 Instruction Manual - Page 144
needs to be replaced soon. There is a problem with the ink cassette. The ink cannot be used with the selected paper type. Waste tank is full. Refer to the instruction manual of your printer. You attempted to print an image that was made with another camcorder, has a different format, or was edited - Canon Optura 30 | OPTURA40 OPTURA30 Instruction Manual - Page 145
. RECHARGE THE PRINTER BATTERY The printer battery is depleted. COMMUNICATION ERROR The printer is experiencing a data transmission error. Cancel printing, disconnect the USB cable and turn off the head is defect. Refer to the instruction manual of your printer. Additional Information 145 - Canon Optura 30 | OPTURA40 OPTURA30 Instruction Manual - Page 146
camcorder. If the camcorder does not function properly, consult qualified service personnel. ❍ Handle the camcorder with care. Do not subject the camcorder (30 ˚C). ❍ After storage, check the functions of your camcorder to make sure that the camcorder is still working properly. Cleaning Camcorder - Canon Optura 30 | OPTURA40 OPTURA30 Instruction Manual - Page 147
the Canon DVM-CL Digital Video Head Cleaning Cassette or a commercially available dry cleaning cassette. ❍ Tapes already recorded with dirty video heads may not be played back correctly even when you clean the video heads. ❍ Do not use wet type cleaning cassettes as this may damage the camcorder - Canon Optura 30 | OPTURA40 OPTURA30 Instruction Manual - Page 148
the camcorder. Wipe the terminals with a soft cloth. ❍ Since storing a charged battery pack for a long time (about 1 year) can shorten its lifecycle or affect performance, we recommend to discharge the battery pack fully and to store it in a dry place at temperatures no higher than 86 ˚F (30 ˚C). If - Canon Optura 30 | OPTURA40 OPTURA30 Instruction Manual - Page 149
to 30 ˚C). At cold temperatures, performance will temporarily decline. Warm it in your pocket before use. E ❍ Replace the battery pack if camcorder after use. ❍ Do not use spliced tapes or nonstandard cassettes as they may damage the camcorder. ❍ Do not use tapes that have been jammed as video - Canon Optura 30 | OPTURA40 OPTURA30 Instruction Manual - Page 150
cassette in CAMERA SAVE SAVE mode, the message "THE TAPE IS card defects or exposure to static electricity. Canon Inc. makes no warranties for corrupted or lost data. ❍ Do not turn off the camcorder, disconnect the power source, open the memory card cover or remove the memory card while the card - Canon Optura 30 | OPTURA40 OPTURA30 Instruction Manual - Page 151
Sources You can use the compact power adapter to operate the camcorder and to charge battery packs in any country with power supply between 100 and 240 V AC, 50/60 Hz. E Consult the Canon Service Center for information on plug adapters for overseas use. Playback on a TV Screen You can only play - Canon Optura 30 | OPTURA40 OPTURA30 Instruction Manual - Page 152
Troubleshooting If you have a problem with your camcorder, refer to this checklist. Consult your dealer or a Canon Service Center if the problem persists. Power Source Problem Cause Solution Camcorder will not turn Battery pack is exhausted. Replace or charge the 13 on. battery pack. - Canon Optura 30 | OPTURA40 OPTURA30 Instruction Manual - Page 153
on the screen. Viewfinder picture is blurred. The camcorder malfunctions. Consult a Canon Service - Center. Camcorder is not set to Set the camcorder to 24 CAMERA mode. CAMERA mode. Time zone, date and time are not set, or the backup battery is exhausted. Set the time zone, date and - Canon Optura 30 | OPTURA40 OPTURA30 Instruction Manual - Page 154
will not appear on the TV screen. [AV/PHONESH] is set to [PHONESH] in the menu. Set [AV/PHONESH] to [AV] in 34 the menu. [AV \ DV OUT] is set to [ON]. Set [AV \ DV OUT] to [OFF]. 88 Tape is running, but TV/VIDEO selector on the TV Set the selector to VIDEO. 34 image will not appear is not - Canon Optura 30 | OPTURA40 OPTURA30 Instruction Manual - Page 155
if flashing persists. Printing The printer is not operating even though camcorder and printer are correctly connected. The camcorder is set to NETWORK mode. 1. Set the camcorder to - CARD PLAY mode. 2. Disconnect and reconnect the USB cable. 3. Turn off the printer and turn it back on - Canon Optura 30 | OPTURA40 OPTURA30 Instruction Manual - Page 156
Battery Charger NB-2L, NB-2LH, BP-2L12, BP-2L14 Battery Pack FS-34U Filter Set VFL-1 Video Flash Light VL-3 Video Light CA-570 Compact Power Adapter NB-2L, NB-2LH, BP-2L12, BP-2L14 Battery Pack S-150 S-video Cable STV-250N Stereo Video Cable TV VCR Commercially available DV Cable Digital - Canon Optura 30 | OPTURA40 OPTURA30 Instruction Manual - Page 157
Canon accessories, although you may request such repairs on a chargeable basis. Battery Packs When you need extra battery packs, select from the following: NB-2L, NB-2LH, BP-2L12, BP-2L14. CB-2LT Battery Charger Use the battery charger for charging the battery packs. It plugs directly into a power - Canon Optura 30 | OPTURA40 OPTURA30 Instruction Manual - Page 158
to the camcorder's accessory shoe and is powered by BP-900 series battery packs. • Approximate usage time: BP-915: 60 min., BP-930: 120 min., BP-945: 170 min. • BP-900 series battery packs are charged with the CA-920 Compact Power Adapter or CH-910 Dual Battery Charger/Holder. WS-20 Wrist Strap - Canon Optura 30 | OPTURA40 OPTURA30 Instruction Manual - Page 159
or in dark places. It attaches to the camcorder's advanced accessory shoe for cable-free operation. VL-3 Video Light This video light enables you to record brightly in color even in dark places. It attaches to the camcorder's advanced accessory shoe for cablefree operation. DM-50 Directional Stereo - Canon Optura 30 | OPTURA40 OPTURA30 Instruction Manual - Page 160
scanning DV system (consumer digital VCR SD system), digital component recording PCM digital sound: 16 bit (48 kHz/2 ch); 12 bit (32 kHz/4 ch) EIA standard (525 lines, 60 fields) NTSC color signal 1/3.4-inch CCD, approx. 2,200,000 pixels Effective pixels: tape approx. 1,230,000 pixels card approx - Canon Optura 30 | OPTURA40 OPTURA30 Instruction Manual - Page 161
(camcorder body only) 1.3 lb. (585 g) CA-570 Compact Power Adapter Power supply Power consumption Rated output Operating temperature Dimensions Weight 100 - 240 V AC, 50/60 Hz 17W 8.4 V DC, 1.5 A 32 - 104 ˚F (0 - 40 ˚C) 2.1 × 3.5 × 1.1 in. (52 × 90 × 29 mm) 4.8 oz. (135 g) NB-2LH Battery Pack - Canon Optura 30 | OPTURA40 OPTURA30 Instruction Manual - Page 162
-570 Compact Power Adapter NB-2LH Battery Pack STV-250N Stereo Video Cable SS-900 Shoulder Strap WL-D83 Wireless Controller IFC-300PCU USB Cable Optional Accessories BP-2L12 Battery Pack BP-2L14 Battery Pack NB-2L Battery Pack CB-2LT Battery Charger CBC-NB2 Car Battery Charger S-150 S-Video Cable TL - Canon Optura 30 | OPTURA40 OPTURA30 Instruction Manual - Page 163
Audio level indicator 61 Audio mode 60 Auto 45 Auto Exposure Bracketing . . . . . 109 Autofocus 52 AV \ DV 87 AV/headphones terminal . . . . 33, 34 B Backlight 82 Backup battery 17 Battery charger 157 Battery pack 13 Beep 80 Brightness 81 C Card jump 114 Card mix 117 Computer 92, 134 - Canon Optura 30 | OPTURA40 OPTURA30 Instruction Manual - Page 164
size 94 Stitch Assist mode 110 Super Night mode 48 T Tape protection 150 Time code 26 Time zone 21 Transfer order 138 Tripod 30 Troubleshooting 152 TV Screen 34, 140 U USB terminal 123, 134 V Video heads 147 Video light 103, 158, 159 Videocassettes 16 Viewfinder 18 W White balance - Canon Optura 30 | OPTURA40 OPTURA30 Instruction Manual - Page 165
of purchase. Canon consumer digital video equipment is Canon DV Camcorders in conjunction with incompatible peripheral equipment and incompatible software. In order to obtain warranty service, contact the authorized Canon retail dealer from whom you purchased the DV Camcorder or call the CANON - Canon Optura 30 | OPTURA40 OPTURA30 Instruction Manual - Page 166
in the instruction manual; ii) the use of accessories, attachments, products, supplies, parts or devices with this Canon product that do not conform to Canon specifications or that cause abnormally frequent service problems; iii) repairs or services performed by any party other than a Canon Service
-
 1
1 -
 2
2 -
 3
3 -
 4
4 -
 5
5 -
 6
6 -
 7
7 -
8
-
9
-
10
-
11
-
12
-
13
-
14
-
15
-
16
-
17
-
18
-
19
-
20
-
21
-
22
-
23
-
24
-
25
-
26
-
27
-
28
-
29
-
30
-
31
-
32
-
33
-
34
-
35
-
36
-
37
-
38
-
39
-
40
-
41
-
42
-
43
-
44
-
45
-
46
-
47
-
48
-
49
-
50
-
51
-
52
-
53
-
54
-
55
-
56
-
57
-
58
-
59
-
60
-
61
-
62
-
63
-
64
-
65
-
66
-
67
-
68
-
69
-
70
-
71
-
72
-
73
-
74
-
75
-
76
-
77
-
78
-
79
-
80
-
81
-
82
-
83
-
84
-
85
-
86
-
87
-
88
-
89
-
90
-
91
-
92
-
93
-
94
-
95
-
96
-
97
-
98
-
99
-
100
-
101
-
102
-
103
-
104
-
105
-
106
-
107
-
108
-
109
-
110
-
111
-
112
-
113
-
114
-
115
-
116
-
117
-
118
-
119
-
120
-
121
-
122
-
123
-
124
-
125
-
126
-
127
-
128
-
129
-
130
-
131
-
132
-
133
-
134
-
135
-
136
-
137
-
138
-
139
-
140
-
141
-
142
-
143
-
144
-
145
-
146
-
147
-
148
-
149
-
150
-
151
-
152
-
153
-
154
-
155
-
156
-
157
-
158
-
159
-
160
-
161
-
162
-
163
-
164
-
165
-
166
 |
 |
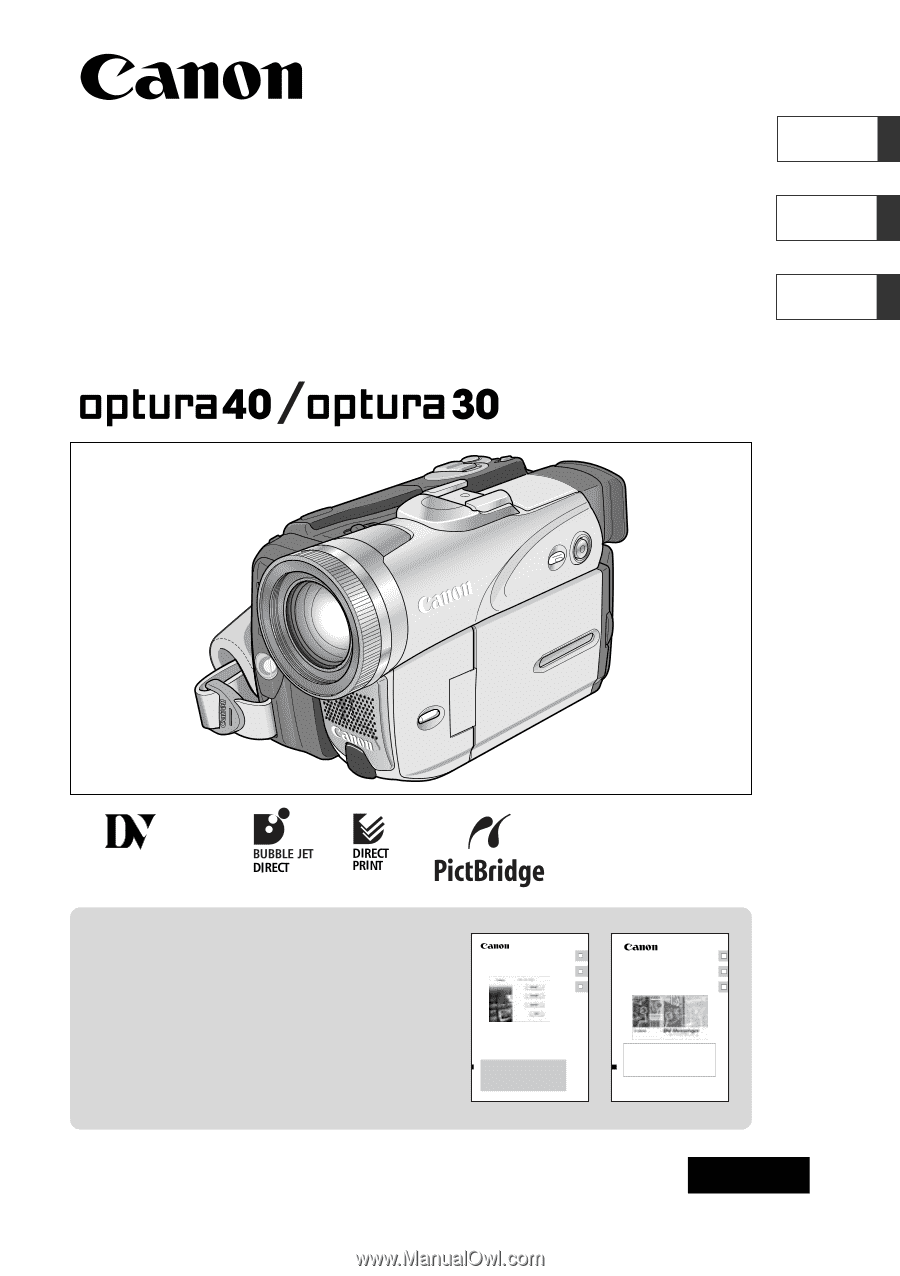
Digital Video Camcorder
Instruction Manual
Camescope vidéo numérique
Manuel d’instruction
Videocámara digital
Manual de Instrucciones
English
Françai
s
Español
NTSC
PUB.DIM-637
Mini
Digital
Video
Cassette
Please read also the following instruction
manuals.
Veuillez lire aussi les modes d’emploi
suivants.
Lea también los manuales de instrucciones
siguientes.
•
Digital Video Software
•
DV Network Software
Digital Video Software
Version 12
Instruction Manual
Mode d’emploi
Manual de Instrucciones
PUB. DIM-627
E
F
Es
DV Network Software
Version 2
Instruction Manual
(Installation and Preparation)
This software is for use with Windows® XP only.
Ce logiciel ne peut être employé que sous Windows® XP.
Este software solamente es compatible con Windows® XP.
Mode d’emploi
(Installation et préparation)
Manual de Instrucciones
(Instalación y preparativos)
PUB. DIM-629
E
F
Es