Canon PIXMA MP980 Easy Setup Instructions For Apple AirPort Wireless Networks
Canon PIXMA MP980 Manual
 |
View all Canon PIXMA MP980 manuals
Add to My Manuals
Save this manual to your list of manuals |
Canon PIXMA MP980 manual content summary:
- Canon PIXMA MP980 | Easy Setup Instructions For Apple AirPort Wireless Networks - Page 1
These instructions are for setting up your PIXMA machine on an Apple AirPort wireless network in a Mac OS X environment. For all other environments, including USB connections, wired networks, non-AirPort wireless networks, and all Windows installations, please use the Getting Started Guide. Also - Canon PIXMA MP980 | Easy Setup Instructions For Apple AirPort Wireless Networks - Page 2
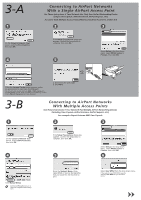
OK. 5 Select Setup in the drop-down menu, select MP980 series in Printers, then click OK. 6 Click Manual Setup. • Confirm the Encryption column to check the encryption method being used. Enter the Network Name. (Also called SSID or Service Set Identifier that you would like the machine to join - Canon PIXMA MP980 | Easy Setup Instructions For Apple AirPort Wireless Networks - Page 3
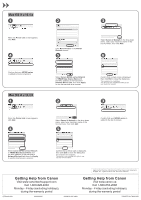
Setup Troubleshooting. • When using Mac OS X v.10.5.x, the machine's Card Slots are not accessible when using the machine over a network. To access the Card Slots from a computer using Mac OS X v.10.5.x, a USB cable must be used. Mac OS X v.10.5.x 1 2 3 Wait for a while, then select Canon MP980 - Canon PIXMA MP980 | Easy Setup Instructions For Apple AirPort Wireless Networks - Page 4
List screen appears, click Add. 4 Confirm that your MP980 series is added to the list of printers. Mac OS X v.10.3.9 1 When the Printer List screen appears, click Add. 4 2 Click More Printers in the Printer Browser screen. 5 3 Select Canon IJ Network in the drop-down menu, select your machine
-
 1
1 -
 2
2 -
 3
3 -
 4
4
 |
 |
1
2
3
4
5
6
Serial Number
* * * * * * *
Serial Number
* * * * * * *
7
1
2
series
Easy Setup Instructions For Apple AirPort
Wireless Networks
These instructions are for setting up your PIXMA machine on an Apple AirPort wireless network in a Mac OS X environment. For all other environments, including USB
connections, wired networks, non-AirPort wireless networks, and all Windows installations, please use the
Getting Started Guide
. Also for setting up additional computers on
your network to access the machine, refer to the
Getting Started Guide
.
Hardware Setup
Unpack the machine and prepare the hardware for use by following chapters 1 to 5 of the
Getting Started Guide
.
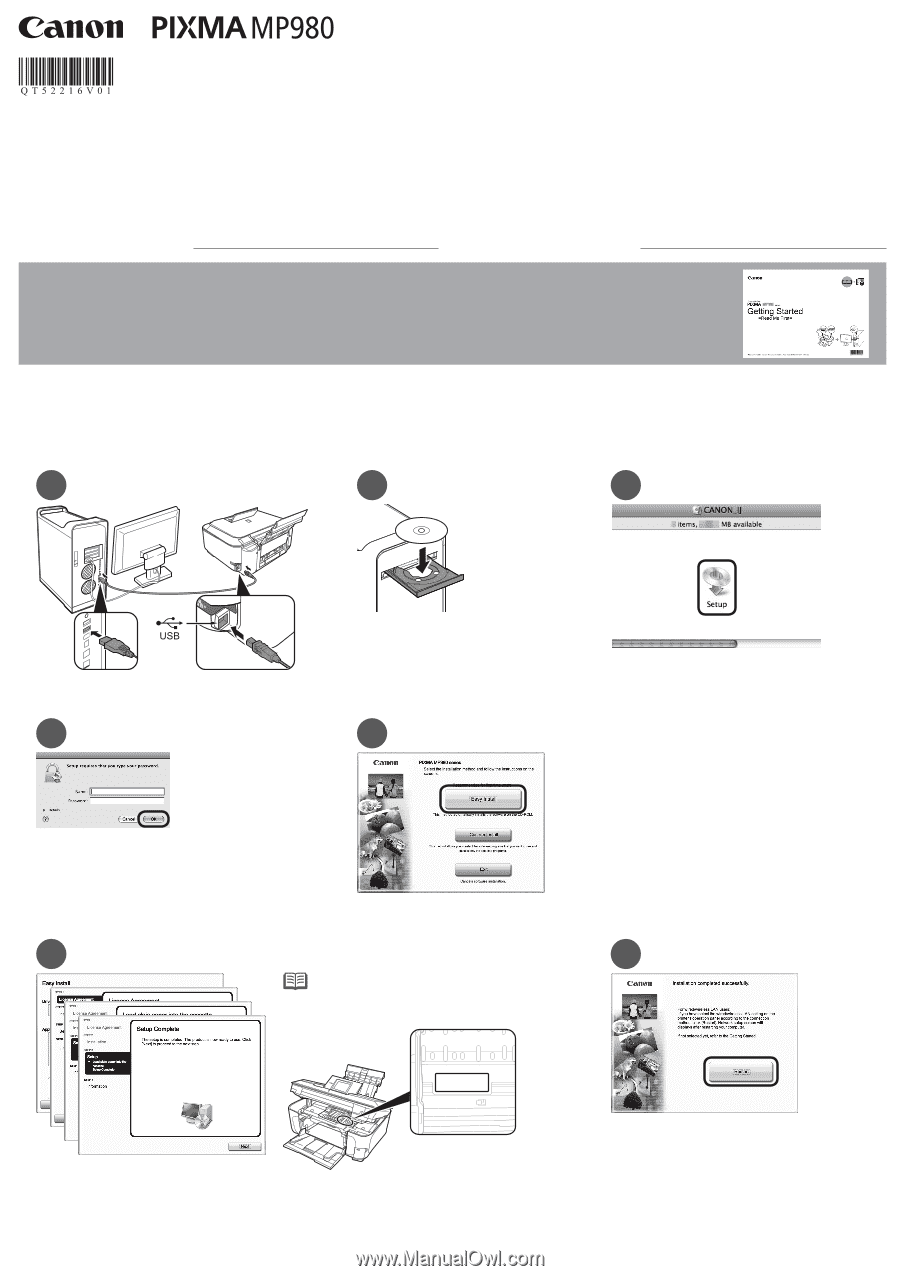
Driver/Software Install
Turn on the computer, then insert the
Setup
CD-ROM
into the CD-ROM drive.
Connect one end of the USB cable to the computer
and the other to the machine.
Make sure the machine is turned on.
Double-click the
Setup
icon.
If the CD-ROM folder does not open automatically,
double-click the
CANON_IJ
icon on the desktop.
Enter your administrator name and password.
Click
OK
.
If you do not know your administrator name or password,
click
Help
, then follow the on-screen instructions.
Click
Easy Install
.
The drivers, application software, and on-screen
manuals are installed automatically.
Click
Restart
.
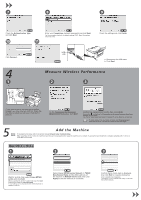
When the computer restarts, Canon IJ Network Tool starts
automatically.
Click
Restart
to restart the computer.
After restarting the computer, remove the
Setup CD-ROM
and keep it in a safe place.
Follow
on-screen
instructions.
If the registration screen appears, follow the on-screen
instructions to register your product. You will need your
product serial number which is located on the packaging,
or, on the inside lower part of the machine.
•
Before starting, please locate and write down the your network name and password. Since Apple recommends using the WPA/WPA2 encryption method for AirPort networks,
these instructions are for configuring the machine on WPA/WPA2 encrypted networks.
Network password (if applicable):
Network Name (also called SSID):