Canon PIXMA MX340 MX340 series Getting Started - Page 35
Network Key, Detected Access Points List, Confirm Connection Access Point, Connect - troubleshooting
 |
View all Canon PIXMA MX340 manuals
Add to My Manuals
Save this manual to your list of manuals |
Page 35 highlights
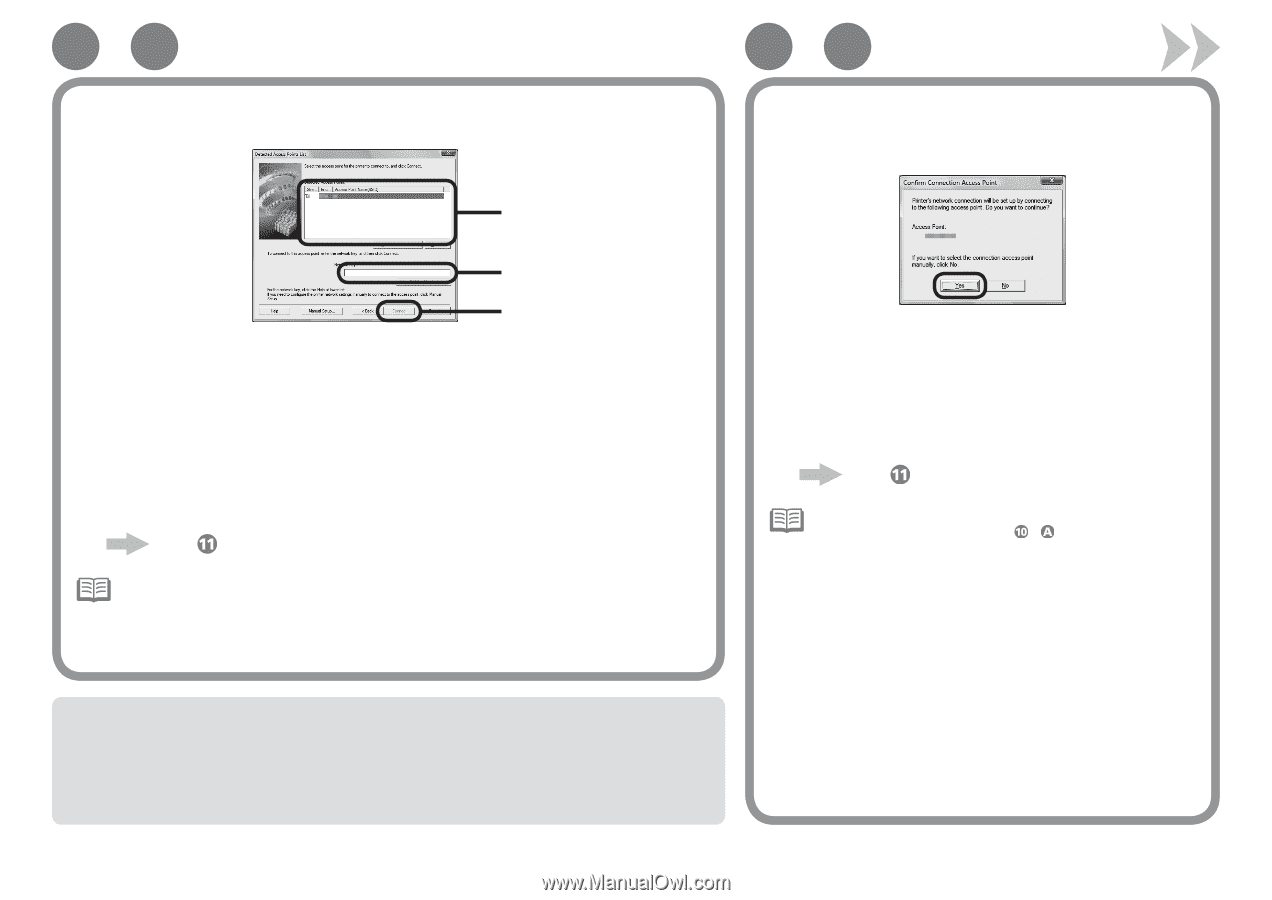
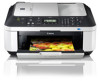
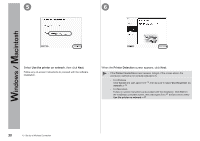
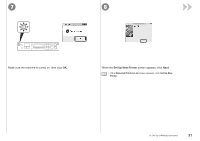
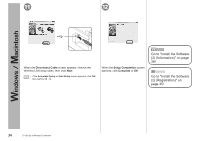
10 - A □ If the Detected Access Points List screen appears 10 - B □ When the Confirm Connection Access Point screen appears 1 2 3 1 Select the target access point name/network name (SSID). 2 Enter the network key. Enter upper and lower case letters of the alphabet correctly. Letters are case sensitive. To use WEP key number 2, 3 or 4, click WEP Key Number, then specify the WEP key number. 3 Click Connect. Go to on page 34. • If the target access point is not displayed on the Detected Access Points List screen, refer to the printed manual: Network Setup Troubleshooting. • For details on how to check the access point name/network name (SSID) and network key, refer to the manual supplied with your access point or contact its manufacturer. 1 Make sure that the target access point is displayed, then click Yes. If you are using Macintosh, a screen asking for permission to access the keychain appears. In this case, click Allow or Allow Once. Go to on page34. • If the target access point is not displayed in the above screen, click No, then perform - . SSID An identifier to identify the specific access point. Network Key Also referred to as encryption key, WEP key or WPA/WPA2 passphrase, Pre-Shared key. A password required to set to prevent unauthorized access to communication. 10 Set Up a Wireless Connection 33
-
 1
1 -
2
-
3
-
4
-
5
-
6
-
7
-
8
-
9
-
10
-
11
-
12
-
13
-
14
-
15
-
16
-
17
-
18
-
19
-
20
-
21
-
22
-
23
-
24
-
25
-
26
-
27
-
28
-
29
-
 30
30 -
 31
31 -
 32
32 -
 33
33 -
 34
34 -
 35
35 -
 36
36 -
 37
37 -
 38
38 -
 39
39 -
 40
40 -
41
-
42
-
43
-
44
-
45
-
46
-
47
-
48
-
49
-
50
-
51
-
52
-
53
-
54
-
55
-
56
-
57
-
58
-
59
-
60
-
61
-
62
-
63
-
64
-
65
-
66
-
67
-
68
-
69
-
70
-
71
-
72
-
73
-
74
-
75
 |
 |