Canon PIXMA MX340 MX340 series Getting Started - Page 51
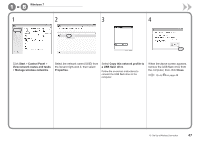
Wireless LAN setup, Select, then press the, button., press
 |
View all Canon PIXMA MX340 manuals
Add to My Manuals
Save this manual to your list of manuals |
Page 51 highlights
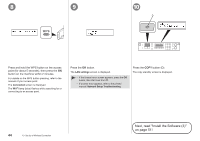
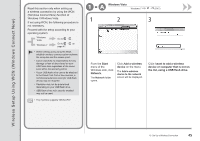
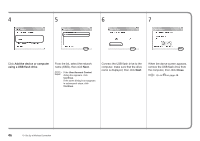
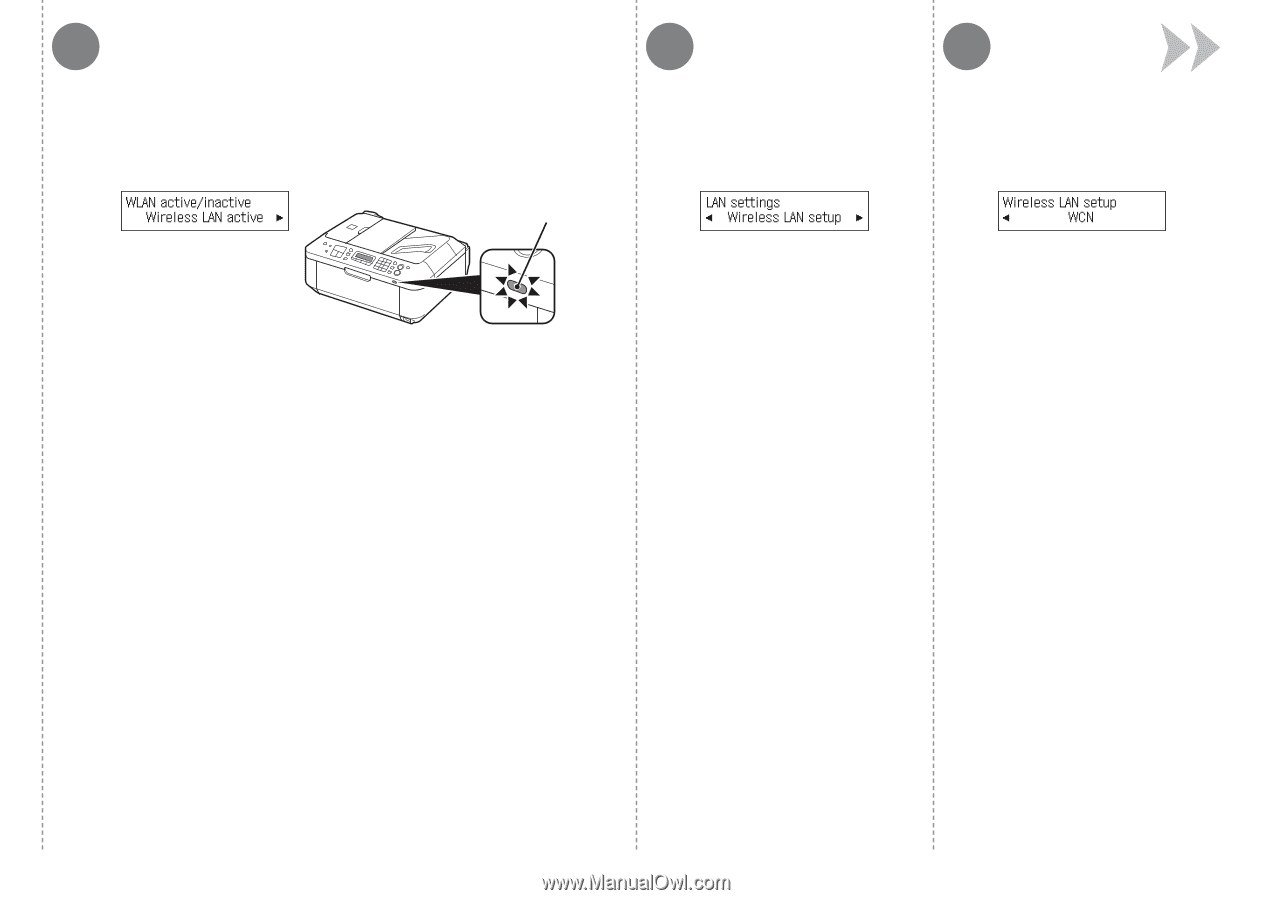
5 6 7 C Select Wireless LAN active, then press the OK button. When wireless connection is enabled, the Wi-Fi lamp (C) lights blue. The LAN settings screen is displayed. Select Wireless LAN setup, then press the OK button. The Wireless LAN setup screen is displayed. Select WCN, then press the OK button. The Connect USB drive on which LAN details are saved and press [OK] screen is displayed. 10 Set Up a Wireless Connection 49
-
 1
1 -
2
-
3
-
4
-
5
-
6
-
7
-
8
-
9
-
10
-
11
-
12
-
13
-
14
-
15
-
16
-
17
-
18
-
19
-
20
-
21
-
22
-
23
-
24
-
25
-
26
-
27
-
28
-
29
-
30
-
31
-
32
-
33
-
34
-
35
-
36
-
37
-
38
-
39
-
40
-
41
-
42
-
43
-
44
-
45
-
 46
46 -
 47
47 -
 48
48 -
 49
49 -
 50
50 -
 51
51 -
 52
52 -
 53
53 -
 54
54 -
 55
55 -
 56
56 -
57
-
58
-
59
-
60
-
61
-
62
-
63
-
64
-
65
-
66
-
67
-
68
-
69
-
70
-
71
-
72
-
73
-
74
-
75
 |
 |
C
5
6
7
³¸
10
Set Up a Wireless Connection
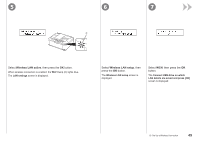
Select
WCN
, then press the
OK
button.
Select
Wireless LAN setup
, then
press the
OK
button.
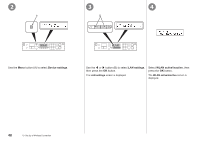
Select
Wireless LAN active
, then press the
OK
button.
When wireless connection is enabled, the
Wi-Fi
lamp (C) lights blue.
The
LAN settings
screen is displayed.
The
Wireless LAN setup
screen is
displayed.
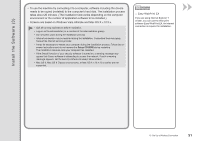
The
Connect USB drive on which
LAN details are saved and press [OK]
screen is displayed.